


 Jun 4, 2015, 07:32 PM
Last edit by: IB Advertising
See related guides and technical advice from our community experts:
Browse all: Brake Guides
- Mercedes-Benz C-Class AMG: How to Replace Brake pads and rotors
Step by step instructions for do-it-yourself repairs
Browse all: Brake Guides

How to: Replace Brake Pads

Thread Starter
Senior Member
Joined: Sep 2010
Posts: 378
Likes: 2
2008 C63
How to: Replace Brake Pads
I'd like to start this by saying I'm not a mechanic, but I do like doing basic service on my car. I decided to try my best with new brake pads. So if anyone has any suggestions, please let me know and we can adjust this going forward.
Tools needed:
- Jack, jack stand/lift
- Everything needed to take wheels off (breaker bar, 17mm socket, torque wrench)
- socket wrench (with 8mm and 14mm sockets)
- screwdriver with small hex (or anything less than 5mm wide and over 1cm long that you can get a hammer on)
- hammer
- plyers (preferrably both needlenose and regular)
So let's get into it:
Step 1:
Get the car into the air. If you're using a jack, remember to use a jack stand too, and break the wheel nuts before you get the car up. I jack up the front, and put a jack stand out the back (vice versa for access to the fronts)
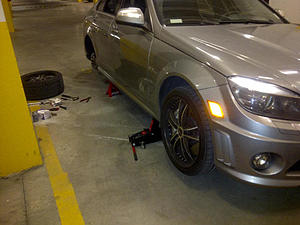
Note: I did not take the calipers off of the car. I didn't feel like it was necessary, and to be honest, I think it'd be more difficult to get some of the pins out.
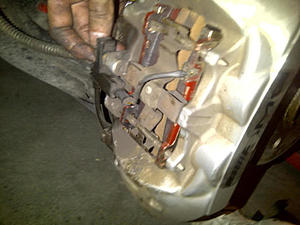
Step 2 (rear):
unbolt the sensor (8mm socket). This is only needed for the passenger side, as there are only brake pad sensors on that side. I've heard that these sensors are not necessary, and can just be zip-tied to something to keep them out of the way.
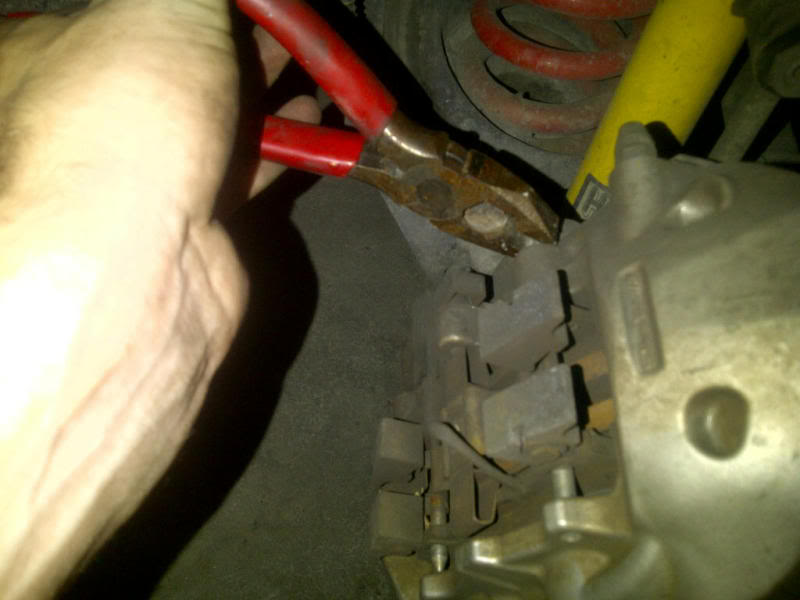
Step 3 (rear):
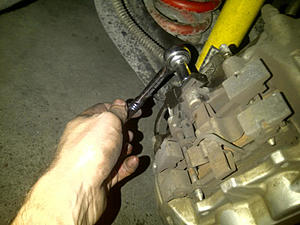
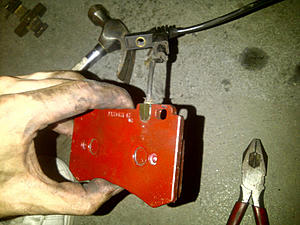
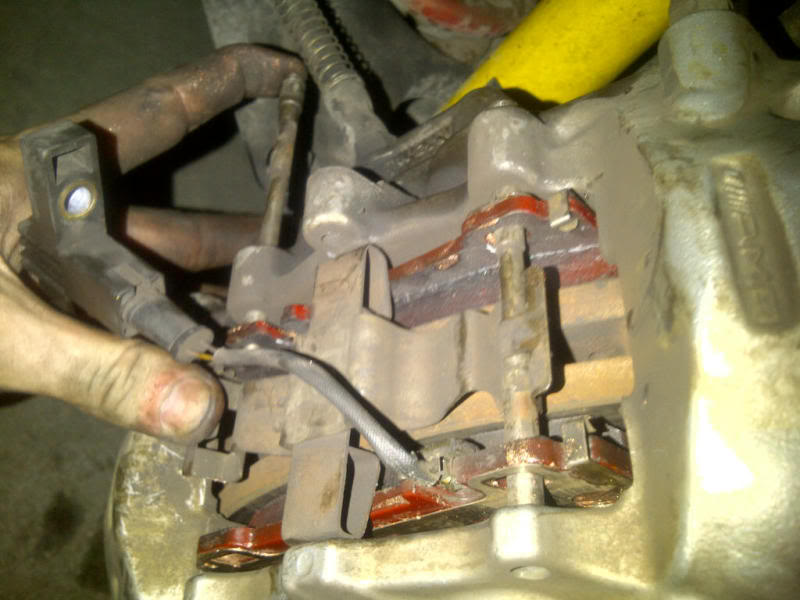
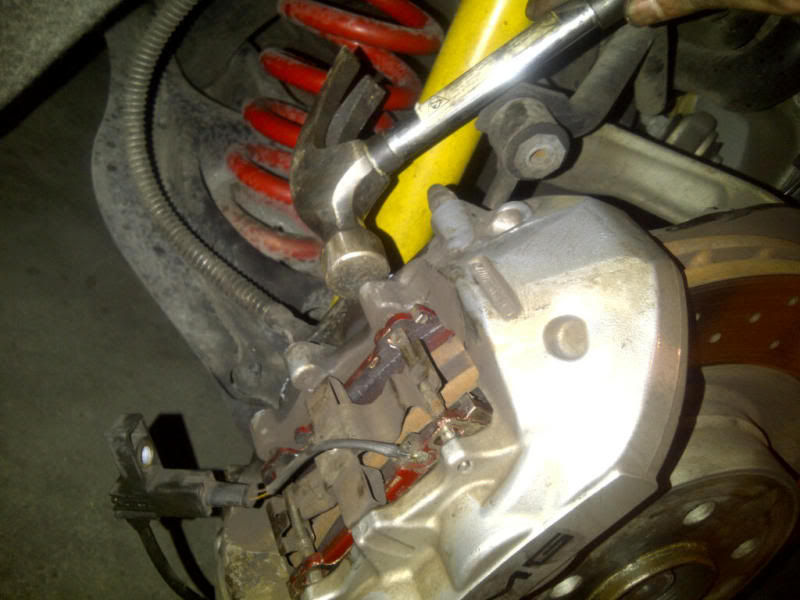
Knock out the pins. I took a hex head screw driver, and then hammered them loose. There are no safety pins or anything keeping these pins in. Watch out for the metal peice on top. They can pop out pretty good.
Then grab the loose pin from the back with the regular plyers. You'll have to wiggle and pull in order to get it moving.

Step 4 (rear):
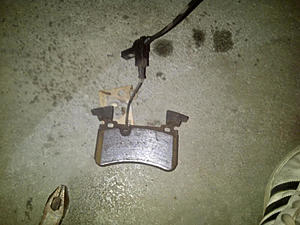
Take out the brake pads. These should pretty much slide out. A good way to save time later, is pull and push as much as you can on the pads. This will compress the brake pistons and make it easier to get the new pads in.
Step 5 (rear):
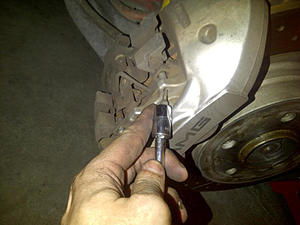
Take off the sensor. To be honest, I struggled with this step, and just used a hammer and a flat head screw driver. However, I broke the sensor... so, you should probably find a better way! Either way, I'm not getting a CEL, so it may not be too bad.

Step 6 rear:
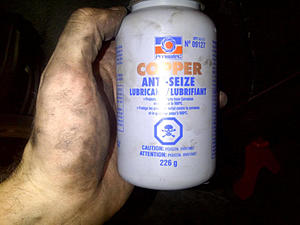
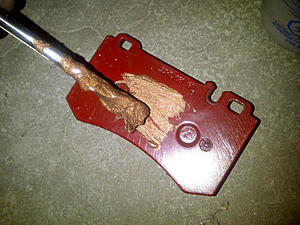
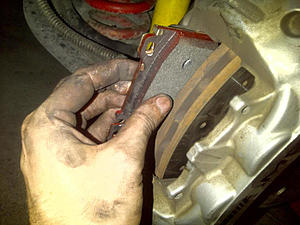
Take out your new brake pads, and coat the back of them with copper anti-squeak. This will make your driving much less noisy.
Step 7 rear:
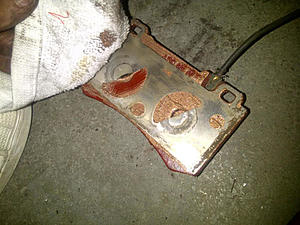
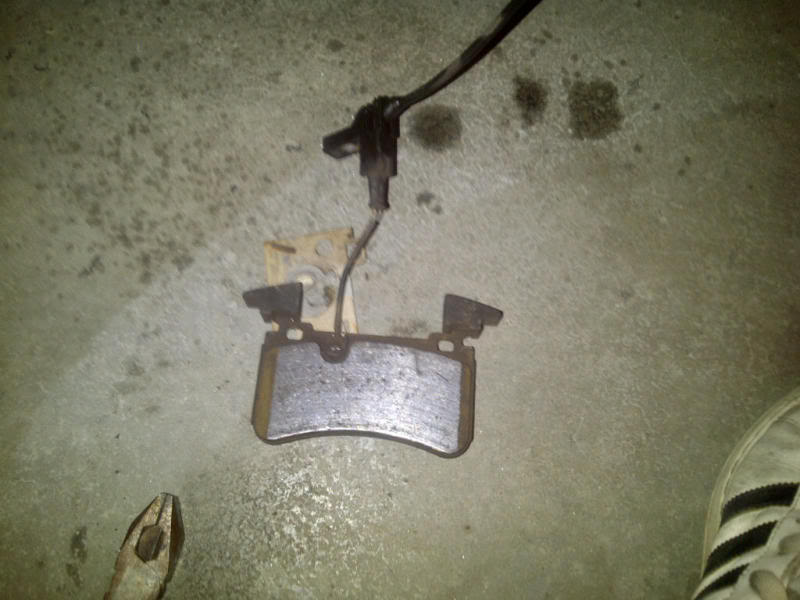
Take the old backing plate from your old brake pad. Clean it up, and put it on the new pad.
Step 8 rear:
Put the sensor back in. Again, I used a hammer and a flat head screwdriver, and it wasn't pretty.
Step 9 rear:
Put the new brake pads in.
Step 10 rear:
Put the pins back in. I got them in by hand, then used the plyers to get them in as much as possible, then finally, hammered them in.

Last step:
Remember to screw the sensor back in:
There, you've done the rears!
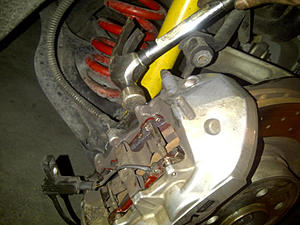
For the fronts, it's pretty much the same thing, although there are a couple of important differences. Here is a picture of the front brake caliper:

There are only two differences from the original how to, for doing the fronts:
1) there is a massive bolt in the middle that has to be ondone. It's a 14mm bolt, and I did this first.
2) there are no backing plates, so don't use any copper paste.
Please remember, I am not a mechanic, but hopefully this helps a few of you DIY'ers!
Tools needed:
- Jack, jack stand/lift
- Everything needed to take wheels off (breaker bar, 17mm socket, torque wrench)
- socket wrench (with 8mm and 14mm sockets)
- screwdriver with small hex (or anything less than 5mm wide and over 1cm long that you can get a hammer on)
- hammer
- plyers (preferrably both needlenose and regular)
So let's get into it:
Step 1:
Get the car into the air. If you're using a jack, remember to use a jack stand too, and break the wheel nuts before you get the car up. I jack up the front, and put a jack stand out the back (vice versa for access to the fronts)

Note: I did not take the calipers off of the car. I didn't feel like it was necessary, and to be honest, I think it'd be more difficult to get some of the pins out.
Step 2 (rear):
unbolt the sensor (8mm socket). This is only needed for the passenger side, as there are only brake pad sensors on that side. I've heard that these sensors are not necessary, and can just be zip-tied to something to keep them out of the way.

Step 3 (rear):
Knock out the pins. I took a hex head screw driver, and then hammered them loose. There are no safety pins or anything keeping these pins in. Watch out for the metal peice on top. They can pop out pretty good.

Then grab the loose pin from the back with the regular plyers. You'll have to wiggle and pull in order to get it moving.
Step 4 (rear):
Take out the brake pads. These should pretty much slide out. A good way to save time later, is pull and push as much as you can on the pads. This will compress the brake pistons and make it easier to get the new pads in.
Step 5 (rear):
Take off the sensor. To be honest, I struggled with this step, and just used a hammer and a flat head screw driver. However, I broke the sensor... so, you should probably find a better way! Either way, I'm not getting a CEL, so it may not be too bad.

Step 6 rear:
Take out your new brake pads, and coat the back of them with copper anti-squeak. This will make your driving much less noisy.


Step 7 rear:
Take the old backing plate from your old brake pad. Clean it up, and put it on the new pad.

Step 8 rear:
Put the sensor back in. Again, I used a hammer and a flat head screwdriver, and it wasn't pretty.

Step 9 rear:
Put the new brake pads in.

Step 10 rear:
Put the pins back in. I got them in by hand, then used the plyers to get them in as much as possible, then finally, hammered them in.
Last step:
Remember to screw the sensor back in:

There, you've done the rears!
For the fronts, it's pretty much the same thing, although there are a couple of important differences. Here is a picture of the front brake caliper:
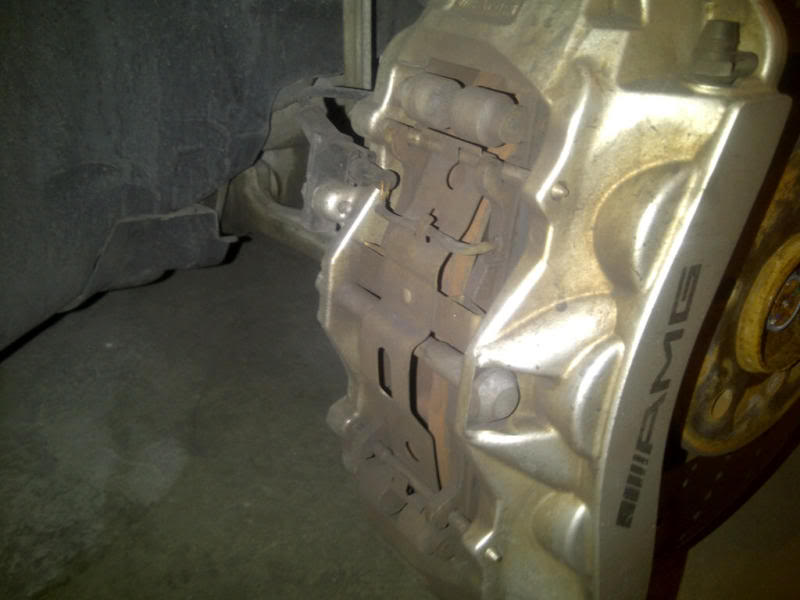
There are only two differences from the original how to, for doing the fronts:
1) there is a massive bolt in the middle that has to be ondone. It's a 14mm bolt, and I did this first.
2) there are no backing plates, so don't use any copper paste.
Please remember, I am not a mechanic, but hopefully this helps a few of you DIY'ers!
Thread Starter
Senior Member
Joined: Sep 2010
Posts: 378
Likes: 2
2008 C63
I picked up Carbotech brake pads. I can't remember the model line, but so far, they feel good, and make no noise. I'll do a post-track update soon.
Trending Topics
Super Moderator
Joined: Jul 2006
Posts: 3,365
Likes: 12
From: Orange County, CA
GMC - Miata - Trek - P-Car
^ Nicely done. Given the ease of replacing MB pads and rotors, it�s simple enough to save a few dollars by swapping them yourself.
Rather than forcing degraded brake fluid back through the hydraulic circuit while retracting the pistons (with the bleeder valves closed),
many recommend instead discharging the old fluid into a suitable recycling container.
Follow that up with a complete 330.1-specification DOT 4+ flush and bleed (required biennially and recommended prior to any track day participation)
to better exploit the full braking capabilities for which you�ve already paid. :)
http://bevo.mercedes-benz.com/d/d/en/Spec_330_1.pdf
MB World Stories
The Best of Mercedes & AMG

7 Craziest Things AMG Gas Ever Built
Verdad Gallardo
New Electric Mercedes-AMG GT 4-Door Coupe Unveiled: 10 Things You Need to Know
Verdad Gallardo
6 Mercedes Models That Did NOT Age Well (But Are Somehow Still Cool)
Verdad Gallardo
Manual Mercedes? 6 Times Sindelfingen Let Drivers Have All The Fun
Verdad Gallardo
Mercedes SLR McLaren 722 S Is Extremely Rare Example Modified by McLaren
Verdad Gallardo
8 Classic Boxy Mercedes Designs That Have Aged Like Fine Wine
Verdad Gallardo
Flawlessly Restored Mercedes 190E Evo II Heads to Auction
Verdad Gallardo
Electric Mercedes C-Class Unveiled: 11 Things You Need to Know
Verdad Gallardo
Mercedes EQS Gets A Major Update: Everything You Need to Know
Verdad Gallardo
Thread Starter
Senior Member
Joined: Sep 2010
Posts: 378
Likes: 2
2008 C63
^ Nicely done. Given the ease of replacing MB pads and rotors, it�s simple enough to save a few dollars by swapping them yourself.
Rather than forcing degraded brake fluid back through the hydraulic circuit while retracting the pistons (with the bleeder valves closed),
many recommend instead discharging the old fluid into a suitable recycling container.
Follow that up with a complete 330.1-specification DOT 4+ flush and bleed (required biennially and recommended prior to any track day participation)
to better exploit the full braking capabilities for which you�ve already paid.
http://bevo.mercedes-benz.com/d/d/en/Spec_330_1.pdf

Thread Starter
Senior Member
Joined: Sep 2010
Posts: 378
Likes: 2
2008 C63
MBWorld Fanatic!
Joined: Aug 2010
Posts: 2,493
Likes: 3
MB
Very nice write-up. I'm sure it will help others.
I also do the DIY for the brakes. It's not too bad. I have help when I've done it, though.
Just an aside, the MB rotors can last a really long time if you don't track the car.
I also do the DIY for the brakes. It's not too bad. I have help when I've done it, though.
Just an aside, the MB rotors can last a really long time if you don't track the car.

Thread Starter
Senior Member
Joined: Sep 2010
Posts: 378
Likes: 2
2008 C63
The rears... I have no idea. They didn't provide any function besides making it easier to take out and put back in the pads.
My rotors have 50k (km's) on them with two track days. Another track day next week... we'll see if they last.
For those that were asking which brake pad model, I have 1521's front and back, and a set of XP10's for the front on the track.

Member
Joined: Jun 2009
Posts: 209
Likes: 0
From: Canada
M156 and LS7
The fronts look like a safety device for the rotors. They can't be pinched together by more than the width of the rotors. However, I could be wrong on the one.
The rears... I have no idea. They didn't provide any function besides making it easier to take out and put back in the pads.
My rotors have 50k (km's) on them with two track days. Another track day next week... we'll see if they last.
For those that were asking which brake pad model, I have 1521's front and back, and a set of XP10's for the front on the track.
Thread Starter
Senior Member
Joined: Sep 2010
Posts: 378
Likes: 2
2008 C63
Check out Carbotech. Great customer service, and the product looks pretty good. I haven't tracked them yet, but they seem to have a good reputation. All in all, brake pads for less than $500 is not bad. The only issue is you have to send them a set of old pads so they can use the existing plates.

MBWorld Fanatic!


Joined: Feb 2010
Posts: 5,654
Likes: 484
2012 C63;1971 280SE 3.5(Sold);2023 EQS 450 SUV 4 Matic (Wife's)
My guess is the "hooks" on the OEM pads are weights to absorb/dampen vibration harmonics and reduce brake squeal with OEM street pad friction compounds. I guess (again) that the aftermarket finds them to be an added cost/complication with little benefit on performance pad friction compounds or they just expect you to put up with any brake squeal you may get with performance brake pads.


MBWorld Fanatic!
Joined: Jan 2009
Posts: 4,563
Likes: 42
C63 AMG
Should sticky this with a list of brake pads and reviews on them.. Can save guys tons of money here, its around 3500-4k to get this done at the dealer.. They are throwing away your half used rotors.. A huge waste!
Ive been running the Porterfield RS4 on all 4 corners with the stock rotor P30 rotors with no complaints. There is no noise and they seem to work just as well as stock or better. Low brake dust as well.
Ive been running the Porterfield RS4 on all 4 corners with the stock rotor P30 rotors with no complaints. There is no noise and they seem to work just as well as stock or better. Low brake dust as well.
Last edited by Merc63; Feb 23, 2012 at 07:33 PM.
MBWorld Fanatic!
Joined: Oct 2007
Posts: 1,717
Likes: 17
From: San Jose, CA
2007 E63 w/P30 and Eurotech CF Diffuser
Thread Starter
Senior Member
Joined: Sep 2010
Posts: 378
Likes: 2
2008 C63

Newbie
Joined: Nov 2012
Posts: 12
Likes: 0
From: North Carolina
C63 AMG
I used this DIY and put on some EBC red stuff pads today (rear only). It took me about an hour. These brakes were the easiest ones I've ever done. Next time it will probably take 20 minutes after having the wheels off.
Quick Tip to get the Sensor off: use a flat head screw driver and pry off the backing plate on the old Pad. Spray in some WD 40, wait, then use a small screw driver to wedge it out. very simple and you won't break it.
Quick Tip to get the Sensor off: use a flat head screw driver and pry off the backing plate on the old Pad. Spray in some WD 40, wait, then use a small screw driver to wedge it out. very simple and you won't break it.


