


DIY Rotors and Brakes (Front)

Thread Starter
Member
Joined: Sep 2009
Posts: 171
Likes: 10
From: SoCal
GL450; Audi Q7 sline; GX470-SOLD, E55-SOLD, Range Rover Supercharged-Sold
DIY Rotors and Brakes (Front)
OK, so there is no DIY for a brake job on this forum so I figured I would snap a few shots of my recent rotor and pad replacement.
I know that there are people that feel OEM is the best way to go and I do not want this to turn into a debate as to what rotors and pads are the best. What I do know that is that I always do these jobs myself, I always do a lot of research and I have always had better results going aftermarket that OEM.
I decided to use the same setup that I had on my full size Range Rover Supercharged. I figure if it works on that beast, it should stop the GL.
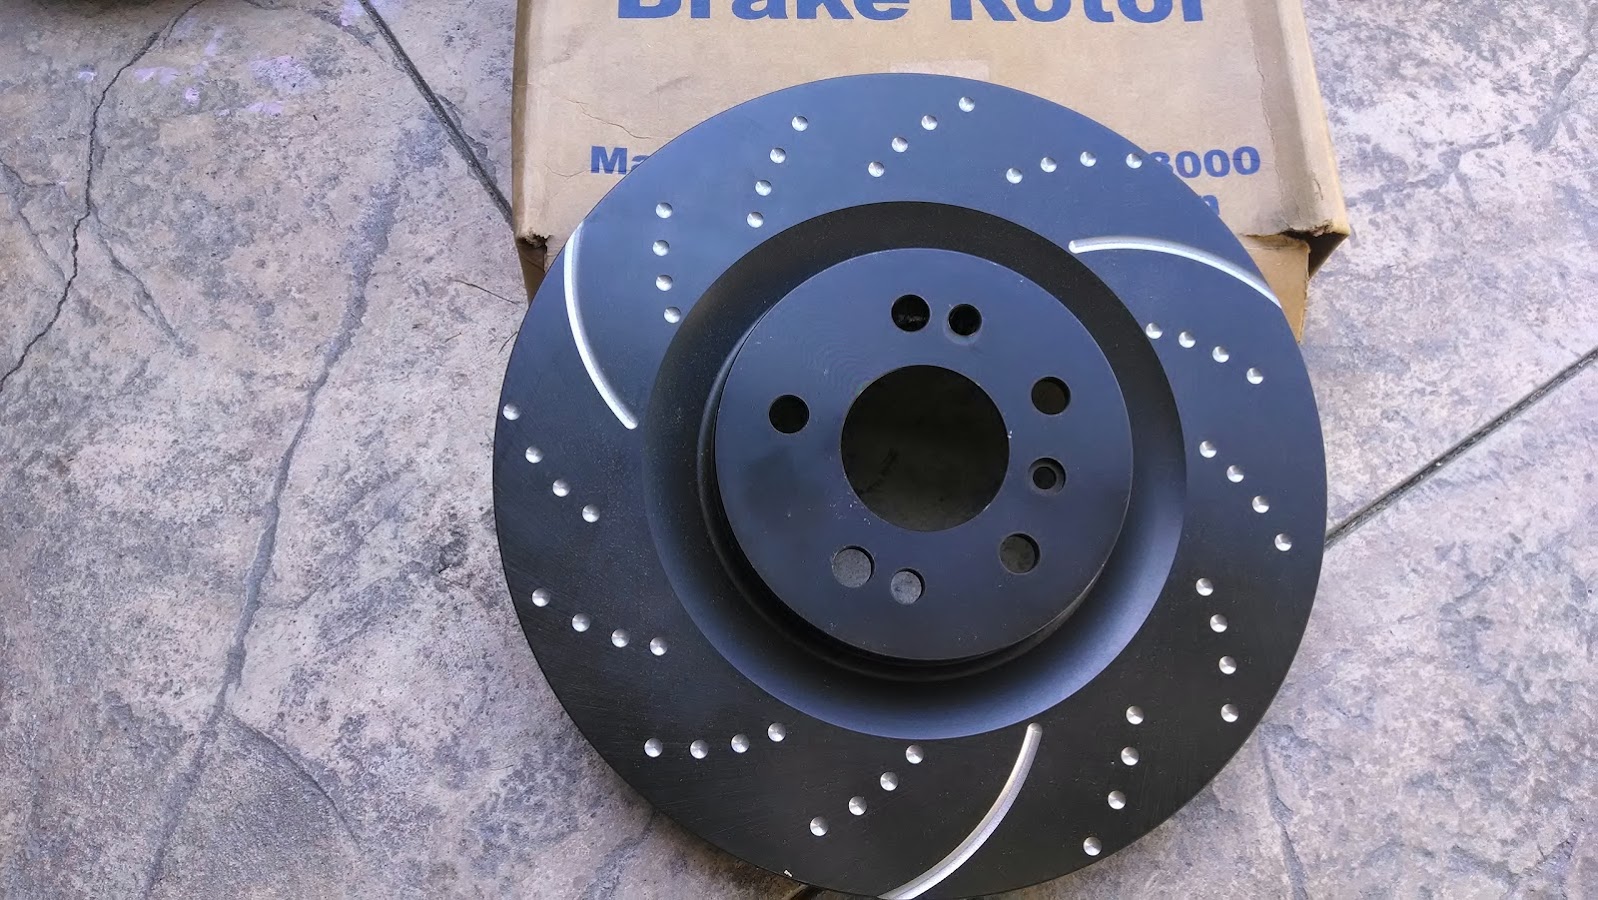
I went with EBC Sport rotors which are dimpled and slotted along with EBC Greenstuff pads.
One thing to be sure of is the size of your rotors. The GL comes in two different size rotors for the front and I figured since my car came with the 20in wheels that I would have the larger rotors (373mm). When I pulled the wheels to do the job I found that mine were indeed the smaller (350mm) rotors. Good thing I ordered on Amazon...
So if you decide to do this yourself please note that this is FOR REFERENCE ONLY. I AM NOT A MECHANIC, ANY DAMAGE YOU DO TO YOUR CAR, YOURSELF, YOUR ANIMALS OR ANYTHING IS YOUR FAULT, NOT MINE. READ ON AT YOUR OWN RISK.
First remember to work on your car on a flat surface. Use wheel chocks and jack stands and never lay under the car while it's off the ground.
Below are the tools and parts you will want for this job:
1. Pull the front wheels and you will see the rotors and calipers:

Here are my worn bits:


The new stuff:

2. Next you will want to loosen the T30 torx screw securing the rotor to the hub. This is likely rusted on there so the best way is to use an impact driver. This works by striking the driver with a mallet. When you hit it, it turns the screw. This does two things: Makes sure the bit does not slip and breaks it free at the same time. You can get one at Harbor Freight for not much $. If you don't have one I would try heat and make sure you have new screws on hand for the re-install.
3. Remove the Plastic caps from behind the caliper which will expose the 9mm allen bolts that hold the caliper to the mounting bracket. You can see the bolt in the picture below (it's inside the rubber boot thing)
4. You will want to hang the caliper from the strut with some string or wire so that it is not hanging from the brake line.
5. Now you will need the 20mm socket and a large ratchet and very likely a breaker bar to remove the Mounting bracket that you just took the caliper off of. These are on there with loctite and can be a bear to get off. Once again, heat helps here but leverage is your friend...use a long breaker bar. There are two 20mm bolts that you must remove. You can easily see them on the bracket. (sorry no picture)
6. Now you are ready to remove the rotor. Give is a whack on the top edge with your mallet. It should break free. There is nothing holding it on now except rust and break dust, but you may have to give it a few whacks around the edges to break it free (remember it's going in the garbage so if you need to hit is with a metal hammer that's ok).
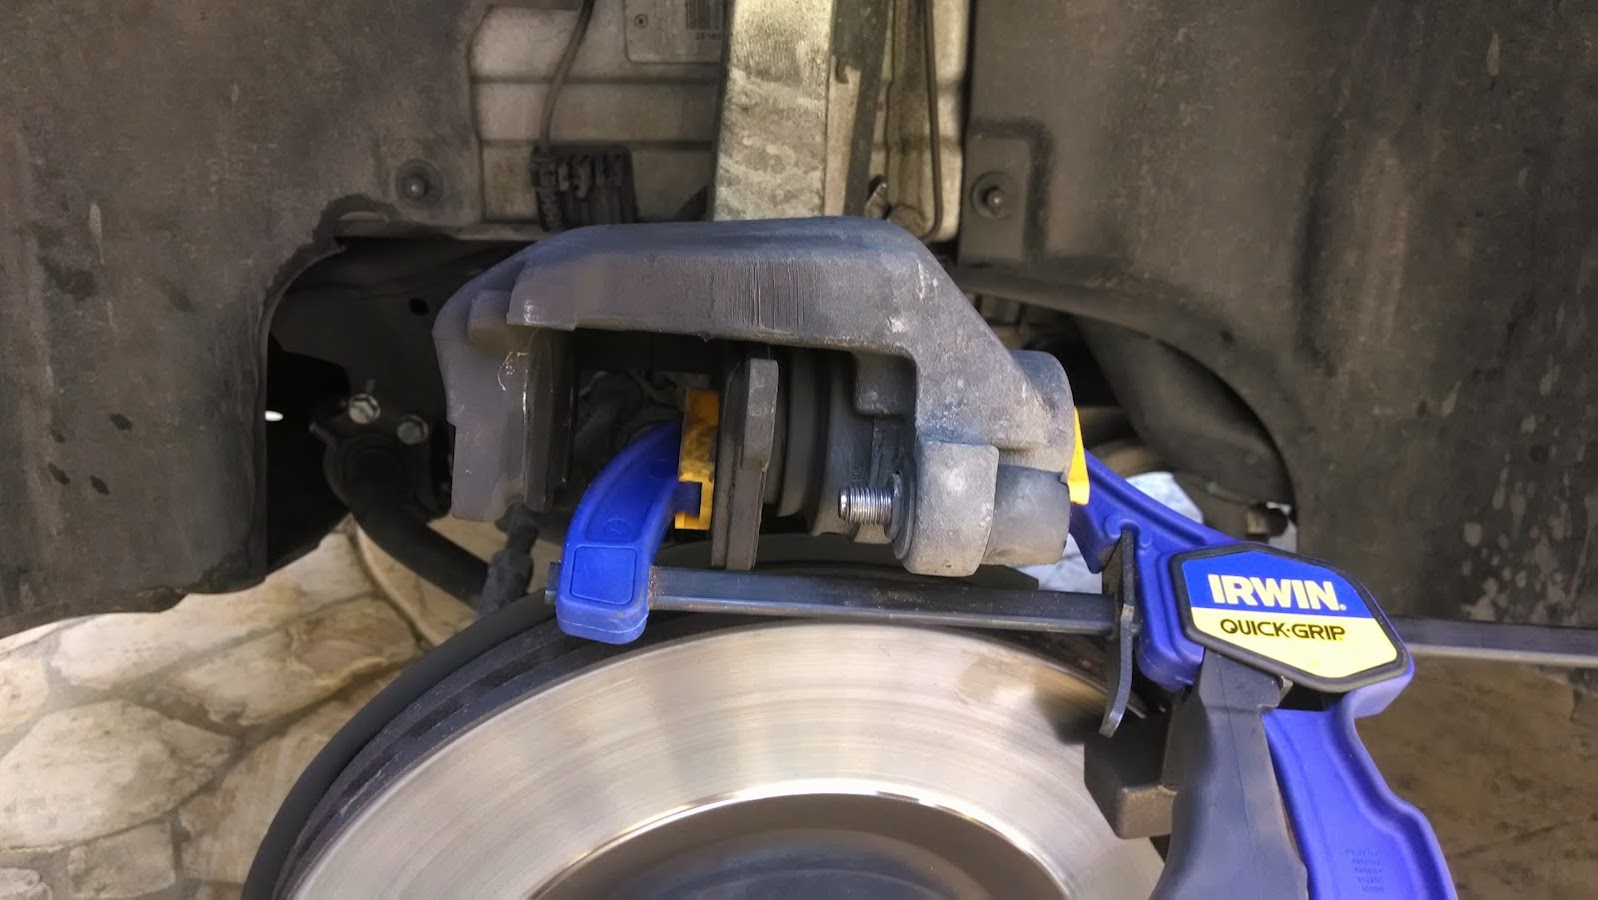
7. Press the caliper pistons back into the caliper. The best way to do this is to used the clamp like the on in the picture below: As you squeeze the grip it will slowly push the pistons back into the caliper. If you do not do this you will not be able to install the caliper over the new rotor with the new pads.
8. Now pry the inner pad out of the caliper with a flat head screwdriver taking caution not to puncture the boot over the piston. Also note that there will be a wear sensor on the passenger side clipped to the inner pad. If you did not get a warning light you may be able to reuse the sensor. If your light went off you WILL NEED a new one.
7. Time Install all the new stuff! Rotor 1st with the 30mm torx screw at 10Nm and some loctite securing it to the hub. Then the mounting bracket with the 20mm bolts tightened to 80Nm and more loctite. Then press the new inner brake pad into the pistons on the caliper. Set the outer pad in place and then place the caliper over the new rotor and into place on the mounting bracket. Now install the 2 9mm caliper bolts. I do not know the torque spec but make sure they are tight. Now replace the plastic caps over the rubber boots and everything should now look like this:

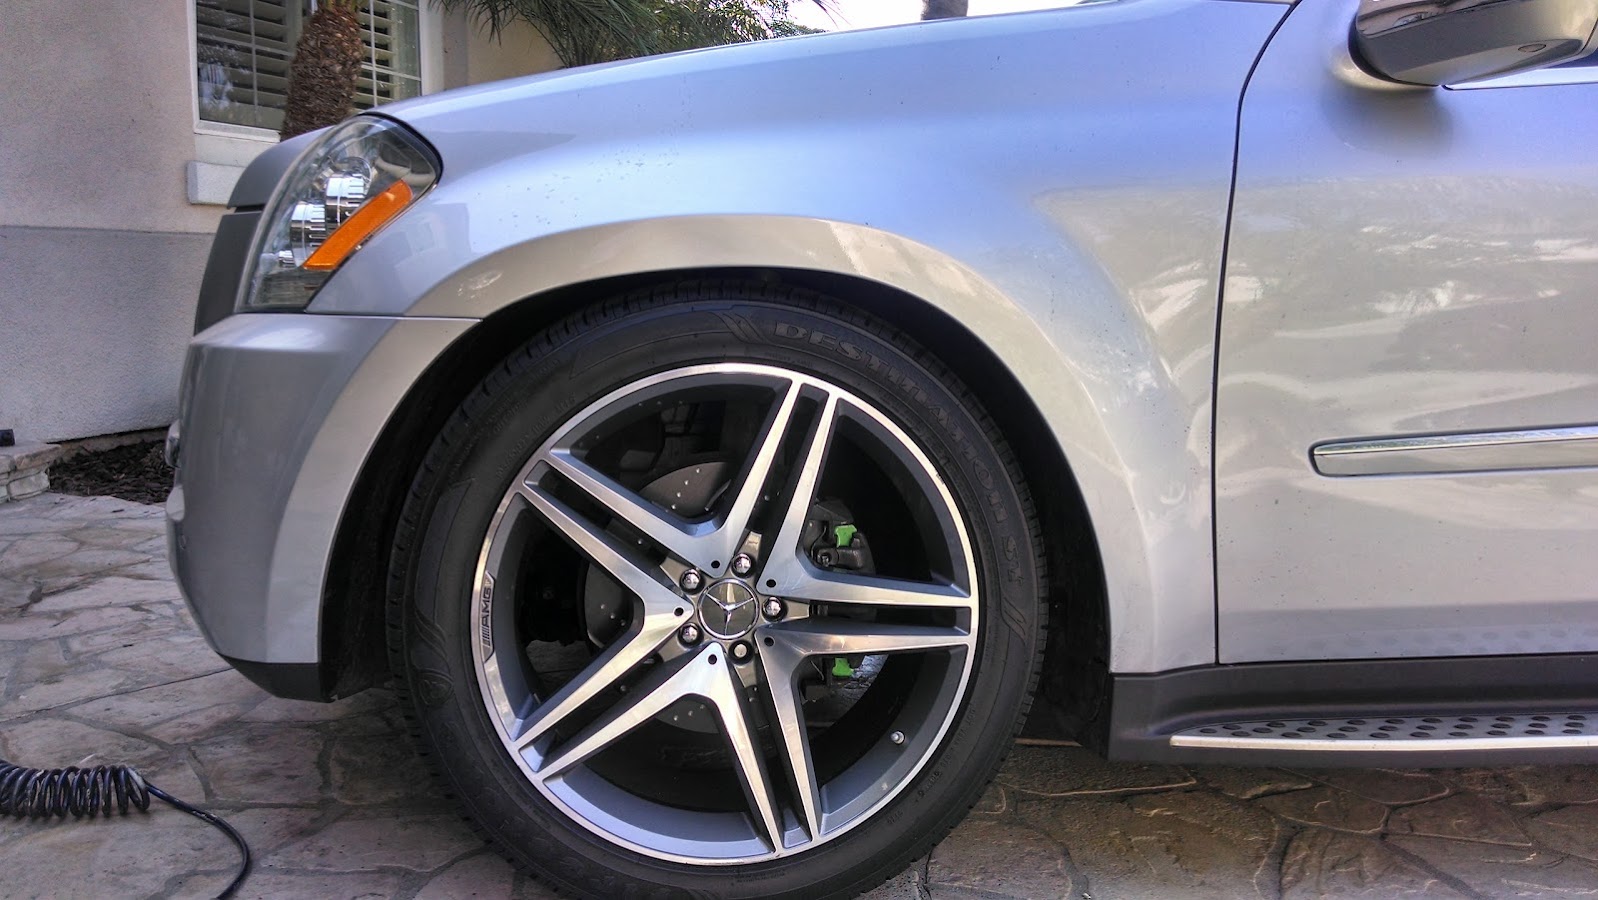
Replace your wheels and check out your new slammed GL!
Don't worry...when you start the car it will level out again!
This is what they will look like after the bed in coating is worn off:

Below is a good method for bedding in your new pads and rotors: (From the EBC website)
"Drive your vehicle steadily within the first 300-400 miles of road use only using the brakes violently in case of emergency. During this time use the brakes lightly and intermittently to achieve a matching between the pad and rotor which we call break in or bed in.
The speed with which perfect brake in will have occurred depends on how often the brakes are used. If you drive on a freeway or motorway and do not use your brakes for miles at a time, break in periods will be much longer. Using the brakes with caution during their early life will extend their wear life and greatly reduce the chances of rotor vibration or �shimmying� as it is known in the States. During the bed in time the pads will only contact the disc on a limited area until tiny irregularities in machining or misalignment of the pads against the rotor have been removed. You can easily see how far you have progressed with bedding in your new brakes by looking through the wheel spokes and evaluating pad contact. The rotor should look shiny and smooth across its surfaces from outside to inside in all areas of the rotor. If you have purchased EBC gold zinc or black zinc coated sport slotted rotors, all of these coatings should have been visibly removed across the entire braking area of the rotor. Break in times on European vehicles is usually considerably longer than on Asian or US built vehicles because of the design of the brake system. European vehicles use a �taller� brake pad and may tend to contact on the outer edges of the rotor first and gradually contact more towards the centre of the axle over the first few hundred miles. After you are confident that the pads and discs are perfectly mated, use the brakes on a quiet and safe road 5-6 times at medium pressure bringing the car from 60mph to 10mph. Drive the vehicle for a few miles to allow the brakes to cool and repeat this procedure. During this final break in a brake odour will almost certainly appear and this is perfectly normal. This is known as green fade where the surface resins within the pad finally cure and burn off.
This bed in procedure is for STREET driving only. For race use bed in please see notes inside the package."
I hope this is helpful to anyone considering a brake DIY!
__________
I know that there are people that feel OEM is the best way to go and I do not want this to turn into a debate as to what rotors and pads are the best. What I do know that is that I always do these jobs myself, I always do a lot of research and I have always had better results going aftermarket that OEM.
I decided to use the same setup that I had on my full size Range Rover Supercharged. I figure if it works on that beast, it should stop the GL.
I went with EBC Sport rotors which are dimpled and slotted along with EBC Greenstuff pads.
One thing to be sure of is the size of your rotors. The GL comes in two different size rotors for the front and I figured since my car came with the 20in wheels that I would have the larger rotors (373mm). When I pulled the wheels to do the job I found that mine were indeed the smaller (350mm) rotors. Good thing I ordered on Amazon...
So if you decide to do this yourself please note that this is FOR REFERENCE ONLY. I AM NOT A MECHANIC, ANY DAMAGE YOU DO TO YOUR CAR, YOURSELF, YOUR ANIMALS OR ANYTHING IS YOUR FAULT, NOT MINE. READ ON AT YOUR OWN RISK.
First remember to work on your car on a flat surface. Use wheel chocks and jack stands and never lay under the car while it's off the ground.
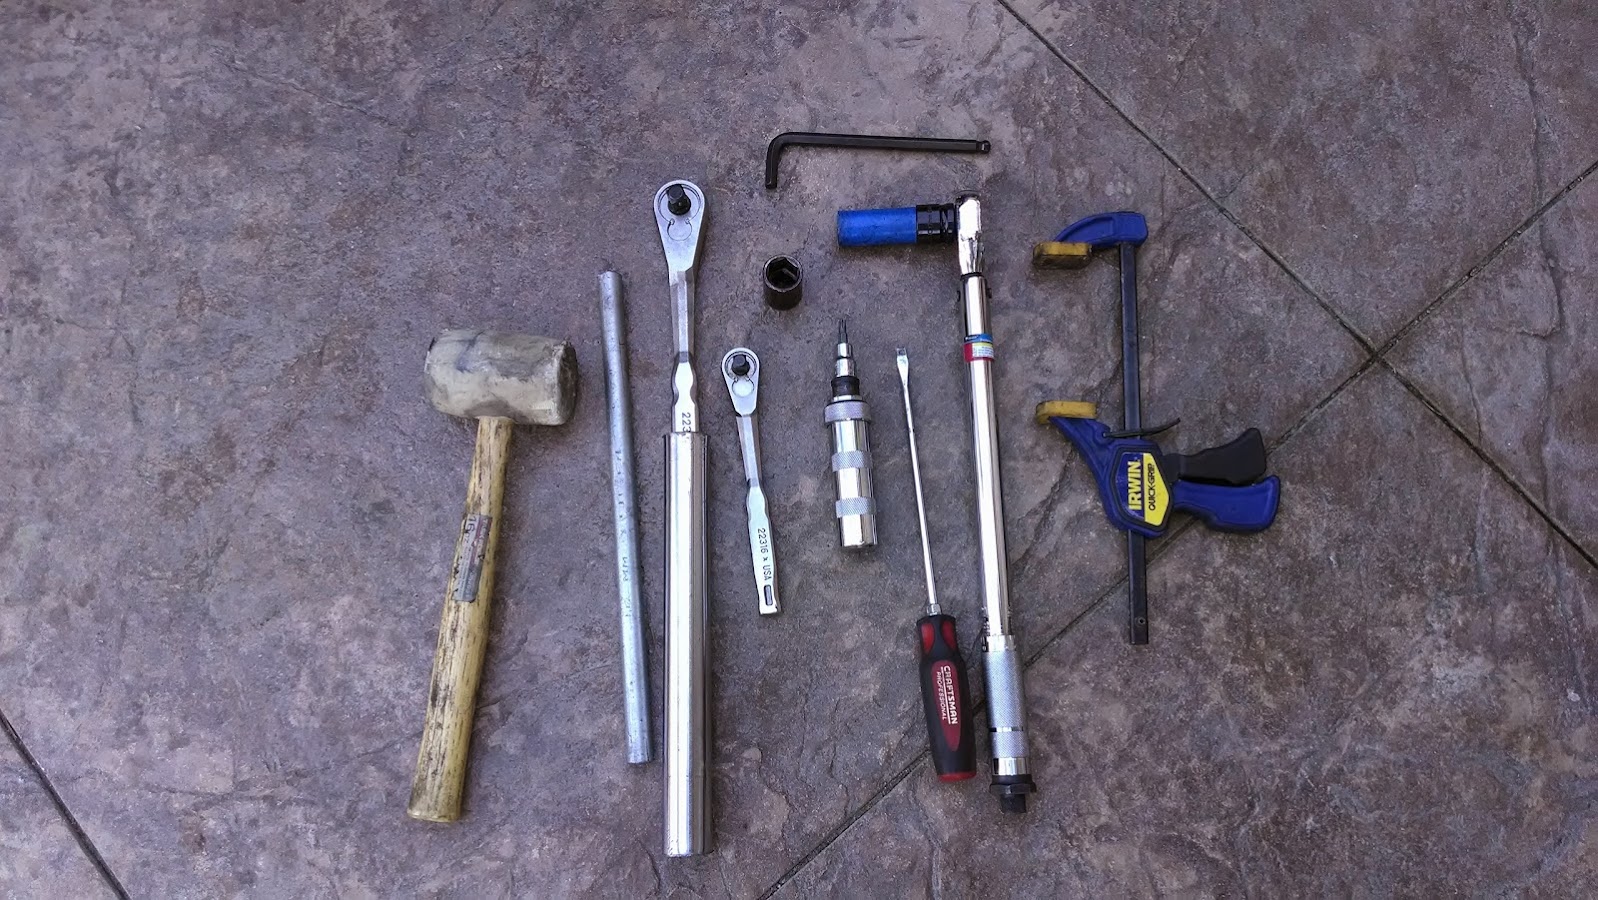
Below are the tools and parts you will want for this job:
- Rubber Mallet
- Breaker Bars
- Ratchets with 20mm and 17mm sockets
- 9mm allen wrench (actually hard to find so don't assume your set has one)
- Impact driver with T30 Torx bit
- Long flat head screw driver or small pry bar
- Torque wrench
- C clamp (I really like the Quick Grip like below)
- loctite
- New wear sensor - OEM
- New rotors | Part Number: GD7399 for 350mm | Part Number: GD7545 for 373mm rotors
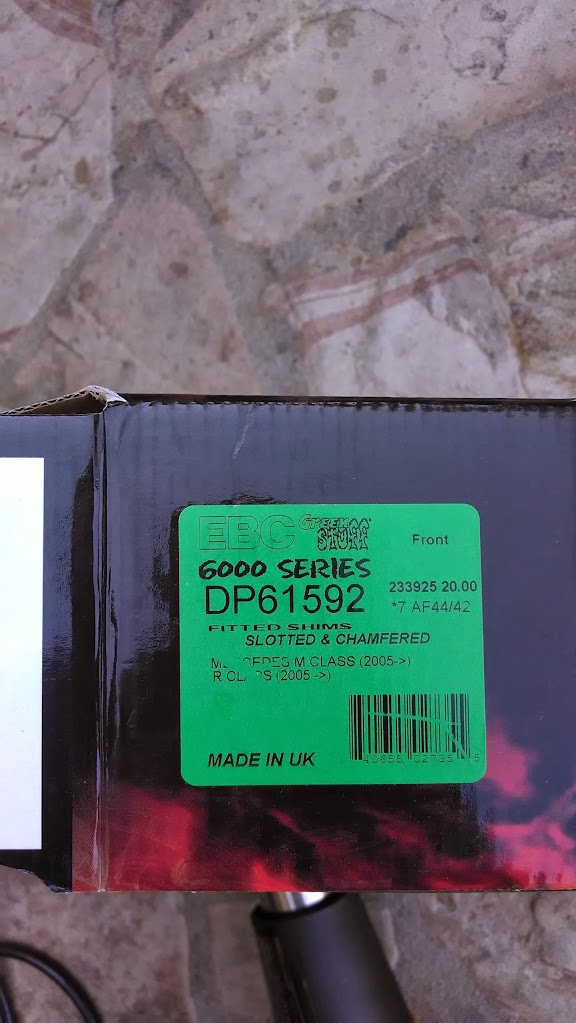
- New pads | Part Number: DP61592 for 350mm | Part Number: DP61860 for 373mm
1. Pull the front wheels and you will see the rotors and calipers:
Here are my worn bits:
The new stuff:
2. Next you will want to loosen the T30 torx screw securing the rotor to the hub. This is likely rusted on there so the best way is to use an impact driver. This works by striking the driver with a mallet. When you hit it, it turns the screw. This does two things: Makes sure the bit does not slip and breaks it free at the same time. You can get one at Harbor Freight for not much $. If you don't have one I would try heat and make sure you have new screws on hand for the re-install.
3. Remove the Plastic caps from behind the caliper which will expose the 9mm allen bolts that hold the caliper to the mounting bracket. You can see the bolt in the picture below (it's inside the rubber boot thing)
4. You will want to hang the caliper from the strut with some string or wire so that it is not hanging from the brake line.
5. Now you will need the 20mm socket and a large ratchet and very likely a breaker bar to remove the Mounting bracket that you just took the caliper off of. These are on there with loctite and can be a bear to get off. Once again, heat helps here but leverage is your friend...use a long breaker bar. There are two 20mm bolts that you must remove. You can easily see them on the bracket. (sorry no picture)
6. Now you are ready to remove the rotor. Give is a whack on the top edge with your mallet. It should break free. There is nothing holding it on now except rust and break dust, but you may have to give it a few whacks around the edges to break it free (remember it's going in the garbage so if you need to hit is with a metal hammer that's ok).
7. Press the caliper pistons back into the caliper. The best way to do this is to used the clamp like the on in the picture below: As you squeeze the grip it will slowly push the pistons back into the caliper. If you do not do this you will not be able to install the caliper over the new rotor with the new pads.
8. Now pry the inner pad out of the caliper with a flat head screwdriver taking caution not to puncture the boot over the piston. Also note that there will be a wear sensor on the passenger side clipped to the inner pad. If you did not get a warning light you may be able to reuse the sensor. If your light went off you WILL NEED a new one.
7. Time Install all the new stuff! Rotor 1st with the 30mm torx screw at 10Nm and some loctite securing it to the hub. Then the mounting bracket with the 20mm bolts tightened to 80Nm and more loctite. Then press the new inner brake pad into the pistons on the caliper. Set the outer pad in place and then place the caliper over the new rotor and into place on the mounting bracket. Now install the 2 9mm caliper bolts. I do not know the torque spec but make sure they are tight. Now replace the plastic caps over the rubber boots and everything should now look like this:
Replace your wheels and check out your new slammed GL!
Don't worry...when you start the car it will level out again!
This is what they will look like after the bed in coating is worn off:
Below is a good method for bedding in your new pads and rotors: (From the EBC website)
"Drive your vehicle steadily within the first 300-400 miles of road use only using the brakes violently in case of emergency. During this time use the brakes lightly and intermittently to achieve a matching between the pad and rotor which we call break in or bed in.
The speed with which perfect brake in will have occurred depends on how often the brakes are used. If you drive on a freeway or motorway and do not use your brakes for miles at a time, break in periods will be much longer. Using the brakes with caution during their early life will extend their wear life and greatly reduce the chances of rotor vibration or �shimmying� as it is known in the States. During the bed in time the pads will only contact the disc on a limited area until tiny irregularities in machining or misalignment of the pads against the rotor have been removed. You can easily see how far you have progressed with bedding in your new brakes by looking through the wheel spokes and evaluating pad contact. The rotor should look shiny and smooth across its surfaces from outside to inside in all areas of the rotor. If you have purchased EBC gold zinc or black zinc coated sport slotted rotors, all of these coatings should have been visibly removed across the entire braking area of the rotor. Break in times on European vehicles is usually considerably longer than on Asian or US built vehicles because of the design of the brake system. European vehicles use a �taller� brake pad and may tend to contact on the outer edges of the rotor first and gradually contact more towards the centre of the axle over the first few hundred miles. After you are confident that the pads and discs are perfectly mated, use the brakes on a quiet and safe road 5-6 times at medium pressure bringing the car from 60mph to 10mph. Drive the vehicle for a few miles to allow the brakes to cool and repeat this procedure. During this final break in a brake odour will almost certainly appear and this is perfectly normal. This is known as green fade where the surface resins within the pad finally cure and burn off.
This bed in procedure is for STREET driving only. For race use bed in please see notes inside the package."
I hope this is helpful to anyone considering a brake DIY!
__________
Thread Starter
Member
Joined: Sep 2009
Posts: 171
Likes: 10
From: SoCal
GL450; Audi Q7 sline; GX470-SOLD, E55-SOLD, Range Rover Supercharged-Sold

Senior Member
Joined: Feb 2011
Posts: 350
Likes: 106
From: Palo Alto, CA
2011 GL 350, P1 Package, HID headlamps, Blind spot assist, Parktronic, Wood steering wheel
Just put new front pads on my 2011 GL 350 at 39,000 miles. When I had the truck in for warranty service, the tech noted I needed new pads and rotors. I bought new Akebono ceramic pads from Amazon - about $80 for both front rotors. Have had great luck with these on all of my vehicles, and they don't create dust.
I measured my rotors with a caliper and found they were still well within spec at about 30.5 mm. No scarring or vibration either - so I decided to keep them instead of replacing.
When I went to remove the factor brake pads, I found they still had abut 25% left - so I probably could have waited another year - but heck I already had the time and parts.
Took about two hours for both sides - but I also did a full brake fluid flush at the same time. The Akebono pads come with a new wear sensor - you only need one, on the passenger side. There is no sensor on the driver's side.
Note that when you are not replacing the rotors, you don't need to mess with the large bolts holding the caliper bracket to the truck. You just need to remove the smaller bolts hidden behind the rubber boots with a 9mm allen wrench. This allows you to remove the caliper and change out the pads. On my 2011 GL 350, the larger bolts were not 20MM - they were 21 or 22 mm - I think 21.
All in all a quick and easy job and huge savings vs. doing this at the dealer.

Out Of Control!!


Joined: Aug 2010
Posts: 12,516
Likes: 628
From: Charlotte NC area
2019 WS222 S450 4-Matic / 2007 W211 E350 4Matic (Sold) / 2008 X164 GL320 CDI
Great write-up!
My Centric pads came with new rubber bushings and covers for the slide pins.
It looks like you reused yours?
What is "normal"?
I saw that the slide pins are fairly inexpensive. Do they also normally get changed?
I cleaned mine and reused them, but later noticed the new ones (in on-line pics) seem to have some Loctite on the threads. Should I have reapplied Loctite on reused pins?
I only did the rear, as my fronts were fairly new from the previous owner.
Did you do all four? My GL320 caliper bolts are 18mm. Do you know if that is a front/back difference, a year to year difference, or a GL320/GL450 difference?
Last edited by N_Jay; Feb 19, 2014 at 09:53 AM.
Junior Member
Joined: Jan 2014
Posts: 23
Likes: 0
From: Denver Colorado
GL450 / GSX-R / Acura RL / Acura TL Type-S
Nice write up - Question, how did you figure out what size rotors you have install on your GL??
I'm thinking about doing similar setup as your.
Nice ride by the way!!!!
I'm thinking about doing similar setup as your.
Nice ride by the way!!!!
Senior Member
Joined: Feb 2011
Posts: 350
Likes: 106
From: Palo Alto, CA
2011 GL 350, P1 Package, HID headlamps, Blind spot assist, Parktronic, Wood steering wheel
You can either measure, or you can call your VIN into your dealer's parts person and they can look up which of the two sizes you have on your truck....
Trending Topics
MB World Stories
The Best of Mercedes & AMG

6 Mercedes Models That Did NOT Age Well (But Are Somehow Still Cool)
Verdad Gallardo
Manual Mercedes? 6 Times Sindelfingen Let Drivers Have All The Fun
Verdad Gallardo
Mercedes SLR McLaren 722 S Is Extremely Rare Example Modified by McLaren
Verdad Gallardo
8 Classic Boxy Mercedes Designs That Have Aged Like Fine Wine
Verdad Gallardo
Flawlessly Restored Mercedes 190E Evo II Heads to Auction
Verdad Gallardo
Electric Mercedes C-Class Unveiled: 11 Things You Need to Know
Verdad Gallardo
Mercedes EQS Gets A Major Update: Everything You Need to Know
Verdad Gallardo
5 Underrated Mercedes-Benz Models That Don't Get the Love They Deserve
Verdad Gallardo
Mercedes 300D Has Pushed Well Past 1 Million Miles and It Ain't Stopping
Verdad Gallardo

Senior Member
Joined: May 2013
Posts: 437
Likes: 84
From: Espoo, Finland
2012 GL 350
For guide pins, I always use a light coating of brake caliper grease (this is a super-thick grease you can find at any auto parts store.) I have seen Loctite specified on some guide pins for other cars, but if you use it, certainly don't use anything more than blue.
Great write-up!
My Centric pads came with new rubber bushings and covers for the slide pins.
It looks like you reused yours?
What is "normal"?
I saw that the slide pins are fairly inexpensive. Do they also normally get changed?
I cleaned mine and reused them, but later noticed the new ones (in on-line pics) seem to have some Loctite on the threads. Should I have reapplied Loctite on reused pins?
I only did the rear, as my fronts were fairly new from the previous owner.
Did you do all four? My GL320 caliper bolts are 18mm. Do you know if that is a front/back difference, a year to year difference, or a GL320/GL450 difference?
My Centric pads came with new rubber bushings and covers for the slide pins.
It looks like you reused yours?
What is "normal"?
I saw that the slide pins are fairly inexpensive. Do they also normally get changed?
I cleaned mine and reused them, but later noticed the new ones (in on-line pics) seem to have some Loctite on the threads. Should I have reapplied Loctite on reused pins?
I only did the rear, as my fronts were fairly new from the previous owner.
Did you do all four? My GL320 caliper bolts are 18mm. Do you know if that is a front/back difference, a year to year difference, or a GL320/GL450 difference?
Senior Member


Joined: Jan 2012
Posts: 338
Likes: 15
SL65 AMG
I did my front and rears on my 07 450 at the same time. Was getting a wear indication light and after changing pads, front and rear and both sensors, I'm still getting the wear indication. Any ideas on why? Also getting a white battery light as well yet everything works fine.

MBWorld Fanatic!


Joined: Dec 2004
Posts: 4,268
Likes: 253
It is a good idea to do a brake flush before pads replacement. This way when you squeeze the caliper pistons you will not push dirt into the abc module. Most of the brake fluid sludge and grime is in the caliper so you don't want that fluid pushed around through abs and master cylinder. This is the reason why lots of vehicles fail abs or master cylinder shortly after pads replacement

Senior Member
Joined: Mar 2009
Posts: 401
Likes: 31
From: CT
GL 450, 993TT, Cayenne Diesel, 964C4
DIY Rotors and Brakes (Front)
Did all four corners yesterday. The 20mm bolts were a bear and factory used a crap load of blue loctite which I thought was unnecessary. Could not loosen them with impact wrenches and was tight putting the calipers back.
I cleaned the wheel hub off with a metal brush after the rotors came off and applied anti seize around so it will be easy to replace the next time around.
I just cleaned off the glide pins and applied anti seize before reinstallation. No need to replace.
Also used a turkey baster to suck up extra brake fluid as brake pistons are pushed back or it will overflow. I left fluid above max all the time because the caliper pistons will move back closer to rotors and use fluid. Recheck the brake fluid level after all four corners are done. Close the brake fluid reservoir. Pump the brake and drive around. Recheck fluid level again. I flushed my brakes 15K miles prior so I had to pull more brake fluid out than normal.
It is disappointing that this expensive and heavy truck uses sliding calipers. Wonder if the GL63 uses a better braking system.
MBWorld Fanatic!

Joined: Jun 2009
Posts: 1,111
Likes: 48
From: North California
02 C32 AMG, 05 SL55 AMG, 09 SL63 AMG, 14 E350, '18 G550, 92 300ZX & 15' GL63 AMG
Hello, here's a revive! (quarantine)
I am quoting just the torque specs for the caliper mounting bolts, 80Nm, is this the same for GL63? i got around to doing my front rotor replacement yesterday and this perhaps has got to be the only thread i found that provided torque specs for those caliper mounting bolts. They were a PAIN to break loose initially.
Thanks all in advance, and i hope everyone is well and safe
Out Of Control!!
Joined: Aug 2010
Posts: 12,516
Likes: 628
From: Charlotte NC area
2019 WS222 S450 4-Matic / 2007 W211 E350 4Matic (Sold) / 2008 X164 GL320 CDI
Hello, here's a revive! (quarantine)
I am quoting just the torque specs for the caliper mounting bolts, 80Nm, is this the same for GL63? i got around to doing my front rotor replacement yesterday and this perhaps has got to be the only thread i found that provided torque specs for those caliper mounting bolts. They were a PAIN to break loose initially.
Thanks all in advance, and i hope everyone is well and safe
Forget the gun and get a proper breaker bar. Easy as pie with a 24" bar.
MBWorld Fanatic!
Joined: Jun 2009
Posts: 1,111
Likes: 48
From: North California
02 C32 AMG, 05 SL55 AMG, 09 SL63 AMG, 14 E350, '18 G550, 92 300ZX & 15' GL63 AMG
Thank you,
i was able to get those caliper bolts loose after a few attempts , but they were def tight! the only thing was prospecting for accurate torque specs for those 21mm caliper bolts for assurance. But after researching and cross-referencing with other AMGs with a like front brakes from different chassis, that 85ft/lbs of tq should be good. Ive come across others reporting 130-200ft/lb range , but i just can't fathom those bolts being that tight originally prior to breaking them loose. I mean, they were tight, but nowhere there 130-200ft/lb tight...
After I've completed the front rotor replacement and all was reinstalled; i took the GL63 for a drive to bed in the rotors/pads together 10 passes 2x and they were fine. Brakes were smooth and function as they should without exhibiting any abnormal behaviours.
Unless someone can confirm correct tq specs for those caliper mounting bolts, i will most definitely retighten them, but 85ft/lbs seem to hold just fine


