When you click on links to various merchants on this site and make a purchase, this can result in this site earning a commission. Affiliate programs and affiliations include, but are not limited to, the eBay Partner Network.
Steps to install the Take-up Device on Cabin Side
Remove rear bench seat cushion by reaching under the bench seat cushion, between the cushion and floor, pushing fastening locks in to release the hooks (NOTE: this part of the procedure is only for cars without the Rear seat package.)
Then unbolt the Rear Backrest by unscrewing the two outside bolts and the nut on the floor mounted mounting point bolt at the middle of the backrest bottom.
Rear Backrest Passenger side bolt
Rear Backrest Middle Mount
Rear Backrest Driver's side bolt
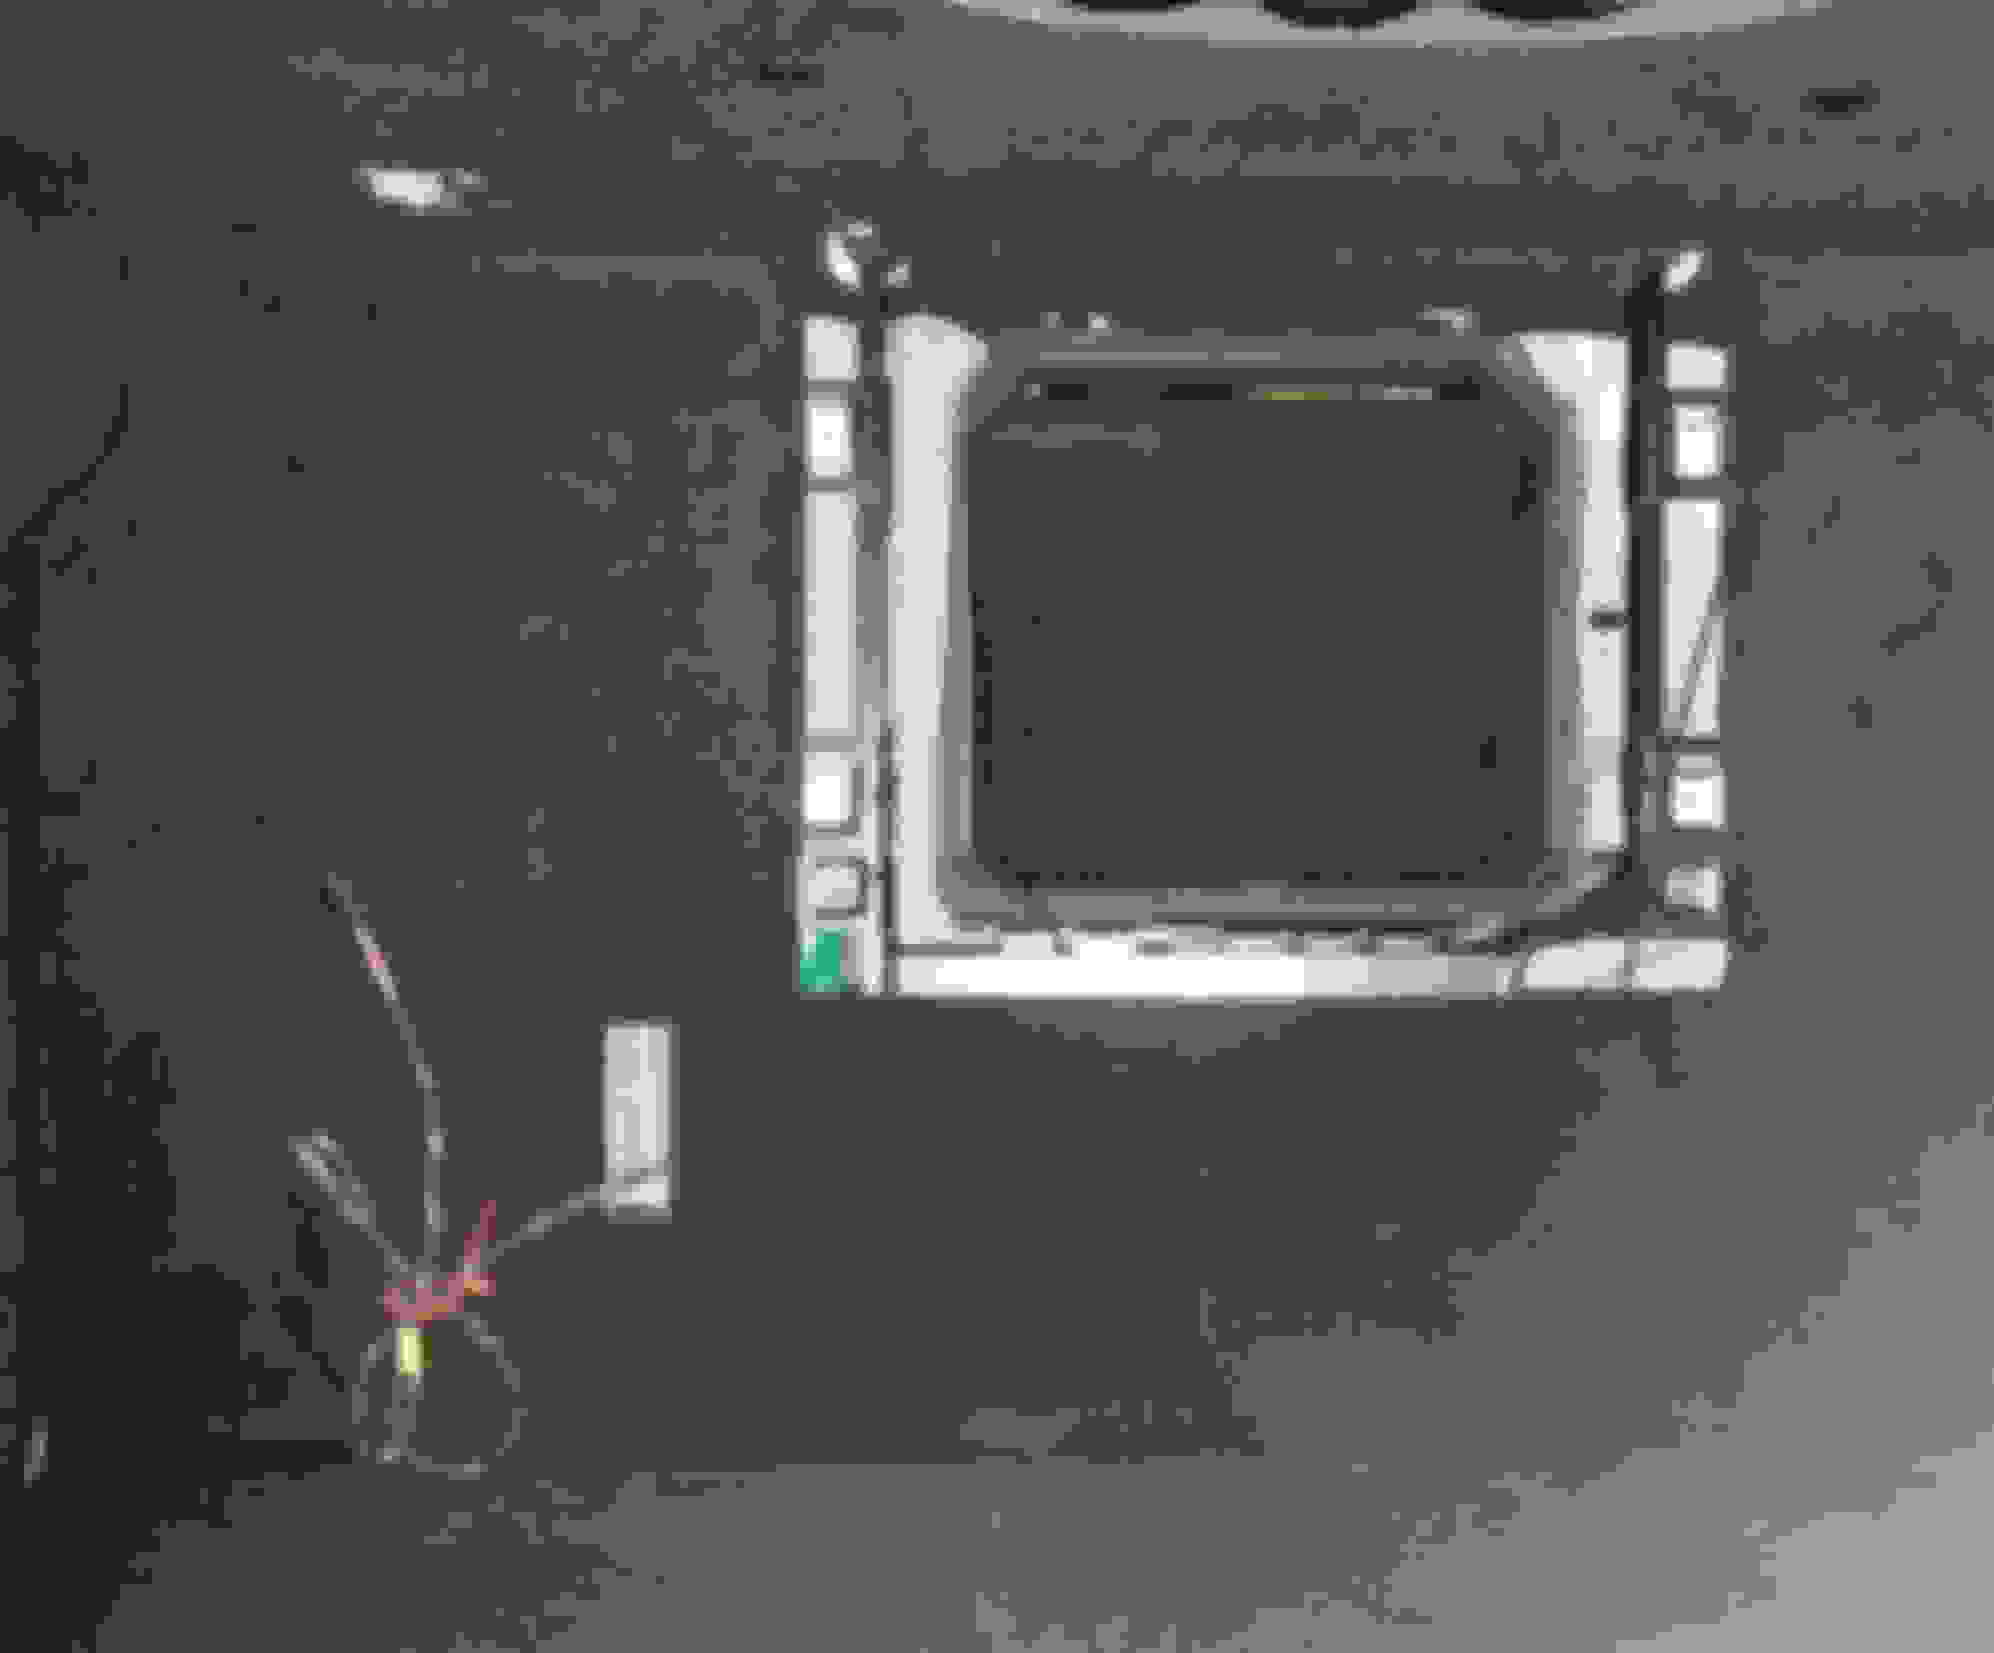
Once the rear backrest bolts are removed, then you should lift up the rear backrest and pull the bottom forward to remove the rear backrest. Exposing the Cabin side take-up device.
Remove the Cabin side Take-up device by unscrewing the two 4.9 x 19mm screws on each side off the take-up device.
Install new/replacement take-up device for options 282 and 308 (A221 840 0055)
Re-install rear backrest and rear seat cushion, reversing the removal steps.
Trunk:
Remove inner Panels, replace Stiffening Frame with 282/308 options Stiffening frame (221 640 06 19) Two bolts at top and two nuts at the bottom. Install top bolts first, then bottom nuts. While stock Stiffening frame is out of the car and before you install the 282/308 Stiffening frame (221 640 06 19), install the harness and fuse into the Rear SAM (221 440 74 05)
Harness for Rear SAM to the Fridge electrical connection
Rear SAM Slot - 139 - install harness into this slot in the rear SAM.
Once you have installed the Stiffening Frame and the Harness, you should install the 282/308 option Rear Panel (221-694-01-25-9F28)
Next install the Trunk-side Take-up device for option 282/308 (221 840 01 55)
Next install the End of the harness into the rear of the harness cover/bracket (A1296900114)
Next install the Harness cover/bracket into the 282/308 Rear Panel of trunk
Ok, now the car is ready for the Fridge or skis, or 4"x8" boards, etc. Now to save up for the fridge and a two post lift (two axle brake jobs and the lift will pay for itself.)
Excellent work. That did not come easy... Very cool stuff! (Pardon the pun.)
How cold does it get? You should stick a thermometer in it.
Thanks, I dunno how cold it gets. It has two settings, Small Snowflake and Large Snowflake. I want to get the User Guide that discusses it. I have not looked in my User Guide to see if it discussed, probably not. So I need to get a UG from Europe. Anyone have a UG that discusses the Fridge?
I am really looking for the specifications on clearances around the Fridge. It has 3 vents and there has to be a minimum specification for clearance from solid objects. I am assuming it is 5 inshes or so, but I want to be sure. I also want to know what is the manufacturer's recommended care of the unit.
Could You post Part #'s that were used in this installation?
Thanks in advance.
Please review the thread carefully, I have included the parts at each step, in an effort so that no one will get confused as to what I used and when I used them.
Fridge is part number 221 830 00 60 it should come with the two mounting bolts and its electrical harness
The internal electrical harness and fuse carrier as shown above in this thread is 221 440 74 05
Four 4.9 x 19mm screws for mounting the Trunk-side take-up device
Trunk-side Take up device "trunk-side Ski bag/Fridge Door" 221 840 01 55
Cabin-side take-up device for options 282 and 308 (A221 840 0055)
282/308 options Stiffening frame (221 640 06 19)
282/308 option Trunk-side Rear Panel (221-694-01-25-9F28)
Nope, not if you order from sources in Germany and England, they can get the parts. All of the parts are not available in NorAM as the 308 option was not available to NorAm until 2014. You will need to find a source over there to order from. I ordered them this year and after the date of the start of this thread.
You have bigger fish to fry. I'd stop buying needless crap and concentrate on making your wreck road worthy before worrying about the expensive crap that doesn't matter. The fridge project is super expensive....and takes a lot of rerouting of parts and computers. You'd end up spending more than you're planning to spend on fixing your car.
I got it used for $550 US off of eBay DE (Germany). My total cost in parts was ~$1700 US including the used Fridge. I was willing to take a chance on the Fridge used for that price and it worked out fantastic.
Hmmm, seems it cost me more to retrofit my former 2008 C300 with factory navigation (~ $150 US more) and a lot more time because I tried to use all used parts and ended up buying the retractable display new from www.mercedespartssuperstore.com, as the used ones did not work. I was able to use more of my existing parts and saved cost that way too. I also got lucky on finding a used COMAND HU from a recycler in the US who was not aware how much those units cost new and were not too familiar with Mercedes in general.
You have bigger fish to fry. I'd stop buying needless crap and concentrate on making your wreck road worthy before worrying about the expensive crap that doesn't matter. The fridge project is super expensive....and takes a lot of rerouting of parts and computers. You'd end up spending more than you're planning to spend on fixing your car.
Actually Dave, no it is not, if you are willing to be patient and find a used unit on ebay. The rest of the parts can be acquired cheaply via multiple websites online. If I would have purchased the Fridge new from one of those websites, the prices that were quoted were between $2500 - $3000 US. Shipping was under $230 for used or new. I shipped my unit from a private sale via FedEx and USPS, took about 30 days to get through customs. Shipping is much faster for a new unit. However, I definitely get my car road worthy prior to adding options. One last comment, the Fridge unit cost used is probably cheaper for car's prior to 2010 that for 2010 and up. But I have seen the price on ebay for a W222 Fridge that was only $2200 US. Apparently www.mercteil,com was selling one pulled out of a W222. Purchasing and retrofitting a set of S63/S65 brakes on an S550 is super expensive, the Fridge option retrofitted is no where near that cost even installed.
The total cost in parts was $1700, so they were a total of $1150 including a few parts I actually did not need. No I did not search for any parts but the Fridge used.
Mercedes SLR McLaren 722 S Is Extremely Rare Example Modified by McLaren
Slideshow: A one-of-one U.S.-spec Mercedes-Benz SLR McLaren Roadster became even rarer after a factory-backed transformation at McLaren's headquarters.


 . I want to get the User Guide that discusses it. I have not looked in my User Guide to see if it discussed, probably not. So I need to get a UG from Europe. Anyone have a UG that discusses the Fridge?


 .
.
 !!!
!!!


