


 Just think of the strippers you can make happy by fabbing up some of theese.
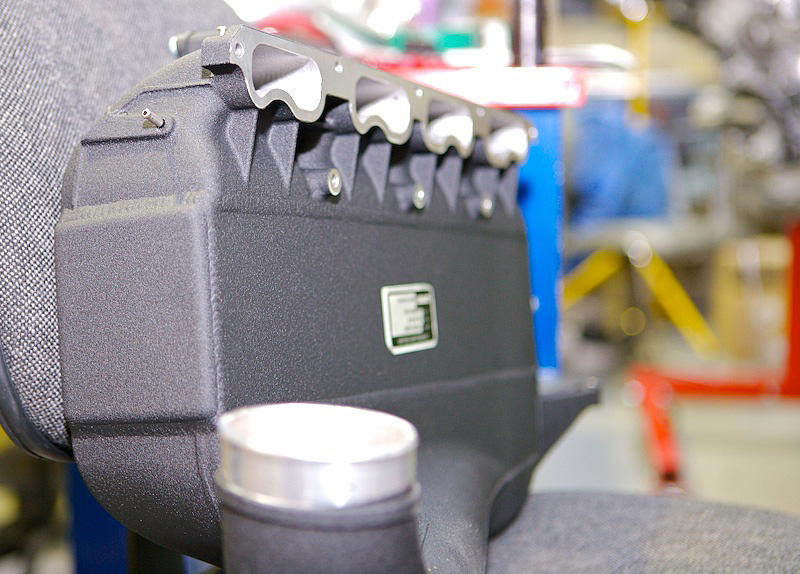


DIY Long Tube Headers
Thread Starter
Senior Member
Joined: Jun 2009
Posts: 253
Likes: 2
Viking War Ship
DIY Long Tube Headers
I've heard a lot of talk about the benefits of long tube headers that I did some investigative work to see what these marvelous things cost. Seeing them priced anywhere between $2000 and $3000, I remembered that I really enjoy the company of strippers. I ordered up some pipe, catalytic convertrs, miscellaneous other things and got started on the build of my own set. Here's the story of a journey that took about 40 hours total and ended in more than a couple days smelling of jasmine body spray and waking up with my face covered in glitter.
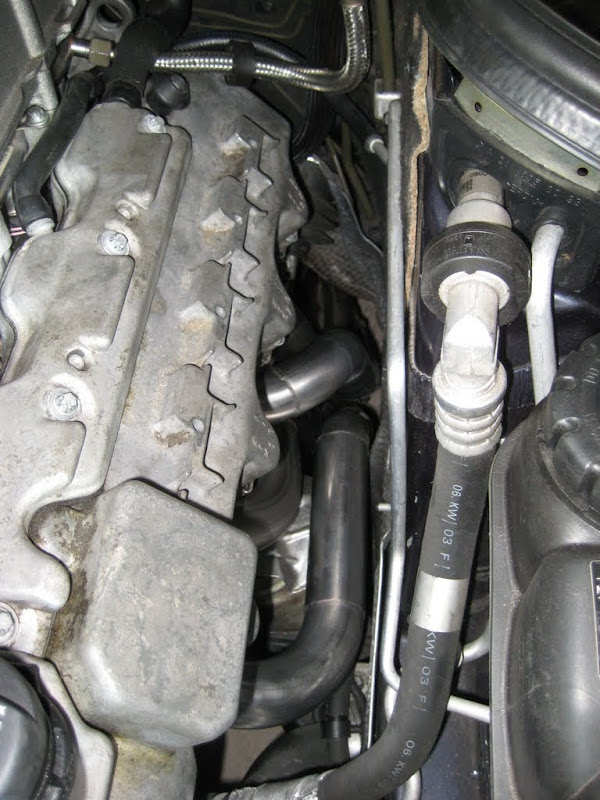
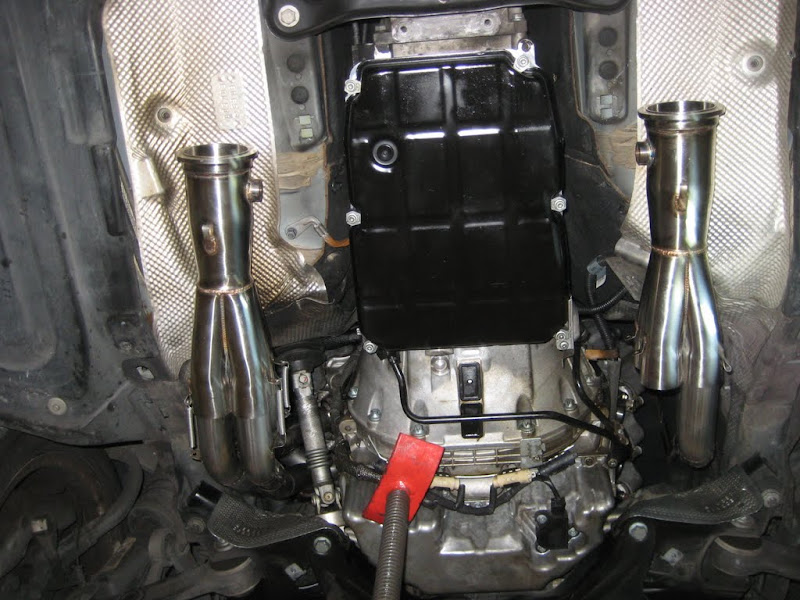
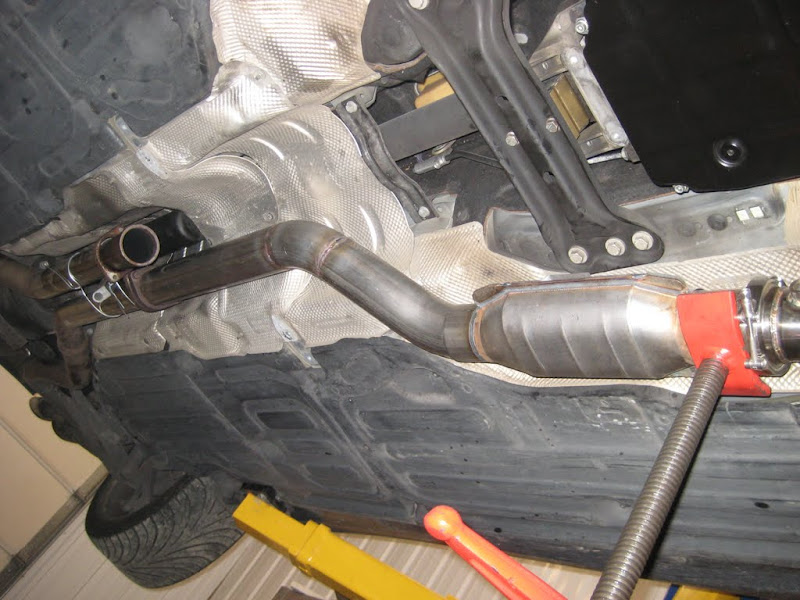
I started by removing the old exhaust. I really like the Mercedes design. It comes out very easy and is really nicely engineered. It's really a shame that it's so restrictive. Disconnect the O2 sensors and the rest just bolts out:
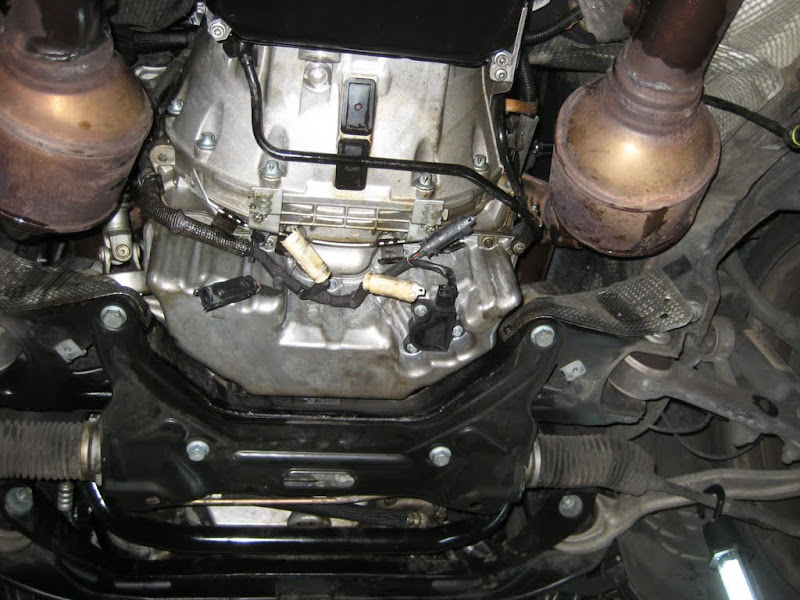
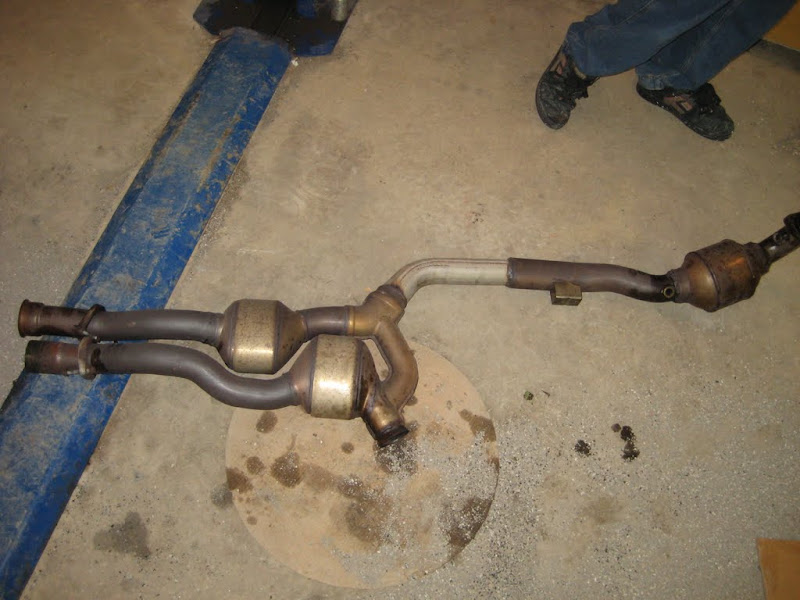
Not sure what the previous owner had happen to the car, but there seems to be a chunk of replacement pipe welded in. Either way it's all coming out:
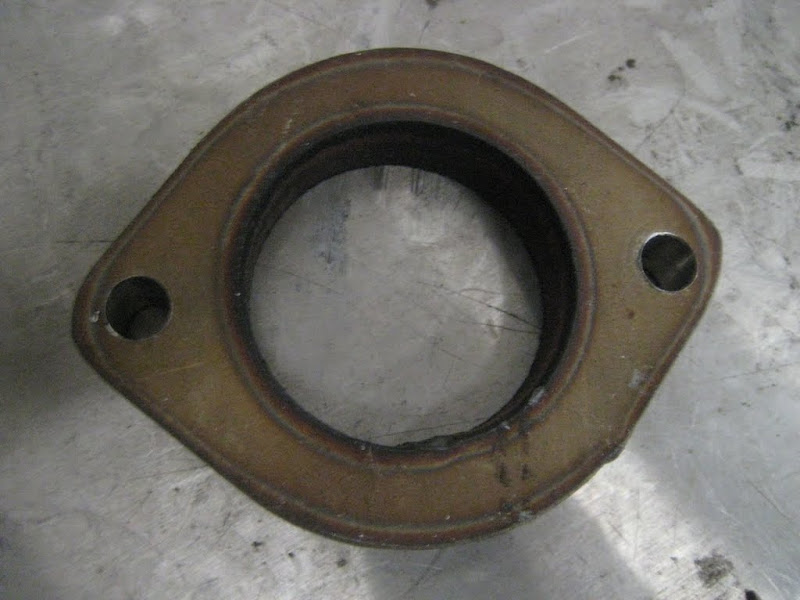
I've got a buddy with a CNC plasma table so I gave him a slab of 1/2" stainless plate and had him hack out some flanges. I opted to go with individual flanges just because I didn't want to have to deal with the logistics of building a set of headers that needed to be put in the car as a single unit. There really isn't that much room. Here's a look at one of the flanges when I got it. Plate this thick tends to have a lot of kerf when plasma cut and generally is not very ideal:
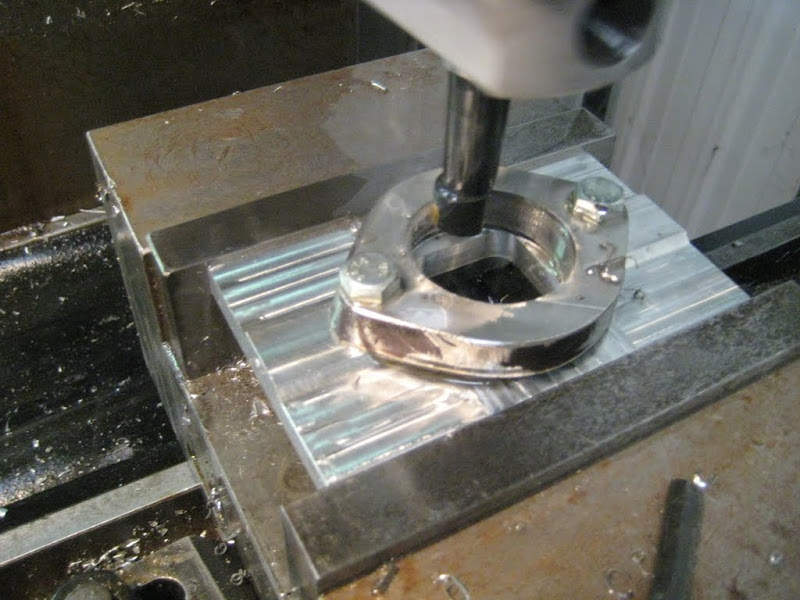
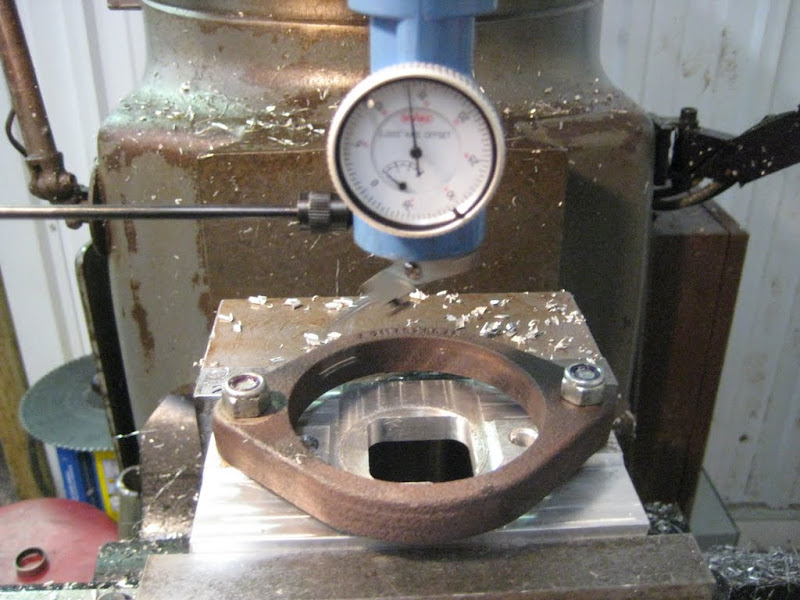
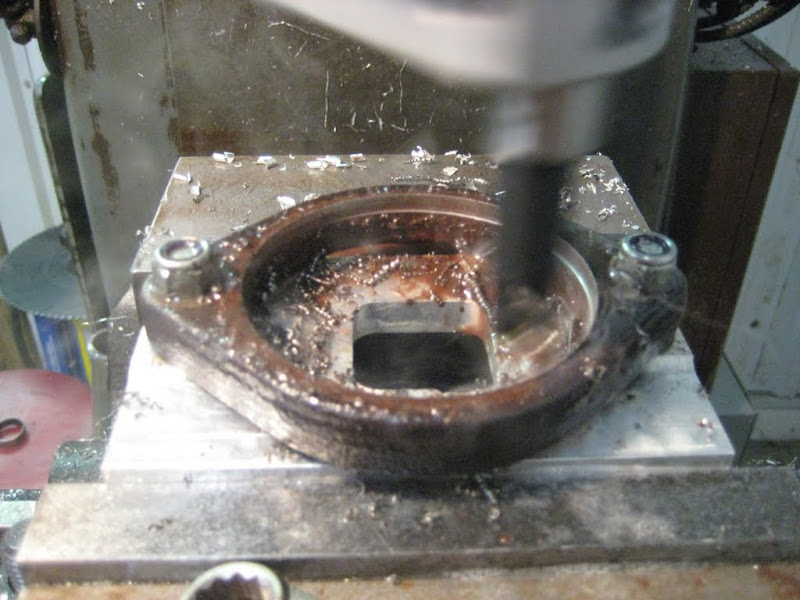
The flanges needed to be cleaned up. I made a jig for them and got to work with the mill. I surfaced each of them smooth with a fly cutter and then bored the openings clean and to size, removing all the kerf and ensuring a leak-free seal:
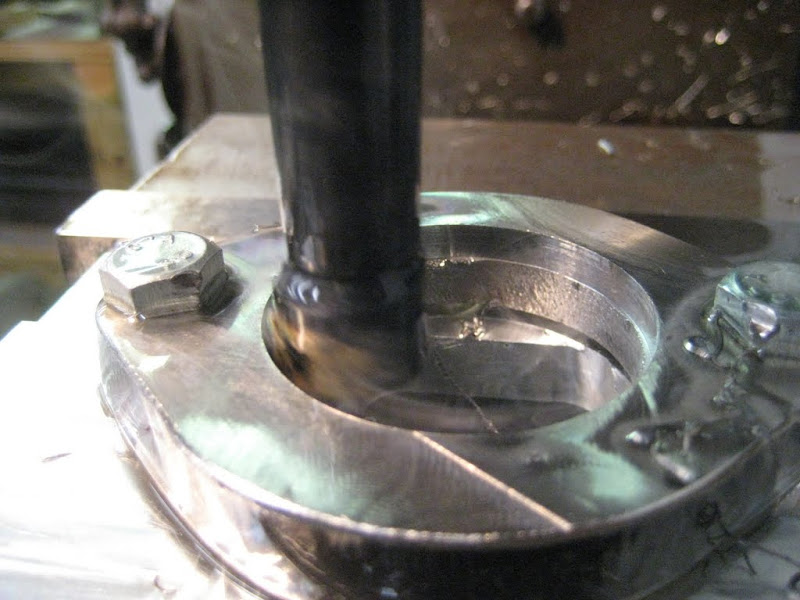
Final pass in the mill with the boring head. Nice!
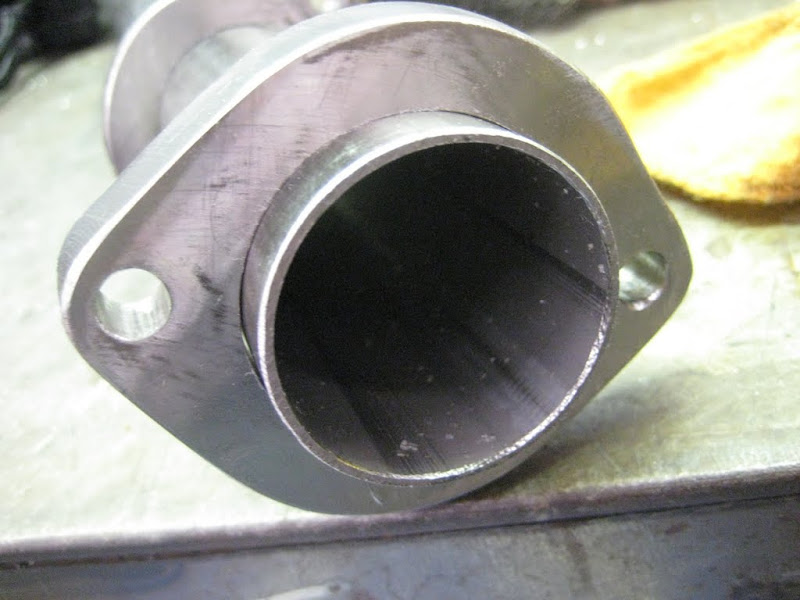
A nice, tight fit is as important when welding as it is in women. In welding helps reduce warping as well as the amount of filler needed to get a clean weld. For women...well...nevermind:
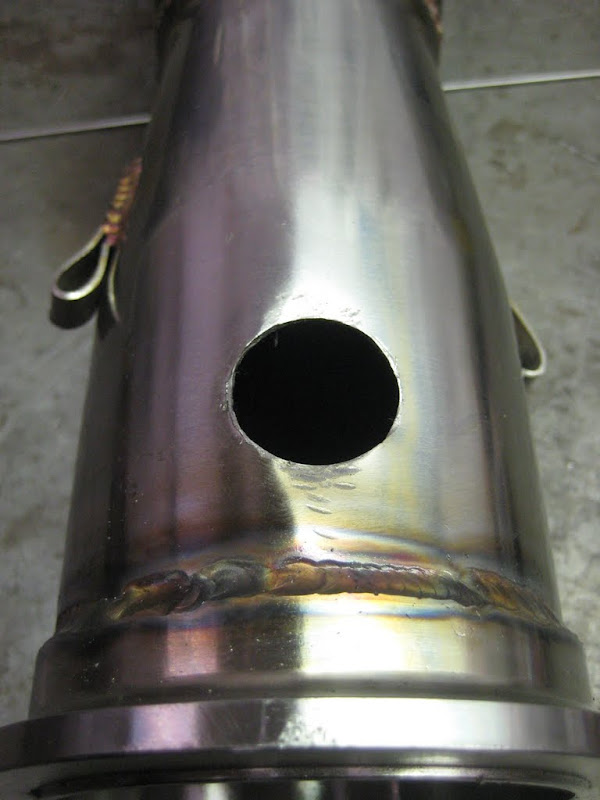
Along with cats, I also ordered some collectors. I've made these in the past and they make me want to punch babies. I hate making collectors and I would wish to die 1000 deaths if that was my full-time job. For what they cost, they are worth buying. Here is a collector with a V-band already welded on getting ready for an O2 bung. Speed bits (aka step bits) are the best invention since internet ****:
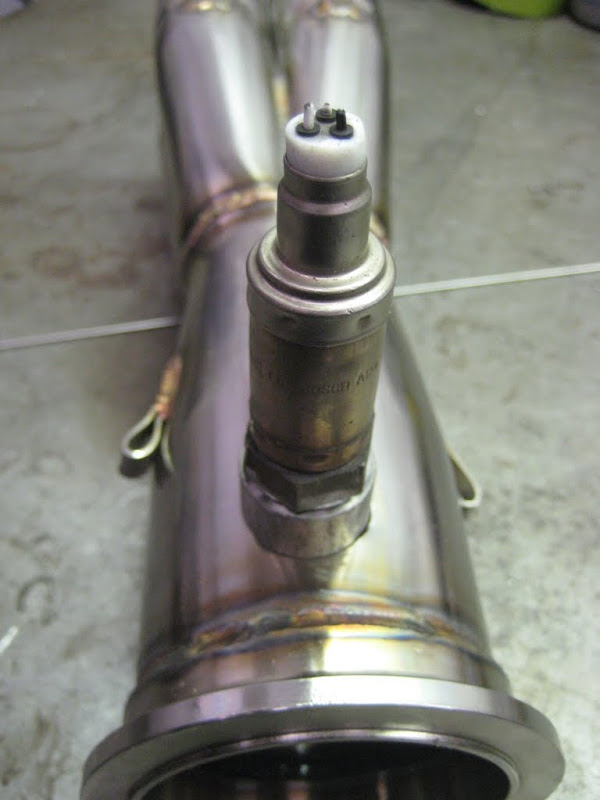
I've got an old O2 sensor I use when I weld bungs on. It helps preserve the threads and gives something to hold onto:
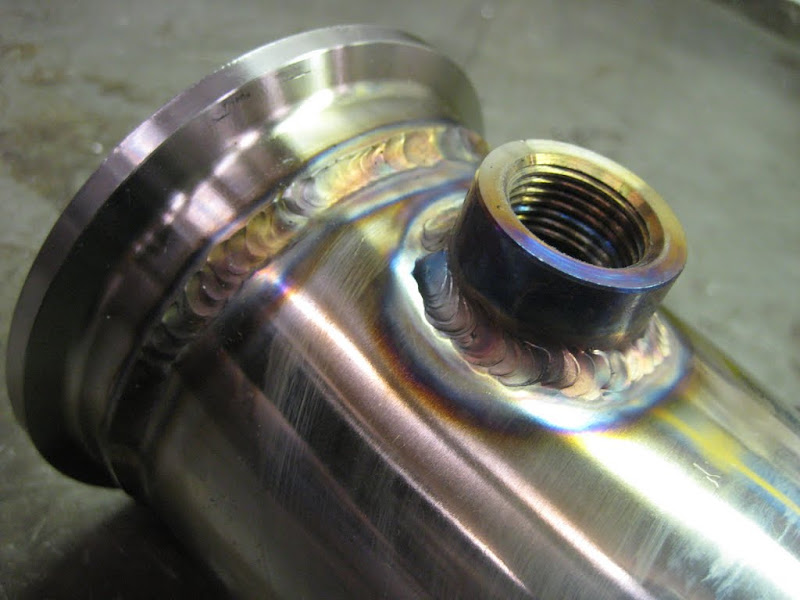
All welded up:
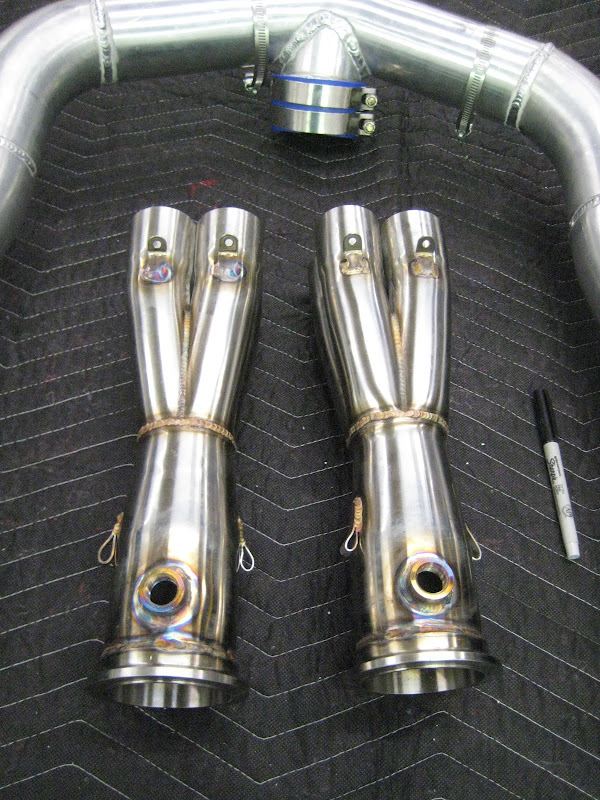
Here are both collectors fitted with V-bands, O2 bungs, and tabs for the slip-joint tension springs:
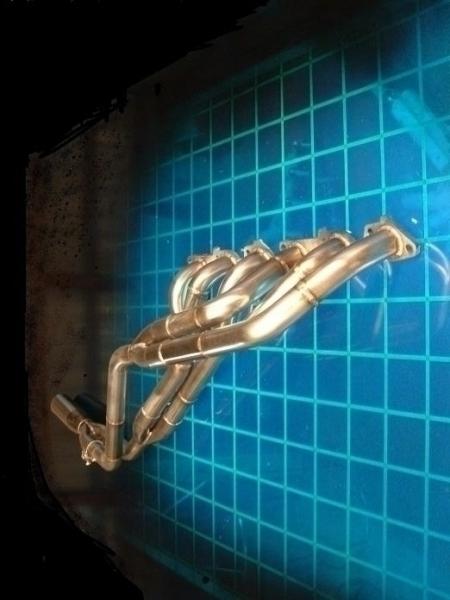
I don't have a whole lot of photos of the mock-up, but what I bought was a bunch of 180 bends, 90 bends, and straight pipe. Then, it's just a matter of hacking those pieces up and making a 3D jigsaw puzzle to get from "point A" to "point B". Here's the finished driver's side:
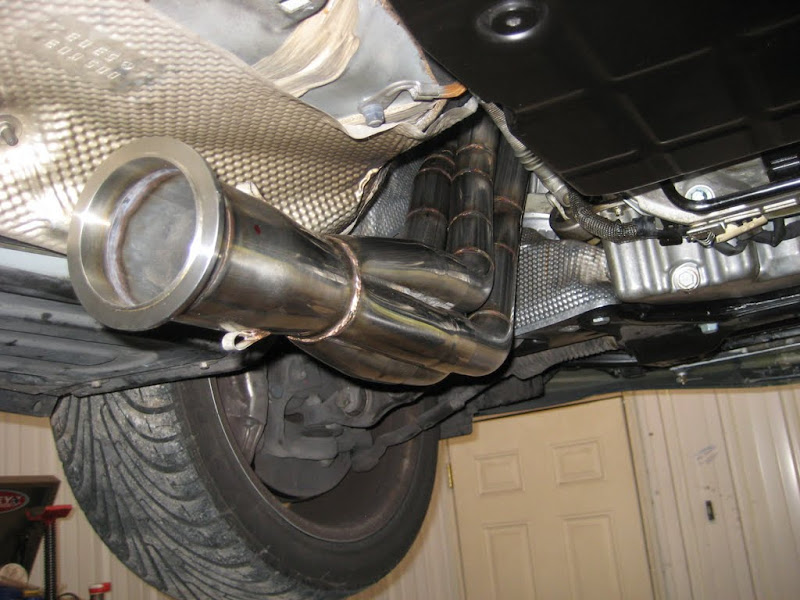
Working around the steering column was just about as enjoyable as sewing my face to the carpet:
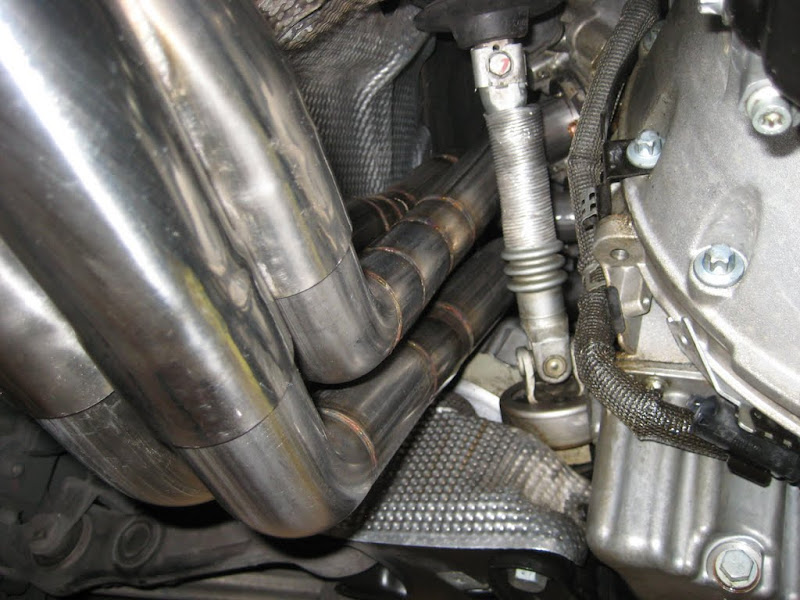
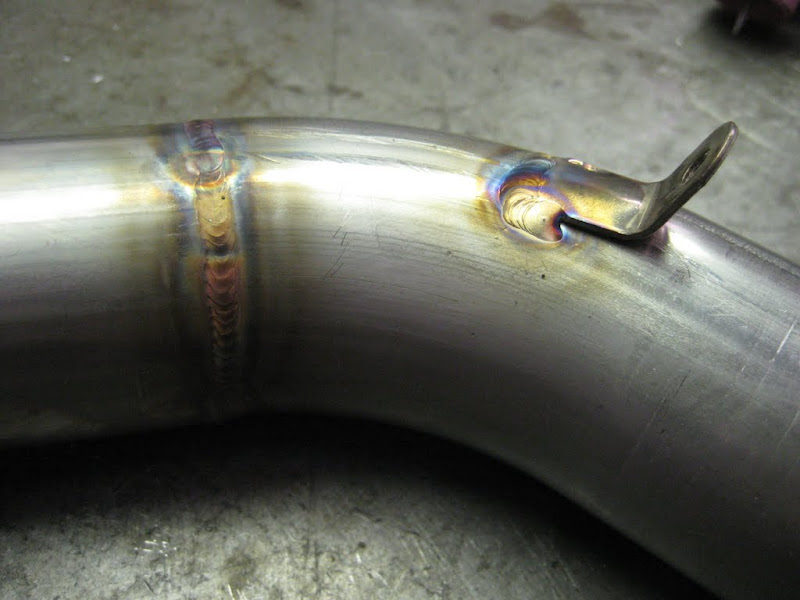
Once I had the pipes mocked up, I could measure and weld on the spring tension tabs onto them. These will hold the pipes tight into the collector and prevent exhaust leaks:
I started by removing the old exhaust. I really like the Mercedes design. It comes out very easy and is really nicely engineered. It's really a shame that it's so restrictive. Disconnect the O2 sensors and the rest just bolts out:
Not sure what the previous owner had happen to the car, but there seems to be a chunk of replacement pipe welded in. Either way it's all coming out:
I've got a buddy with a CNC plasma table so I gave him a slab of 1/2" stainless plate and had him hack out some flanges. I opted to go with individual flanges just because I didn't want to have to deal with the logistics of building a set of headers that needed to be put in the car as a single unit. There really isn't that much room. Here's a look at one of the flanges when I got it. Plate this thick tends to have a lot of kerf when plasma cut and generally is not very ideal:
The flanges needed to be cleaned up. I made a jig for them and got to work with the mill. I surfaced each of them smooth with a fly cutter and then bored the openings clean and to size, removing all the kerf and ensuring a leak-free seal:
Final pass in the mill with the boring head. Nice!
A nice, tight fit is as important when welding as it is in women. In welding helps reduce warping as well as the amount of filler needed to get a clean weld. For women...well...nevermind:
Along with cats, I also ordered some collectors. I've made these in the past and they make me want to punch babies. I hate making collectors and I would wish to die 1000 deaths if that was my full-time job. For what they cost, they are worth buying. Here is a collector with a V-band already welded on getting ready for an O2 bung. Speed bits (aka step bits) are the best invention since internet ****:
I've got an old O2 sensor I use when I weld bungs on. It helps preserve the threads and gives something to hold onto:
All welded up:
Here are both collectors fitted with V-bands, O2 bungs, and tabs for the slip-joint tension springs:
I don't have a whole lot of photos of the mock-up, but what I bought was a bunch of 180 bends, 90 bends, and straight pipe. Then, it's just a matter of hacking those pieces up and making a 3D jigsaw puzzle to get from "point A" to "point B". Here's the finished driver's side:
Working around the steering column was just about as enjoyable as sewing my face to the carpet:
Once I had the pipes mocked up, I could measure and weld on the spring tension tabs onto them. These will hold the pipes tight into the collector and prevent exhaust leaks:
Thread Starter
Senior Member
Joined: Jun 2009
Posts: 253
Likes: 2
Viking War Ship
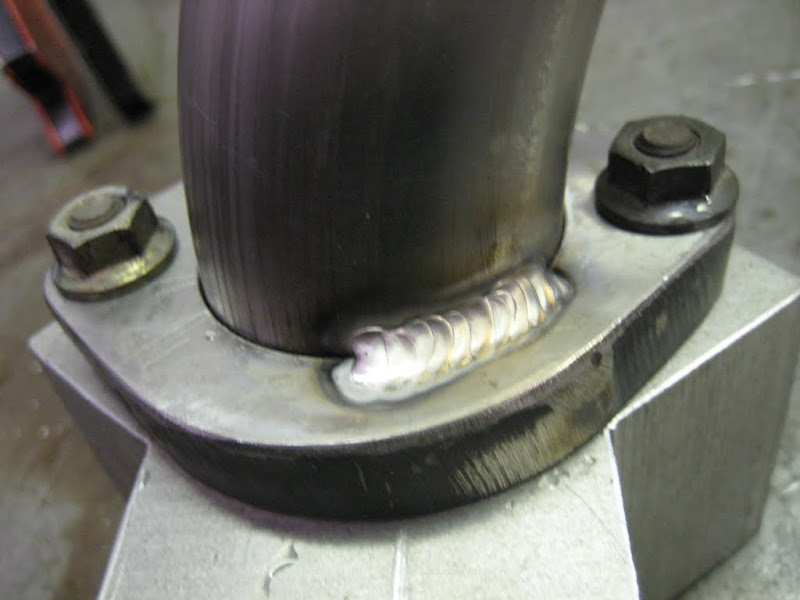
I've warped my fair share of flanges in my day, so I decided to bolt these down tight and try another trick to prevent warpage. I had a hunk of 2" thick scrap aluminum from another application that I drilled and countersunk some holes in with the mill. I surfaced the face of this piece as well just to make sure it was flat. I bolted the flanges to them as I welded them. The aluminum acts as a heat sink to remove any extra heat from the flange that might cause it to warp. The thickness of it also ensured it wouldn't bend or flex if the flange decided to pull on it any:
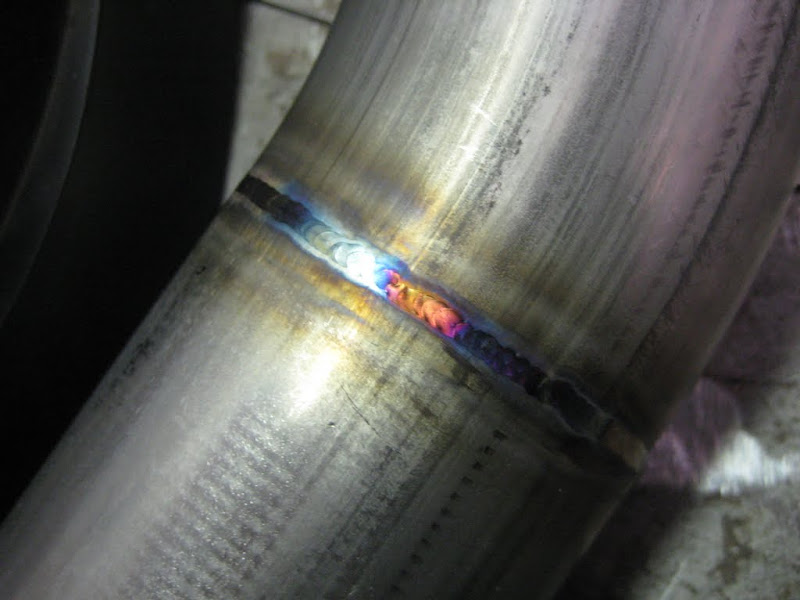
Then I welded in alternating sections...again just to spread the heat out. Stainless changes color as it gets hot...from silver to gold to purple to a slutty grey color (bad). You can see that the weld is very silver-ish meaning it stayed really cold. The aluminum heat sink was doing it's job!
Working around the flange to seal it all up:
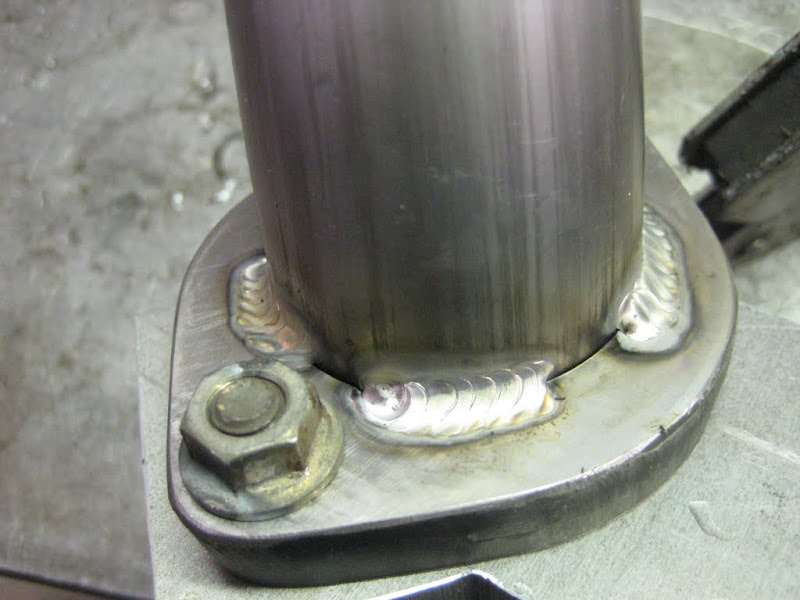
One side all done:
I tried to get a picture of what they look like from the top-side. This is all you can see really. I know it sucks. I gave up trying to get a good top-down shot:
Nearing completion on the passenger side:
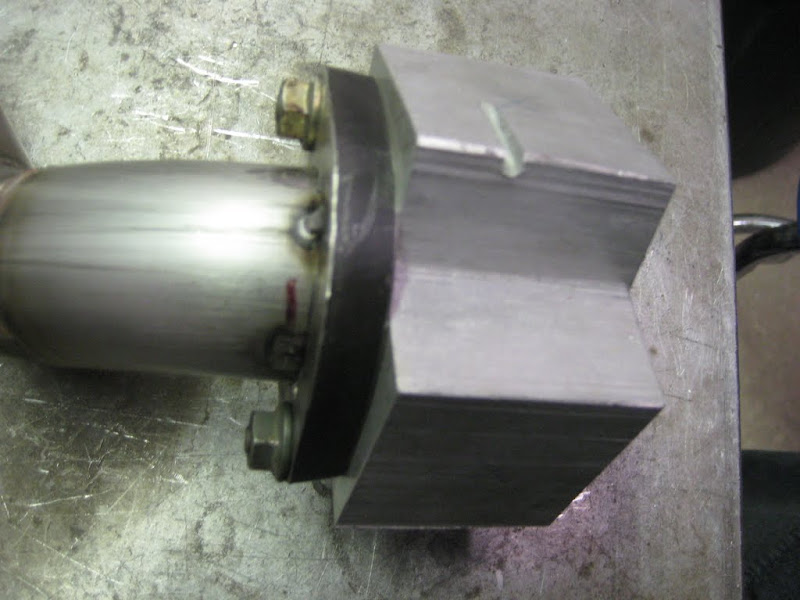
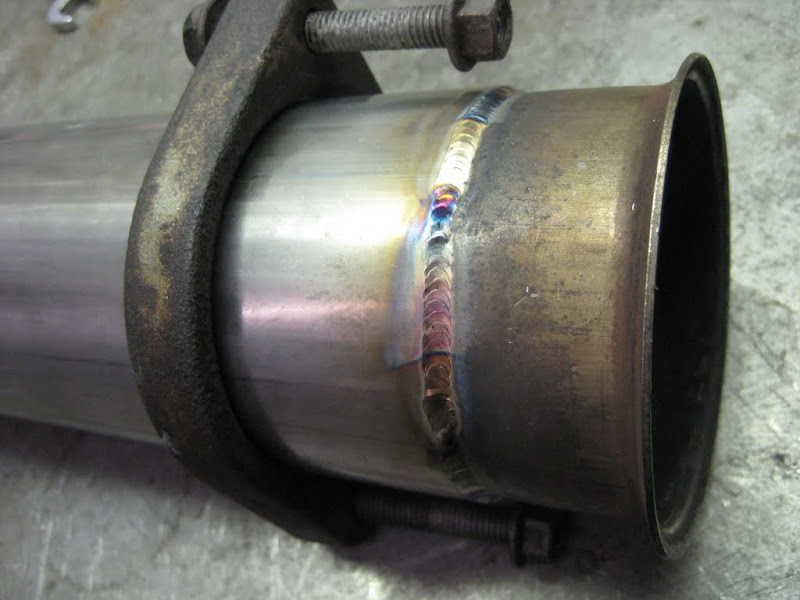
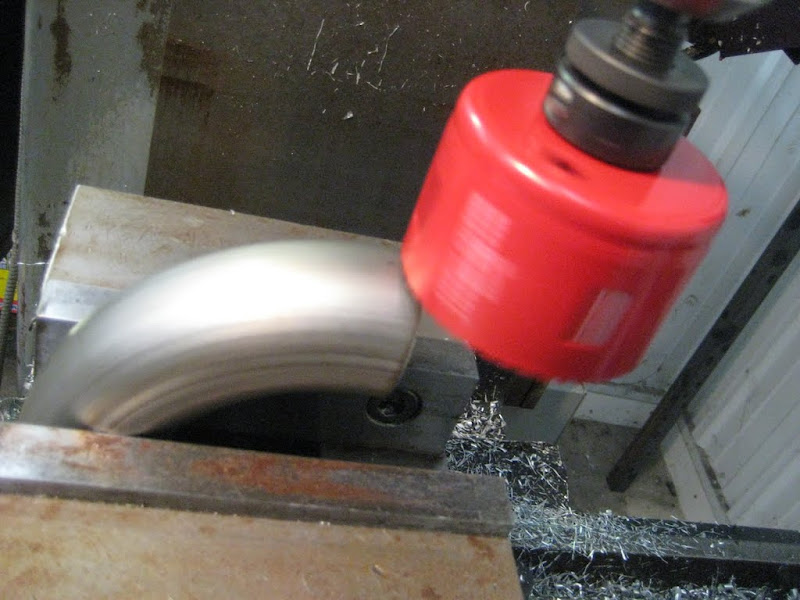
I decided that the rest of the exhaust would merge into the stock back half of the exhaust. I didn't want the car too loud so I opted to keep the stock mufflers. The stock pipe is 2.75" and my mid pipes were 3" so I figured it wasn't too far off and if I thought it out well enough, I could leave the door open for doing the rest of the exhaust in 3" later on if I wanted. Because of this, I chopped off and kept the stock clamps that merge the two halves of the exhaust together, but they needed a little work. They needed to be opened up just a little bit to slip over the 3" piping. Off to the mill again!
Locating the center with the coaxial indicator:
Boring head in action:
Perfect!
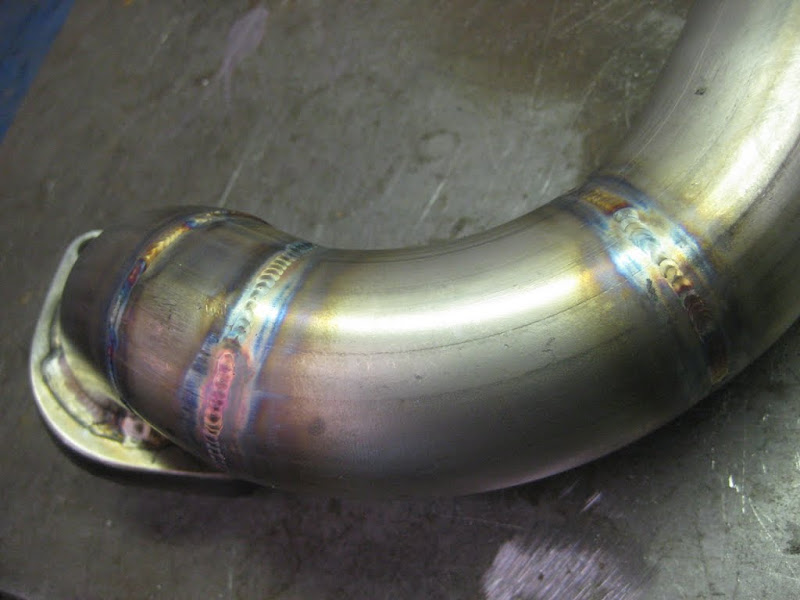
Next, I got to work on the midpipes. Here's one side all done:
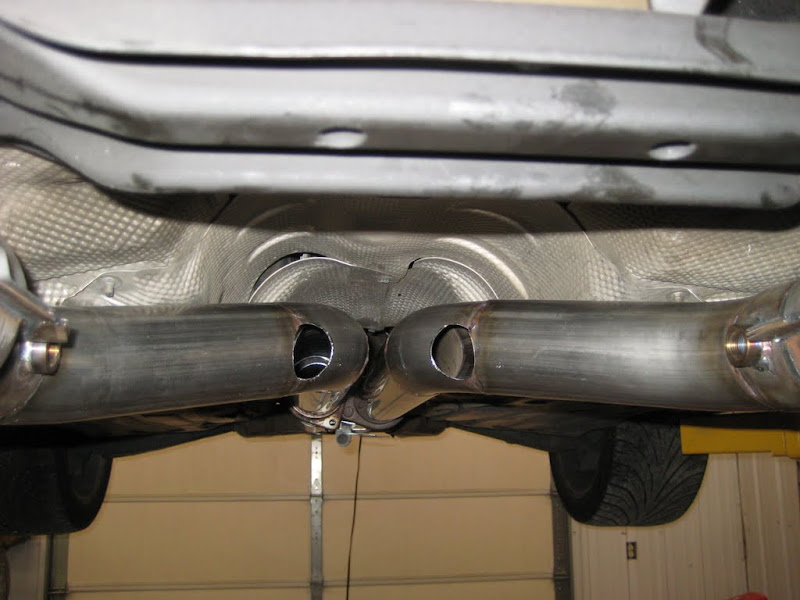
I decided that a formal X-pipe wasn't really necessary...but I did want something. I wanted to make sure that pressure could equalize between the banks. Here's the link I made between the two. I guess you could call it an H-pipe. I was notching it to merge to the 3" mid pipes:
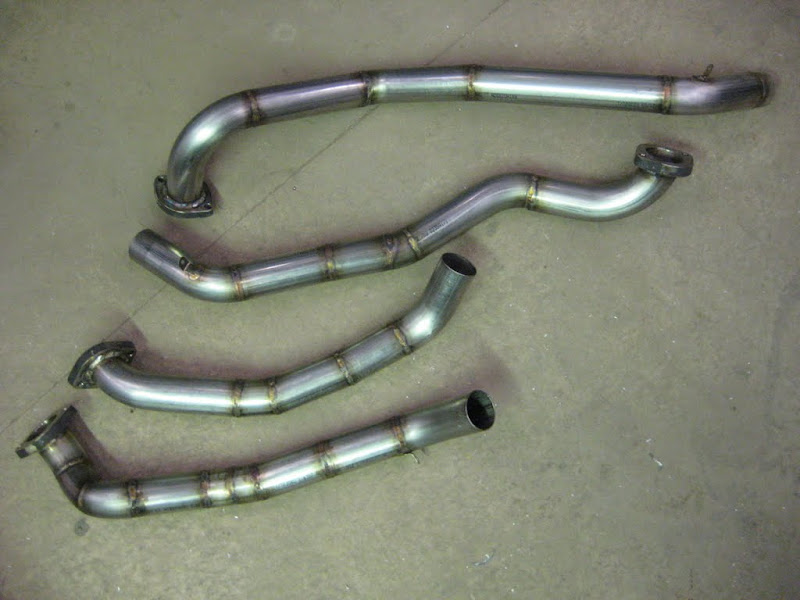
Left and right side mid pipes with the holes cut in them for the connecting pipe:
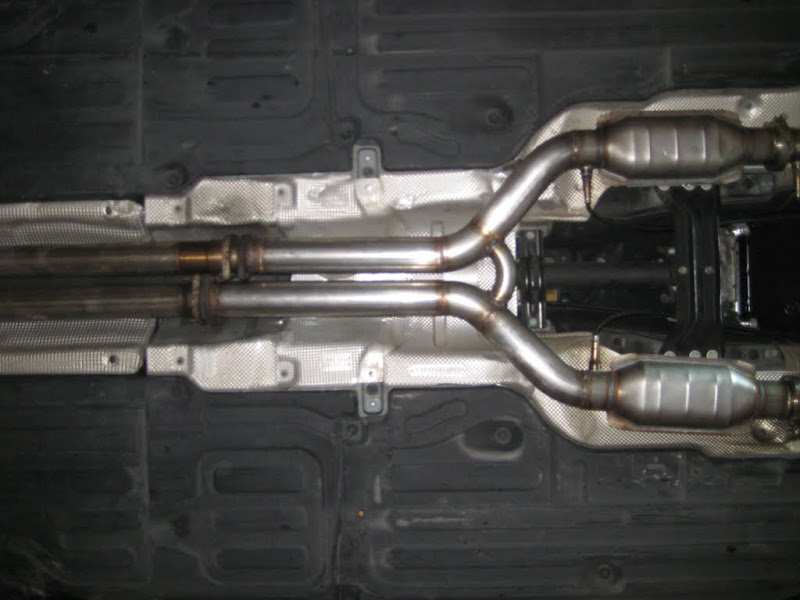
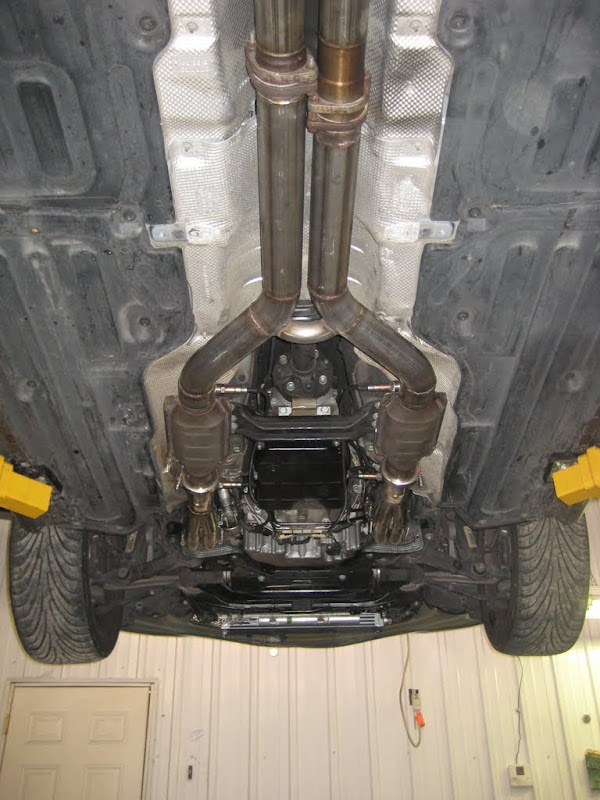
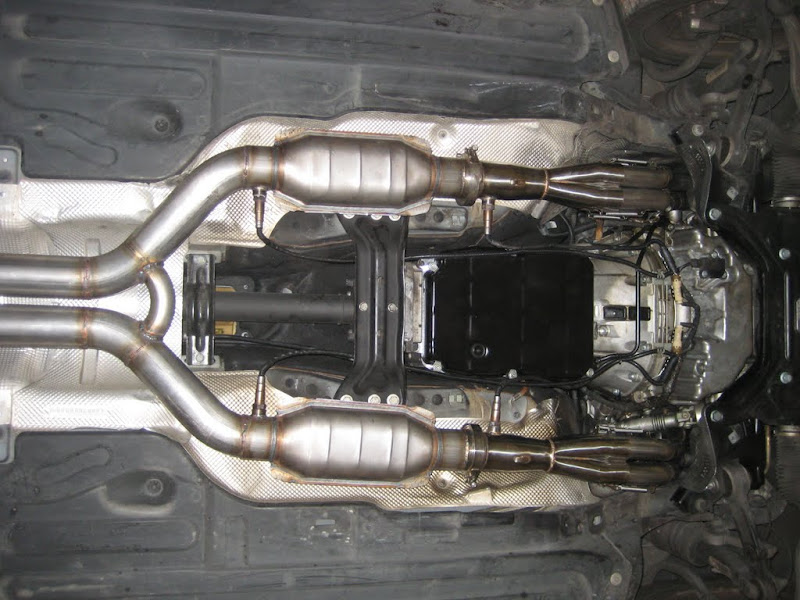
All done. Here are some additional photos of the final product:
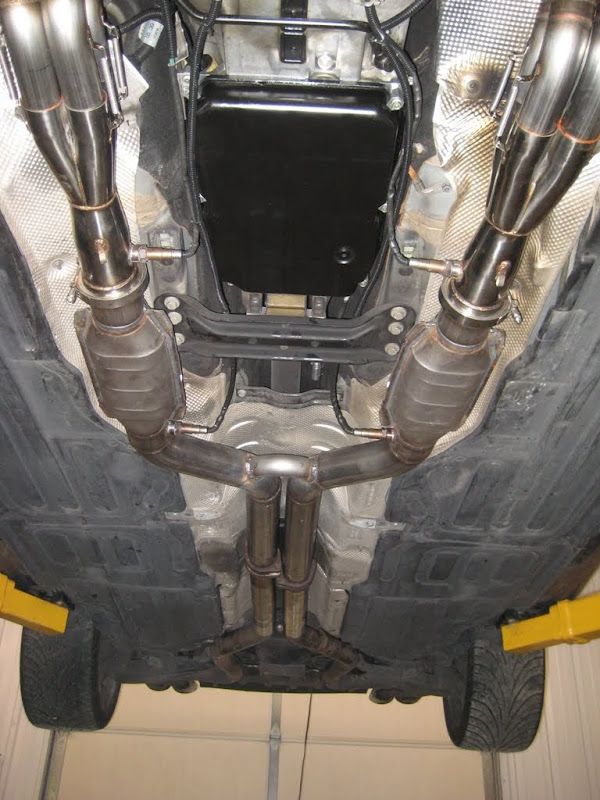
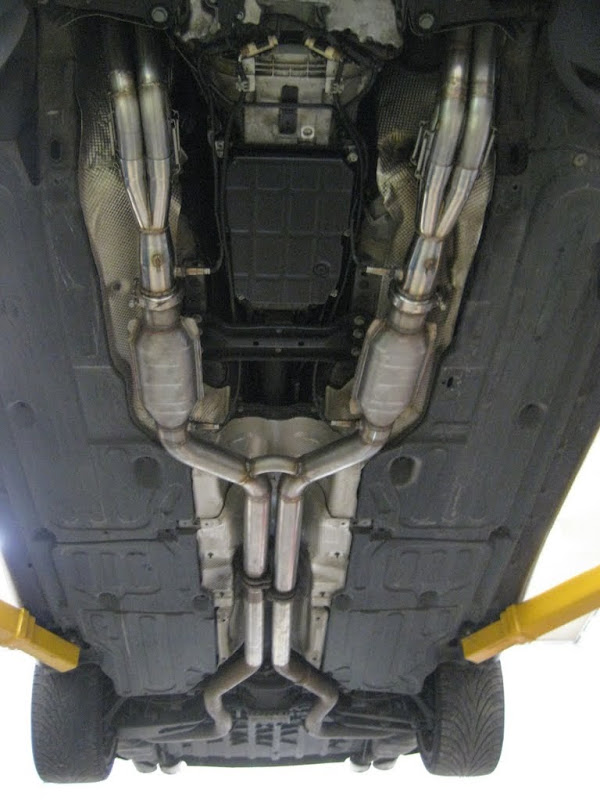
The sound of the car really hasn't changed much when idling. I'm quite surprised since the pipes are so much bigger and it's a high-flow cat instead of the two stock ones. When driving, it's pretty subtle as well. It roars nicely when you romp on it and you fight a lot of wheelspin. All in all I'm very happy. It looks good, lets the engine breathe easier, and has a subtle roar. Holy Jesus I'm glad it's done. Time to hit the titty club.

Then I welded in alternating sections...again just to spread the heat out. Stainless changes color as it gets hot...from silver to gold to purple to a slutty grey color (bad). You can see that the weld is very silver-ish meaning it stayed really cold. The aluminum heat sink was doing it's job!
Working around the flange to seal it all up:
One side all done:
I tried to get a picture of what they look like from the top-side. This is all you can see really. I know it sucks. I gave up trying to get a good top-down shot:
Nearing completion on the passenger side:
I decided that the rest of the exhaust would merge into the stock back half of the exhaust. I didn't want the car too loud so I opted to keep the stock mufflers. The stock pipe is 2.75" and my mid pipes were 3" so I figured it wasn't too far off and if I thought it out well enough, I could leave the door open for doing the rest of the exhaust in 3" later on if I wanted. Because of this, I chopped off and kept the stock clamps that merge the two halves of the exhaust together, but they needed a little work. They needed to be opened up just a little bit to slip over the 3" piping. Off to the mill again!
Locating the center with the coaxial indicator:
Boring head in action:
Perfect!
Next, I got to work on the midpipes. Here's one side all done:
I decided that a formal X-pipe wasn't really necessary...but I did want something. I wanted to make sure that pressure could equalize between the banks. Here's the link I made between the two. I guess you could call it an H-pipe. I was notching it to merge to the 3" mid pipes:
Left and right side mid pipes with the holes cut in them for the connecting pipe:
All done. Here are some additional photos of the final product:
The sound of the car really hasn't changed much when idling. I'm quite surprised since the pipes are so much bigger and it's a high-flow cat instead of the two stock ones. When driving, it's pretty subtle as well. It roars nicely when you romp on it and you fight a lot of wheelspin. All in all I'm very happy. It looks good, lets the engine breathe easier, and has a subtle roar. Holy Jesus I'm glad it's done. Time to hit the titty club.

Super Member


Joined: Aug 2006
Posts: 856
Likes: 0
From: palm beach
CLS55 & CL CK60
very nice. makes me question whether or not i am a real man.. no way i couldve done some crazy machining like that. suckers like me have to pay for our goods. lol. post video with sound!!
Last edited by beauphus; Feb 7, 2010 at 12:30 AM.
Trending Topics
MB World Stories
The Best of Mercedes & AMG

7 Craziest Things AMG Gas Ever Built
Verdad Gallardo
New Electric Mercedes-AMG GT 4-Door Coupe Unveiled: 10 Things You Need to Know
Verdad Gallardo
6 Mercedes Models That Did NOT Age Well (But Are Somehow Still Cool)
Verdad Gallardo
Manual Mercedes? 6 Times Sindelfingen Let Drivers Have All The Fun
Verdad Gallardo
Mercedes SLR McLaren 722 S Is Extremely Rare Example Modified by McLaren
Verdad Gallardo
8 Classic Boxy Mercedes Designs That Have Aged Like Fine Wine
Verdad Gallardo
Flawlessly Restored Mercedes 190E Evo II Heads to Auction
Verdad Gallardo
Electric Mercedes C-Class Unveiled: 11 Things You Need to Know
Verdad Gallardo
Mercedes EQS Gets A Major Update: Everything You Need to Know
Verdad Gallardo


Thread Starter
Senior Member
Joined: Jun 2009
Posts: 253
Likes: 2
Viking War Ship
Thanks for the kind words guys. I'll get some sound clips posted eventually. I need to focus on this S/C gremlin I've got though first.
It's like you read my mind.  I've already priced out the right size liquid/air intercoolers necessary from Bell. I like the ease of the Kleemann top-mount kit where they hack up the stock intake runners, but we'll see how motivated I get. I've been thinking about it a lot so chances are I'll probably try to knock out a set.

I've already priced out the right size liquid/air intercoolers necessary from Bell. I like the ease of the Kleemann top-mount kit where they hack up the stock intake runners, but we'll see how motivated I get. I've been thinking about it a lot so chances are I'll probably try to knock out a set.
Thread Starter
Senior Member
Joined: Jun 2009
Posts: 253
Likes: 2
Viking War Ship
Thread Starter
Senior Member
Joined: Jun 2009
Posts: 253
Likes: 2
Viking War Ship
I feel ya, but here was my reasoning. I heard a lot of people say that you need to merge the pipes to equal out pressure. They said it helps give you a much nicer sound. To prevent the car from sounding like a donkey, I decided I needed a connecting pipe of sorts.
The stock car uses an H-pipe. Everyone else seems to be going with X-pipes. Here's what I don't like about X-pipes. Look at the picture below. You take two 3" pipes in and effectively cut your flow in half where it meets in the middle. I'm no fluid dynamics physics expert, but I can calculate surface area and I can tell you that the surface area of a cross-section of the center is way less than the combined surface area of the inlets.

Because of this, I opted for an H-pipe. I was going to try to run without either, but I didn't want any rework so I put it in right away.
The stock car uses an H-pipe. Everyone else seems to be going with X-pipes. Here's what I don't like about X-pipes. Look at the picture below. You take two 3" pipes in and effectively cut your flow in half where it meets in the middle. I'm no fluid dynamics physics expert, but I can calculate surface area and I can tell you that the surface area of a cross-section of the center is way less than the combined surface area of the inlets.
Because of this, I opted for an H-pipe. I was going to try to run without either, but I didn't want any rework so I put it in right away.
Thread Starter
Senior Member
Joined: Jun 2009
Posts: 253
Likes: 2
Viking War Ship
Super Member
Joined: Apr 2009
Posts: 837
Likes: 1
From: Tacoma WA
Bicycle
My H pipe in my car is identical to yours and I can tell you the diffrence in sounds in crazy, With out the H it was WAY louder and had a crappy tone. My exh. buddy swore that an H pipe would fix it and sure enough he was right. The one step thats a whole lot quicker is once the pipe is all made and hung in the car he traces were he want the H to be then uses a plasma cutter to make the holes, He just fishes the peice out with a magnet.
Thread Starter
Senior Member
Joined: Jun 2009
Posts: 253
Likes: 2
Viking War Ship
Glad I went with the pipe right away then. I would have cut myself if the first time fired up it sounded like a garbage disposal.
I thought about the plasma route too...but 304 stainless isn't magnetic, and I've made the mistake before of setting the plasma amperage too high and blowing through the other side. haha!
I thought about the plasma route too...but 304 stainless isn't magnetic, and I've made the mistake before of setting the plasma amperage too high and blowing through the other side. haha!

Member
Joined: Dec 2008
Posts: 189
Likes: 2
05 cl55 amg Renntech air box w/ K&N's LET 180 pulley & Tune, HE & Pump, 3'' Exhaust res/cat delete
Ok now that we've seen the great job you did why not make a few more and post them up here. Are you going to put it on the dyno to see what kin of gains you have with the headers on?
Thread Starter
Senior Member
Joined: Jun 2009
Posts: 253
Likes: 2
Viking War Ship
Eventually I'll get to the dyno but I have no baseline numbers so that doesn't help much. My full time job is a computer programmer...not a fabricator...so I'm not sure if I wanna deal with the parts manufacturing gig, customer service, tech support, etc. I've thought about it, but I'm not sold at this point. Plus, I'm not a sponsor of the forum so at this point, I can't make and sell anything.
Last edited by kjlindgr; Feb 7, 2010 at 12:07 PM.


