When you click on links to various merchants on this site and make a purchase, this can result in this site earning a commission. Affiliate programs and affiliations include, but are not limited to, the eBay Partner Network.
Hey! Do you mean the LVDS cable that goes into the the back of the HU coming from the Kremersino LVDS box or the "original" LVDS cable (the metal one) that comes from the car's harness and plugs into the LVDS box?
I'm trying to figure out if that wasn't my issue, but I'm thinking not. I think my LVDS cables were set up right since I was able to get the COMAND image on the screen perfectly, the only issue is that I couldn't get the image from the Kremersino unit when doing the long press. If I had the LVDS cable the wrong way, I wouldn't get any image at all, right?
I am trying to get Michael to send me a replacement harness but it's taking a while.
I mean the one going from the Kremersino box into the COMAND unit. The LVDS cable from the car into the Kremersino LVDS box can only go in one way, if I'm not mistaken. I think you're right in saying that's not your issue, as I believe (and I could be mistaken) that neither turned on when I would play anything.
Yeah. Sadly I think my issue is not so simple. With everything plugged in, I get the COMAND screen image via the LVDS box (original LVDS cable into the Kremersino LVDS box and then the cable coming out of the LVDS box into the HU). I just ca't get the Kremersino box image on the screen.
I'm somewhat convinced that the harness is the problem because if the LVDS box was busted I wouldn't get the the COMAND screen image and the Carplay box seems to be working fine since it "clicks" when I do the long press to access the interface.
Hopefully I'll be able to get Michael to send me a new harness and this time I'm paying someone else to install it! Heh.
Got Kremersino installed by AV shop, it was working via wireless....yesterday. Today it's unable to get CarPlay up on the screen. My bluetooth is connected to Limcet Box_886e and it can play audio directly to the Kremersino but the CarPlay won't display "Start connecting CarPlay"
The device is recognizing the wired connection as indicated in the top right. I've reset the Kremersino various times, restarted the iPhone. Is there a way to force a wired connection to stop messing with the wireless?
Was working yesterday Keeps trying to connect today, nothing. Software
Correct, the iPhone�s Bluetooth and Wifi are on but the CarPlay refuses to come on screen.
You can try turning them off then on, or manually connect to the wifi, sometimes (really rarely) mine does not connect automatically. When i connect to the wifi manually it works like a charm for an other couple of weeks Maybe your connection is still on the house's wifi or something like that what i can think of now.
Yeah. Sadly I think my issue is not so simple. With everything plugged in, I get the COMAND screen image via the LVDS box (original LVDS cable into the Kremersino LVDS box and then the cable coming out of the LVDS box into the HU). I just ca't get the Kremersino box image on the screen.
I'm somewhat convinced that the harness is the problem because if the LVDS box was busted I wouldn't get the the COMAND screen image and the Carplay box seems to be working fine since it "clicks" when I do the long press to access the interface.
Hopefully I'll be able to get Michael to send me a new harness and this time I'm paying someone else to install it! Heh.
Yeah, that sucks...is it possible the switches aren't correct? I think I opened it to L-L-L-H-H and switched it to L-L-L-H-L as many others suggested, even before doing anything. Might be worth looking at different combinations.
Maybe try going into the settings and switching Carplay to wireless only? I did this to the Android Auto after having switched it from wired only to both, and then it bugging out wirelessly. So far so good all week.
Maybe try going into the settings and switching Carplay to wireless only? I did this to the Android Auto after having switched it from wired only to both, and then it bugging out wirelessly. So far so good all week.
In the main menu settings, go into "System" and then scroll to "Factory Settings" the passcode there is 688612. It'll be in the options somewhere there; something like "Carplay mode" or something. Unable to check now, but I think you should be able to find it from there.
Yeah, that sucks...is it possible the switches aren't correct? I think I opened it to L-L-L-H-H and switched it to L-L-L-H-L as many others suggested, even before doing anything. Might be worth looking at different combinations.
I've messed around with the dip switches before taking it off and got nowhere. From what I understand, if the dip switch setting is incorrect, when you switch to the interface you get a black screen, right?
I got the Kremersino screen working at some point, but then when redoing the wiring (after being unable to reinstall the HU in place) I couldn't get it anymore. Now when I do the long press, it doesn't change and just stays on the COMAND screen, no black screen.
I spoke to Michael from Kremersino and he's shipping me a new LVDS cable next week. Let's see if that sorts the issue out.
In the main menu settings, go into "System" and then scroll to "Factory Settings" the passcode there is 688612. It'll be in the options somewhere there; something like "Carplay mode" or something. Unable to check now, but I think you should be able to find it from there.
Found it, tried Wired USB only - that didn�t work.
Got the following from Michael but I can�t make any sense of it.
Still struggling to get the CP back up after short success on day 1. Anyone else able to use CP with the following?
iOS 14.5
Paired along with an Apple Watch (I have tried disconnected the Bluetooth connection to the watch, still no CP)
Connected via Wired connection, absent of any wireless connection
I have an Android device laying around that I tried plugging in, it started up Android Auto like a charm. Switch back to the iPhone, no CarPlay at all. Either I'm extremely unlucky or this is junk.
UPDATE 5/3 ------
I bought a new iPhone running older iOS 14.3, plugged it in and still no CP. That rules out iOS as the culprit.
Last edited by M156FSU; May 3, 2021 at 03:37 PM.
Reason: New information
It's super weird. From what I can make out of Michael's instructions, you should disconnect & delete/forget the Kremersino wi-fi unit from your iPhone and then, after restarting, try to connect as if it were the first time.
I'm pretty sure you've already tried it but, if not, it might be worth giving it a shot.
Installed last night and everything worked like a charm (wirelessly, not with Aux cable). This morning, I could connect to CarPlay and the visual aspect is working; however, no audio. Disconnected my iPhone and no sound from radio or CD either. Not sure if this is a simple engineering mode fix but have not had much success fiddling with the settings. Any suggestions? TIA!
I have been closely following this thread and finally decided to pull the trigger. I paid an extra 45 dollars for the premium shipping and I received the package in15 days to the USA. I installed it myself and the installation went without a hitch and everything is working perfectly.
AA and CP work as they should. And so do the other options like mirroring etc.
I am extremely pleased with the unit sold by Kremersino store. If your on the fence with ordering one of these from this seller and Aliexpress in general, don't be.
Hopefully, the few that have some issues in this thread can be resolved easily and they too will get to enjoy this fantastic upgrade in their cars.
Thank you to the OP and everybody else who contributed to this thread!!!!! Without your helpful information and recommendation of this seller I would not have tried to do this. But man am I glad I did.
Installed last night and everything worked like a charm (wirelessly, not with Aux cable). This morning, I could connect to CarPlay and the visual aspect is working; however, no audio. Disconnected my iPhone and no sound from radio or CD either. Not sure if this is a simple engineering mode fix but have not had much success fiddling with the settings. Any suggestions? TIA!
The setting in the engineering mode should do the trick, sounds weird that it was working before. I remember I had to change the setting, but right after installing.
I have been closely following this thread and finally decided to pull the trigger. I paid an extra 45 dollars for the premium shipping and I received the package in15 days to the USA. I installed it myself and the installation went without a hitch and everything is working perfectly.
AA and CP work as they should. And so do the other options like mirroring etc.
I am extremely pleased with the unit sold by Kremersino store. If your on the fence with ordering one of these from this seller and Aliexpress in general, don't be.
Hopefully, the few that have some issues in this thread can be resolved easily and they too will get to enjoy this fantastic upgrade in their cars.
Thank you to the OP and everybody else who contributed to this thread!!!!! Without your helpful information and recommendation of this seller I would not have tried to do this. But man am I glad I did.
Sounds fantastic! Enjoy! I don't know how I was able to live without it
Hi All, I was not able to remove the center vent with the metal hooks. Tried everything. Any tricks? Anyone is Seattle that can help and I can reimburse you for your time?
Also, if anyone wants the unit, I can ship it to them for $225. Its brand new but too much work for me!
Quick update. Michael was kind enough to send me a new LVDS harness + an LVDS box so I can get my install figured out. It took a while but he was very supportive and only charged me for the shipping.
I intend to tackle the install again in a couple of weeks, but this time I'm going to pay someone to do it. Hehe.
I need pdf of unit setting. I can not get into factory setting. I am facing multiple issues
The connection looks good. The problems I have now.. The box light is always red. I tried several combination but it always stays red. Second apply phone connects wirelessly but Android does not connect wirelessly and we dont get sound on both and sound only coming on from original CD but there is no display from original system.
Originally Posted by S550e
This is a DIY Installation thread that covers how to install wireless Apple CarPlay for Comand unit NTG4.0 in most Mercedes-Benz models from 2009-2011. This thread is based and inspired off of @cadetdrivr 's amazing install thread for NTG4.5/4.7 foundhere.
The device I used is a Kremersino Wireless CarPlay box that merges the videos cables of the factory Comand unit and allows for a plug and play install, no splicing or cutting what so ever. The install is very clean and looks factory (retains factory resolution), you can switch easily between the CarPlay screen* and the factory Comand navigation screen. *(As I keep referring to this unit as a CarPlay device, please note that it also supports Android Auto. I am all Apple products so I will refer to the screen as the CarPlay unit. Please also note that I have not tested Android Auto on my NTG4.0 unit.)*
I am not going to cover how to install the unit in-depth as @cadetdrivr has already made clear instructions on how to get started on the W212 interior foundhere. There are some differences, as his car is a W212R 2014+, and I will cover those differences here.
I am not much of a DIYer or a mechanic but I found this job to be somewhat easy with some help from a friend.
Job time - 3 to 4 hours Experience level - none prior Tools needed - Big towel, plastic pry bars, electrical tape, and TORX T20
Please make sure to identify what NTG unit you have before purchasing your CarPlay unit. Contact Kremersino if needed. WhatsApp +86 134 2516 3678 or Ali Express chat
This is what comes in the package:
Everything you will need to get CarPlay working in your Mercedes. (Source: @reject )
Some owners stated it was hard to find the last screws for the glovebox, You will need to pry off the side panel to the right of the glovebox (LHD USA) with the plastic pry bar. The glovebox is still fixed in place with all screws removed, so remember that for the reinstall, the glovebox should not move or be unstable even with all screws removed.
I could not figure out how to fully remove the MMI cable from the glovebox, so I left my glovebox in the passenger footwell. There is plenty of slack for the thick MMI cable to rest and the glovebox sat fine on the passenger floor. Feel free to disconnect the MMI cable if you know how to or leave it and do what I did. This is one of the differences from the W212R removal process.
Remove the two screws on the top of the Comand unit. You'll want to remove everything from the cup holders and close the lid. Place a big towel over the AC controls, Comand scroll wheel, Cup holders, and any other lower center trims. This is to protect your car while the Comand unit is pulled out.
Make sure to transfer the orange Fiber-Optic cable to the new power harness, this is for your sound. It is very special (handle with care). 10 year old plus wires.
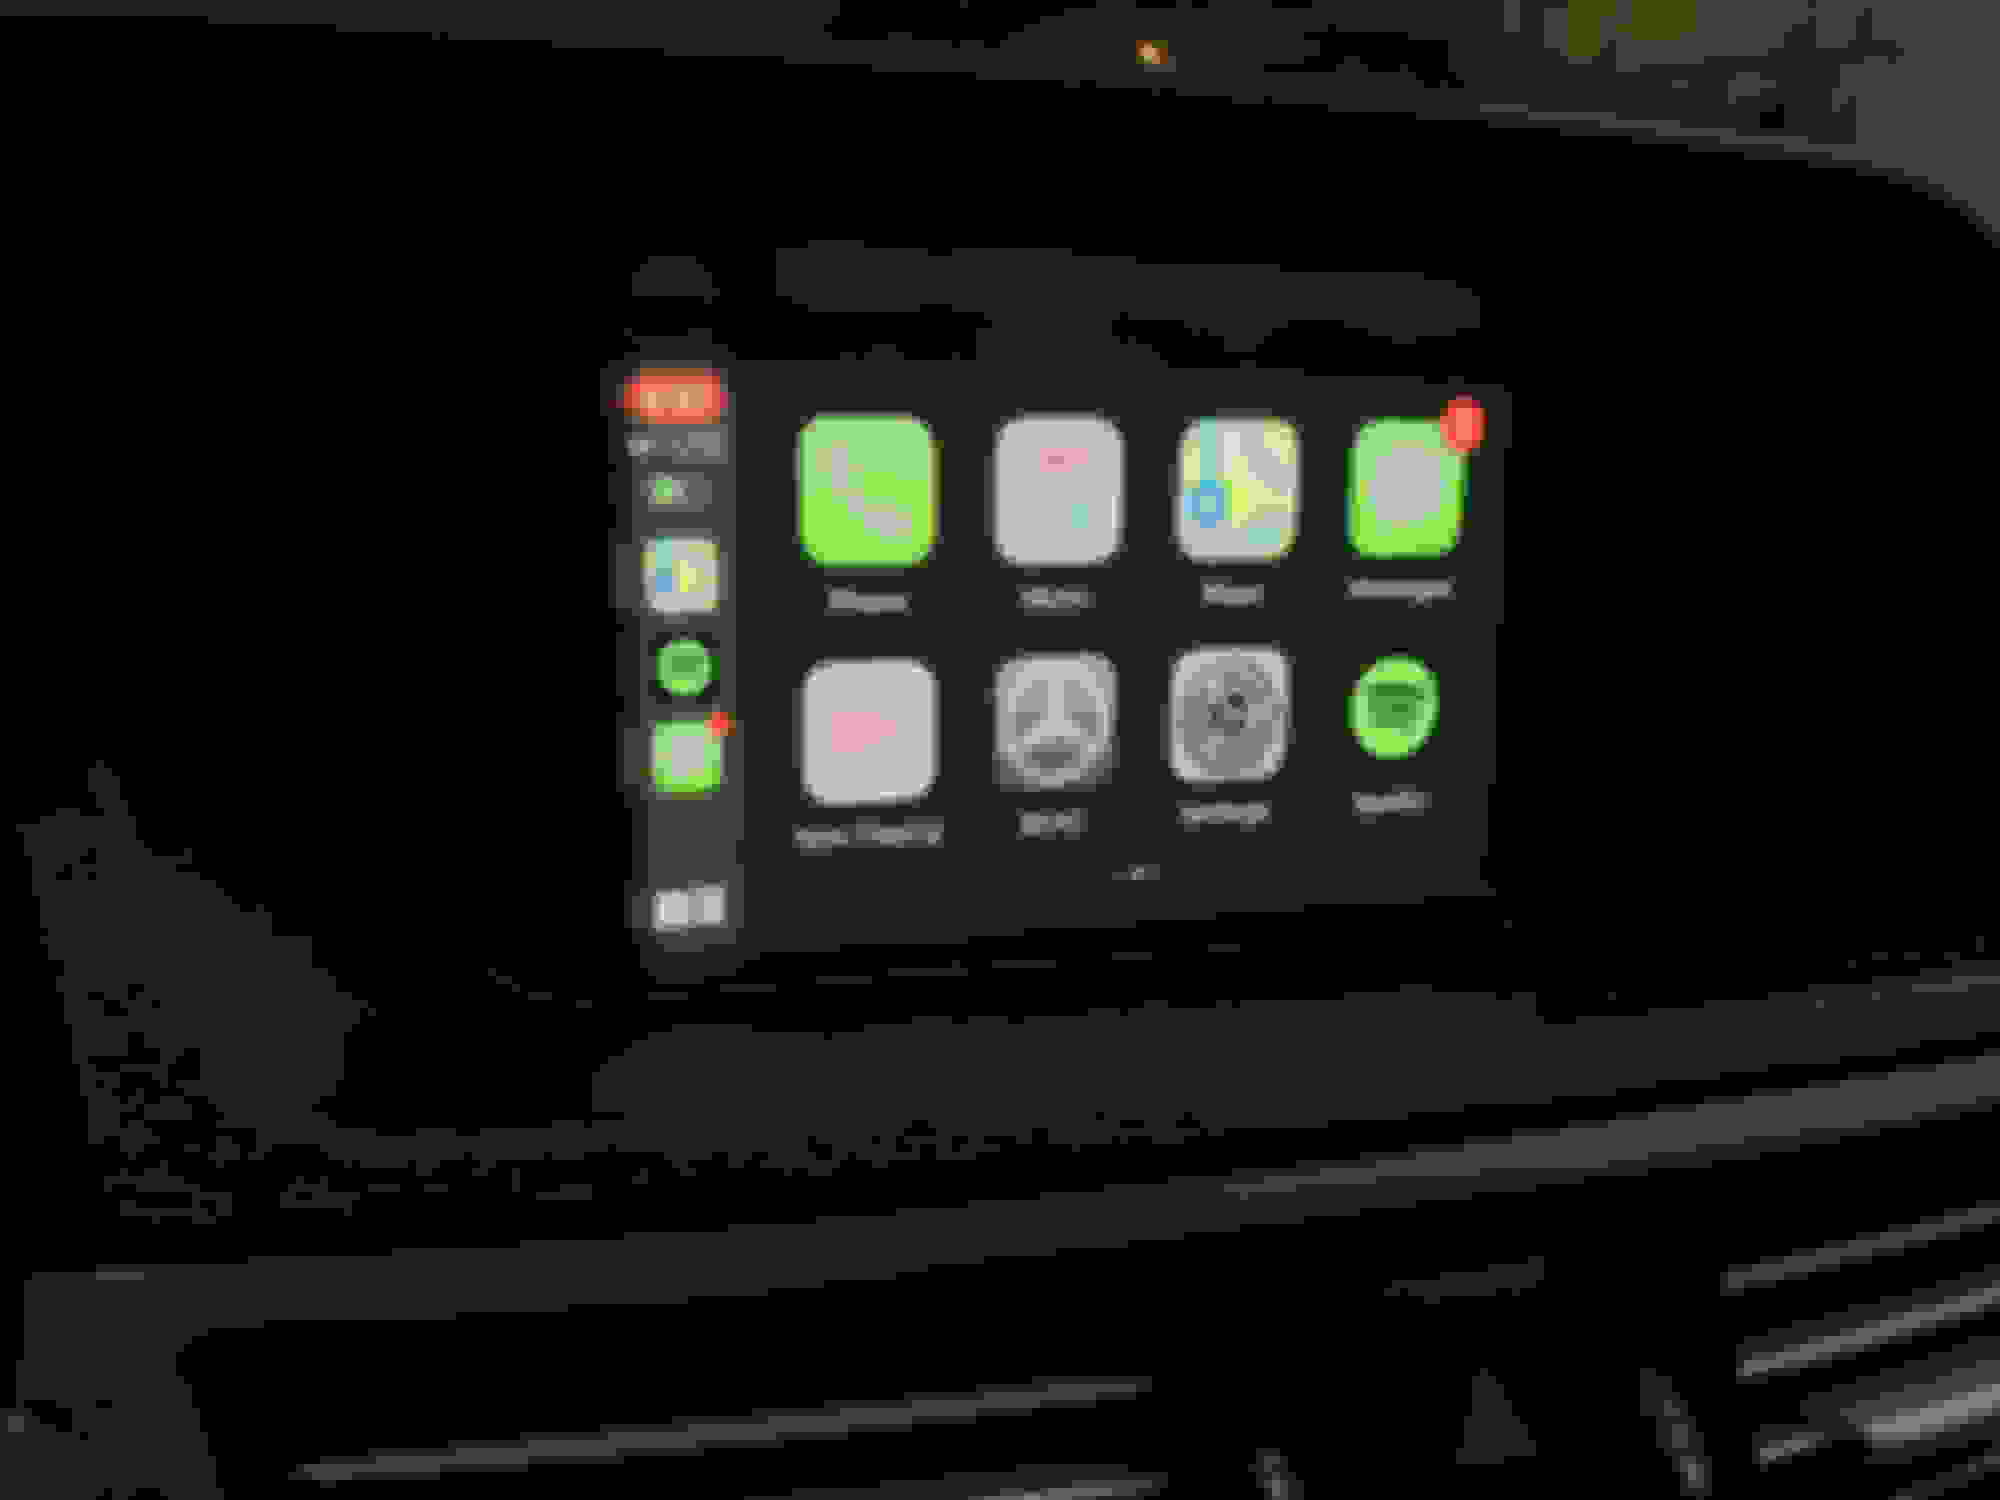
Plug everything in and test to see if the unit works before reinstalling. Make sure sound, controls, and all features work on both the factory Comand screen and the CarPlay screen.
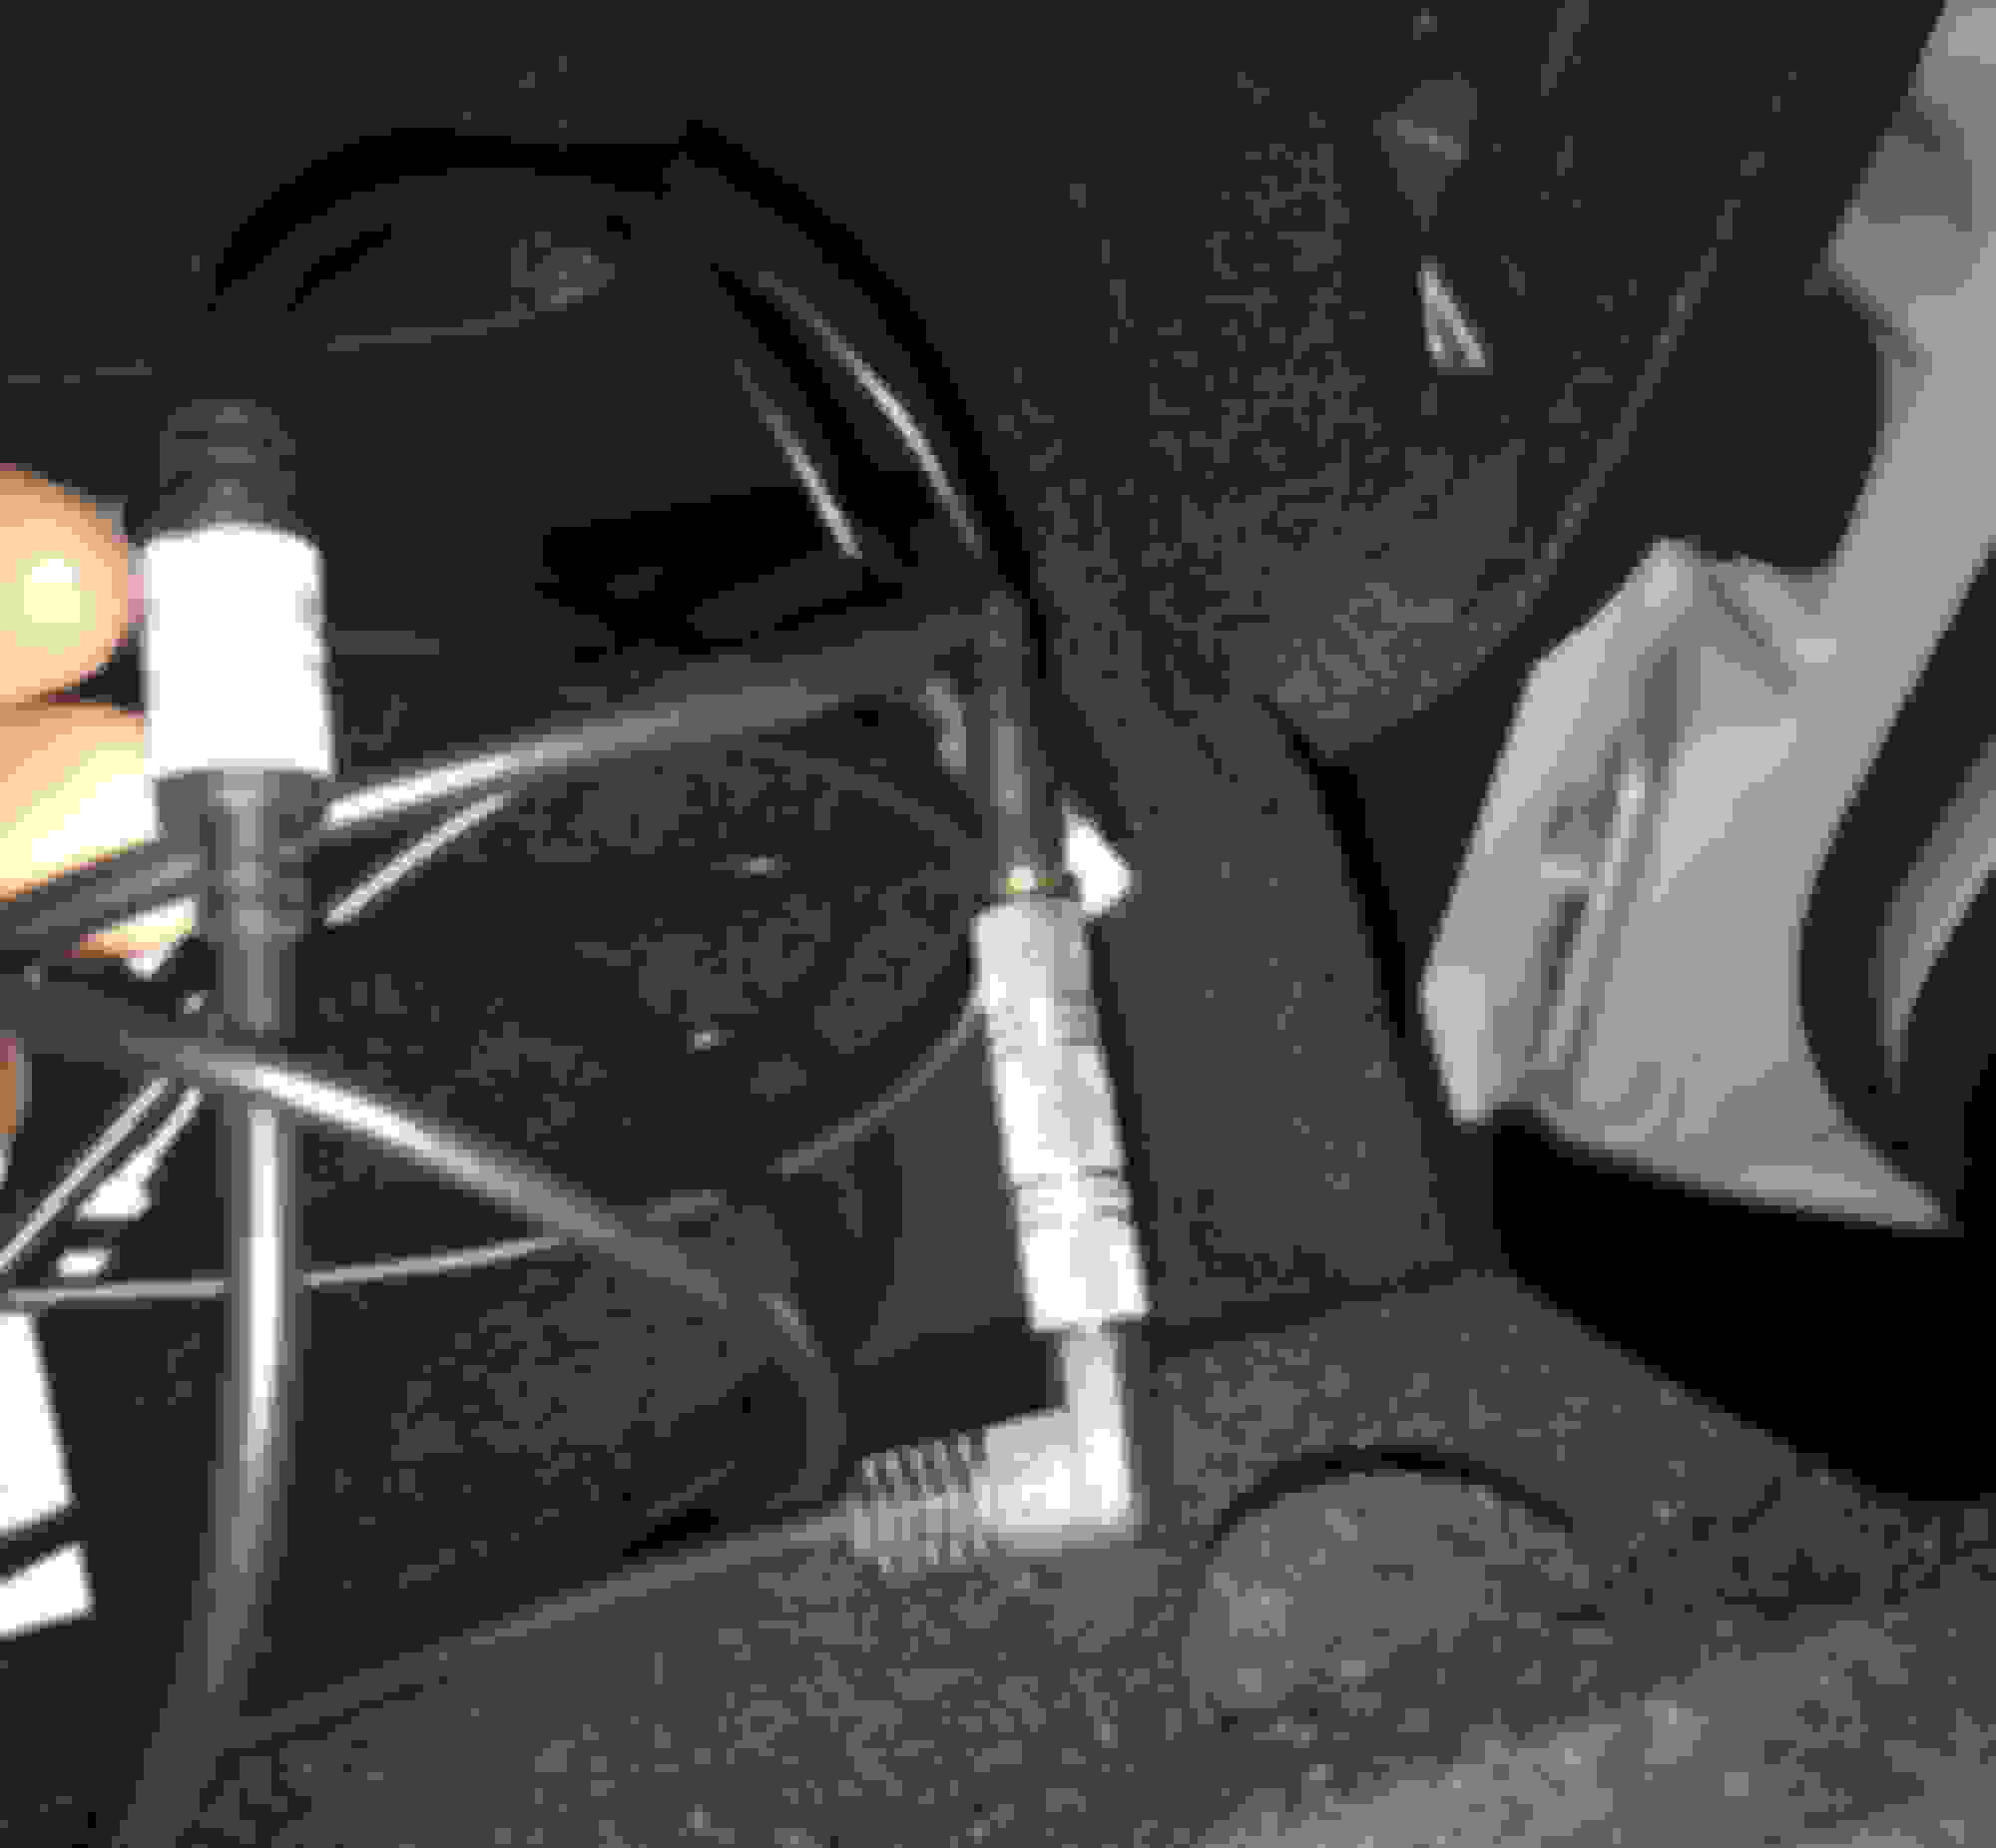
IMPORTANT: LVDS CABLE
MAKE SURE THE LVDS CABLE GOES IN THE RIGHT WAY. There is an indent, or small marking that shows and that should be facing up. Do not install upside down. It will be a pain to remove from Comand unit. I have included a picture here to show which way it should be plugged in. There is this marking in the middle on one side only, you can't miss it.
See the little hump that the blue arrow is pointing to? Make sure that side is facing up. Plug in and it should be snug. (Source: Kremersino Install video)
RE INSTALLATION:
Run all of the cables to right side where you removed the glovebox. Unfortunately, our gloveboxes do not have a removable opening like the W212R gloveboxes (I checked and could not find anything. YMMV). So, I was unable to store the CarPlay unit on the top tray of my glovebox like @cadetdrivr . We will get back to this later.
Tuck all of the extra wires and cables behind the AC control unit. There is plenty of room for the big power harness and the small LVDS box. Slide the Comand unit back into place until it is flush. This may take a couple of tries before it become flush. Slide the Comand unit in and out unit it is flush.
Reinstall the glovebox and make sure all of the wires you pulled over are clear of the glovebox's path and it is set to the bottom corner (in between the bottom footwell trim (removed right now) and the glovebox. Near the OFF button on the AC controls.
At this point, your Comand unit should be reinstalled, the glovebox reinstalled, and the upper air vent long strip. Almost done.
(UPDATE 9/14/20 - NO NEED FOR MMI TO AUX)Run the Aux cable from the wires at the bottom to inside of the glovebox, very easy. This is how you will get your sound. Using the MMI cable in the glovebox. You will need the 3.5mm female to female adapter if your MMI to aux is male.
This is my 3.5mm female to female. Found at Guitar Center the same day as the install. In glovebox.
Reinstall the bottom footwell trim (three screws). Leave the CarPlay unit resting on top of the trim (on the insulation). Make sure the wifi antenna, and all other connections are plugged in. It is going to be harder to get the three screws in with the box sitting on top, but you can do it! This is a great way to store the box for the people who don't have access to put the unit in the glovebox. It can be easily acessed with only three torx 20 screws.
The unit will be good here. You can also turn on head and footwell airflow to blow some more cold air in that area near the unit but, it hasn't been an issue for me yet. (Some other owners were having overheating issues).
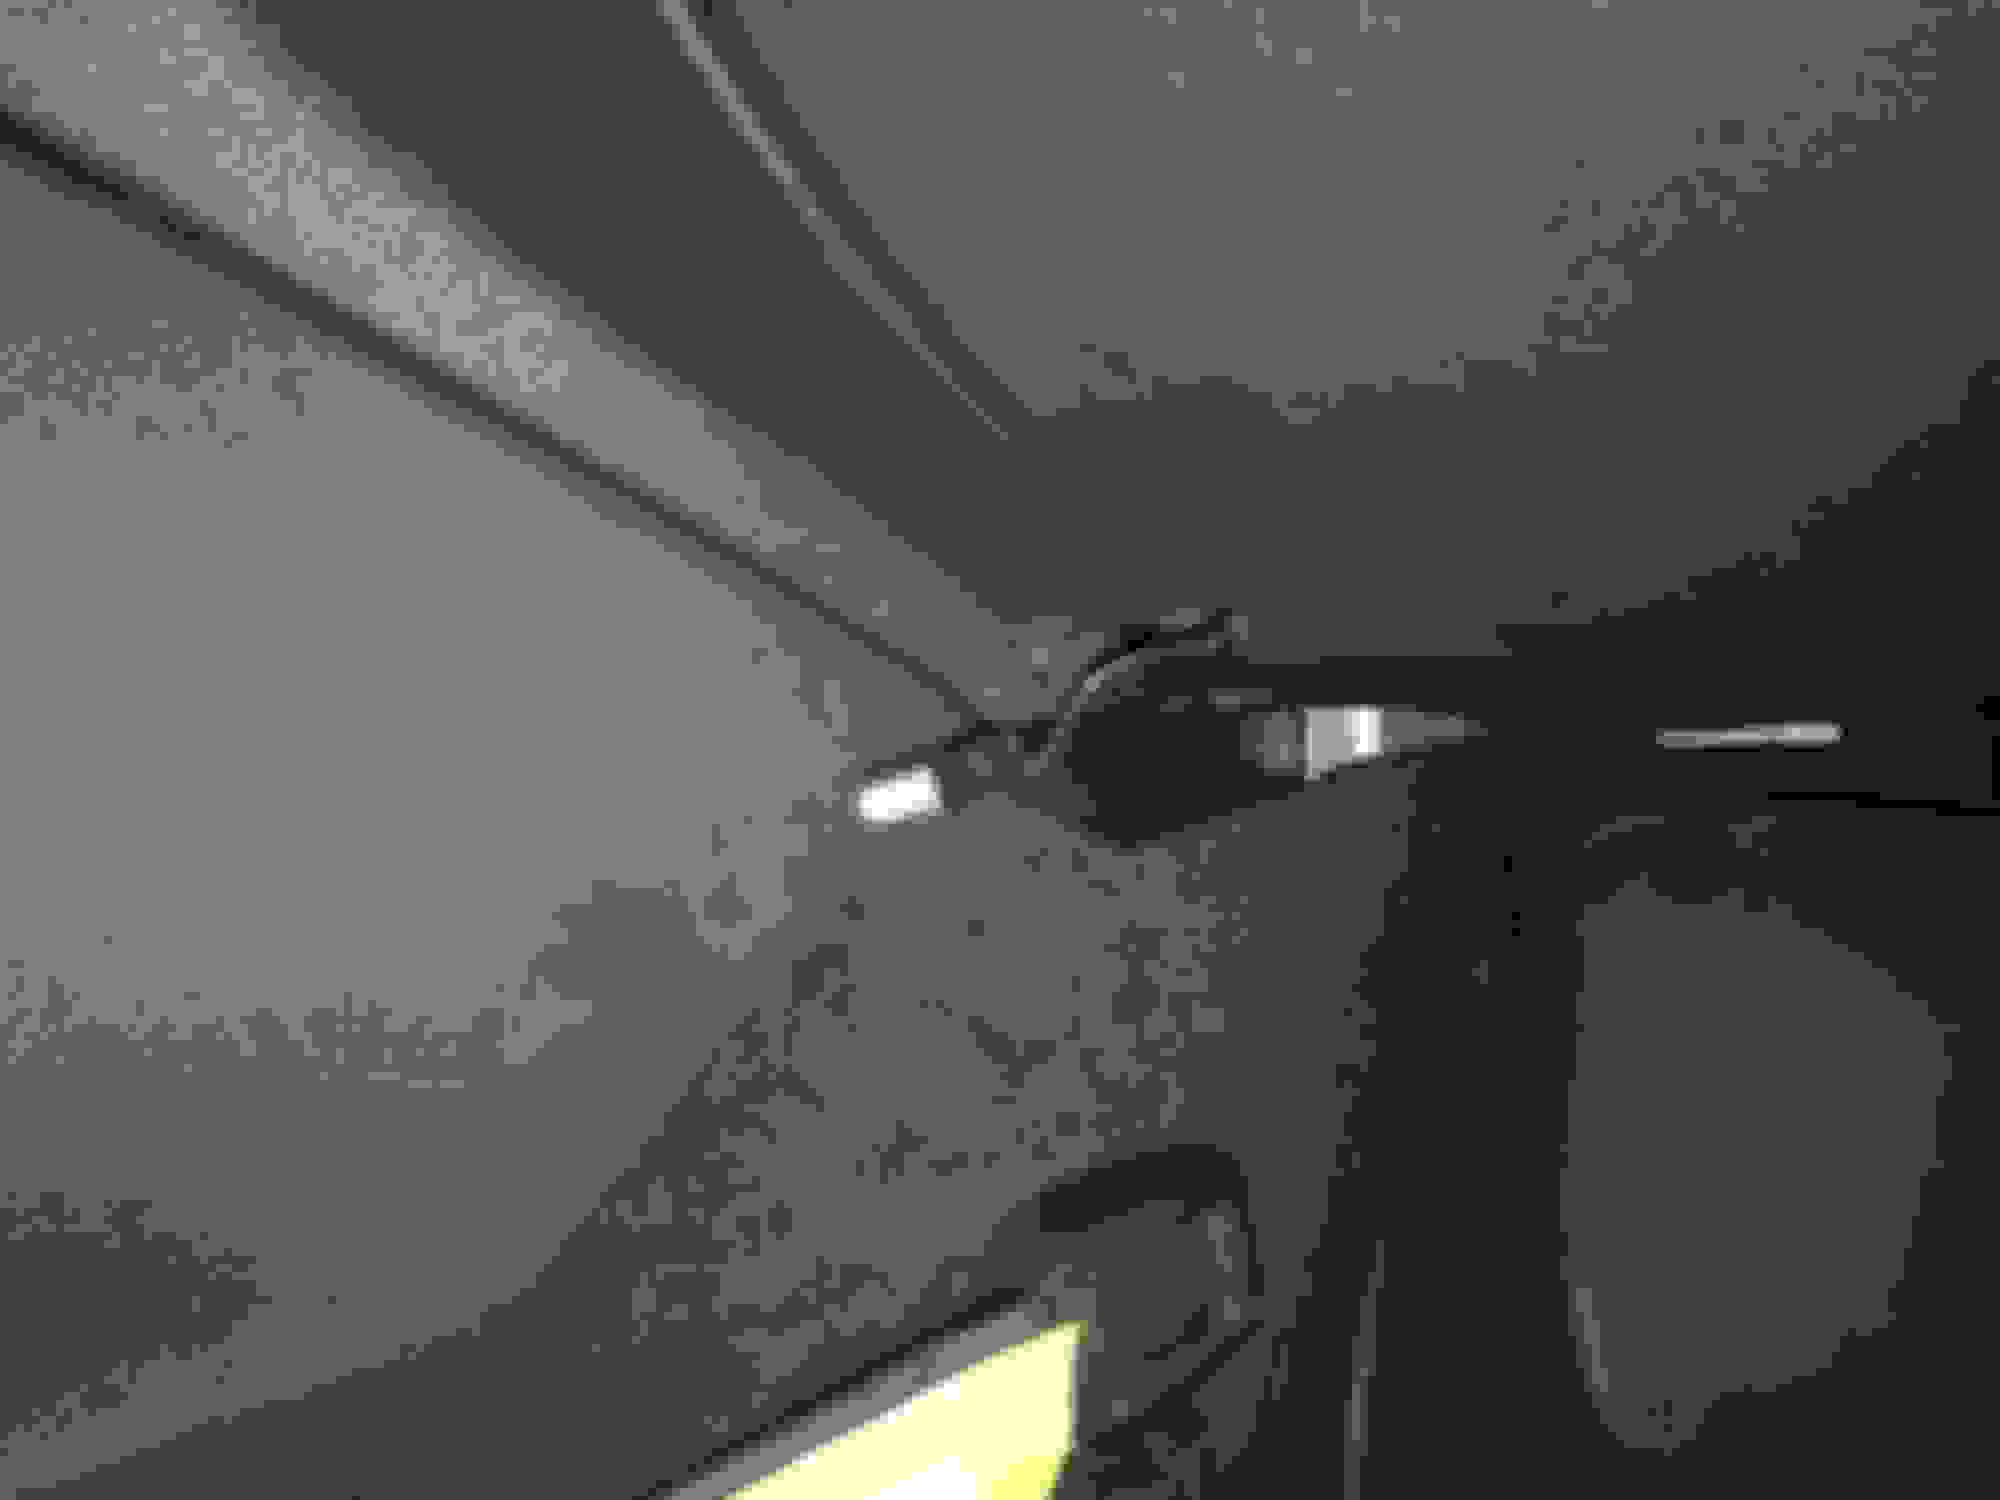
Run the USB cable to wherever you would like (get creative). You can drill into the ash try and hide it there, route it to the glovebox, or simply let it poke out of the footwell. Regardless, the cable needs to be easily accessible (for updating the unit, charging, and wired CarPlay / Android).
It should look something like this.
FINISHED:
Everything should be working now. Take a drink, pat yourself on the back, and make sure everything is working one last time.
It should look like this! YAY
If you are not getting sound through CarPlay, go back into the Comand screen and make sure you have selected AUX.
If you are still not getting sound, make sure you have activated AUX in engineering mode. Here is a video on how to do it. Your AUX may be already activated, everyone's will be different.
(UPDATE 10/14/20 - RE-ENABLE SDARS AND EXTERNAL AMP IN TGW PARAMETER MOST SETTINGS) Make sure to re-enable SDARS and External amp in the TGW Paramter MOST settings. This will ensure the sound is going to the speakers as well as your SAT radio and live traffic updates for the regular Comand unit screens.
MY PERSONAL THOUGHTS:
This is a great unit. It really updates my 10 year old Mercedes. This is a great and cheaper alternative to the big android screen head unit upgrade. IMHO, this is better than those android screens. It retains factory look and the anti glare properties of the OEM screen. You can easily flip back and fourth with Comand and CarPlay. If you are thinking about getting it, go for it. It doesn't hurt and it is fully reversible.
This DIY thread was not possible without the endless support of @cadetdrivr !! Make sure to give him a shout! He spends loads of time troubleshooting and helping for the NTG4.5/4.7 owners. And I hope to do the same for the NTG4.0 owners along with some other members who also has this unit on the way.
I will constantly be updating and communicating on this thread. About software updates, new issues, and other comment about the unit. So far, so good. Kremersino has great support through WhatsApp with fast response times (+86 134 2516 3678). They offer software updates and a warranty similar to the owners with RoadTop and Joyeauto.
PLEASE NOTE:
I did NOT install the included microphone. I never use SIRI and that is the main use for the microphone. You can still answer calls through CarPlay and use the factory MB mic! All you need to do is go to Settings > Accessibility > Touch > Call Audio Routing > and SET to Bluetooth Headset. You can answer calls on CarPlay and when you hit Accept, it will route the call to the factory MB Bluetooth. Make sure you are connected to both MB Bluetooth and the CarPlay unit Bluetooth for this to work.
You may feel the need to install the included microphone (for SIRI only), follow the video installation and route it to where you wish.
OTHER THREADS TO READ:
I suggest checking out these other threads before purchasing or attempting to install the unit.
Hello, I'm new and have retrofitted a Kremersino CarPlay system in the E-Class Cabrio with NTG4, where can I download the latest firmware? Thanks in advance for the support. Best regards and always have a good trip.
Mercedes SLR McLaren 722 S Is Extremely Rare Example Modified by McLaren
Slideshow: A one-of-one U.S.-spec Mercedes-Benz SLR McLaren Roadster became even rarer after a factory-backed transformation at McLaren's headquarters.


 Maybe your connection is still on the house's wifi or something like that what i can think of now.