When you click on links to various merchants on this site and make a purchase, this can result in this site earning a commission. Affiliate programs and affiliations include, but are not limited to, the eBay Partner Network.
02. The jumpy jump road will test my repaired DLC/OBD connector too. https://mbworld.org/forums/e-class-w...or-repair.html
and
to further test the previously weird N70/b1 interior temperature sensor value going to below 4 celcius and dancing values too.
It was solved by simply un-plugging and plugging back all the connectors of that module the OverHead Control Panel, but I have not test with high speed jumpy-jumpy road yet.
03. I redone my HVAC few days back. Make it better/cooler. Will post it sometime next week about it.
==========
04. It is a Sunday, so my usual Italian Tune Up session and this paid highway I have not visited for some months now.
Okey dokey, open for bets now : What do you guys think is making that seemingly "expensive" noise
- No fluid leak/spill under the car.
- No inner liner of wheel came off and scrubbing tires.
- All engine values are normal, surely no DTC
- No nails or whatever nonsense on the tire/s.
The noise is surely rotational and rotational speed related.
So after I did that emergency stop at the highway, I exited the highway at very low speed because I do not want to get hit by some moron ( like often we see in US highways ) while on emergency stop lane.
I then enter the highway again going opposite direction aka home direction and stop 100 meters after the toll both payment gate.
At 100 meters away from a toll booth payment gate, no moron will ever hit me as they would be too slow and so easy to spot me.
Near where I stop, 20 meters away there is the local office of the highway operators and their tow truck, so if I ever need a tow, it will be easier.
The noise actually gone by the time I move from 1st location emergency stop to this new stop.
I then inspect the car again to the best of my ability without using a jack or the sort.
No extra heat on the wheels for bearing failure possibility or let say my caliper broke one of its main bolts.
No weird smell of something over heating.
No loose wheel lugs/bolts
All seems normal. Nothing out of the ordinary.
I then decided to drive slowly at 70 KM/H which is the safe slow for this highway and open the window and listen if the noise comes back.
5 minutes with open window and only irritating concrete highway stupid whining noise on my tires and then I closed the window.
The noise never came back............... till I got home.
I then got to work immediately, Quick Jack the car up and started inspecting all wheels from under the car. All good.
I spin by hand all wheels, all good. No noise from rear DIFF. Me car is RWD, so no front DIFF. All good.
Guibo rubber flex disc at differential, good.
Shaft Middle bearing good, no shake shake no sound when shaft spin.
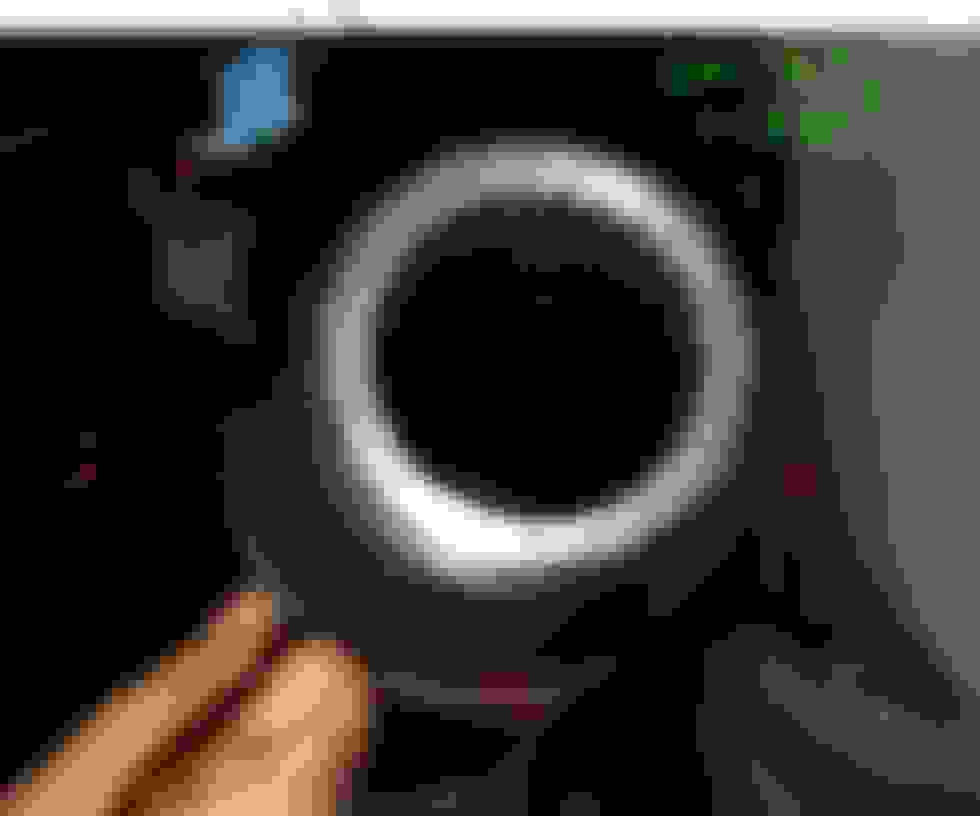
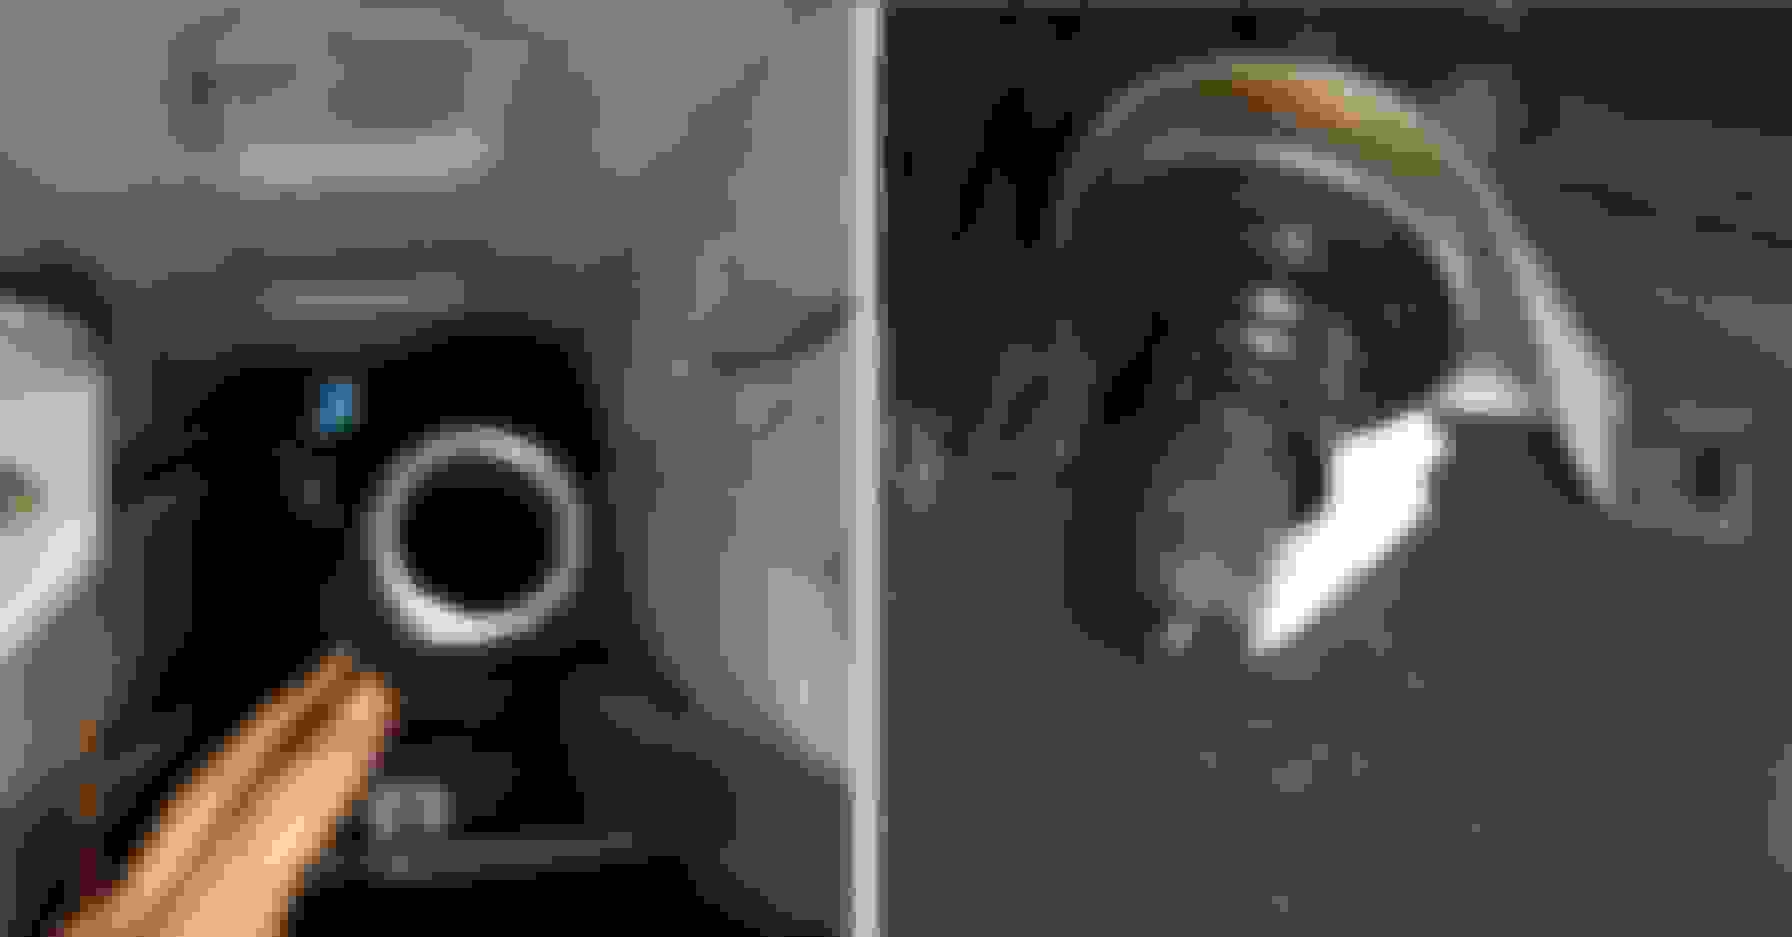
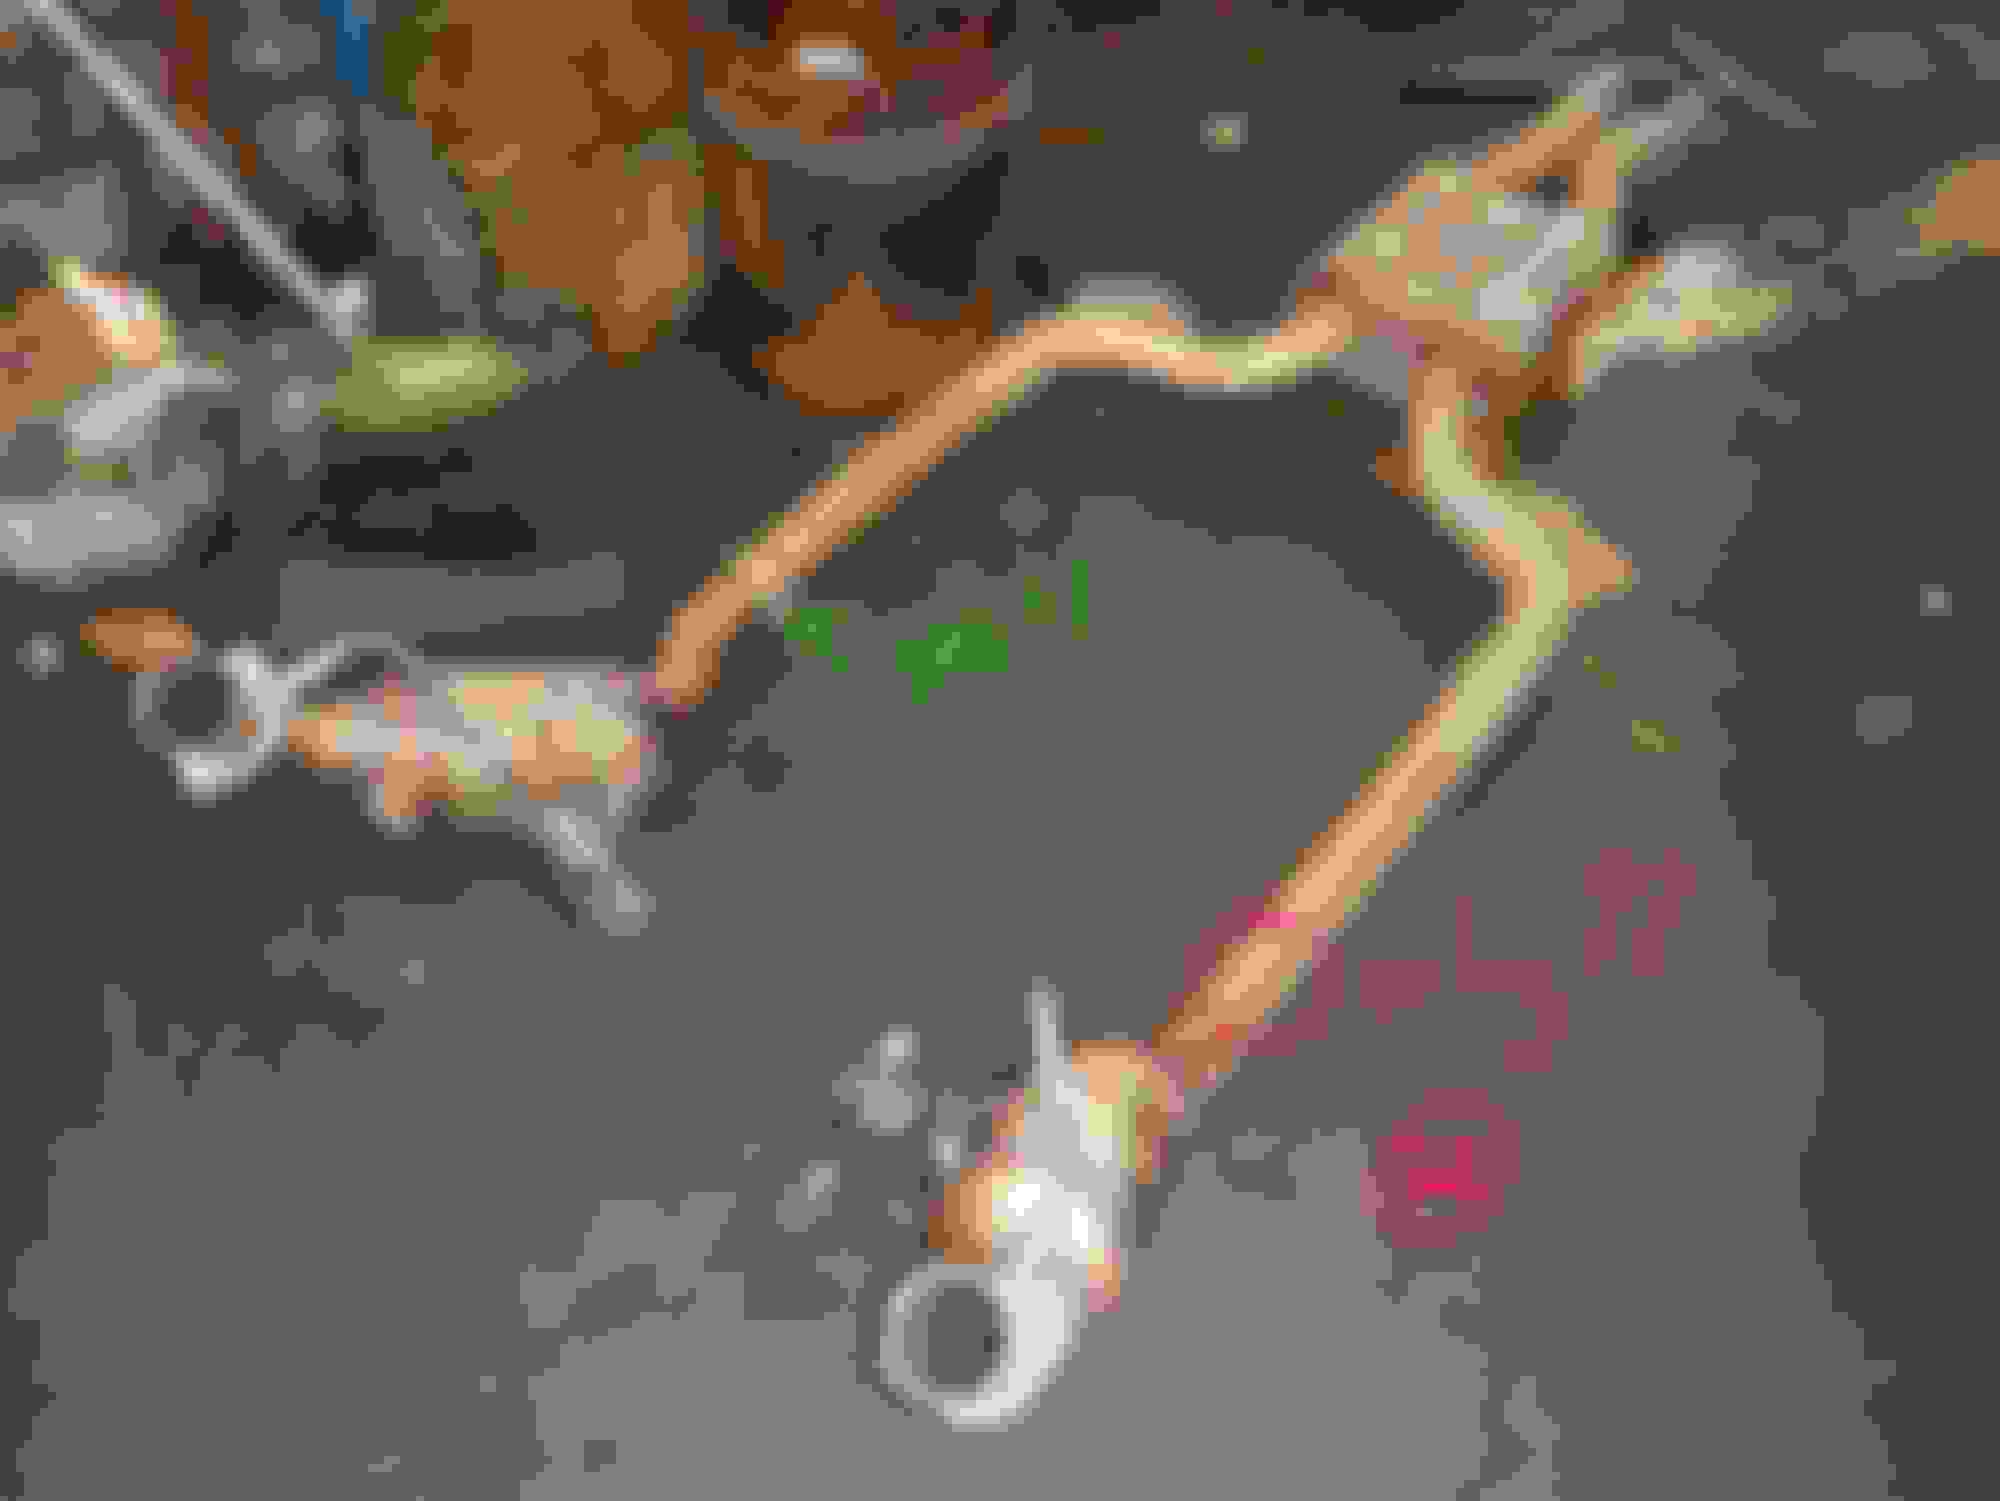
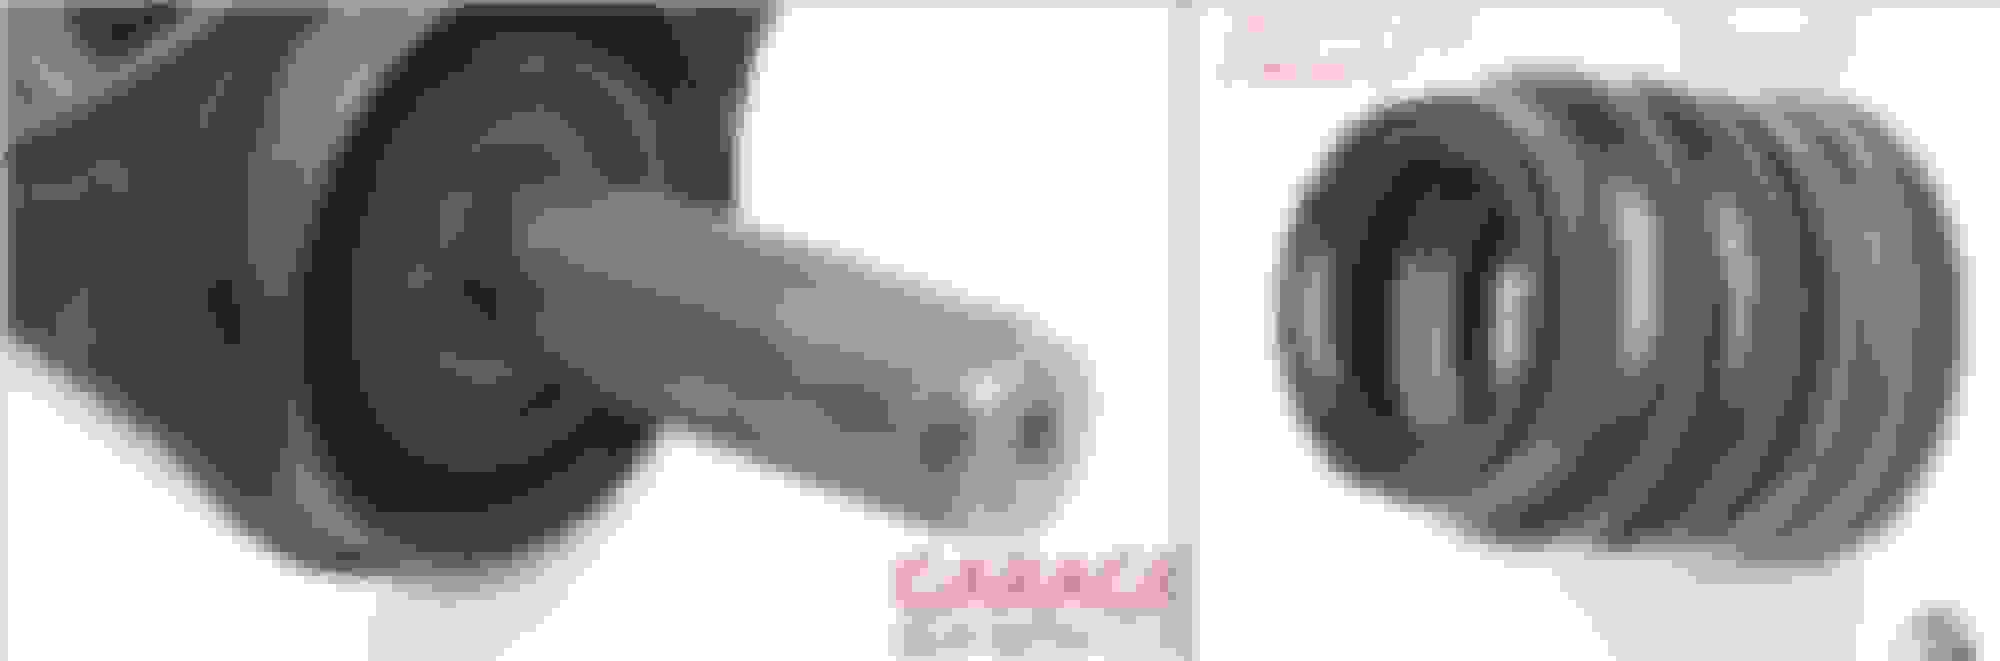
Guibo rubber flex disc at tranny output shaft...................aha, the Guibo is good but I saw something weird.
My heat/noise insulation has a small window torn off and is rubbing the drive/propeller shaft...WT-Hell ?
Who would have thought a fabric or fleece type noise dampener and/or heat shield material can make so much noise !!!!!
This black stuff is a big tougher than the one in the engine bay false or intermediate firewall.
I wonder why there is a pre-cut shaped window on the heat/noise shield ?
That pre-cut window is the weak point. I do high speed often and this tunnel probably have very high air turbulence, as such this window get torn off.
Age too, 9 years old material in 9 years of my tropical humid heat = SUFFER
So I re-insulated that open section with 4mm HVAC foam x 2 layers. I am so bad with sticking these ...LOL. Ugly but as long as it works, I am OK.
1 nylon nut lost. New one installed.
I always have spare nylon nut from MB genuine, as our black fleece sound shield under the car 2 units, LEFT and RIGHT side, sometime this same nylon nuts get loose and lost.
I am happy Uncle Murphy did not pay me a visit .
This is CHEAP fix for what I thought a potentially expensive "noise"....wheewwww.....
could you imagine how expensive this "fix" would have been at the dealer lol
MB Indonesia licenced dealer and also sales showroom charged me US$140 just to use Xentry to do full scan when I first bought the car in 2018 as a 4 years old pre-owned. I worry the ODO reading been rigged.
I dont think they did other visual inspection too.... I don't know. It was in the service bay and I can't go in there.
I think if I send it to them for this "noise" minimum US$200 if they spot it before needing to remove propeller/drive shaft and this is not USA hourly rate, but local .... LOL
Or quote a new driveshaft, fix the real problem, and charge you a disposal fee for the old parts.
I just came back from a 800KM x 2 = 1,600KM round trip to another city, called Surabaya.
At 540-ish KM highway marker from Jakarta my city the Zero KM mark, I got another noise attack .
I thought WTF, how can the adhesive of the HVAC foam get dislodged so fast ??.
Sure, I was running decently fast by the 6-7th hour of the total 9 hours run one way when the traffic and highway has became less dangerous.
The first 0-400 KM of the highway I can't do above 70MPH safely due to many bad road surfaces and heavy traffic you see.
450 to 620 KM part of the highway is good enough to run 130 MPH if I want, but I was not in the mood to exceed 110MPH.
The noise was not as strong as 1st case on 11th June, but I thought it could be some other parts of the noise/heat shield tearing off again.... as it does sound rather a like to 1st case.
So I took a peek under the car the best I could and no dangling thingy on under carriage, so I got back on the road and wait out til the "naughty"parts snaps off and
no more sound. Within like 3 minutes at slow under 100KM/H, sound gone and I resume driving faster.
Was 5 days in Surabaya. I did not bother to seek any garage to inspect what could be the sound/noise source.
Back in Jakarta last nite and work on it this morning.
Well, aging rubber.... high tropical humidity, often bad traffic jam and under carriage surely no airflow..... rubber get cooked FAST !!!
Archive of Feb 2021, left image. When I replaced engine mount for 2nd time at 28,800 KM. Rubber boot is good. Right image is current condition.
When the rubber boot made that sound , it was 37,600KM ish, 2 years 5 moths later.
9th Feb 2021. 28,800KM archive.
Exhaust system need to be removed, a 100% !!!
I do not understand why MB designed my exhaust to have only 1 interconnect, which is the Bank 1 or right side bank exhaust.
If the LEFT one has the interconnect too, I can remove a lot without needing to remove the 2 most difficult ones, the CATs.
Archive of 2018. First time engine mount replaced at 10,700 KM.
Archive of June 2020, when I installed the British made Quaife ABT LSD differential
The only thing I CAN NOT do myself for this repair, is my hand too big to un-clip the Lambda sensors connector.
I have tried to access those 2 + 2 connectors and never could.
My Indie has a slim guy with hands small enough to do so and he had done it on my car twice already.
Will update when I get my Indie to remove the exhaust system a 100% and inspect closer the entire propeller shaft assy.
===========================
Ebay visualization aid
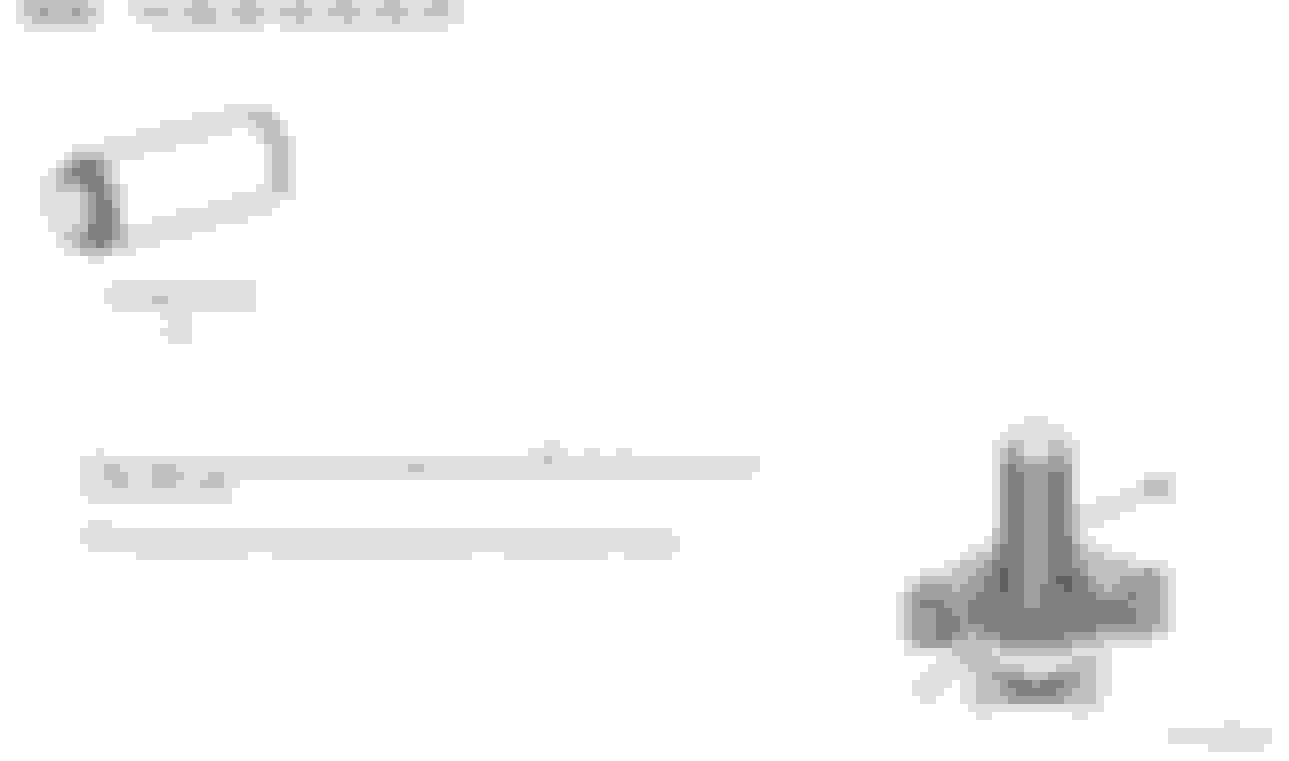
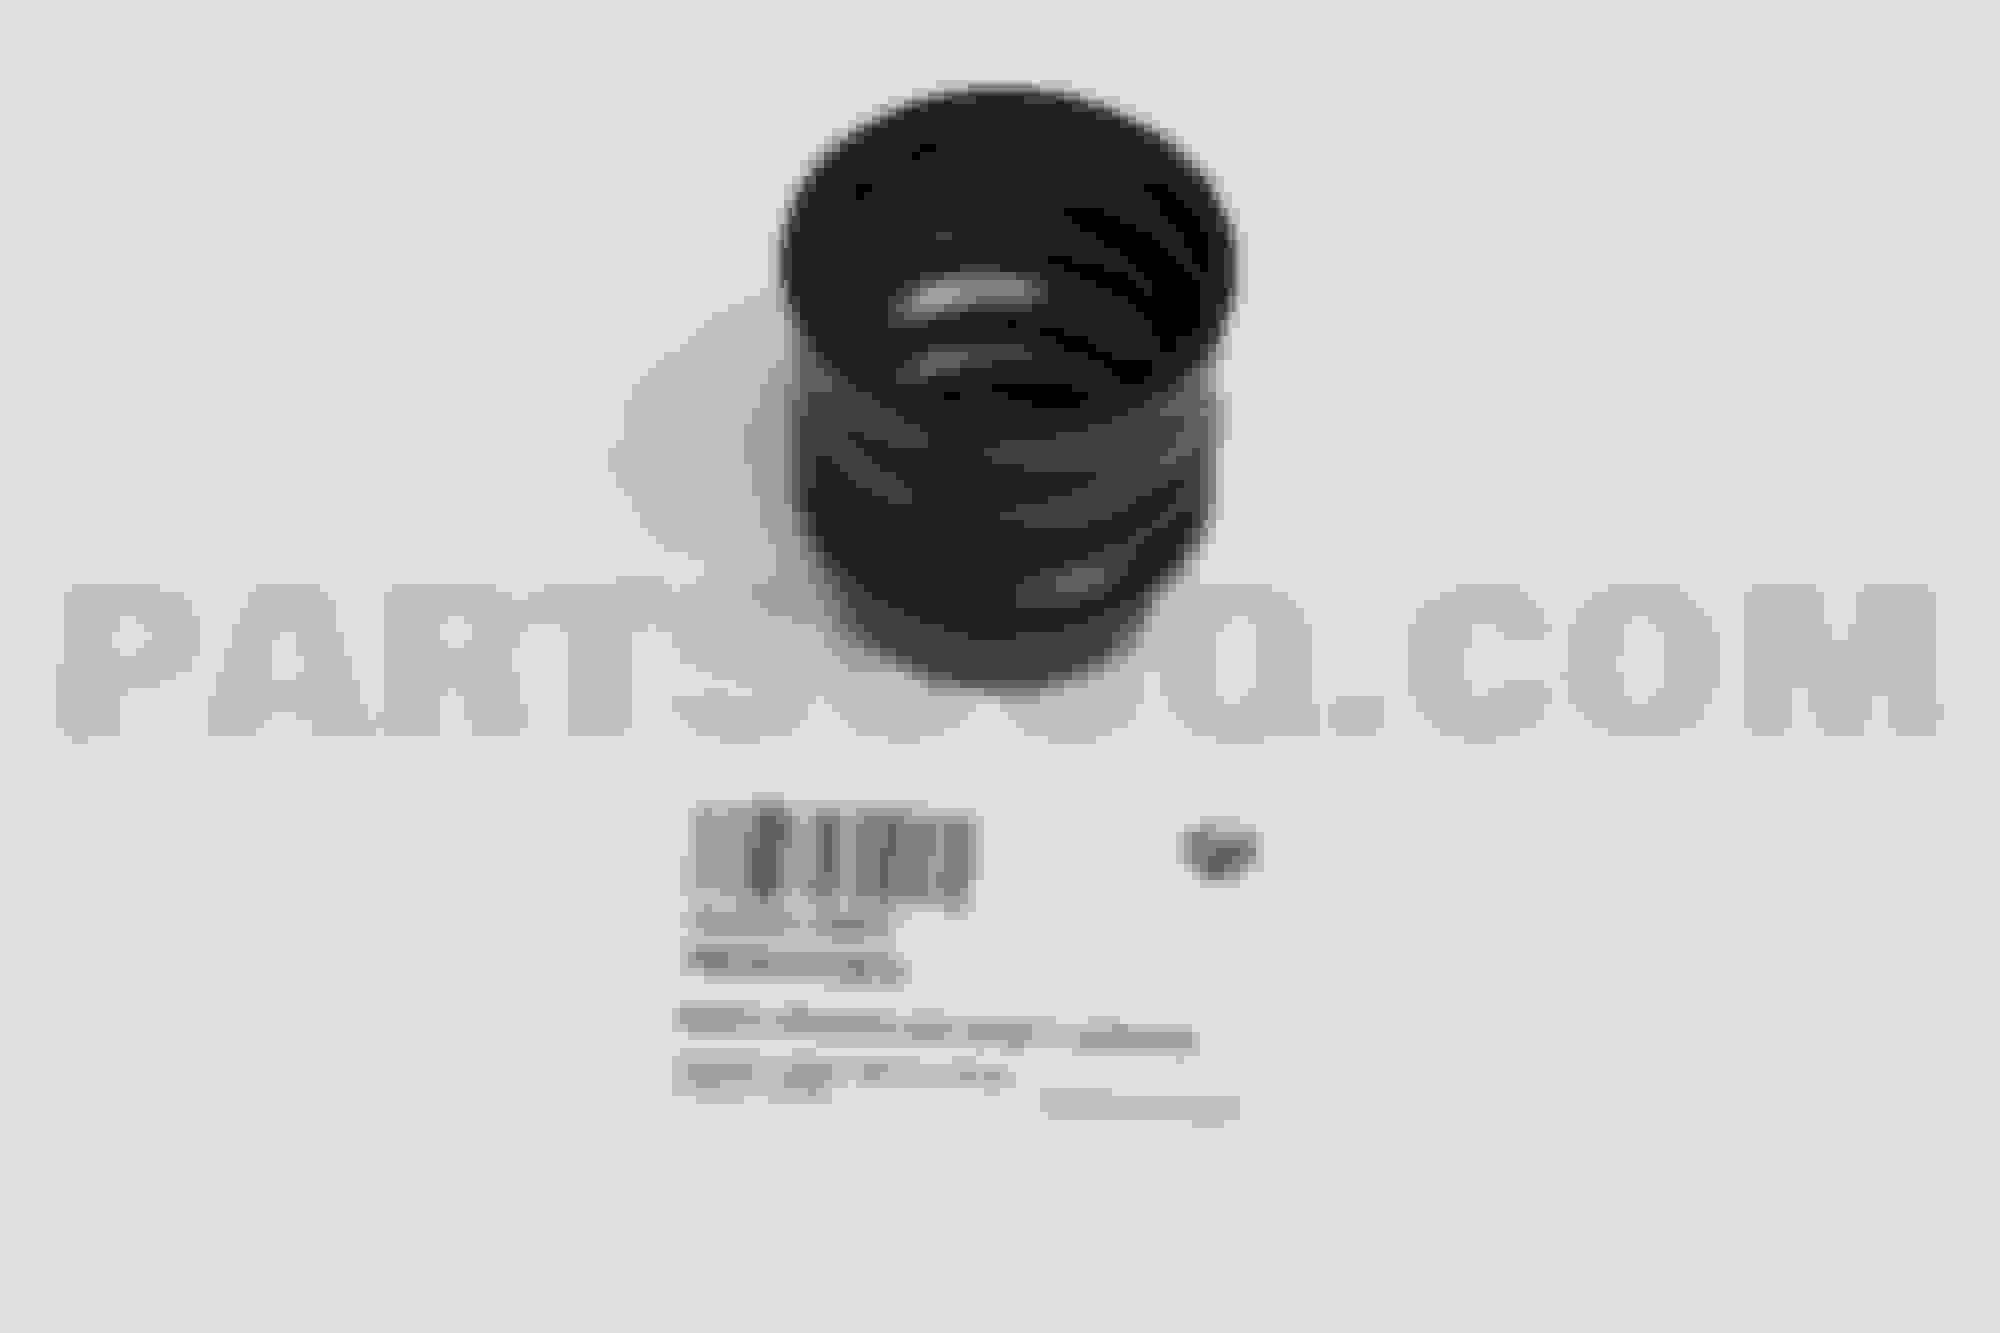
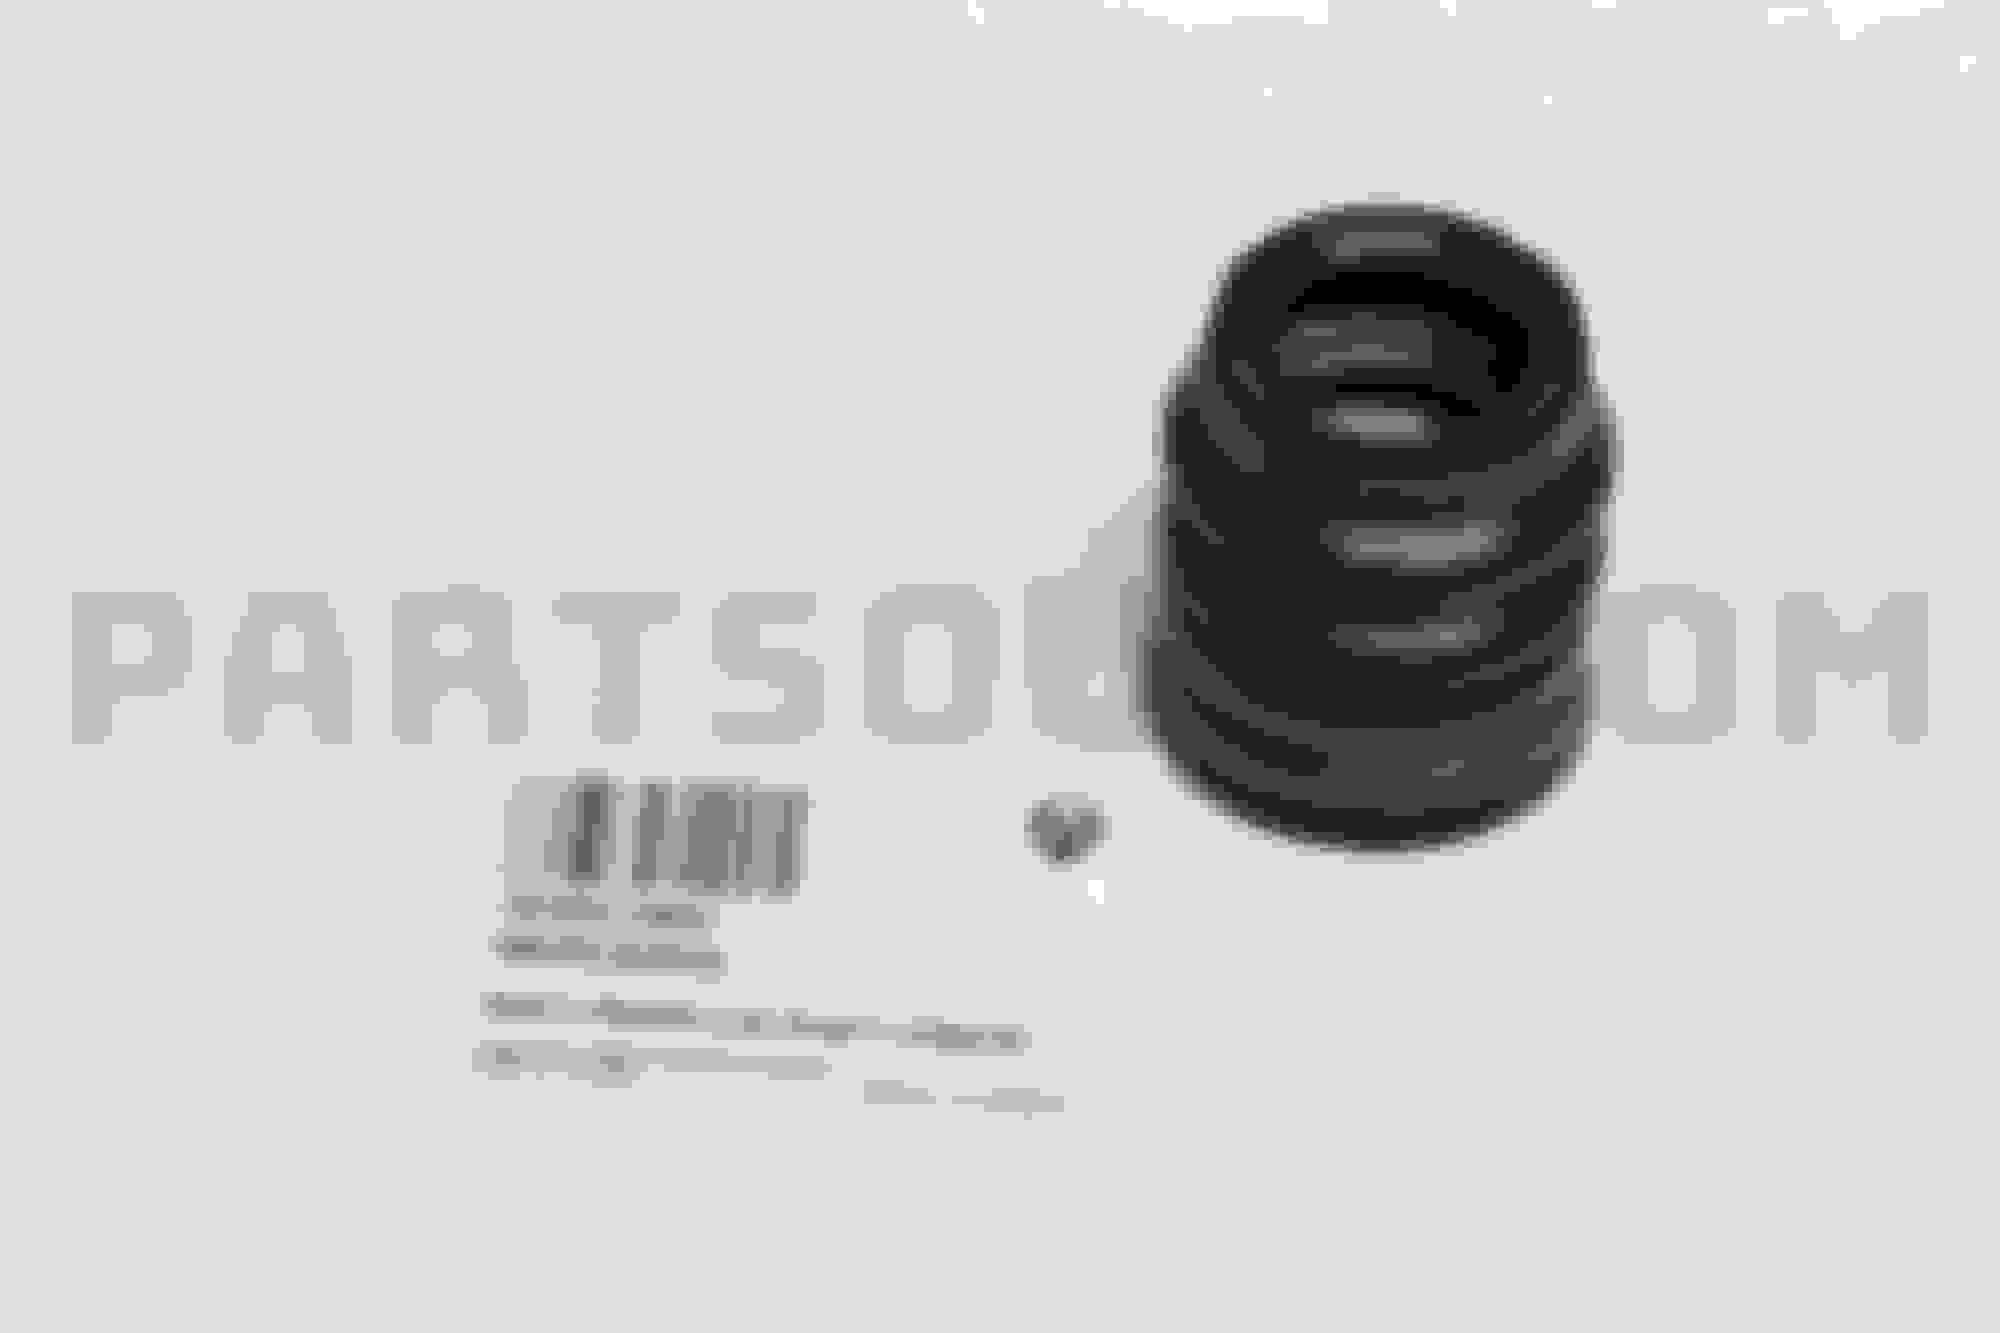
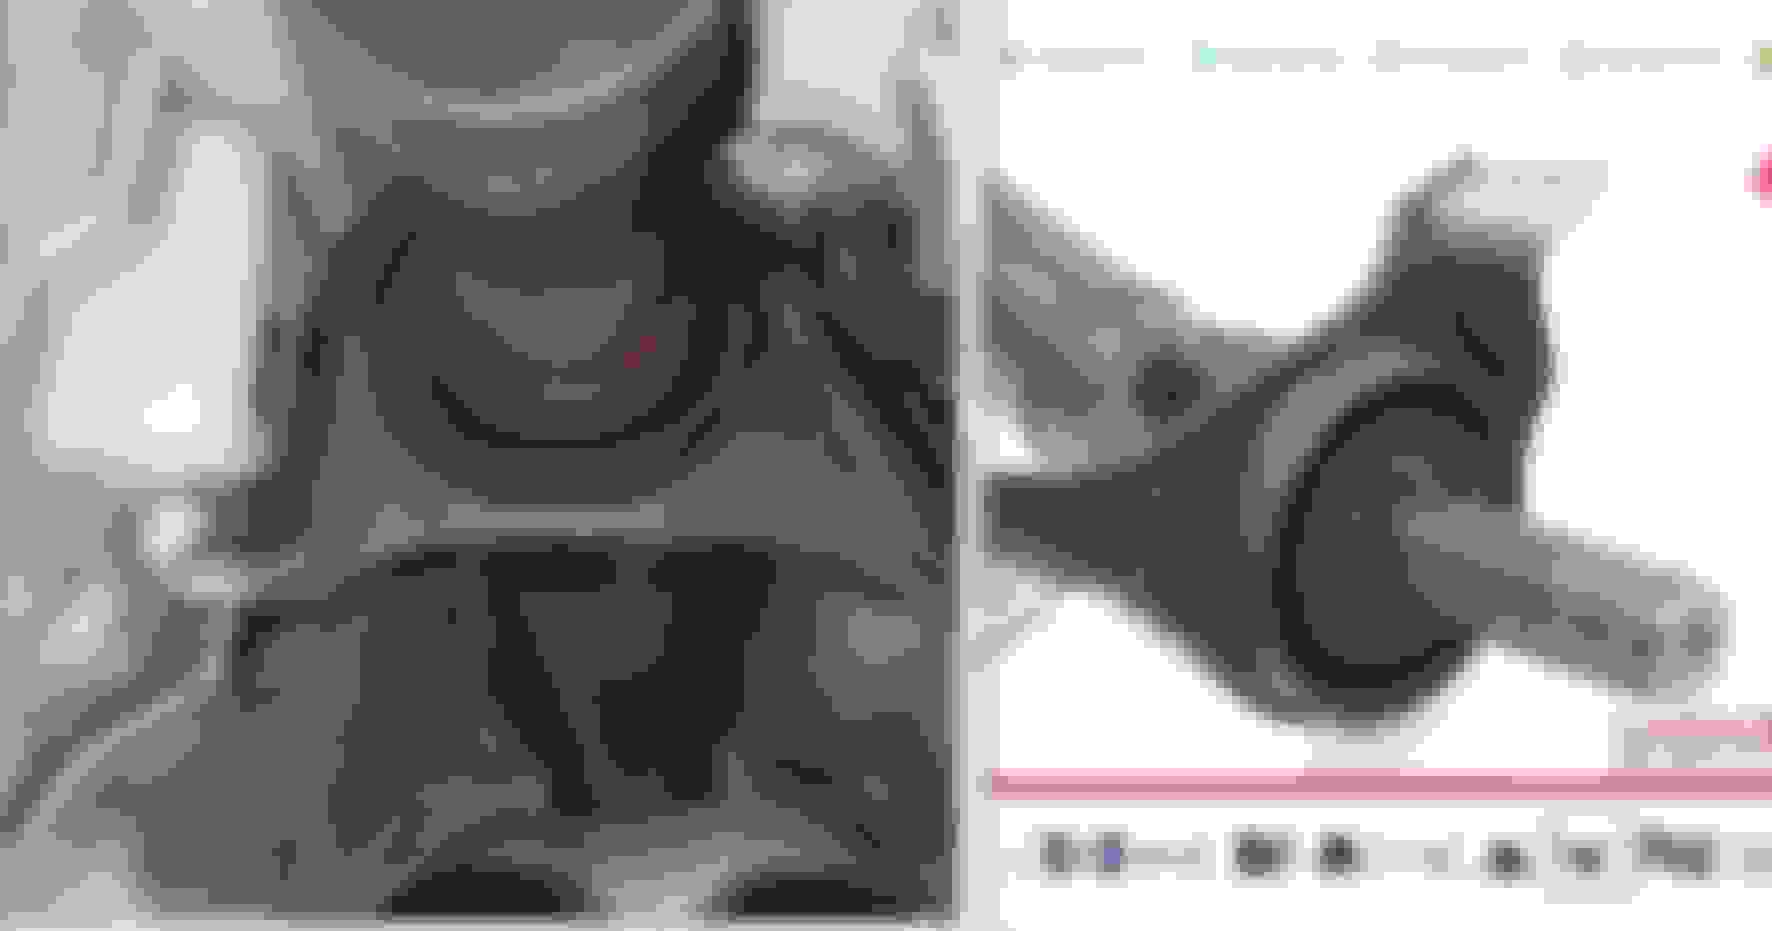
No clip of any kind for the rubber boot . Simply using friction/channel only ??
I will replace the middle bearings too, items 140, 130 and 170, aside from the rubber boot item 150. Item 130 middle part is also rubber.
I don't think there will be any adhesive, its purely tight fit friction of rubber to metal. The WIS does not mention adhesive, only grease.
These all spin at the same speed anyway.
The boot is made with 2 fat bellows, that is for when the male spline has to move in-and-out of the female spline.
According to what I read on the required grease for such duty, the grease has to be super sticky and not easily thrown out from the spinning nature of the shaft.
The male spline in-out movement is not big deal in terms of friction generation.
I wonder how much natural leak of grease will occur from the smaller diameter or front side of the rubber boot ?
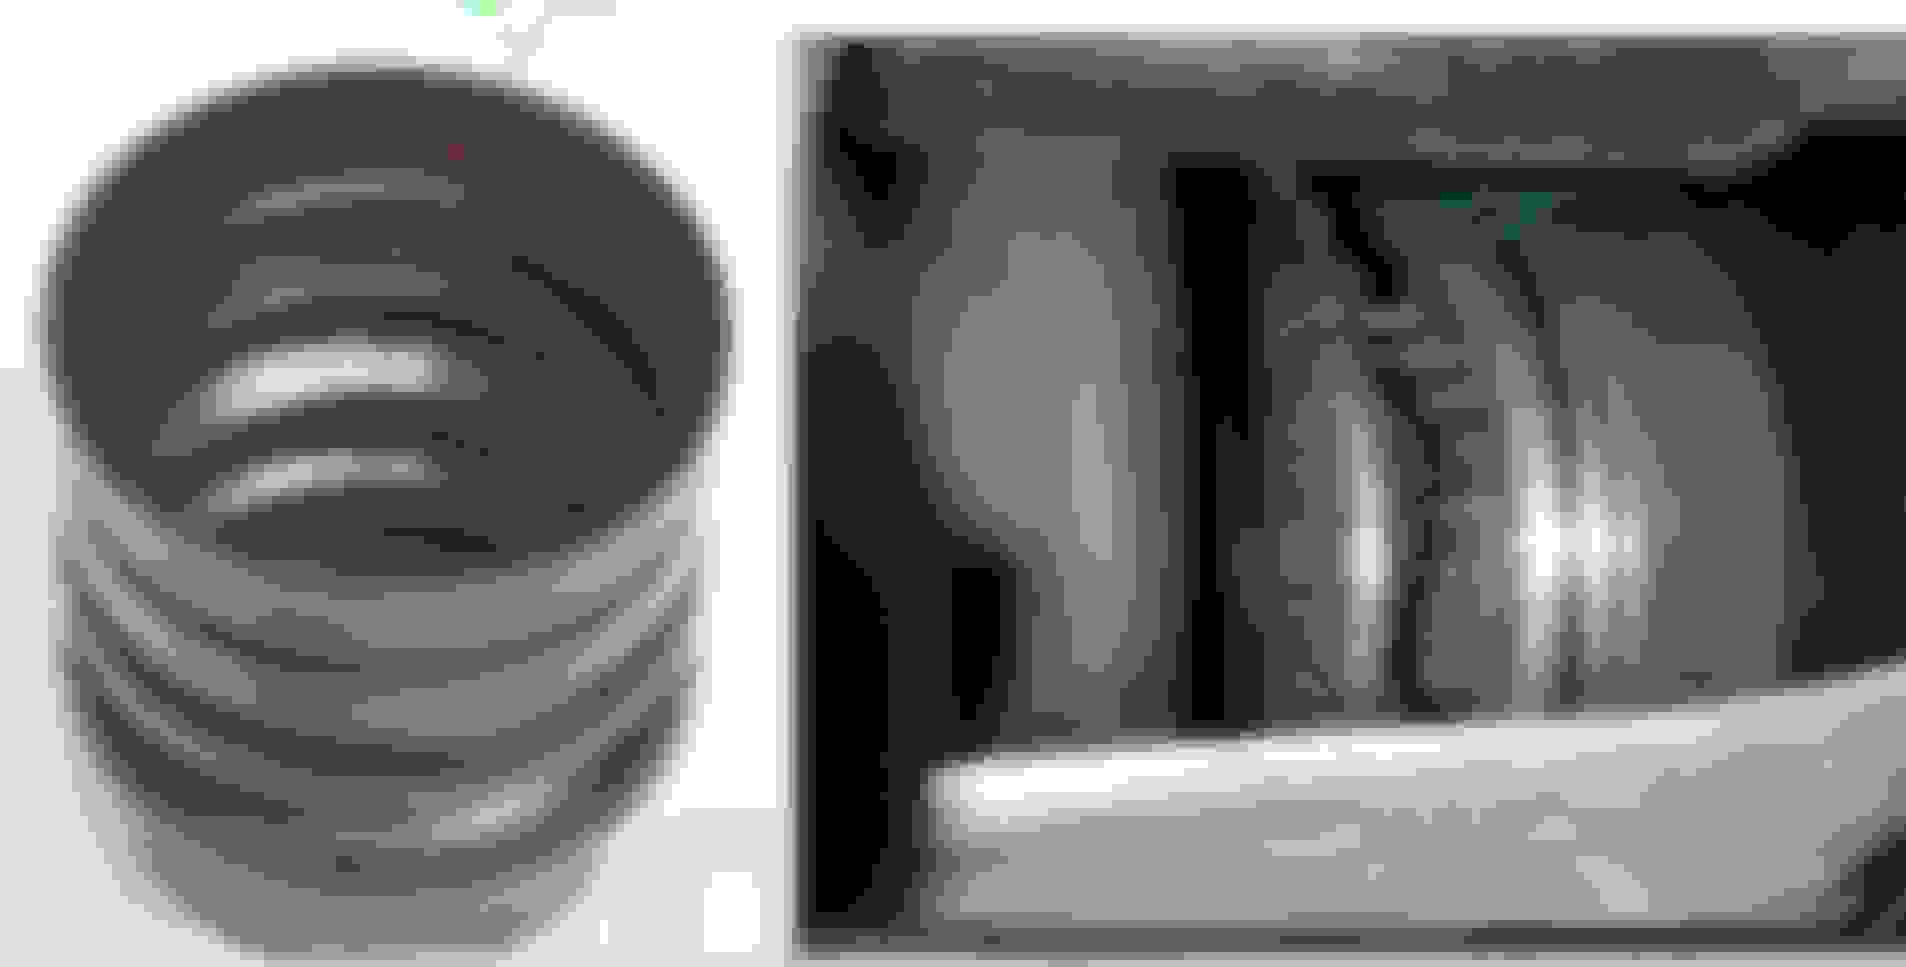
Seeing the photo below, it seems the rubber boot does a good job at keeping the grease inside the spline cavity. No sign of grease splash outwards.
While the slip yoke does seems to splatter out a bit of its grease....so very little.
The friction fit. The big diameter side of the rubber boot has best "grip" and sealing facility.
Before any twisting load from wheel traction, and car is on a flat ground, all engine + tranny + DIFF mounts in good condition, I think 1 smaller bellows length as X on the rubber boot is the amount of in-out play prepared by design.
Last edited by S-Prihadi; Jul 29, 2023 at 09:28 AM.
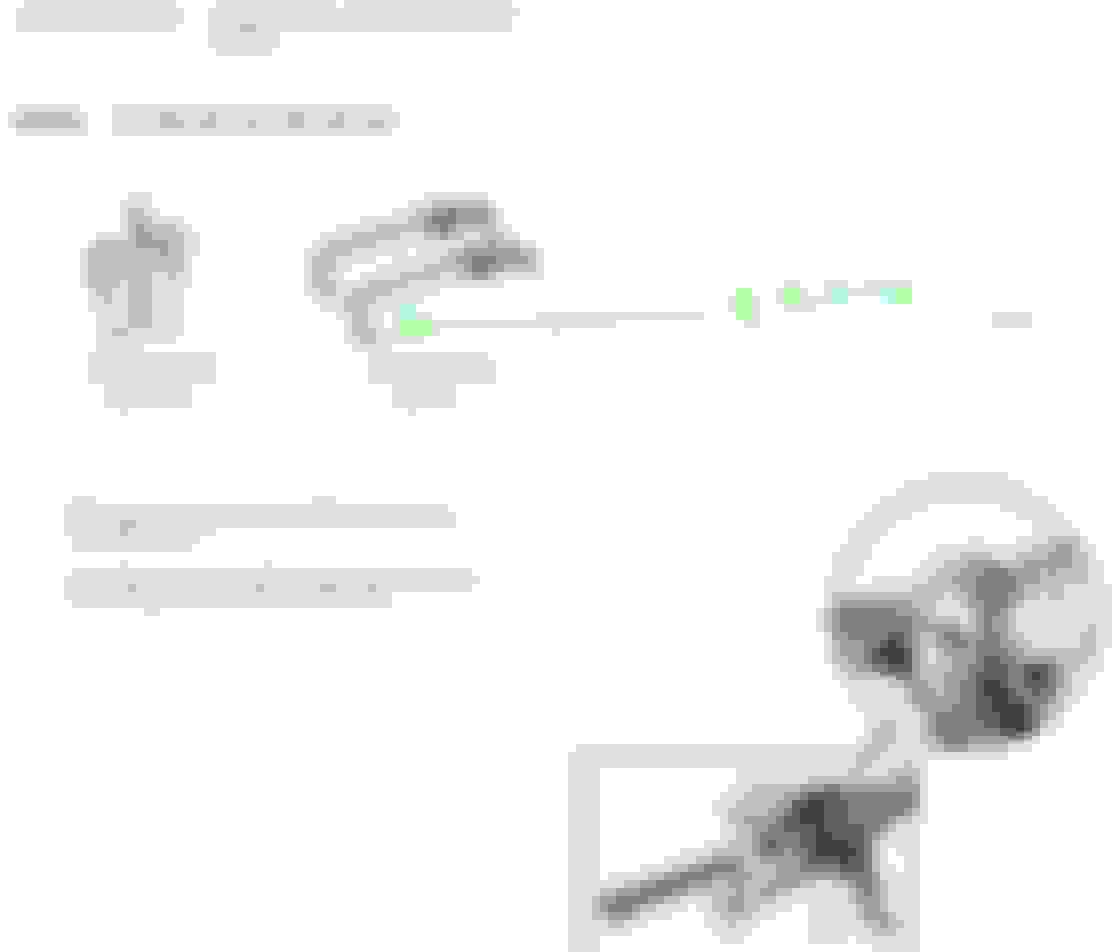
I made the bearing pushing tool the day before I went to my Indie. From a steel pipe of ID 30mm and OD 38mm.
The exhaust system has to come down 100%, all of it.
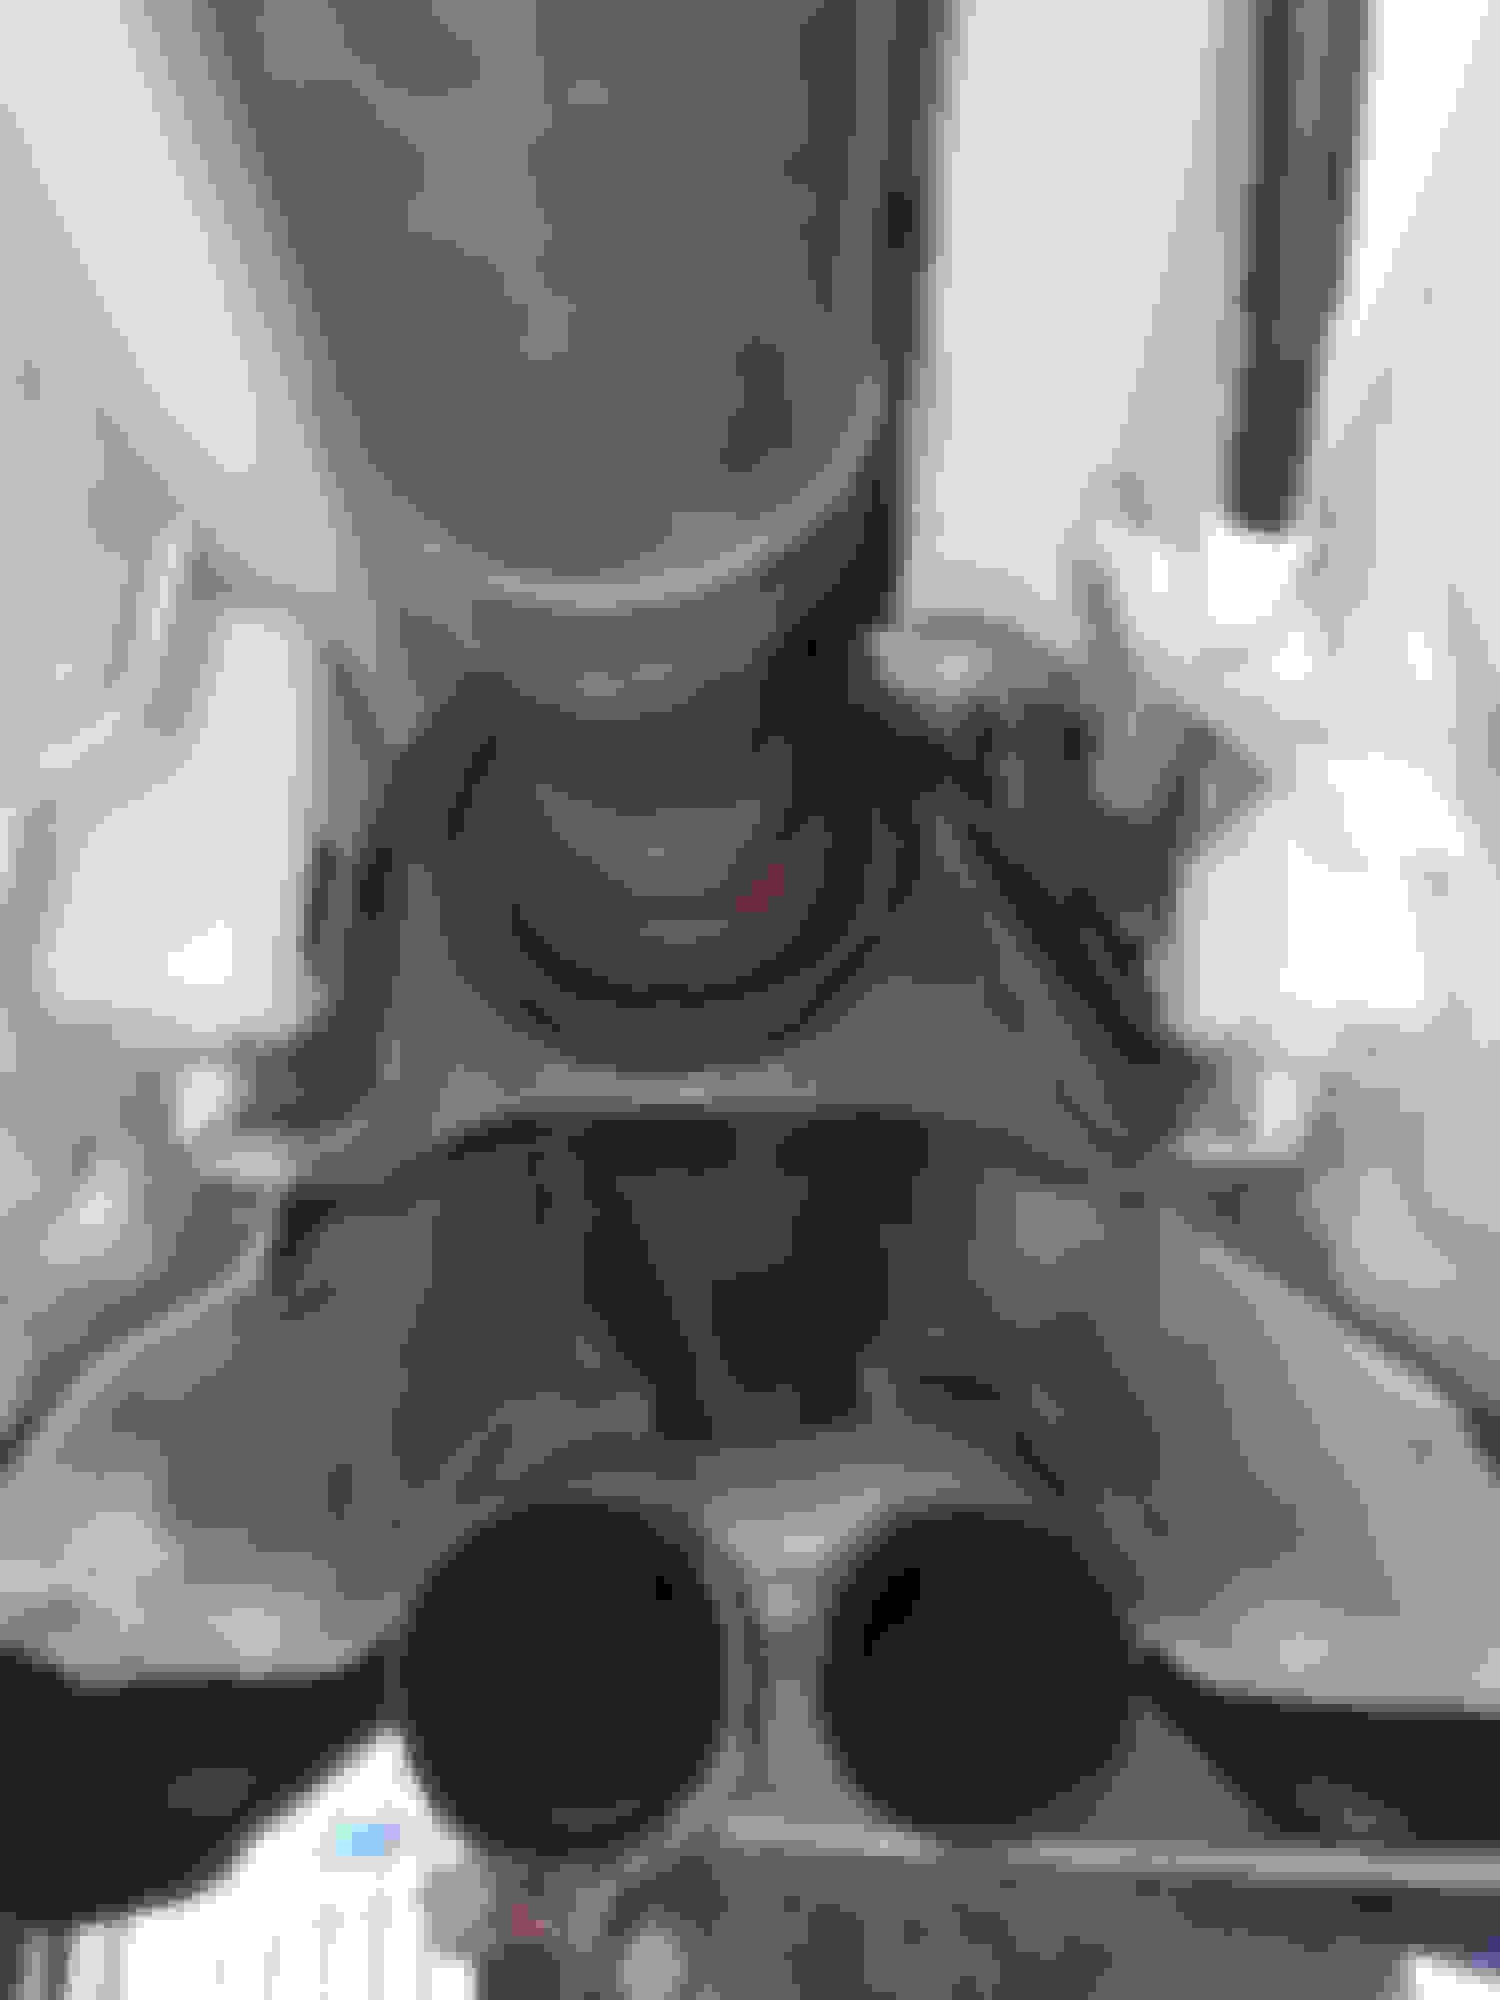
The propeller shaft to remove is the joint with the male spline, which is the one from mid bearing to differential.
Add additional alignment marking to be safe when re-installing.
While MB has provided its own alignment markings, the spline is quite a fine one and to miss 1 tooth is easy and that is worth 13.33 degrees we are OFF.
===================
I am happy and pissed at the same time.
I am pissed because the rubber boot is the WEAK LINK here in terms of longevity. Its already brittle, hence it got torn.
I am happy that the bearing holder ( wrinkle bearing ) and the bearing itself is still 90% condition, it will do easy another 4 years for the wrinkle bearing ( rubber) I am quite sure.
NOTE : I am only at 39,000KM.
The rubber boot is so cheap. If only they make it out of a VERY high quality silicone and even it cost 5-7x or US$50 and if it can last 20 years, it will be so much cheaper for us.
I do not know how much will an Indie workshop will charge you for this job in USA, but I bet wit wont be less than 3 hours job.
01. The exhaust system is not lightweight and it is bulky, more so the most rear mufflers x 2 which is spread a part as wide as the car. Need more than 2 hands to do it proper and fast.
02. Remove propeller shaft rear portion, the shaft end part looking like 4 fingers interfacing the rubber damper disc called "Guido" at the DIFF, is the no fun part to remove , if the Guido is still healthy like mine.
The Guido has bushing and it pops-out approx 2mm, which locks to the propeller shaft finger's bolt cavity.
So far so good as for zero vibration, but it was a slow and short drive from my Indie to my home.
I need to spin the propeller shaft to above 4,300 RPM and I need this weekend to run 120MPH mininum to confirm all good zero-vibration wise.
211 KMH = 131 MPH
============
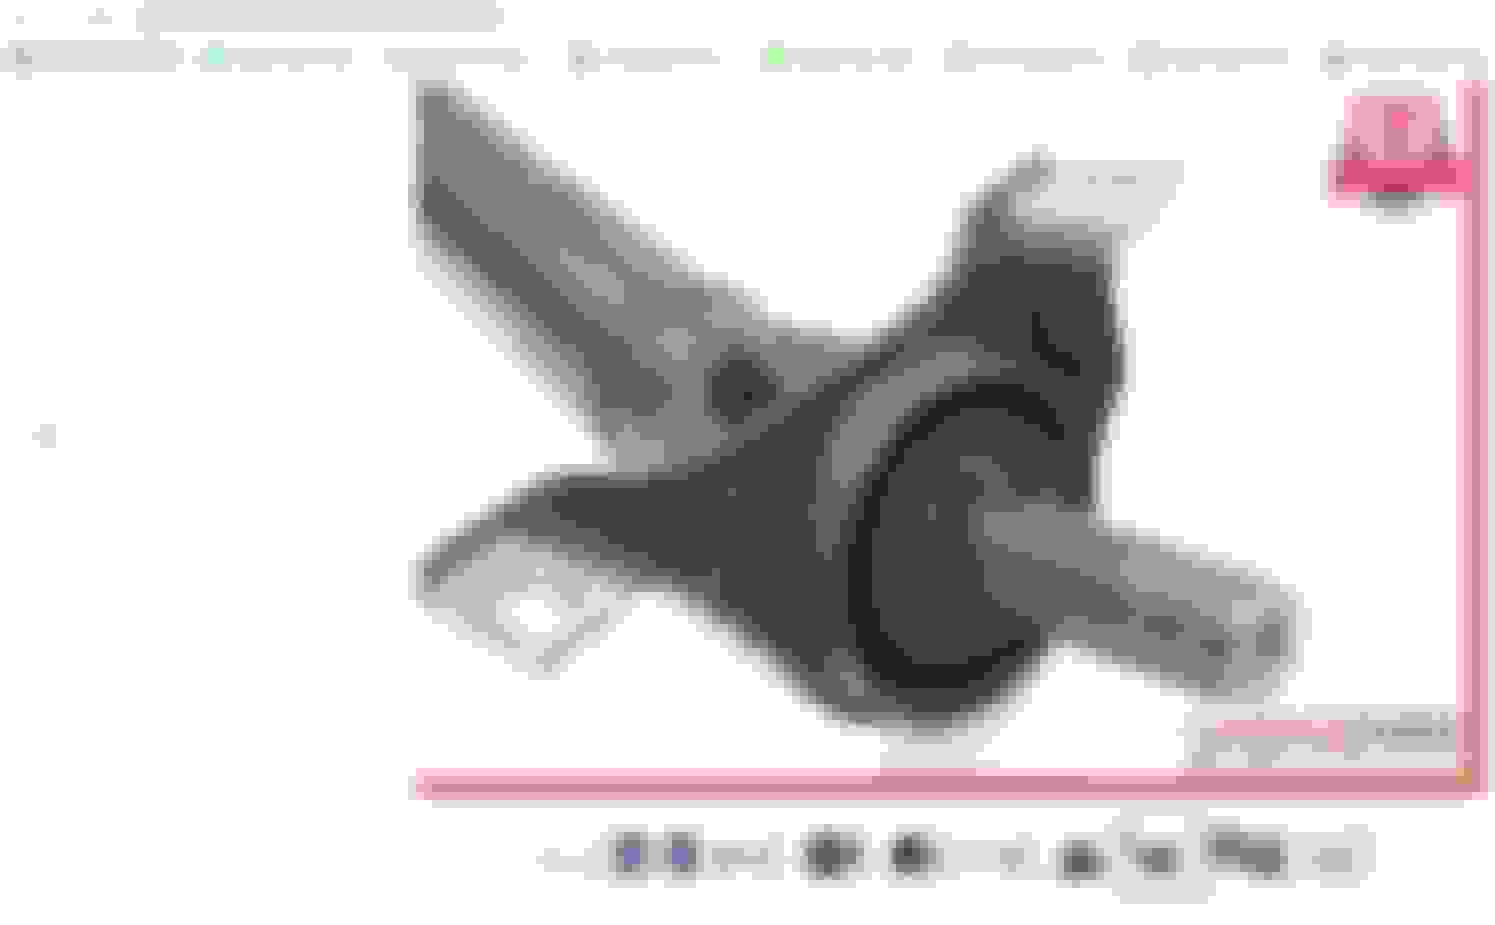
The wrinkle bearing ( rubber ) albeit it looks all 100% rubber, it is not. The rubber is NBR.
Its diameter holding the bearing OD, is actually a steel molded ring into the rubber.
I wonder why in EPC it is called wrinkle bearing this rubber assy, why not name it BEARING HOLDER, Dugggh!!!!!
Removing this old wrinkle bearing on a used car need more work.
Installation of a new wrinkle bearing is so easy, lubed it and "massage" to the ball-bearing OD and you are done. Very little force needed, no need special tool.
MB recommends one to use a bearing tracker/puller of extra long "L" shaped end and pull out the ball-bearing and the wrinkle bearing ( rubber ) will come off along with the ball-bearing.
And then use special push-out tool to remove the ball-bearing out of the wrinkle bearing ( rubber mount ).
What a waste of time. Throw these 2 out in the garbage bin and buy new ball-bearing and the rubber mount/wrinkle bearing ALREADY !!!
As I said, if new wrinkle bearing/rubber mount installation to ball-bearing, no need special tool. Installation of a new wrinkle bearing is so easy, lubed it and "massage" to the ball-bearing OD and you are done. Very little force needed, no need special tool.
So my bearing push tool ( using pipe ) is equal to MB recommended special tool below ....LOL
Will update when I am done testing the high speed ......................
.
Last edited by S-Prihadi; Aug 24, 2023 at 07:26 PM.
1) Is the part/driveshaft that failed OEM ?
2) Is your car lowering at high speed ? More than 30% of aerodynamic drag is produced from under the car typically.
1) Is the part/driveshaft that failed OEM ?
2) Is your car lowering at high speed ? More than 30% of aerodynamic drag is produced from under the car typically.
Great writeup !
01. It is explained well in post #9 . It is original untouched rubber boot , only rubber boot was the torn one due to heat and I spin them fast often hahaha .
The ball bearing and the wrinkle bearing aka bearing holder thingy is fine. I replaced these 2 also, because they are 9 years old, although only 38,000KM , both are cheap, not worth savings the money now and
I ended up replacing the wrinkle bearing/bearing holder which is rubber.... like 5 years later paying the labor and wasting my time.
02. My car is not airmatic, so it can't auto lower at high speed.
Mercedes SLR McLaren 722 S Is Extremely Rare Example Modified by McLaren
Slideshow: A one-of-one U.S.-spec Mercedes-Benz SLR McLaren Roadster became even rarer after a factory-backed transformation at McLaren's headquarters.


 .
.


 .......... I already ordered