When you click on links to various merchants on this site and make a purchase, this can result in this site earning a commission. Affiliate programs and affiliations include, but are not limited to, the eBay Partner Network.
Before I go into this deeper, I wanted to clear a couple things up:
1) The Factory instructions are the best to be followed despite the extensive amount of work involved in panel removal to get to the upper shock towers. I'm not saying my method is bad that many others have tried, but Mercedes R&D decided their way was the best method to do it. So I give them credit where it is due.
2) Now that I'm past that pleasantry crap - THERE IS NO RIGHT OR WRONG WAY TO DO THIS.
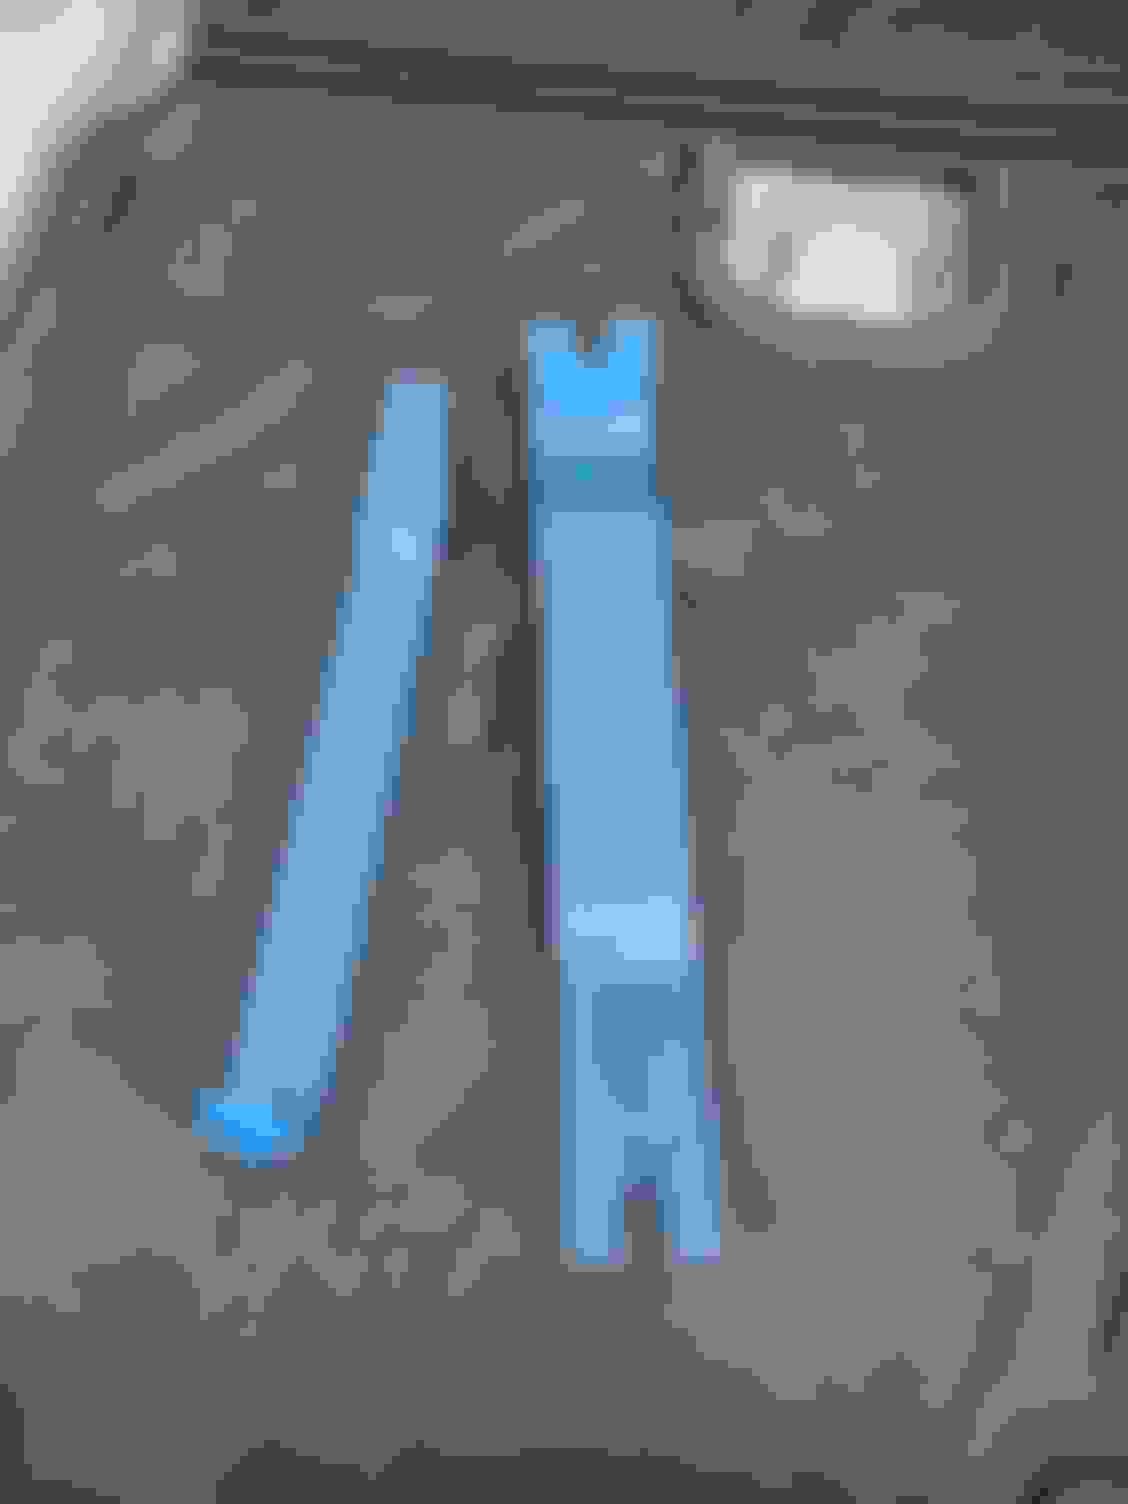
3) Yes you can remove the armrests by using panel pullers to pry it up. You will brake the tabs that fasten the armrest to the inner panel, but IT DOES NOT COMPROMISE the interior (unless you are a dumbass and try to pry it with the sharpest screwdriver in the world.)
4) You have to cut through insulation, and it's not a big deal since you can put it back. If you're OCD like me, just buy some Dynamat and tape it over the area you cut in case you hear a spider fart under the armrest you just removed to replace the shock.
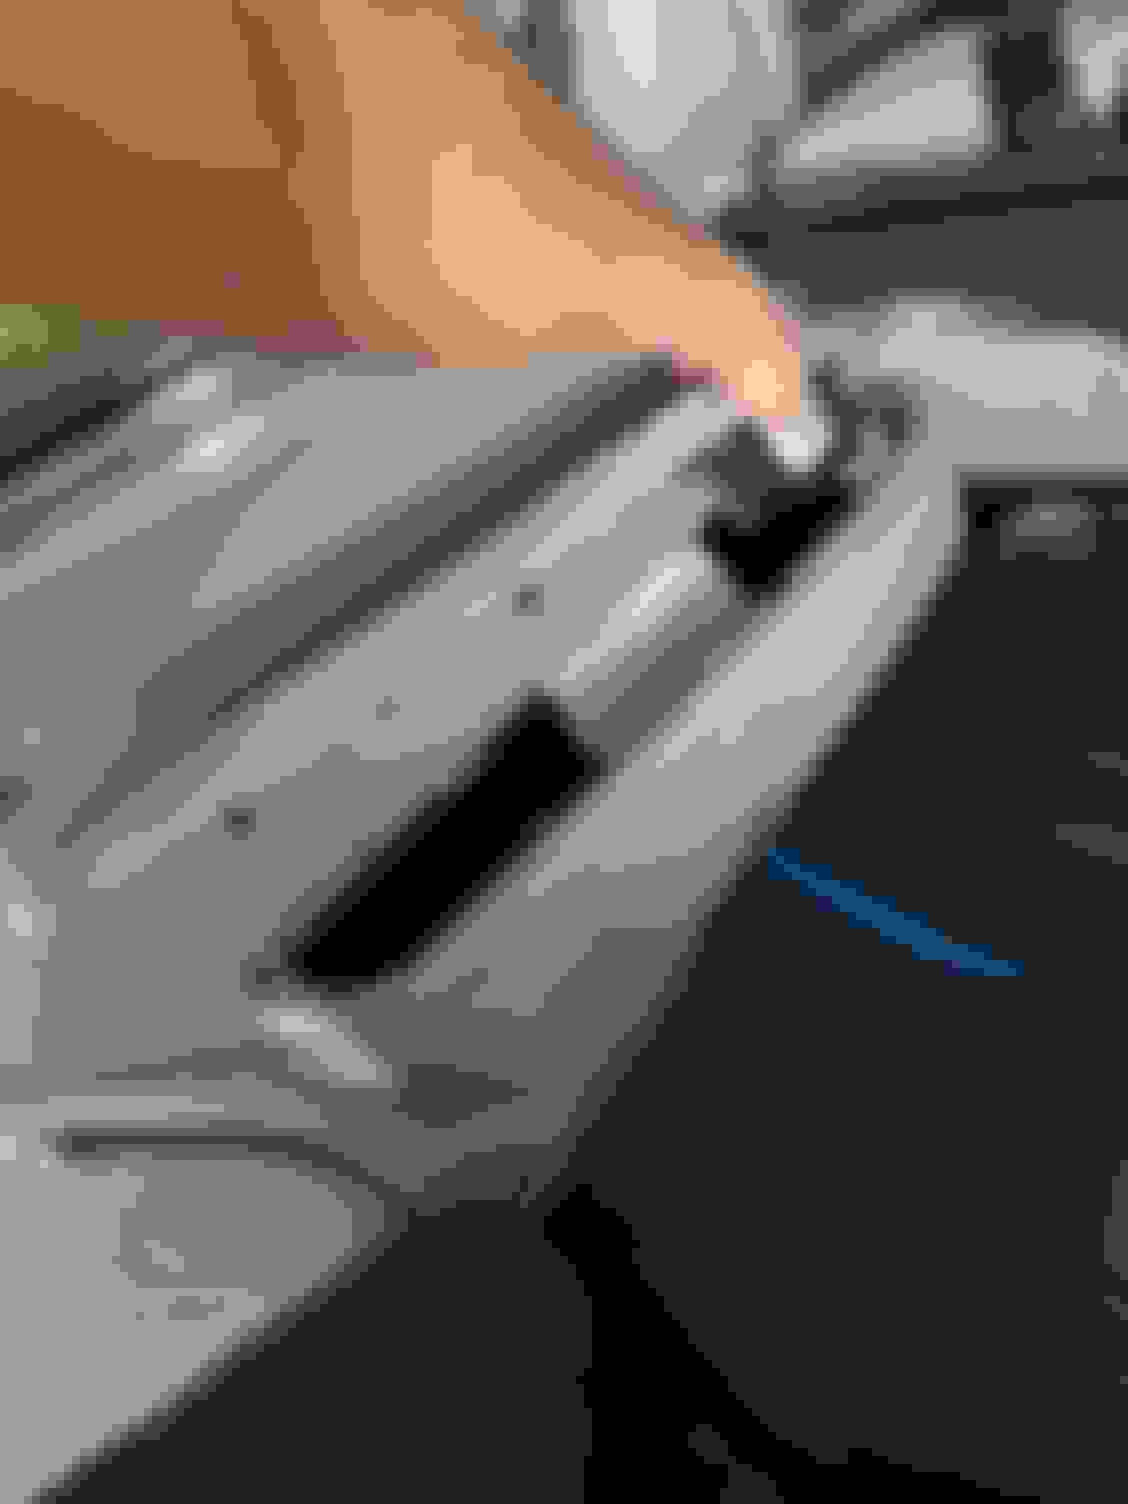
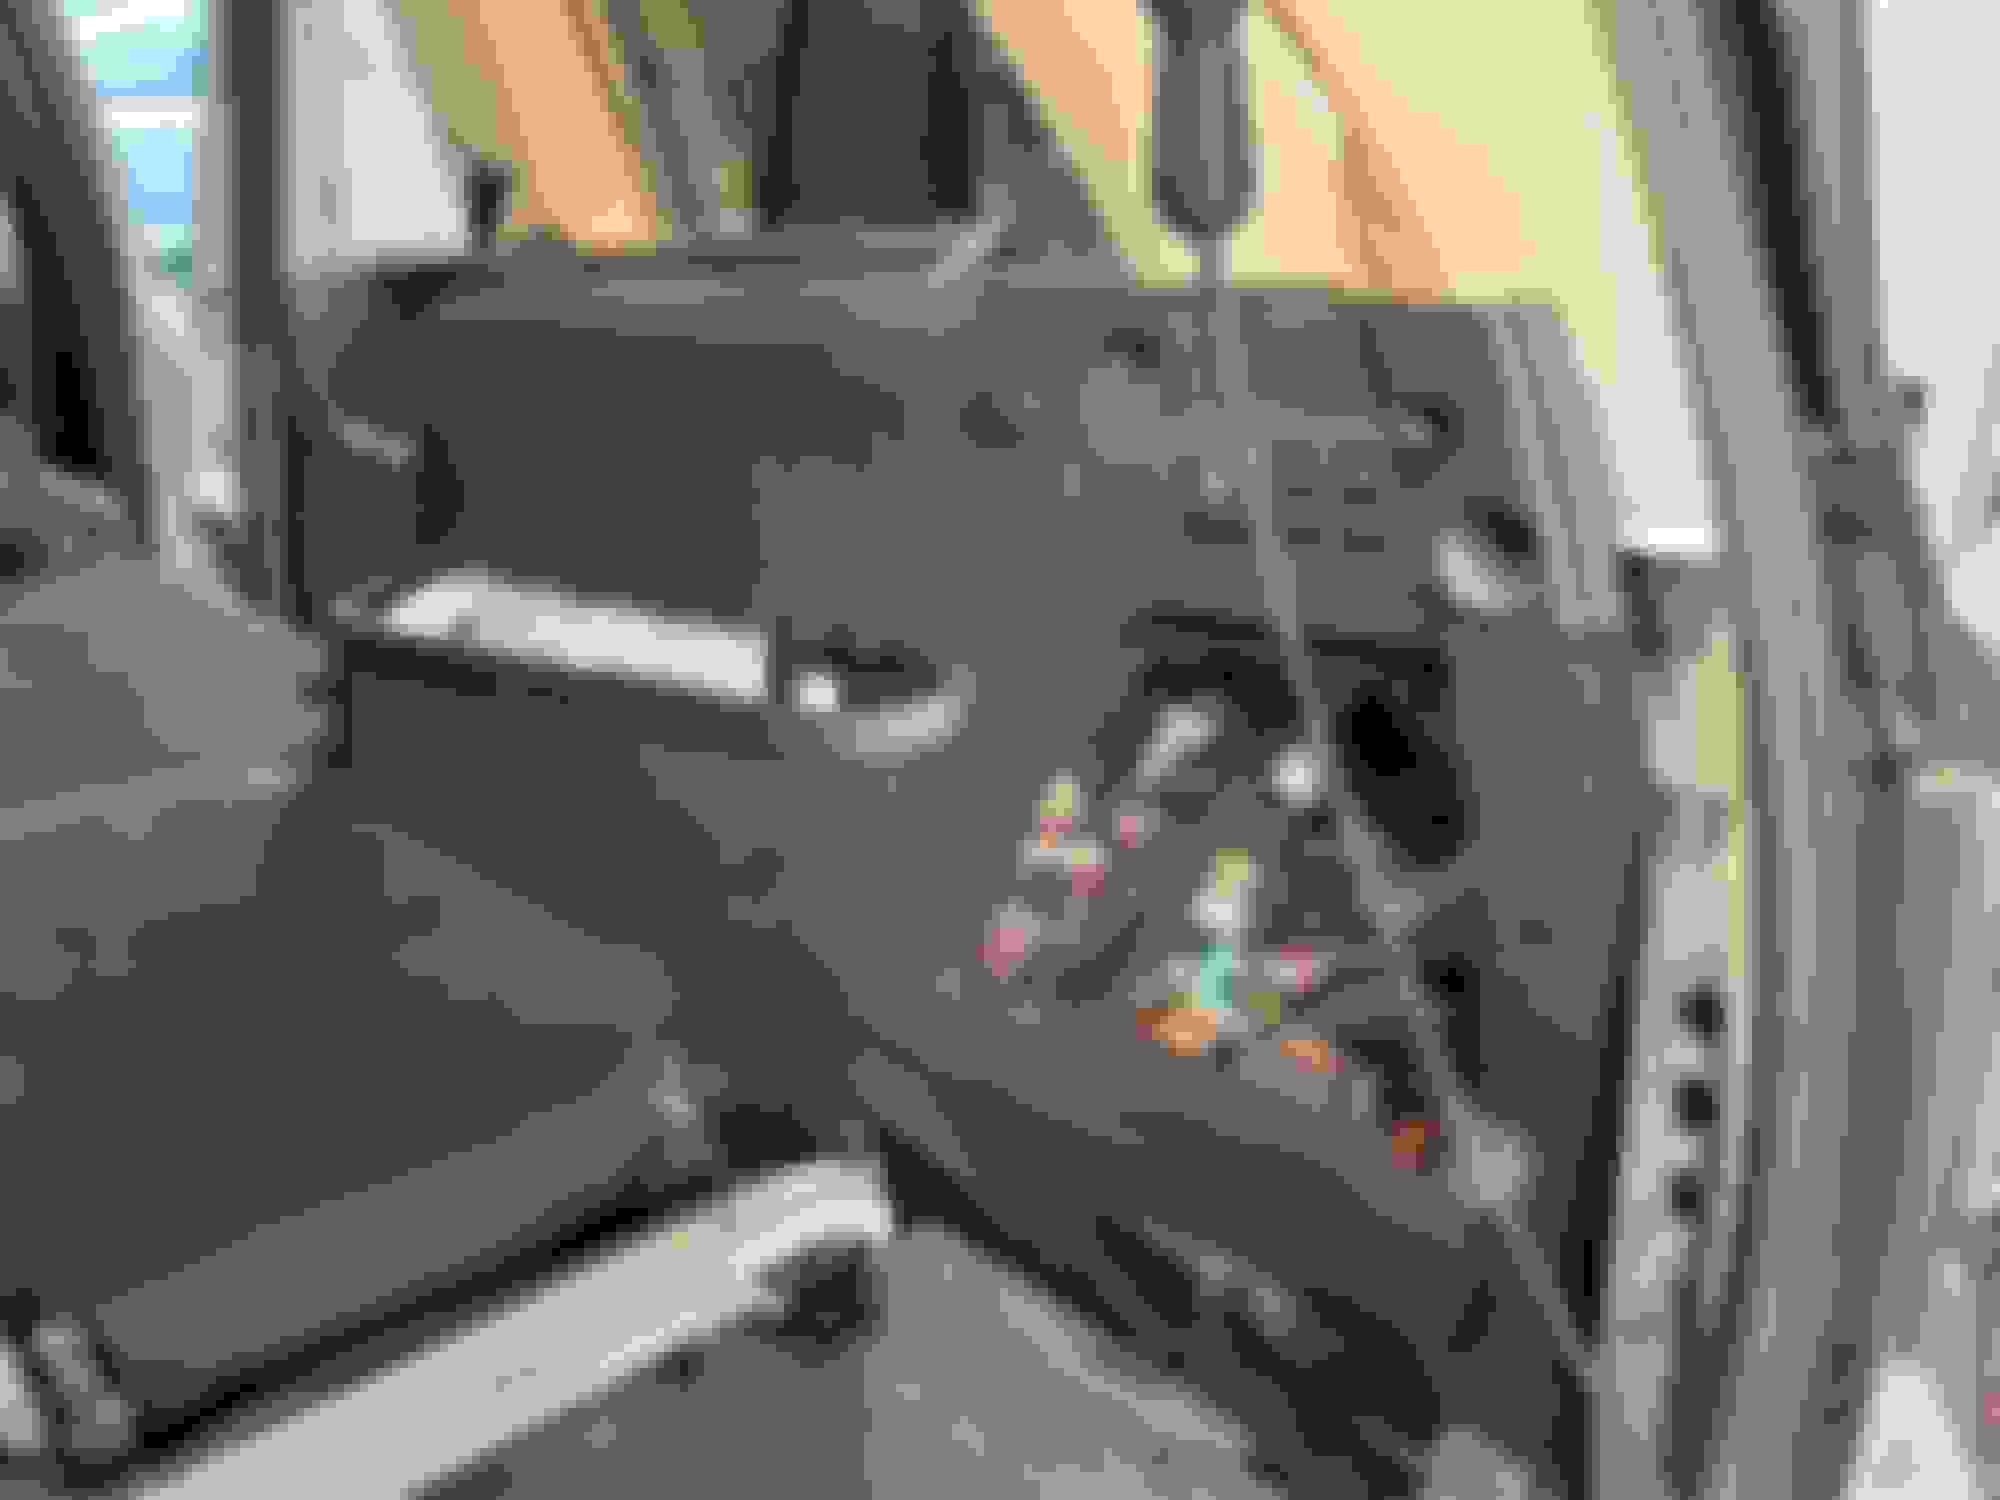
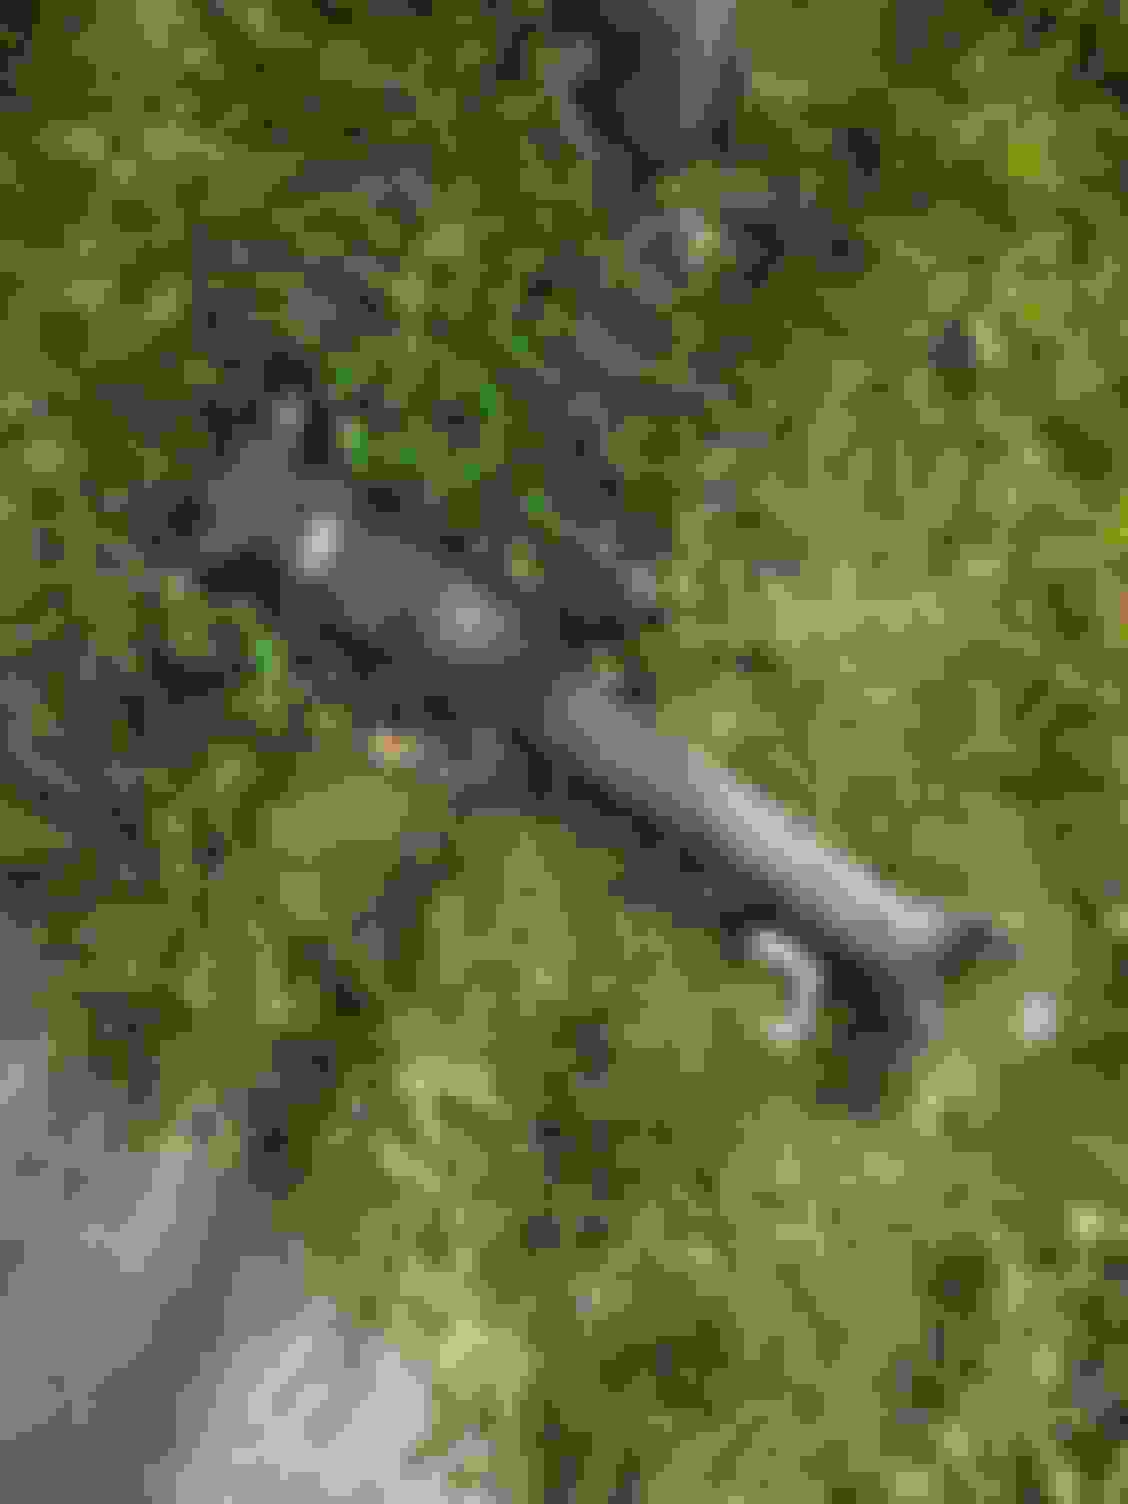
Passenger side.. Ooh a main wiring loom and Airmatic lines. Scary. Just don't have a shaky hand, drink some good alcohol to mellow you out and you'll be just fine.
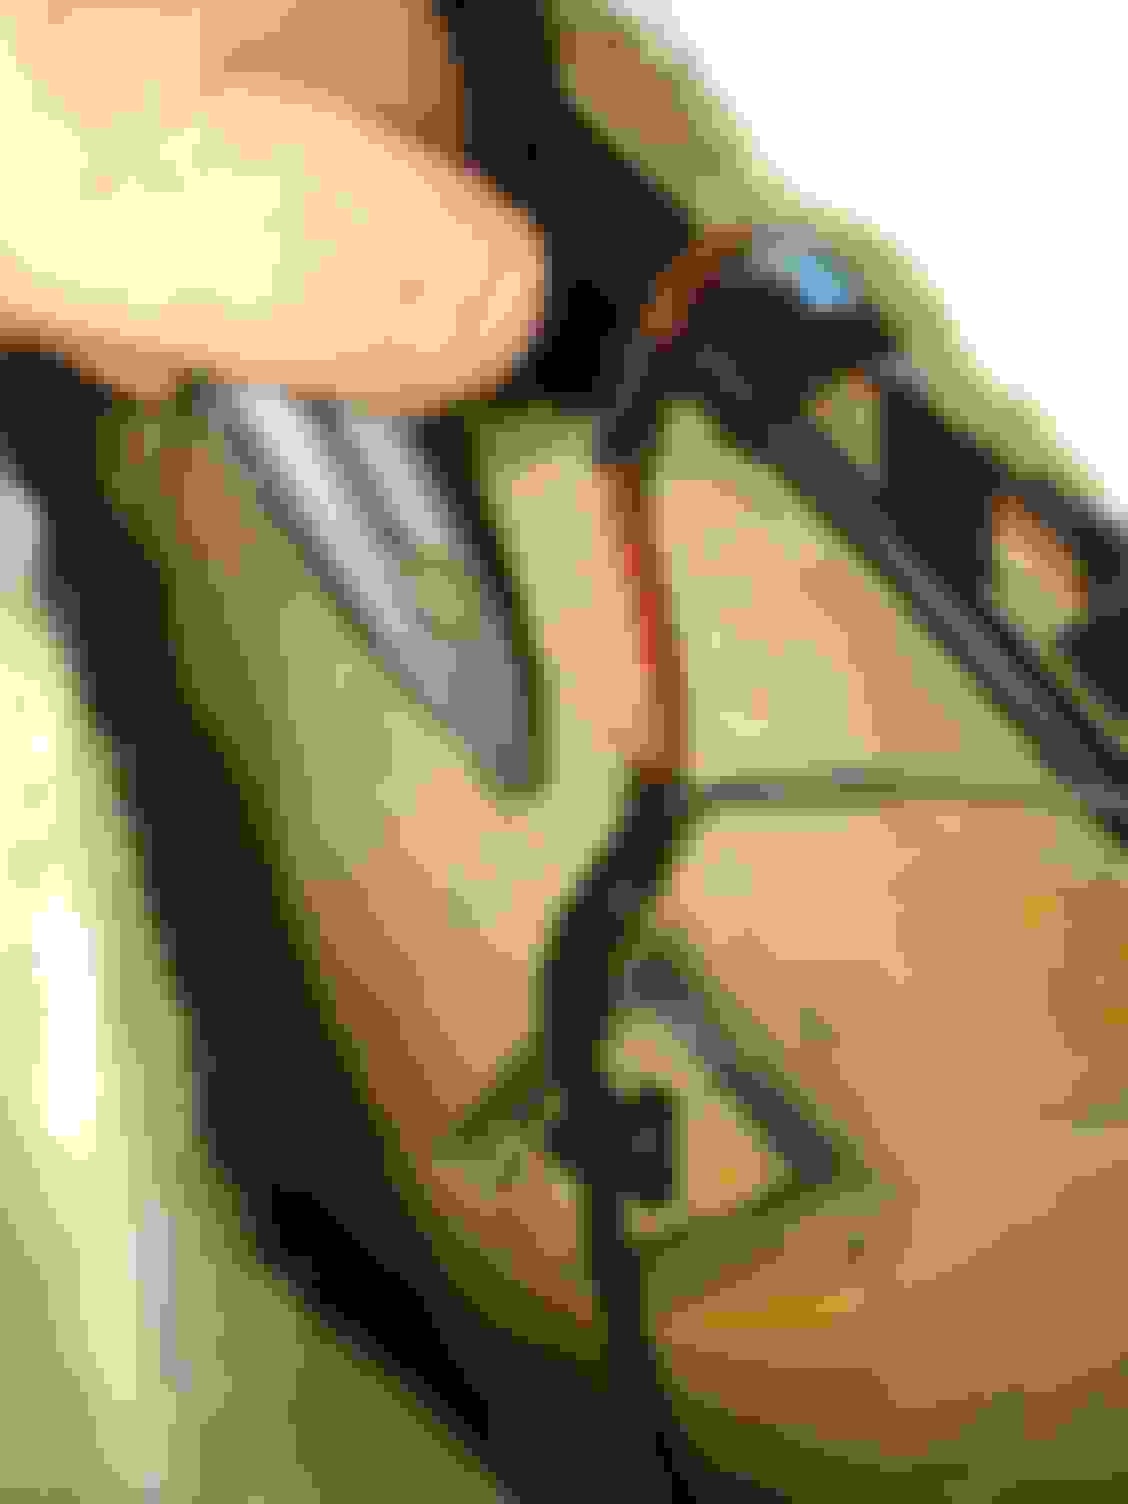
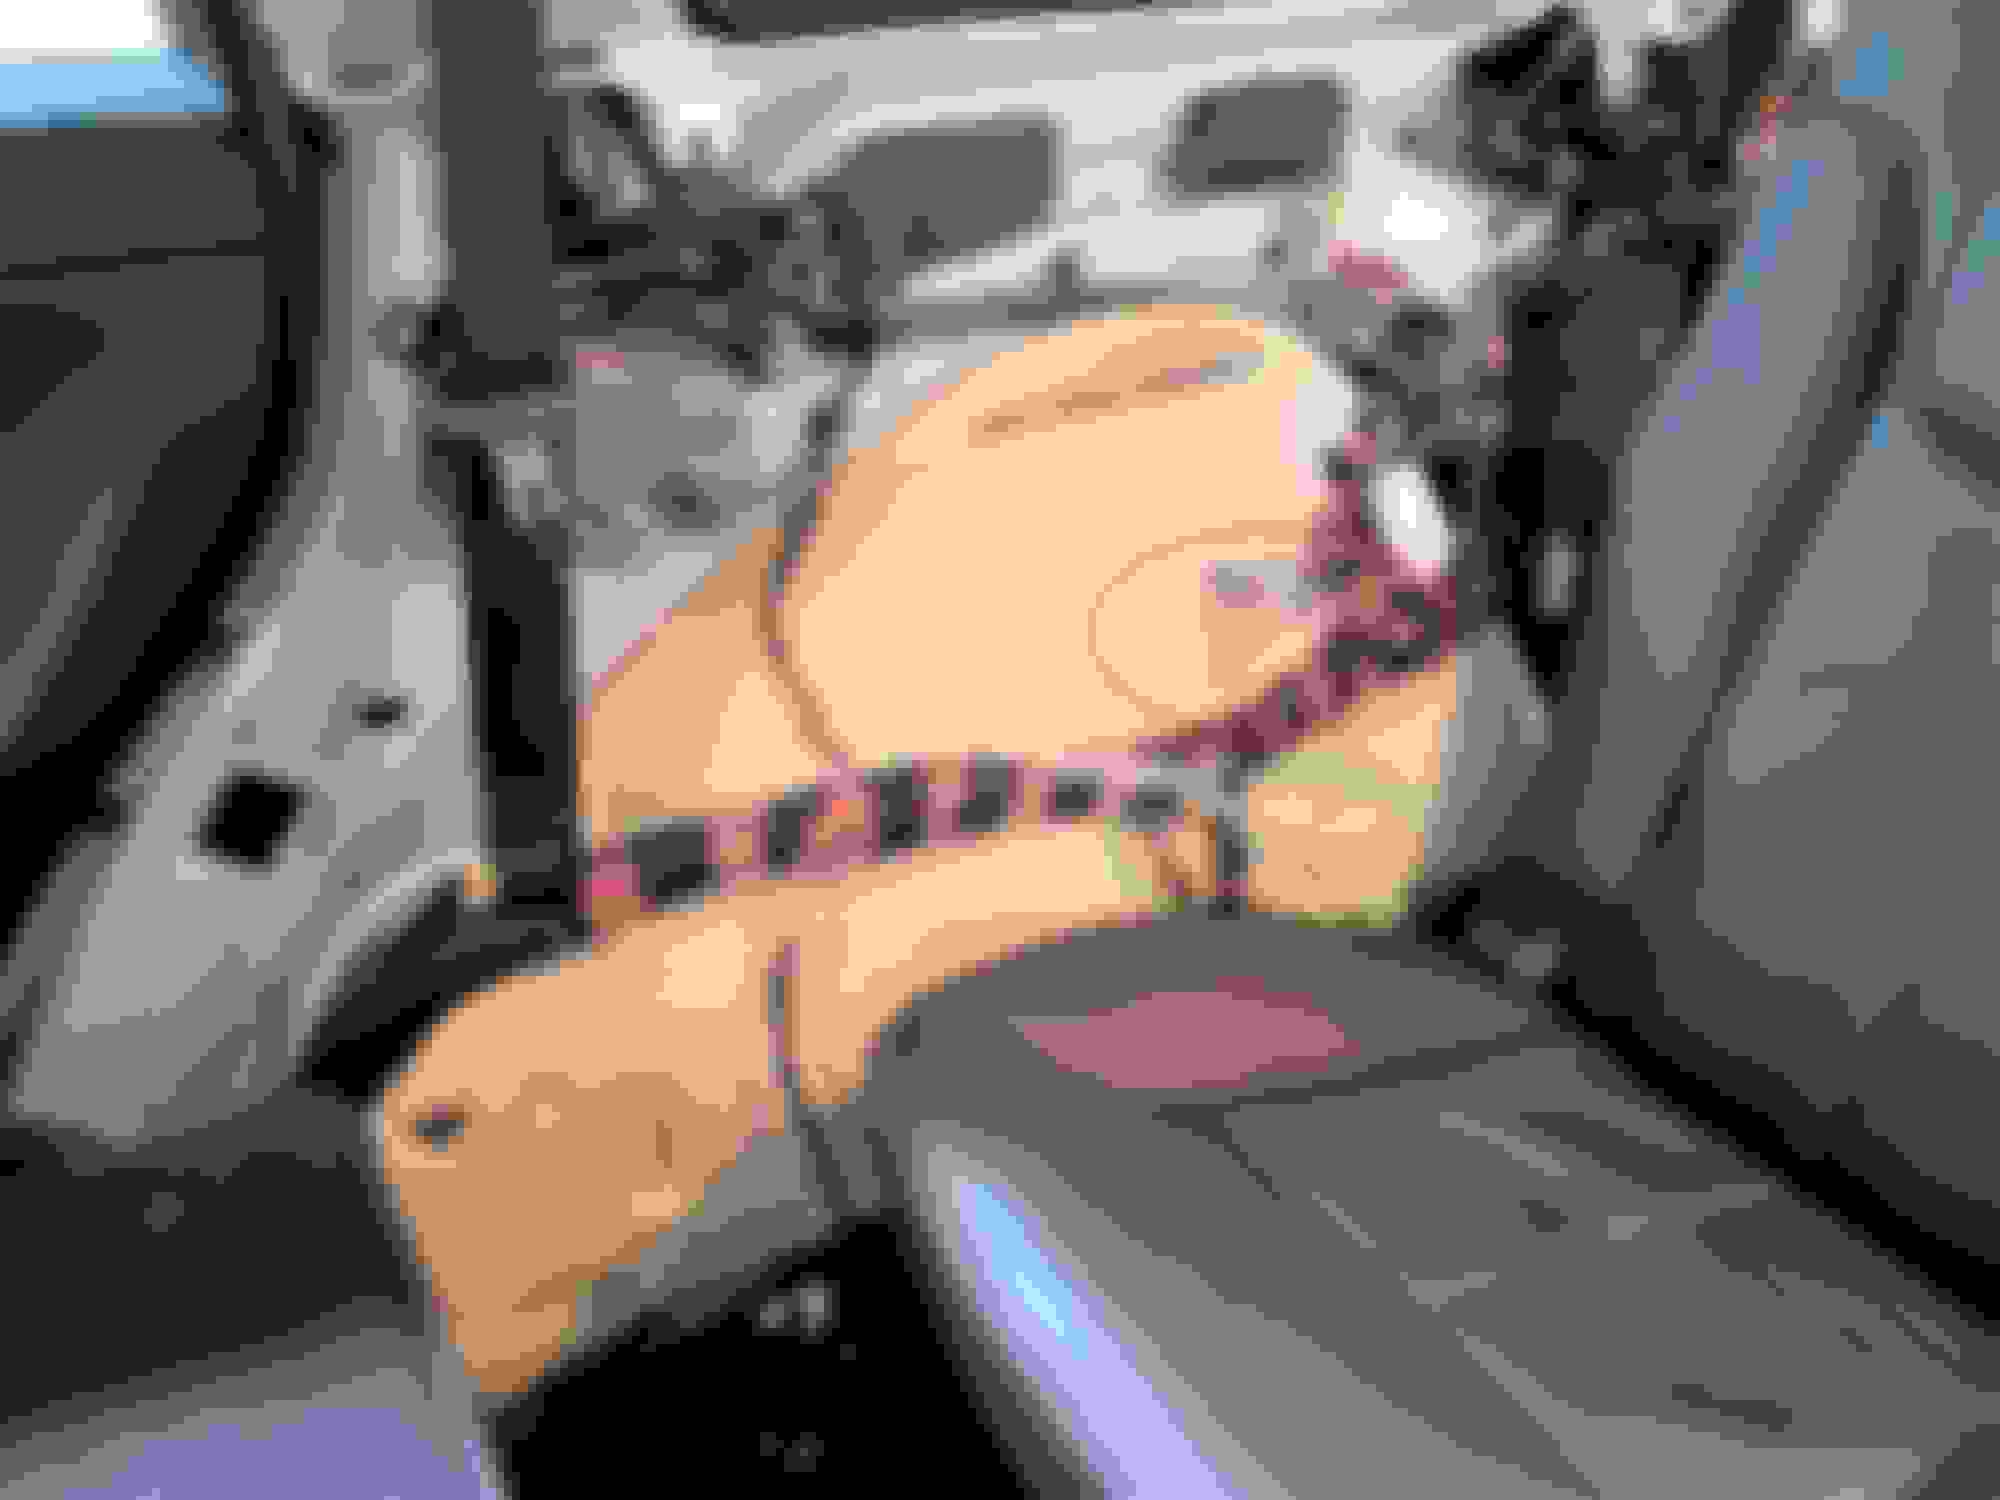
Now give yourself a pat on the back. You now have access through the top and you more than likely didn't cut your airlines if you don't see your wheel wells slammed into your tires like one of Cardi B's ugly rides.
I'll post the easy work on the bottom you have to do later this week. It's raining now and I want an ice cold beer.
I like your style. Post more often.
I am actually about to remove the third row seats entirely, so have little use for the armrests besides using them as covers for covert storage underneath.
Thank you, U, for that. It's nice, concise write-up. Question... the armrest cover looks to have (3) metal spring clips. If you knew where they were, would you be able to slide a thin tool in there (possibly a credit card or putty knife) and compress the clip to release it?
A little adhesive caulk - or even silicone - in a few key places should keep it secure and quiet.
Yes. This is exactly what I did. I used 2 panel pullers. The smaller one pressed the tab and released while I used the bigger puller to lift.
For adhesives to reduce rattles, you can use basic silicone where the MB Tex meets the plastic panels. Do a small dab on each corner, and one small in the middle. Install and wipe off any excess. Note the area where the metal tabs clip the armrest to the panel base do a good job at suppressing rattles as there was no adhesive used by the factory. Silicone on the panel wall side will silence any rattles. I hear more rattles from my son's stroller back there anyways.
Last edited by Uranium238; Oct 18, 2021 at 10:24 PM.
I did this job recently ... driver's side goes exactly as described above. But the passenger side was a real challenge for me.
Once I had the top arm rest removed, the wiring harness and the airmatic pressure lines were exposed.
I started digging for the shock top mounting nuts, but quickly realized that I was cutting in the wrong area. The shock mount is BELOW the wiring harness ( see RED and GREEN circles in pic). This massive wiring harness is thick and barely moves. I could not get around it to cut safely. I decided it was too risky ...
I removed the entire side panel. It's actually not too bad, just pull gently and start in the back. Removal of the entire panel is easier if the you lay the 3rd row seat lumbar down (mine is electric and needed to be done before the switch in the panel was disconnected). Once the panel is removed, you have much better access to the shock mounting location and no issues with the possibility of cutting into the wiring harness or air pressure lines! It also allows you to repair the foam after the job is done.
Having done this job per the WIS the only thing I�m really worried about is losing one of those nuts upon reassembling per this method. Slim to no chance you�ll get em back if you lose one.
and then they�ll be rattling back there for eternity.
Having done this job per the WIS the only thing I�m really worried about is losing one of those nuts upon reassembling per this method. Slim to no chance you�ll get em back if you lose one.
and then they�ll be rattling back there for eternity.
I had the same concern and seriously thought about running to the hardware store and getting new self locking nuts ..., because the proper way to do this is to always replace self locking hardware.
I didn't bother: I used some blue loctite and tightened to torque.
After breaking the top nuts loose, use thick multipurpose grease inside a socket which will grab the nut as you remove it. I actually have no trouble shoving my hand in either side of the armrest and spinning the nuts off without losing them. Again, not a hard job.
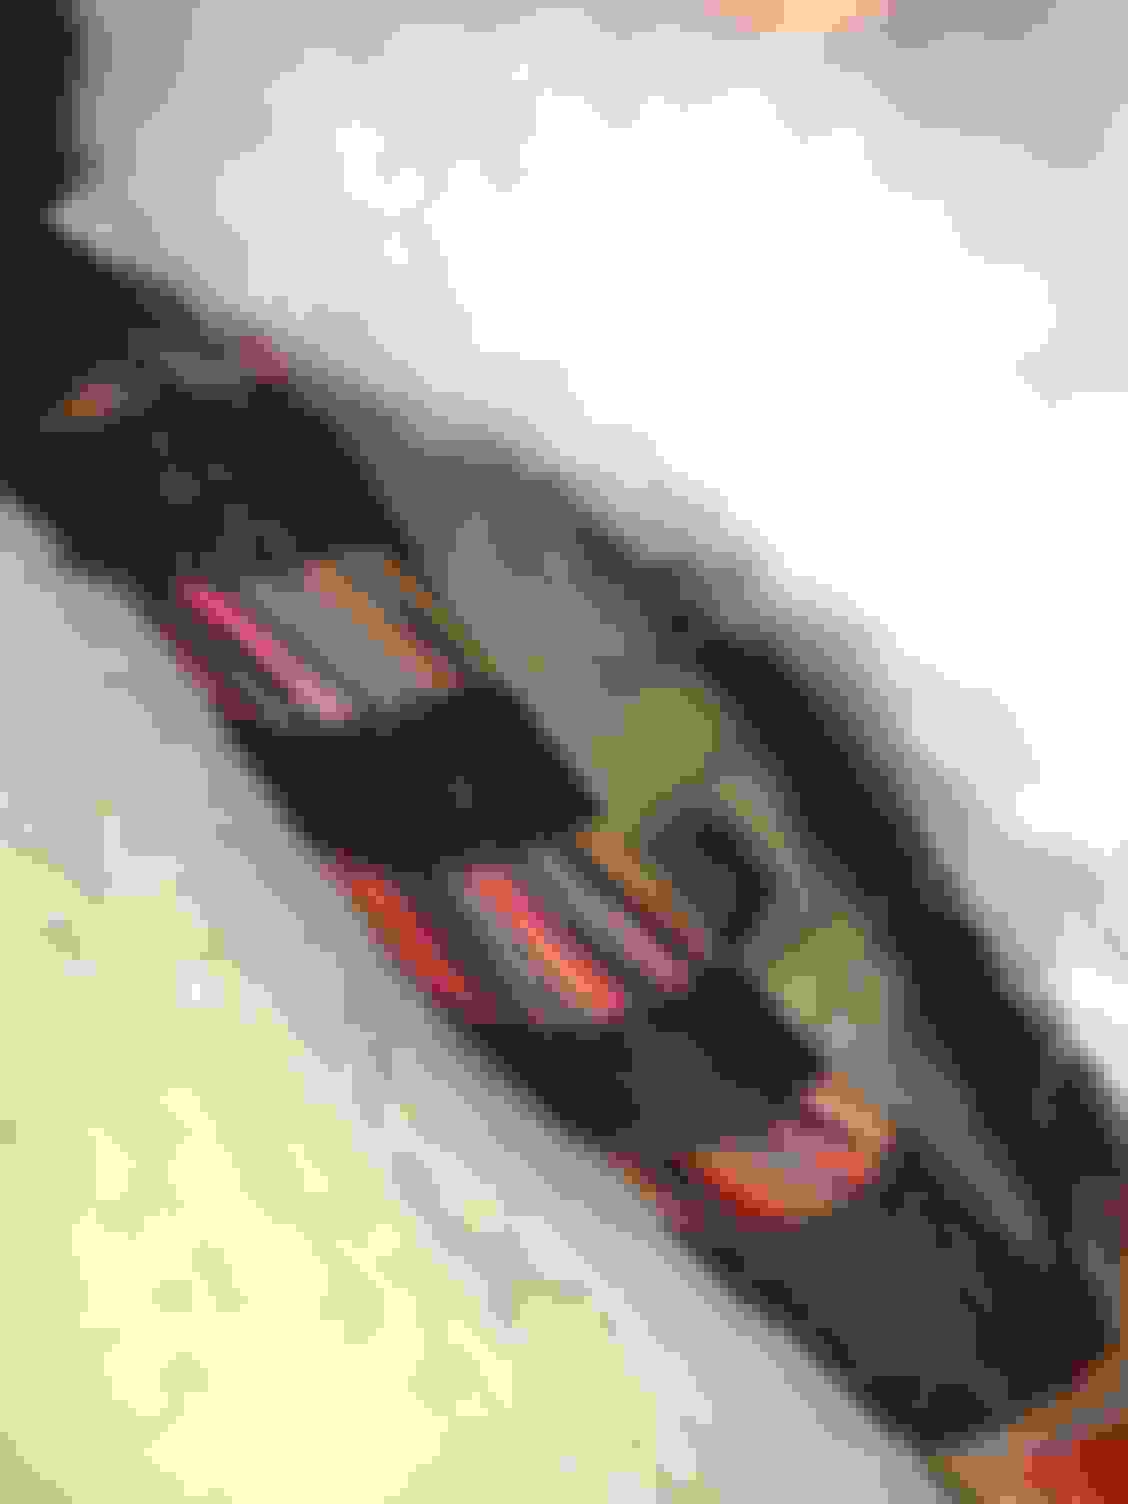
Use the picture I took above to identify the passenger side shock top below the wiring harness and just behind the air lines. It's still raining where I'm at so I won't be able to tackle this job until later. Right now I'm doing cooling hoses in a w211 in the garage until this whole storm blows over.
Last edited by Uranium238; Oct 20, 2021 at 07:16 PM.
I did this myself 2 years ago....not gonna lie, my arms look like I had a bad dream with Freddy Krueger when it was done. There was some difficulty with getting one of the nuts off below the armrest foam (I think I tried to do it with minimal foam cutting (I know that isn't super important)...but this process still seemed WAY easier than taking all the other crap apart.
I did this myself 2 years ago....not gonna lie, my arms look like I had a bad dream with Freddy Krueger when it was done. There was some difficulty with getting one of the nuts off below the armrest foam (I think I tried to do it with minimal foam cutting (I know that isn't super important)...but this process still seemed WAY easier than taking all the other crap apart.
I did both:
Through the arm rest on driver's side (easy) and ...
... panel off on the passenger side. Taking the panel off on passenger side was easier.
Consider the damage or cost if you cut through the wiring harness or air lines!
Another disadvantage: the 3rd row seat arm rests do not snap in place where the tabs have been broken ... if you push against the panel wall, the arm rest comes loose ...
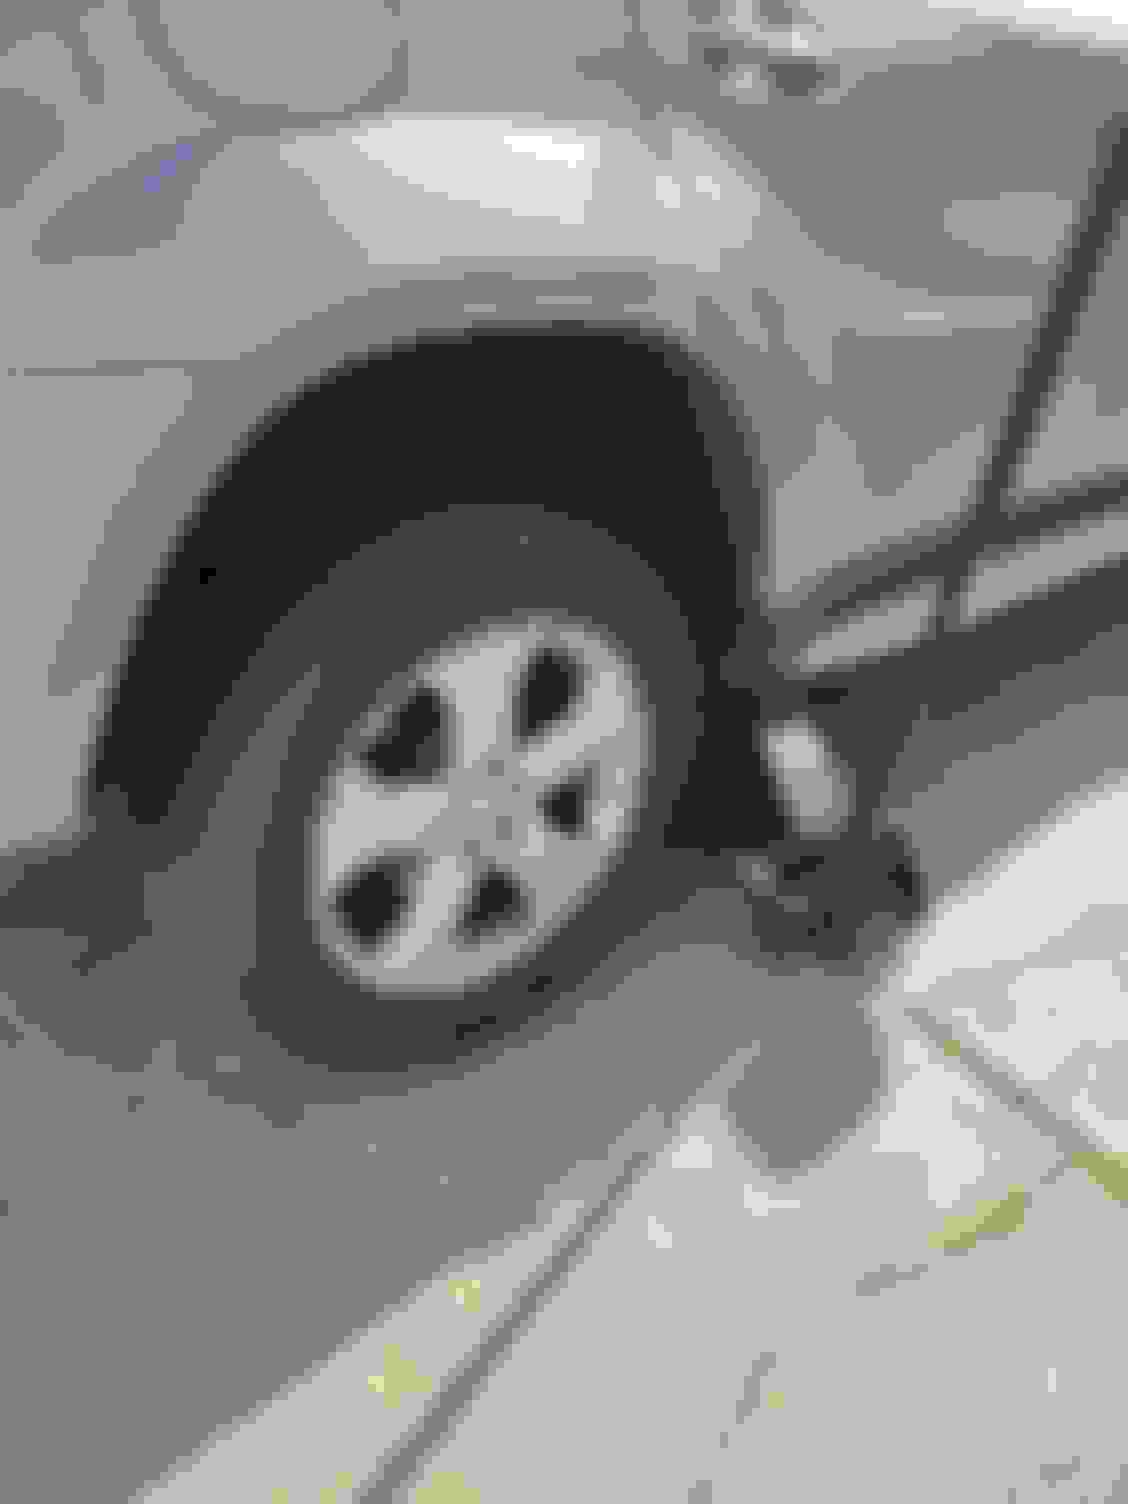
Bumping after a while due to non-car related issues. Let's start on the bottom now and get the wheel off. You will need 2 floor jacks as one will support the lower control arm as you lower it to remove the shock, and raise it to install. Undo the 2 10mm nuts holding the wheel liner. This allows you to pull it back slightly to remove the shock and guide the replacement up into the body.
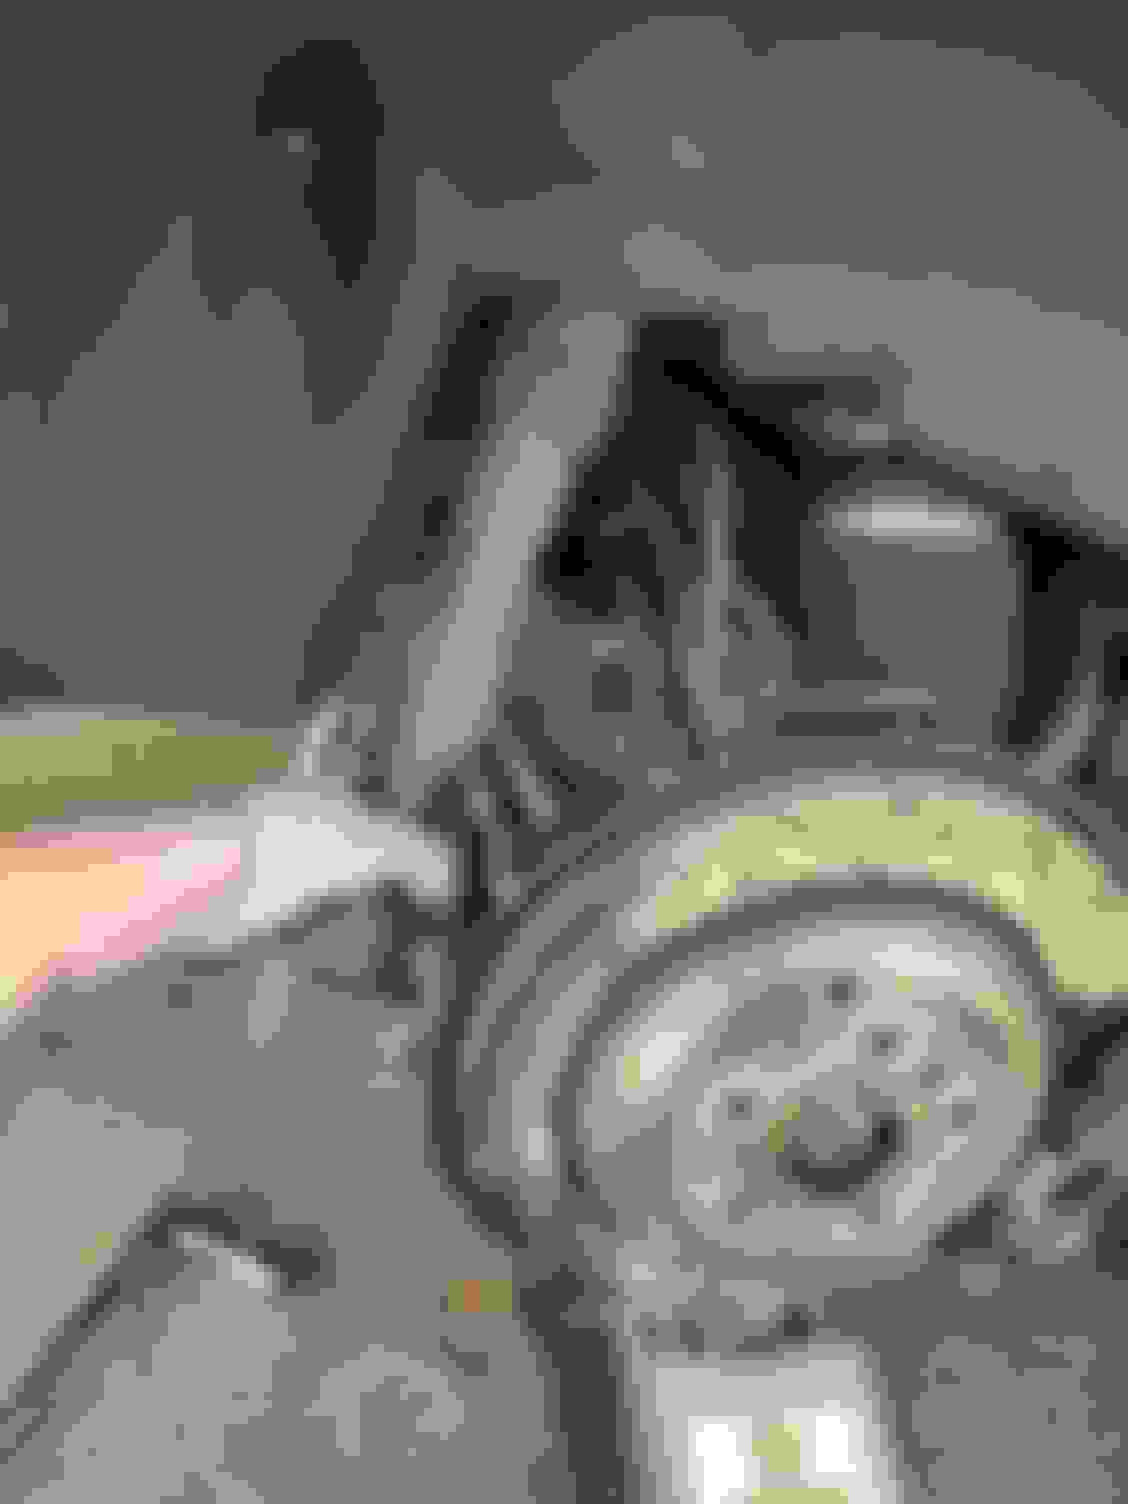
Loosen but do not remove the lower shock bolt. You will need a 24mm wrench and socket. You should probably buy an electric impact wrench for this job if you have not done so. Don't be a cheap ***... it will pay for itself. Harbor Freight will work, but I like my Kobalt from Lowe's. It's blue, and came out the other side of the factory as the Harbor Freight one from China... Where else do you think cheap impact tools come from?
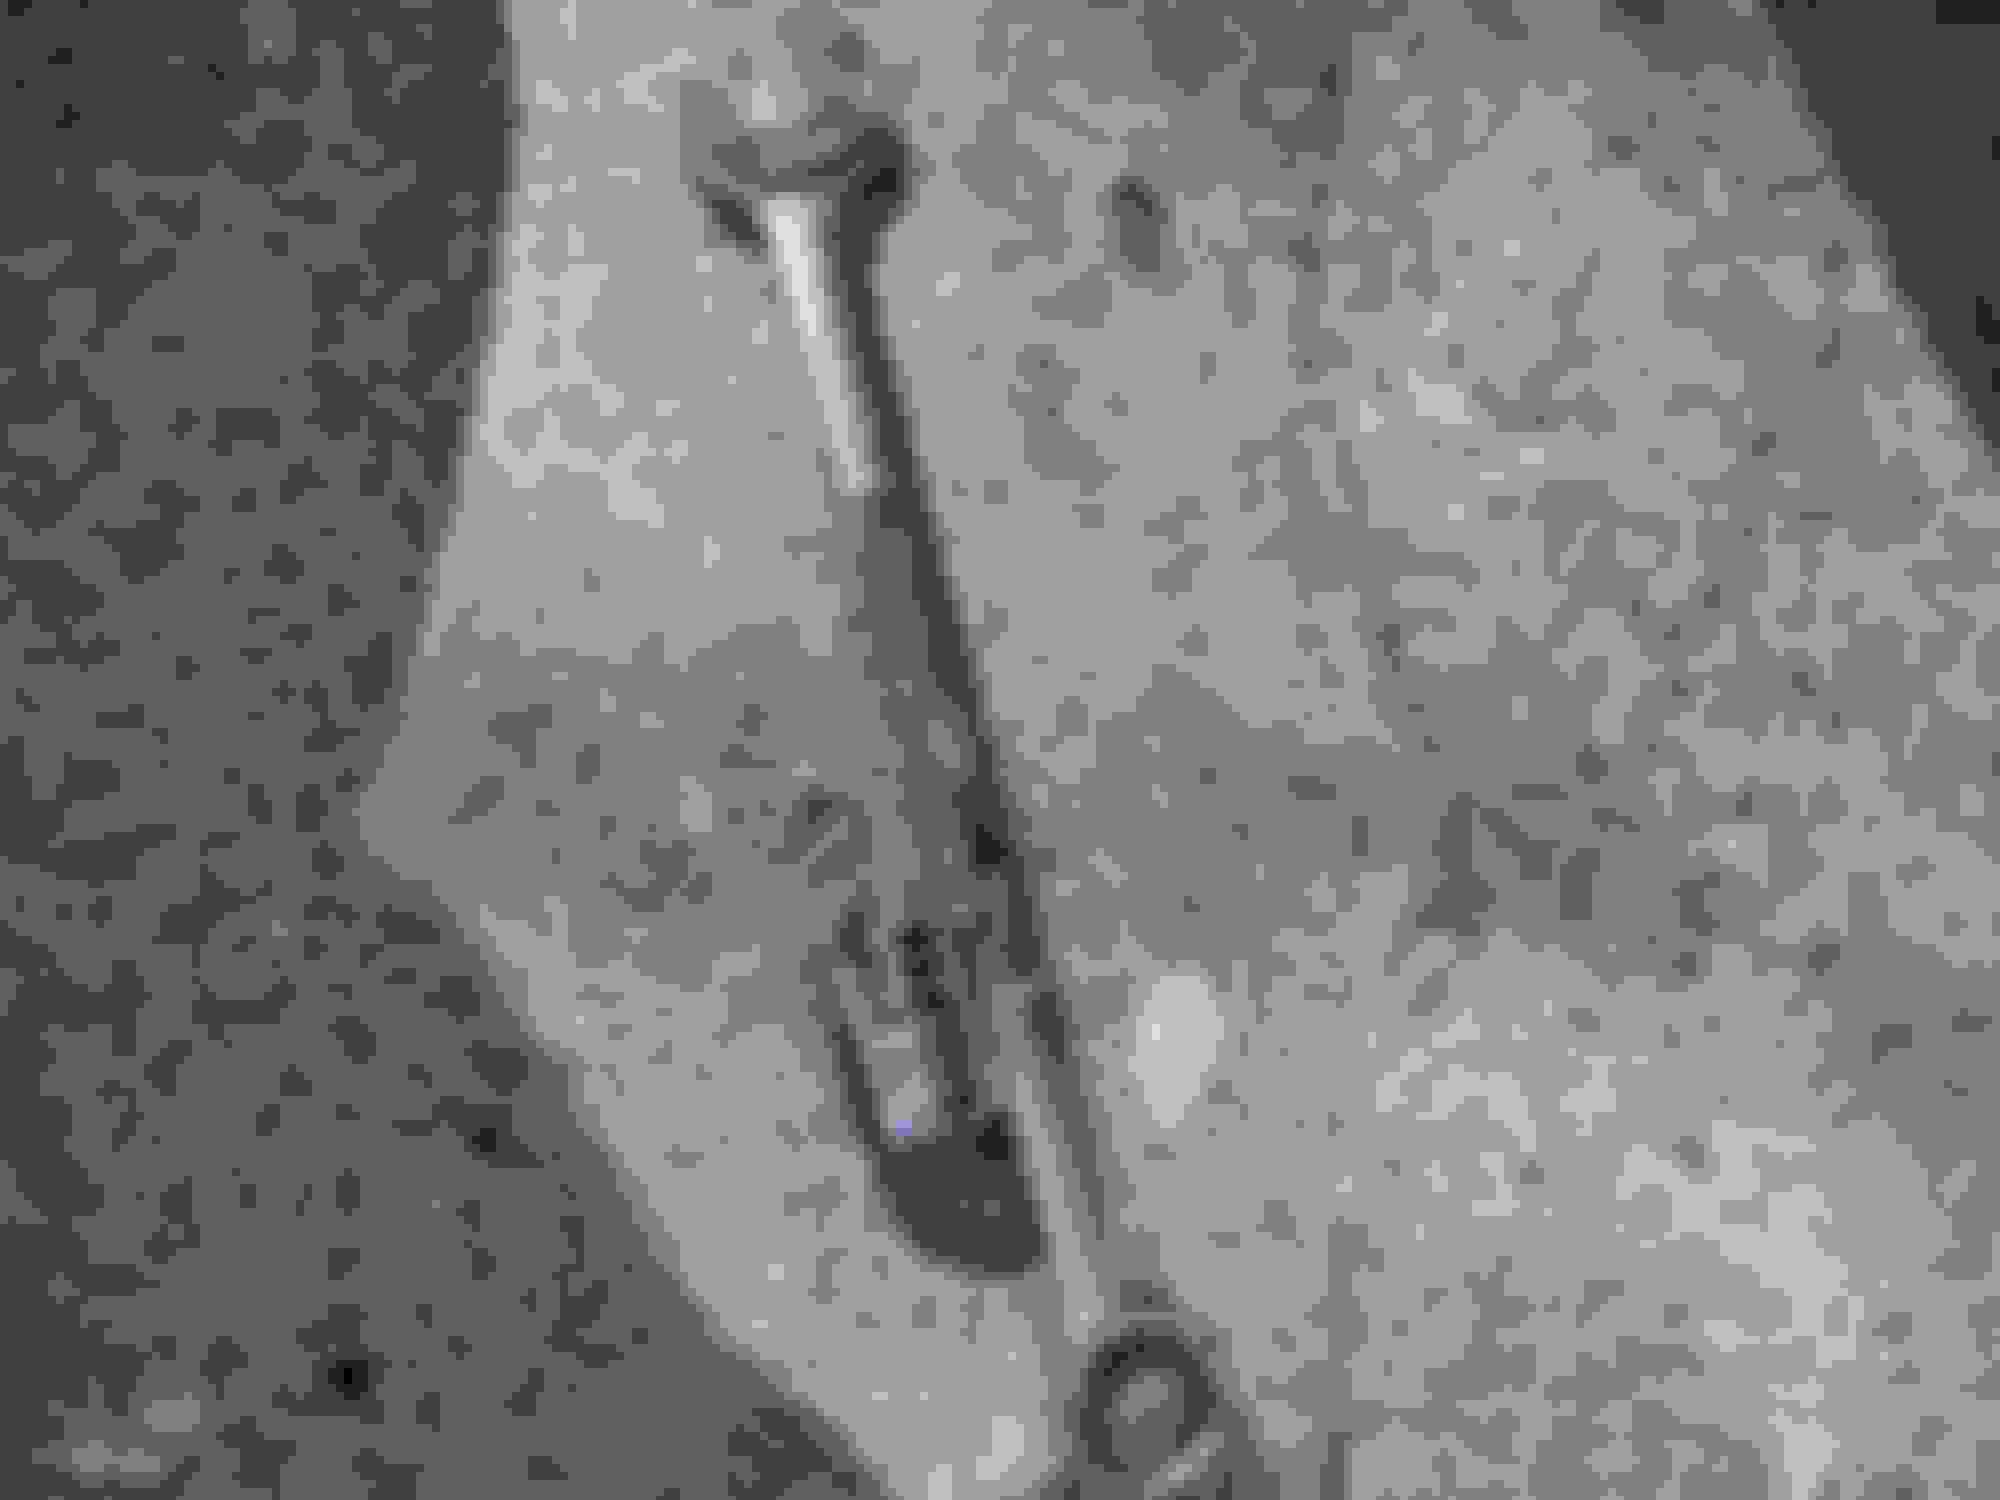
Note that there is a castle nut (or similar) which provides locking capability onto the shock. I reused mine after confirming the tabs were not spread wide open like a flower.
Last edited by Uranium238; Mar 3, 2022 at 01:53 PM.
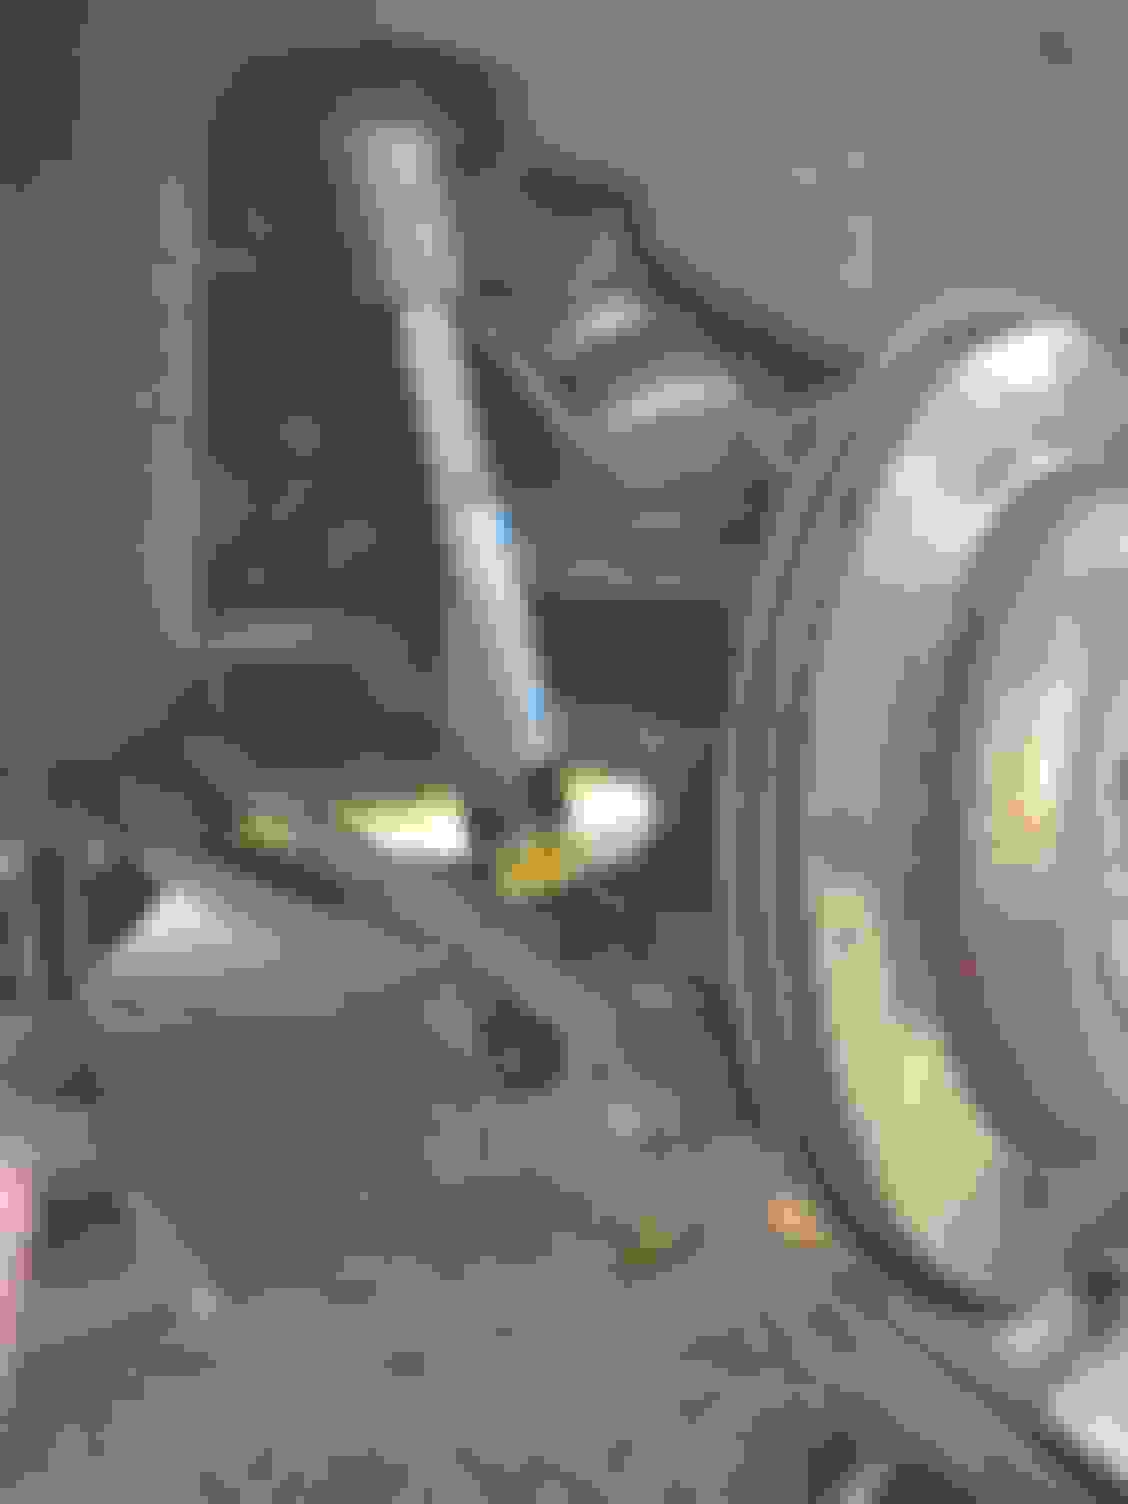
Let's move back up to to the cargo area and remove the nuts on the top of the shock. I didn't really have any issues with clearance despite how tight it looks.
NOTE - I recommend you jack the lower control arm up to ease the tension on the top 13mm nuts. If the shock is extended, the nuts want to pull out, making it harder to loosen, or even come off and fall into the netherworld of the body.
Given there is a black plate covering access to the rear nut, a universal makes it easier. If you haven't taken a sip of beer yet, do so afterward. Or if you're like me and brought it in the hatch with you, slam it down. Next up we take the shock out by lowering the control arm slightly.
Ok let's pull this old shock out now. Finally remove the 24mm bolt and nut attaching the lower shock. Lower the control arm slightly, causing the tower to separate from the body. Don't lower it too much. Compress the shock with your hands. Mine still had some life in it so it needed a little more compression. Hope y'all are your Wheaties this morning.
Place that old shock aside and change your gloves so you don't get brake dust all over the new shock. If your wife or girlfriend is around watching you like mine was, be sure you smack that booty and leave a nice grimy hand print to let her know she's yours.
Get your new shock out. This is where the fun begins. If you lowered your control arm to get the old one out, it's easy to pop the new one in with a little compression to clear the lower arm.
Insert the top first and align the tower studs as best as you can with the holes in the body. Next, run your 24mm bolt and nut through the shock and lower arm, tighten but do not torque!
As you raise the control arm, guide the top of the shock into the body holes. You can jump up in the cargo area to verify the shock is in correctly.
Thread the nuts in the top studs of the shock and tighten. Once you are done, you can now tighten and torque the large 24mm bolt and nut on the bottom of the shock.
Lower the control arm, put your wheel back on. You are done. Pat yourself on the back. Now you have wiring to evade on the passenger side. Get another beer.
You should be a beer or 5 in now like I was and ready to work on the passenger side. Jack it up as [safe] as you can and use that second jack for the lower control arm again. Pretty much the same process until you get into the interior again.
Alright, final run now.... Be glad you're not paying someone to pull the panels off your truck, SUV whatever at the dealer. Take that difference in cash and go buy something nice for the wife, or a steak and lobster dinner and some "5-star" restaurant with a watered down martini or Manhattan.
Open the armrest if you closed it before to keep your kids from sneaking and dropping Legos in. Embrace the wiring and Airmatic lines in front of you...
Ooh scary...right? WRONG! There is plenty of clearance to get your ratchet in there and loosen those nuts, assuming you cut the insulation back enough like I did. If you're good with your hands like I am ('that's what she said') you can thread the nuts off the top towers and set them aside.
Bravo. Now take the 24mm but and bolt off the bottom of the shock next and lower the control arm down enough to pull the shock.
Now that you removed the 24mm nut and bolt, lower the arm and pull the shock out. Get your new one, and slap the baby back in there! Reinstall the 24mm hardware but don't tighten until the top nuts are on. Raise the control arm and guide the top studs into the body correctly.
Everybody grab your nuts, and thread them onto the shock tower studs (what do you think I meant, really?). Tighten everything up on top. Make your way back down to the lower arm to tighten and torque the 24mm hardware.
I recommend double checking your work and tightness before putting the wheel back on and lowering the car slowly so you don't freak out the Airmatic control system.
All right? Great. Put the insulation back in, the rubber foam one you cut out will need to be glued back in. I left mine out. Not a big deal and the noise does not exceed what's going on in the passenger seat while I speed down the freeway.
Rattles in the armrest? Well guess what guys, I don't have any. I didn't use glue. That's probably because I was surgical in the removal of them with my prying tools.
Now that you saved all that money, go get your steak and lobster, a gift for the spouse for tolerating 2 hours work only and remind her that MB would've gutted the interior and sucked your wallets dry.
Thats it. Done. Well bye.
Last edited by Uranium238; Mar 3, 2022 at 01:47 PM.
Terrific writeup, complete with the sense of humor we all need whilst dealing with these cantankerous beasts. Thanks. I will definitely be referring back when I go to do my rear shocks, especially considering I am going to be eliminating the third row seats to enable additional cargo space.
Mercedes SLR McLaren 722 S Is Extremely Rare Example Modified by McLaren
Slideshow: A one-of-one U.S.-spec Mercedes-Benz SLR McLaren Roadster became even rarer after a factory-backed transformation at McLaren's headquarters.