When you click on links to various merchants on this site and make a purchase, this can result in this site earning a commission. Affiliate programs and affiliations include, but are not limited to, the eBay Partner Network.
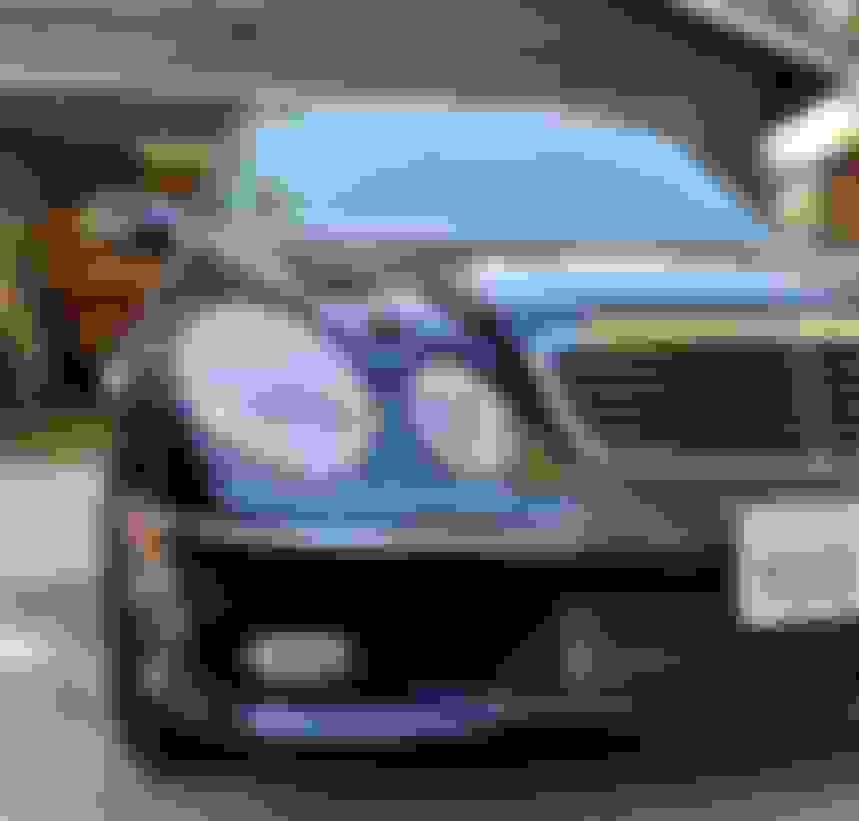
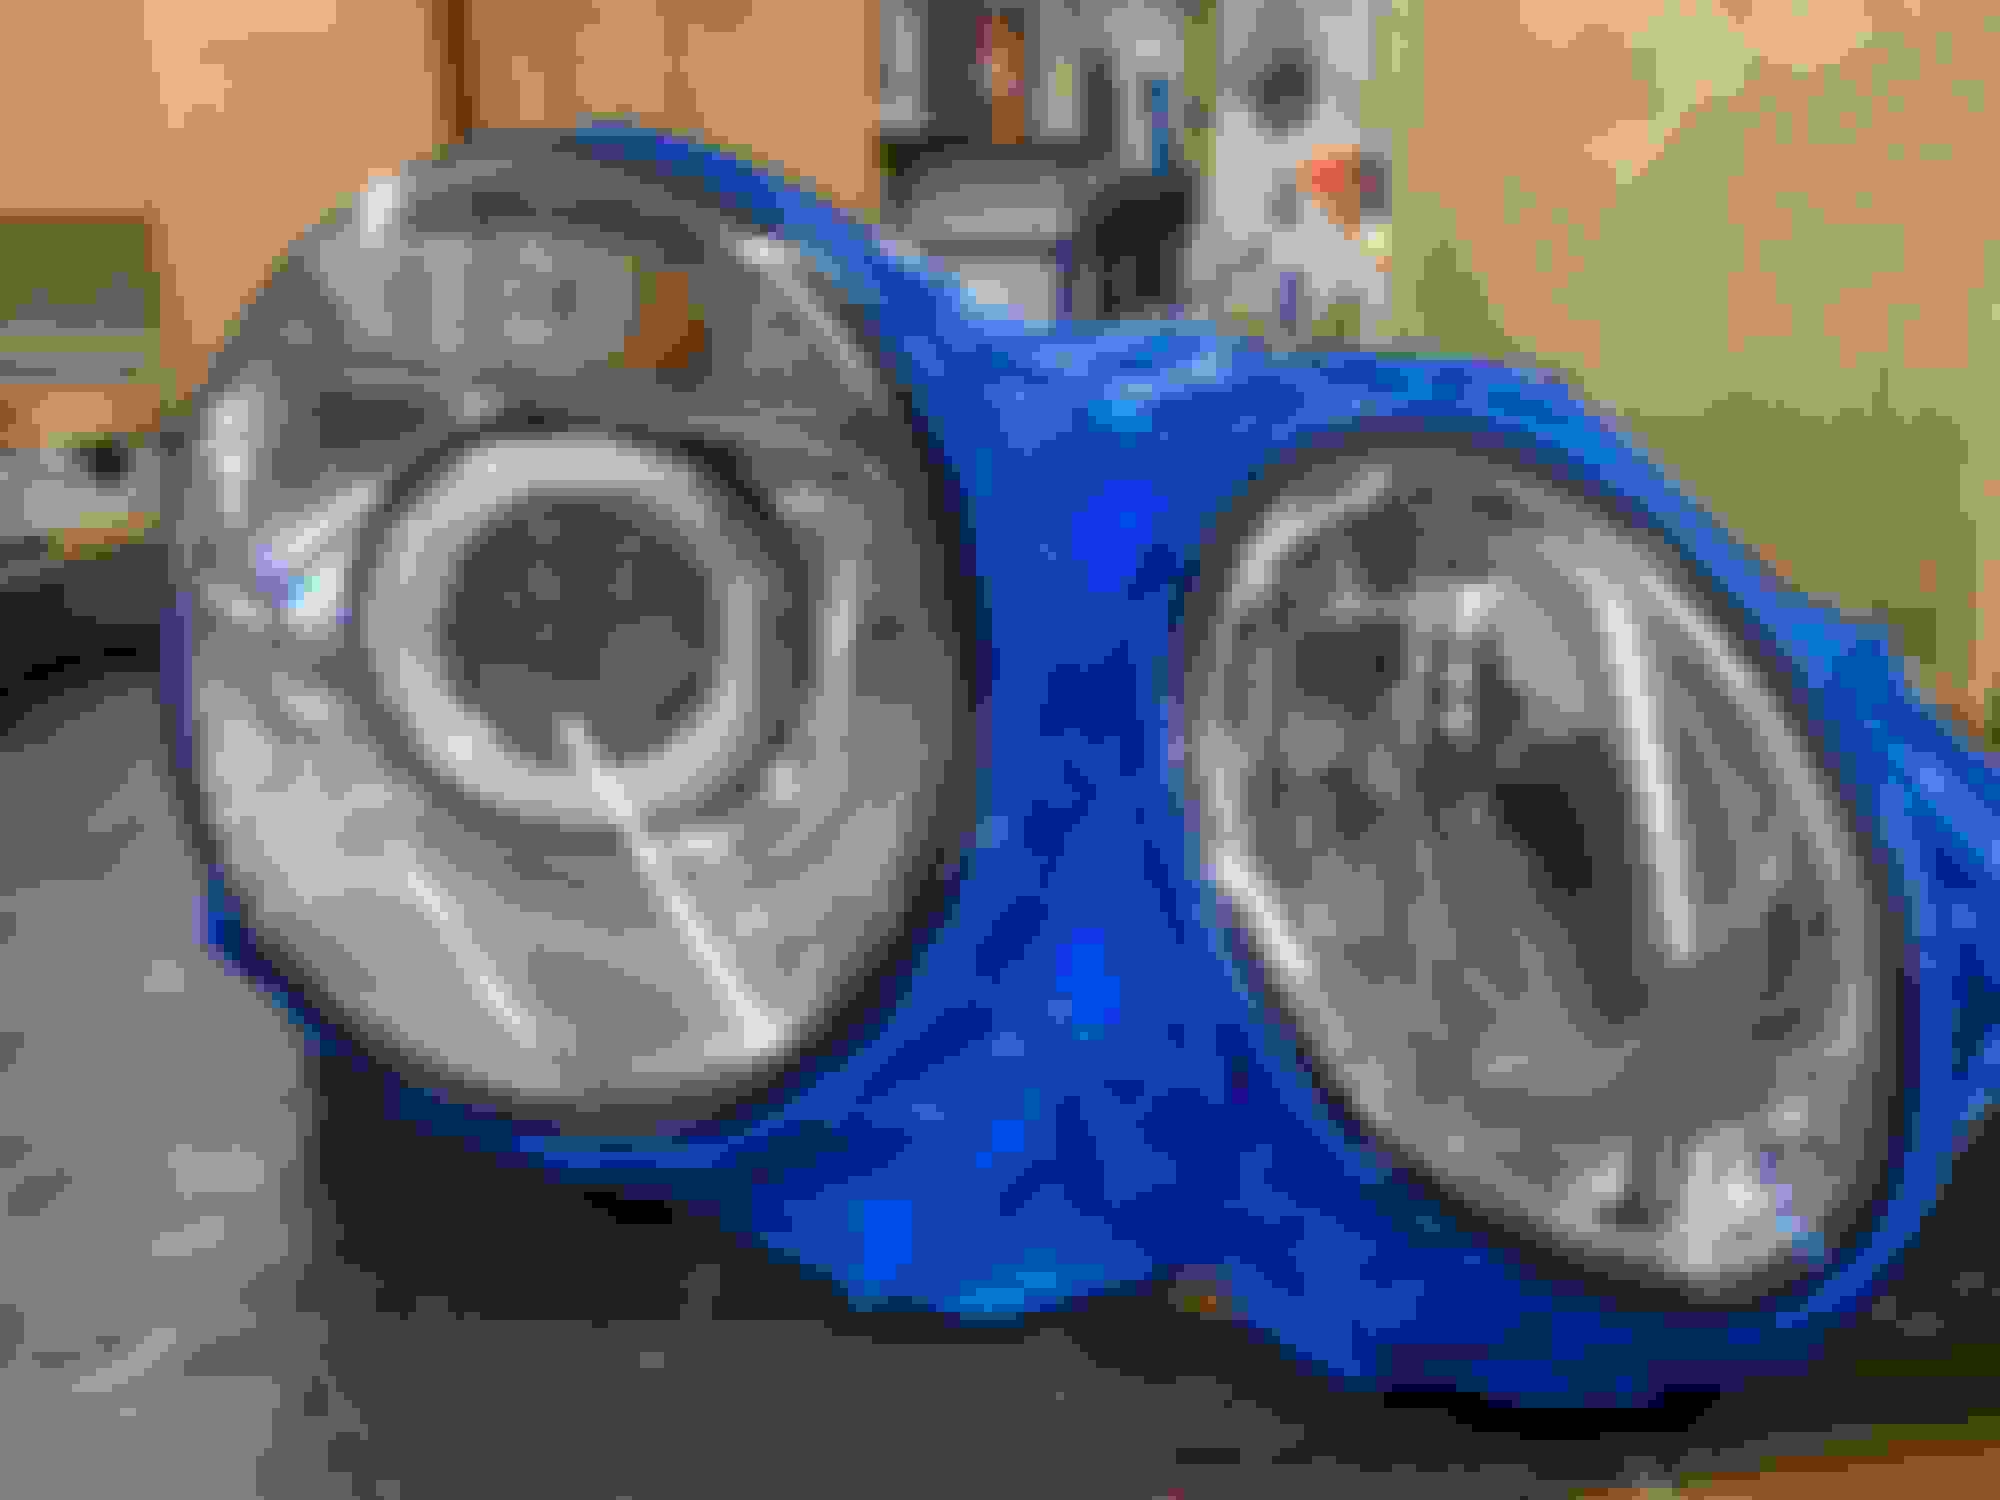
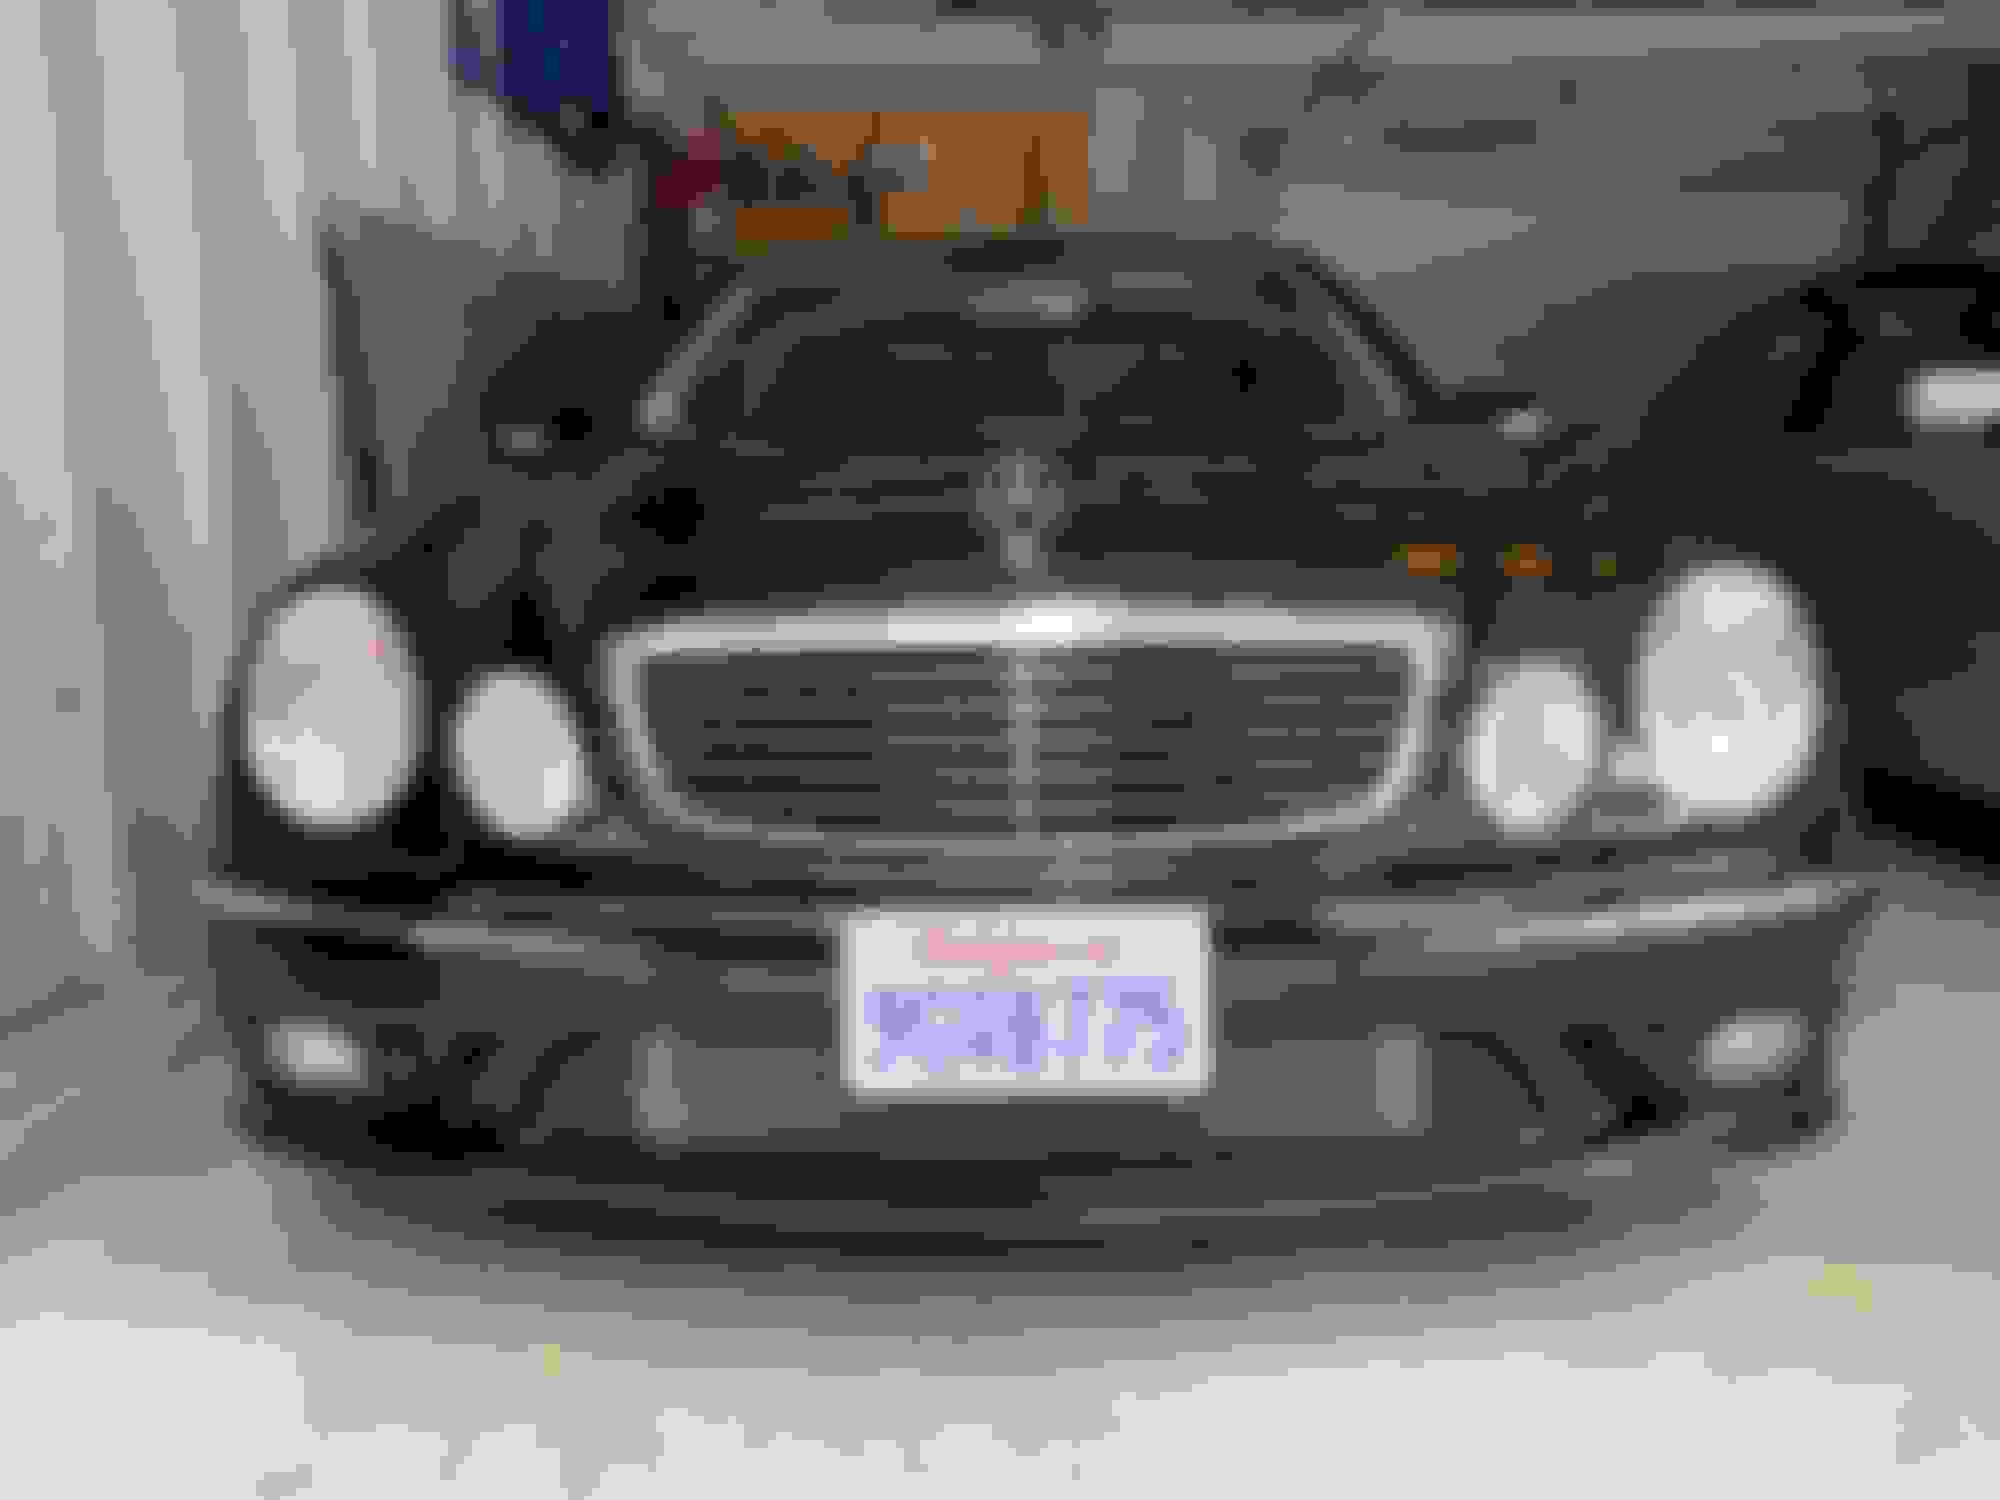
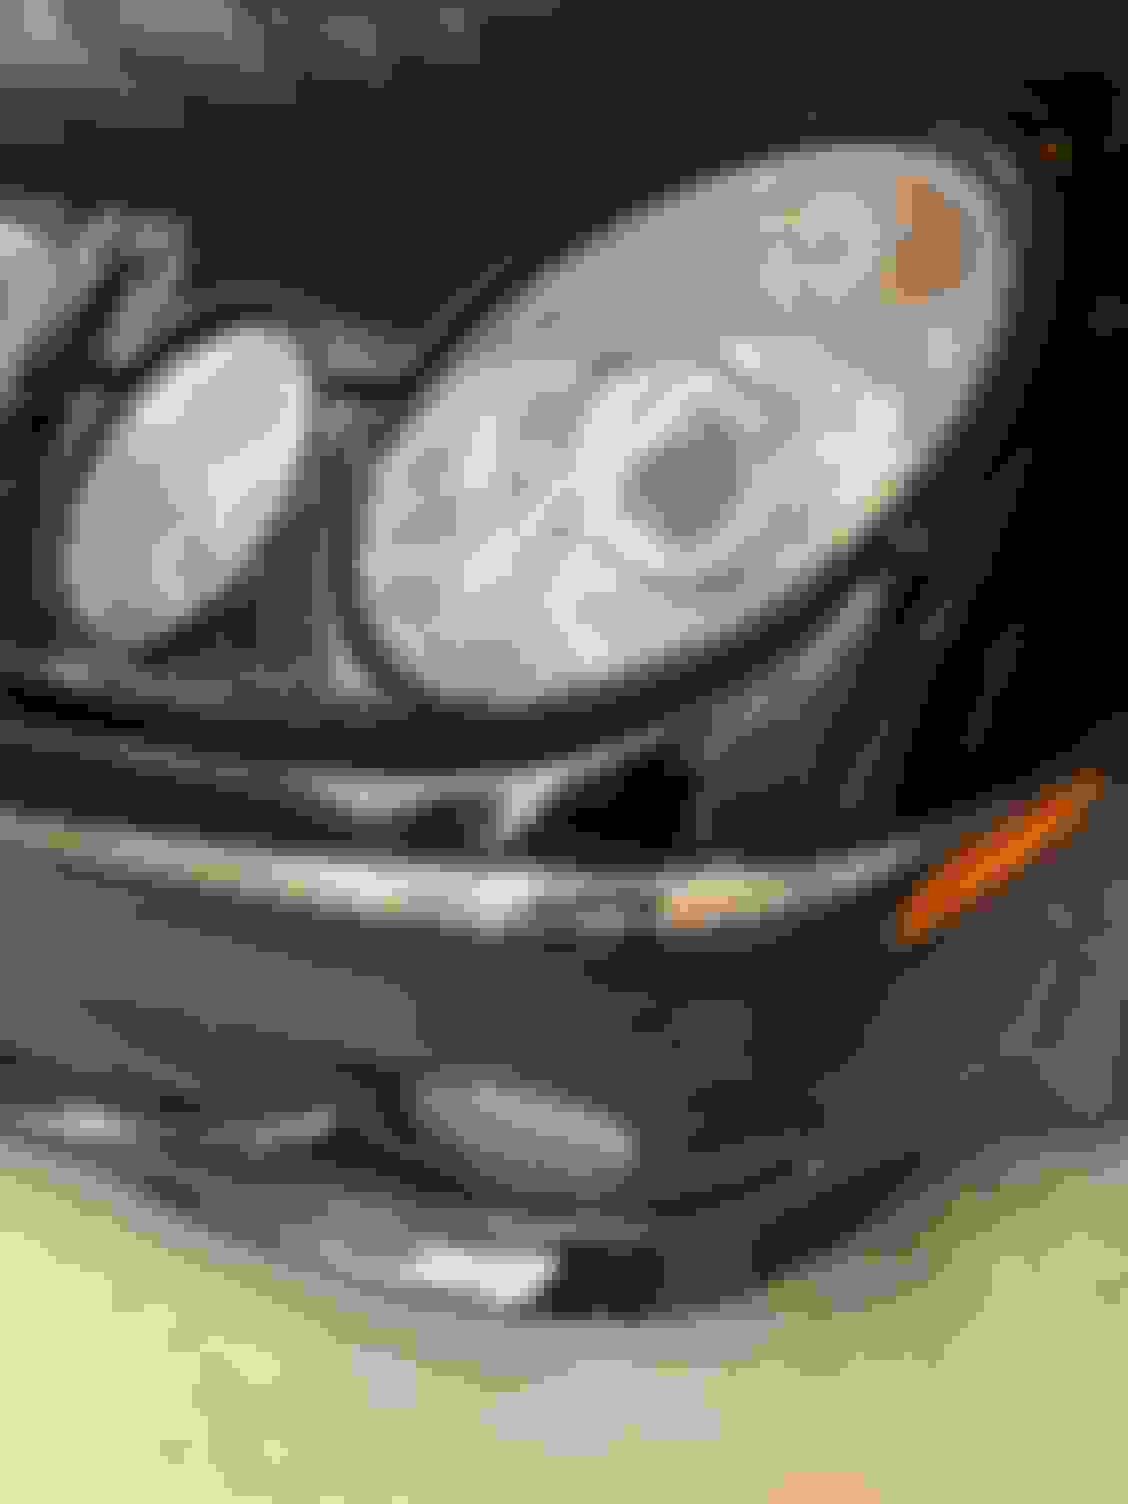
Hello gentleman, I have a 2006 E55 which needs the yellow / hazy headlights replaced. Can anyone recommend a web site where I can find replacements. They are HID, self leveling. I don't care about the leveling, and can replace with either HID or LED. All I can find is replacements for original halogen head lights
Hello gentleman, I have a 2006 E55 which needs the yellow / hazy headlights replaced. Can anyone recommend a web site where I can find replacements. They are HID, self leveling. I don't care about the leveling, and can replace with either HID or LED. All I can find is replacements for original halogen head lights
Extra notes
1. if you resolve with non active lights you will need to code them out
2. if you want new active lights like I went with, getting them can be hard. Many will list active but will come as reg HID
3. any led bulbs you swap in vs staying HID will not perform well. However you can make HID perform like LED as you can see in my thread vs the LED on my G.
If you clear them after they�ve been polished, they will definitely peel.
really? Are you sure? The headlights in my truck have been polished and cleared for 5 years now. Don�t see any pealing. Perhaps you�re just not very good at it?
don't forget that not only do lens's need replacement or polishing, that also reflectors may have their foil burned off. lenses are available through various places online. haven't tried replacing to see how difficult it would be. if not too difficult, replacement of lens will always be clearer than polishing due to any micro divots from rock chips you may have.
don't forget that not only do lens's need replacement or polishing, that also reflectors may have their foil burned off. lenses are available through various places online. haven't tried replacing to see how difficult it would be. if not too difficult, replacement of lens will always be clearer than polishing due to any micro divots from rock chips you may have.
I recently replaced just the lenses on mine. It is not that difficult. You need to be able to heat them up to soften the adhesive, but without damaging the housings. I used an old pizza oven. Scrapping off the old adhesive from the housing body is a pain. The second one went faster than the first. They turned out great.
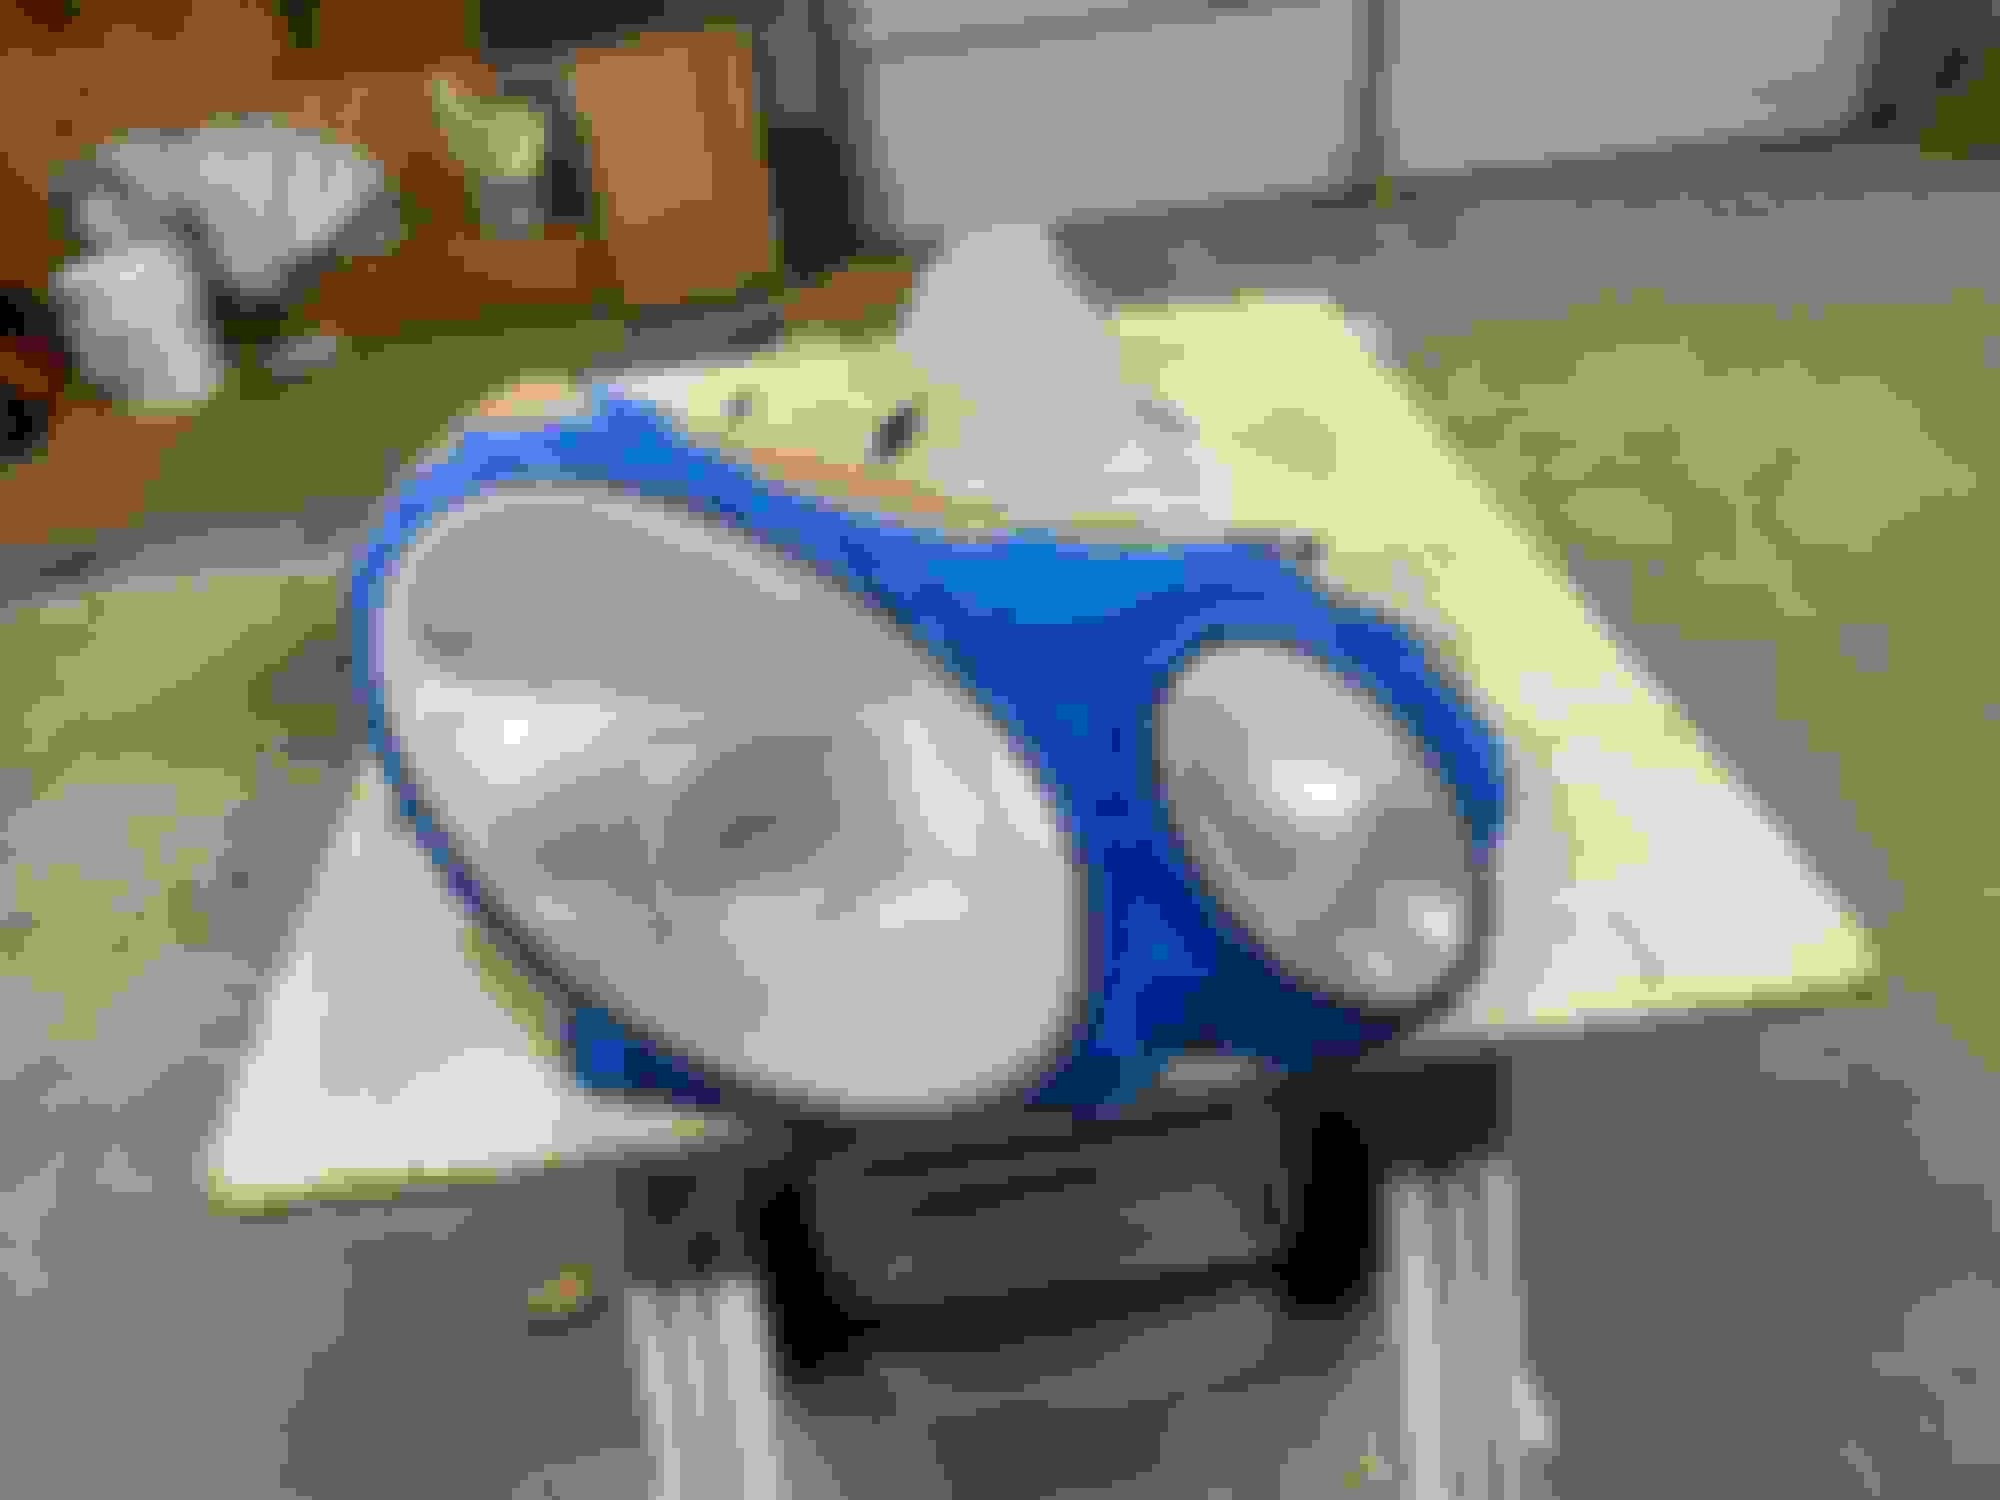
The old lenses were discolored on the inside as well as the outside. No amount of polishing was going to fix that.
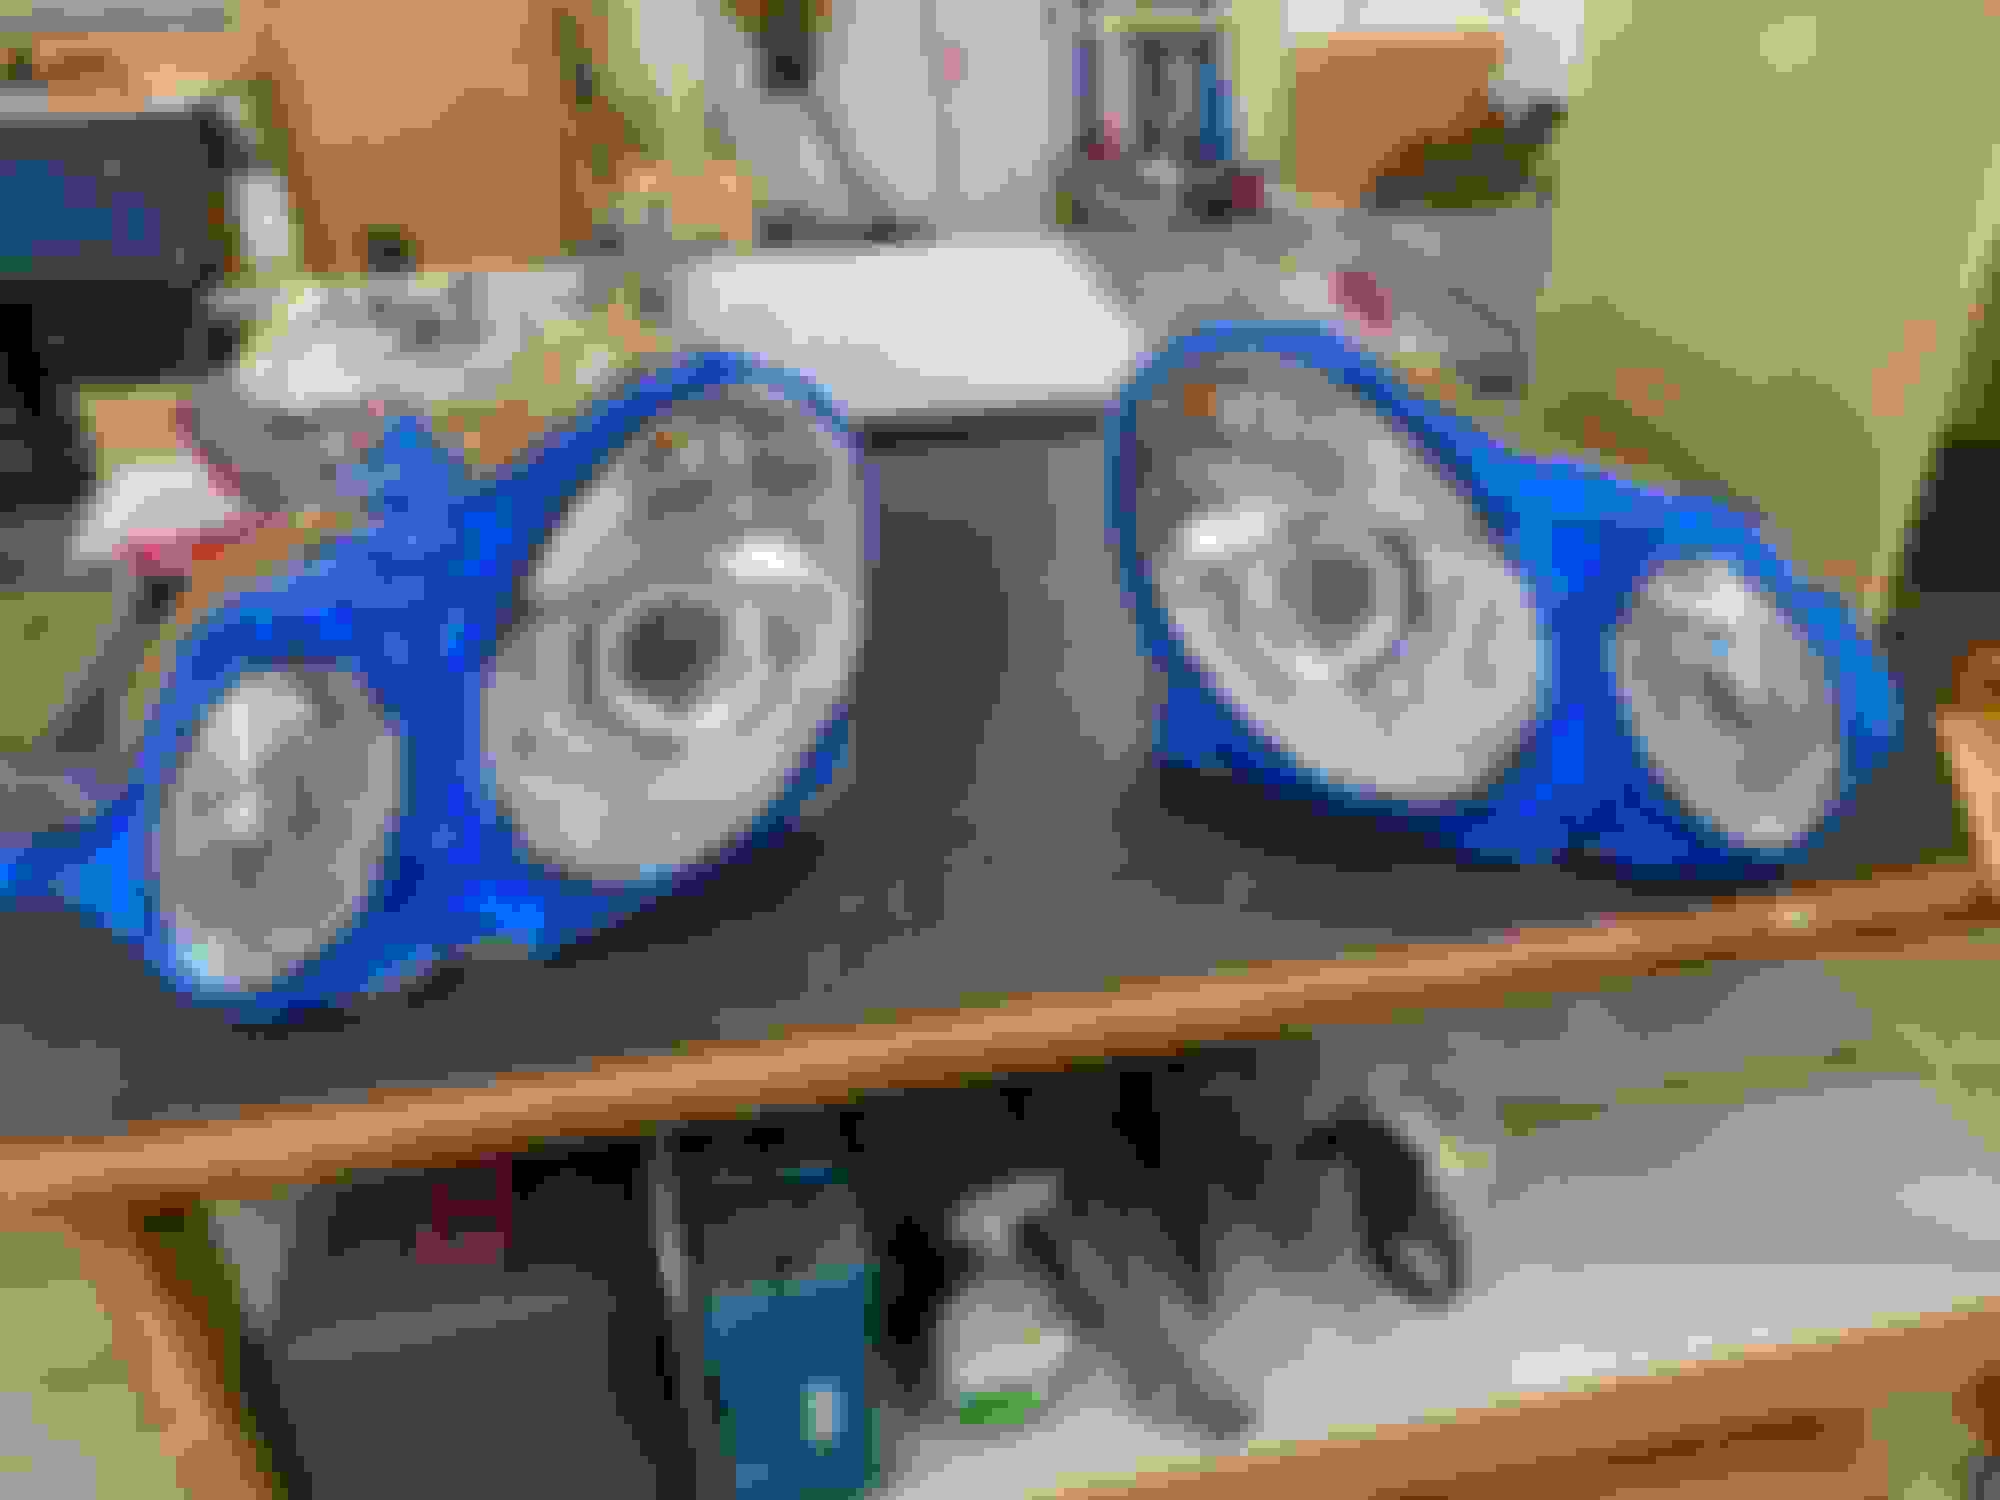
Or, if only swapping bc lenses are hazed or yellowed, try using the wet sand/spray method I�ve been doing on my e39, and now E55. Requires a little time and elbow grease, but results are only topped by buying new - imo. I considered doing the heated outer lens
swap method, but feared an imperfect seal and moisture getting in�. I use 3M wet/dry sandpaper (320* 400 600 & 1000) and SprayMax 2 Headlight clear. SprayMax is a professional grade two part, acrylic spray that includes UV protection and dries very hard, yet retains a bit of flex to account for seasonal temp changes. Follow directions on their website for superior results. First pull lenses out of the car and clean with denatured alcohol. *(Depending on how crapped out the lenses are and if there are failed layers of previous spray clear, start with 320 grit and aim to just remove previous clear coats or flaws.) Otherwise, start out with 400grit. I cut the sandpaper into four pieces and fold each piece in half to work one lens only then get a new piece (or sooner depending on your situation). Use a spray bottle of water and keep the sandpaper and surface of the lens wet. Sand in the long direction of your lenses, or as in case of the E55, a sort of circular motion. You should spend about 10 min per grit, per lens (this is the elbow grease part�). You�re looking for a uniformly smoothed and hazed over appearance after each grit. Dry the lens and take a look once in a while and check your work. Redo spots that aren�t smoothed and or give the lens an overall hazy and smooth look. Proceed thru the 400-600-1000 grits until you�re happy with results. Then rinse and dry them, wipe with a tack rag (Home Depot or any paint store) and clean with soft cotton cloth and denatured alcohol (if in California, can use rubbing alcohol since denatured is on the sh*t list). Then mask everything beyond the edge of each lens with 3M blue masking tape and newspaper to protect from overspray. Spray in well ventilated area (outside preferred) at temp above 65� and wear a respirator bc the fumes of this stuff are nasty. The instructions say to put 2 coats, but I�ve been doing 3, just because. I start with one light pass, wait 10 minutes then 2 more medium passes, 10 minutes apart. Wait at least 3 hrs before removing masking tape, but not more than 12hrs. Let dry a day and don�t wash or go over 100mph 😜for a week or so�. I�ve done 3 of my cars this way, and a friend�s son�s car and they�re all still looking great - at least at the 6 month mark.
Not terrible, but less than great Sanded, prepped, ready for spray Drying after spray - big difference! Like new! Takes 10 yrs off Sees and looks good�

 11-03-2023 | 02:37 PM