SL55/63/65/R230 AMG: overZealous1's build thread
Thread Starter
MBWorld Fanatic!
Joined: Sep 2012
Posts: 1,009
Likes: 2
sl55 amg
We went into getting the Prior wide body kit ASSUMING it won't fit. It is just the way it is...thankfully our body and paint guy is fantastic. Once my 993 Turbo build is done, the SL65 will get test fitted. It won't be a good fit from just experience with anything aftermarket.
O...Z...you are my hero for doing this on your own! It makes your build epic!
O...Z...you are my hero for doing this on your own! It makes your build epic!
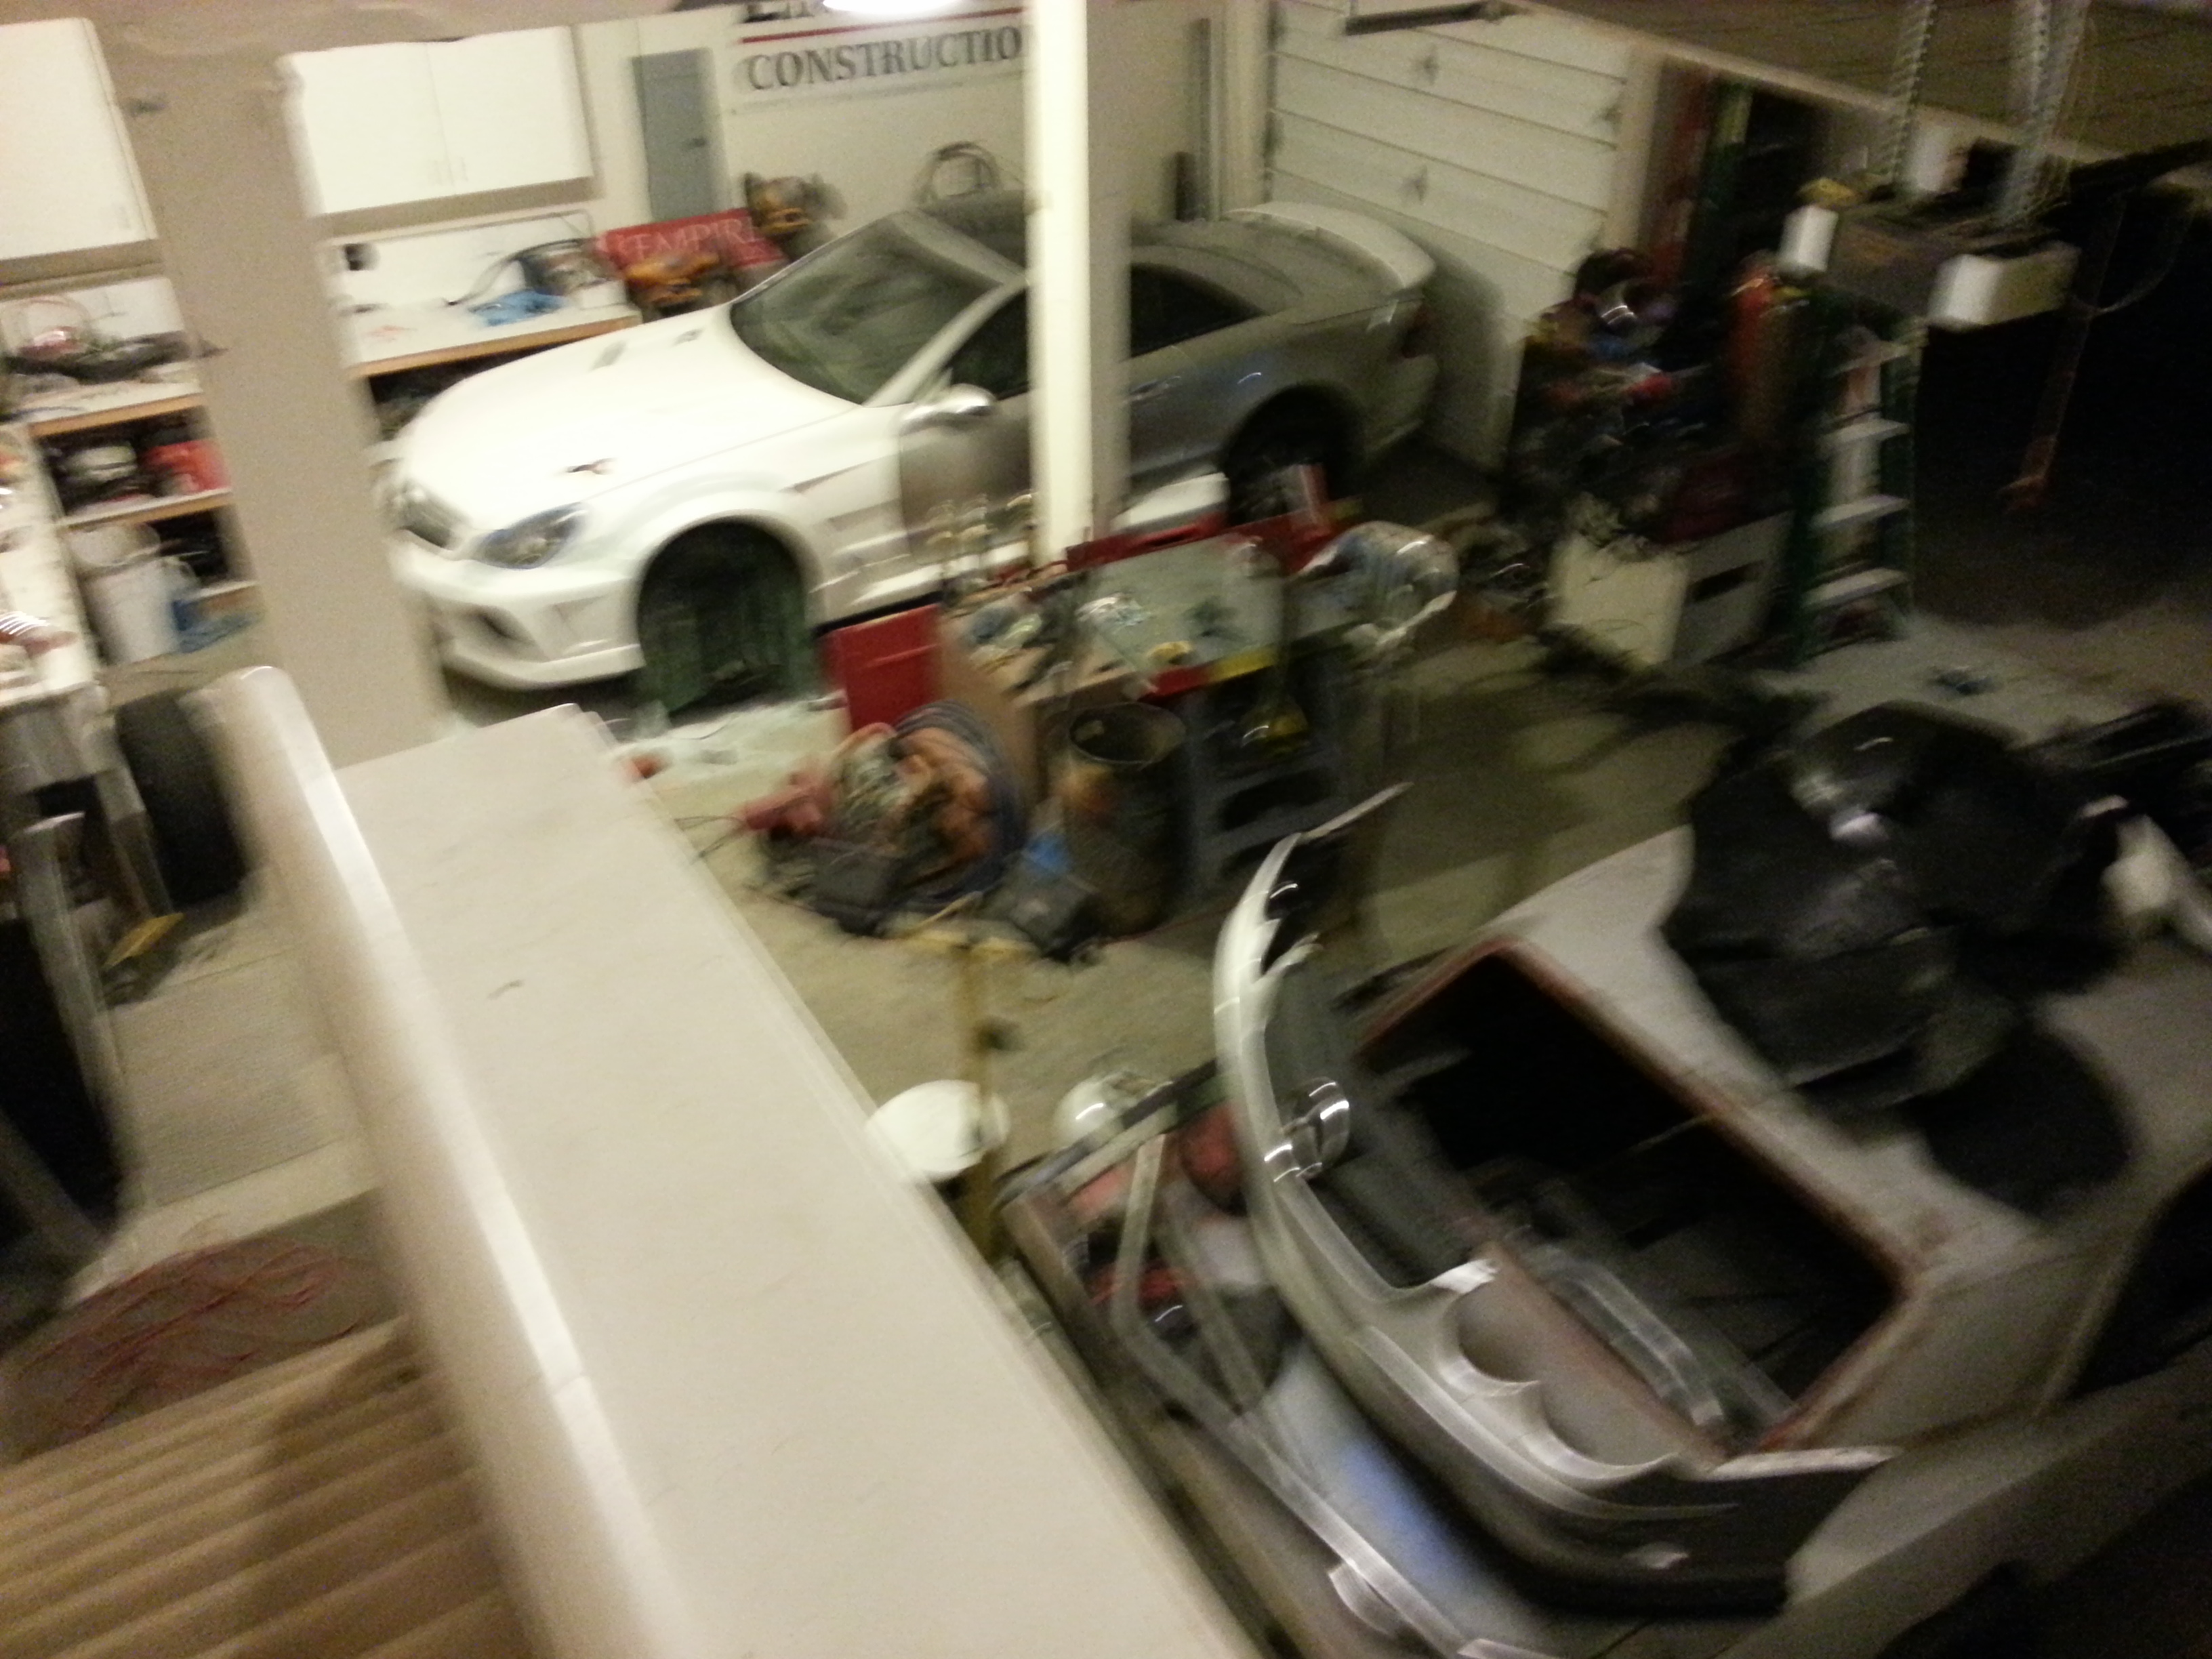
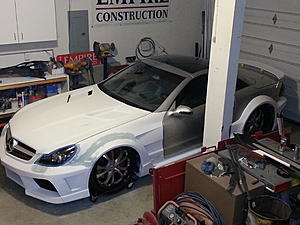
what is amazing even me, is the fact i am doing all this stuff in a 3 car garage. sounds like enough room, but look at the pic. hahaa. i really only have enough room for just one stall. i have already almost maxed out all available storage space. my body panels i took off are now residing in a spare room that was empty. my chopper is displayed in my entranceway to make more room in the garage. lol. i need a big shop again!
crappy pic but you get the idea.
Thread Starter
MBWorld Fanatic!
Joined: Sep 2012
Posts: 1,009
Likes: 2
sl55 amg
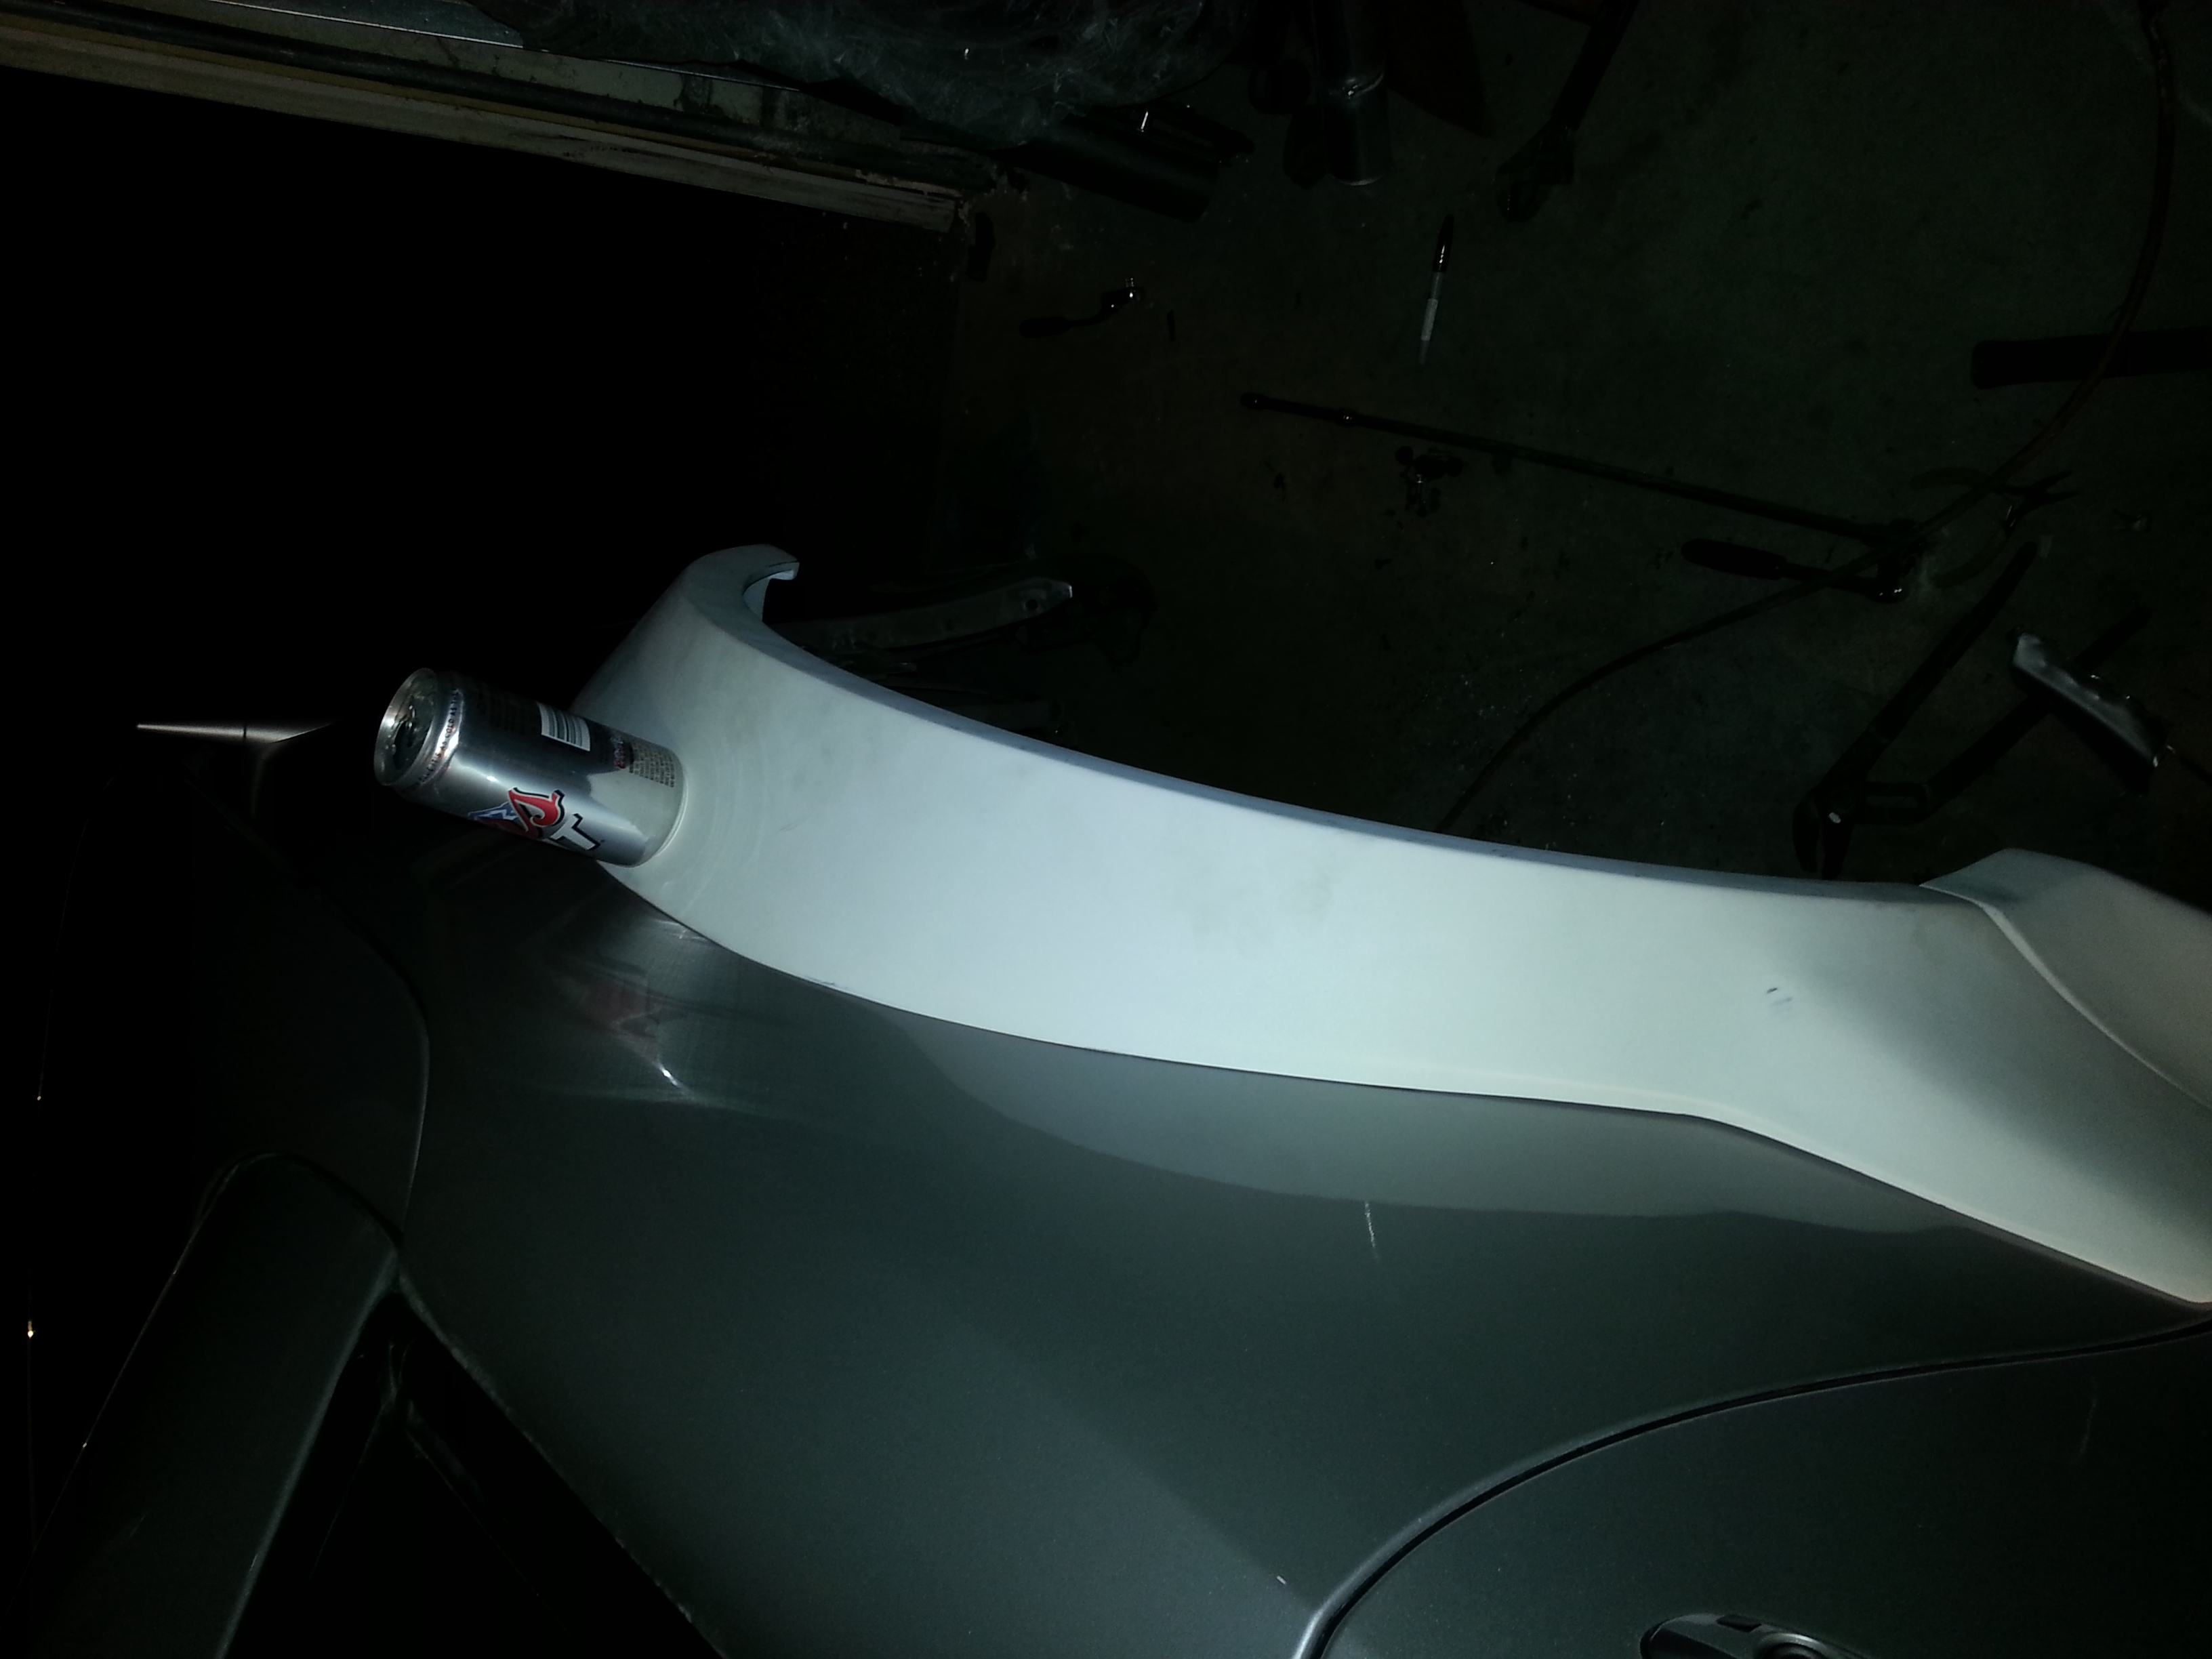
I took few pictures from the right side before I came in from the garage.
I have only "hang" on the parts and have not assembly/adjust them together.
The fender is bolted on at the "frame". I have test and push them together and I know they fit pretty well.
I have not decide yet if I'm gone bolt this parts or glue them together...
But al the lines and parts looks like this.
The hood is only with two bolts and it's to much up but it's easy to adjust it to the right level vs fender.
When I have adjust everything I'm gone take more pictures.
What do you think?
Juha
here is some of mine-
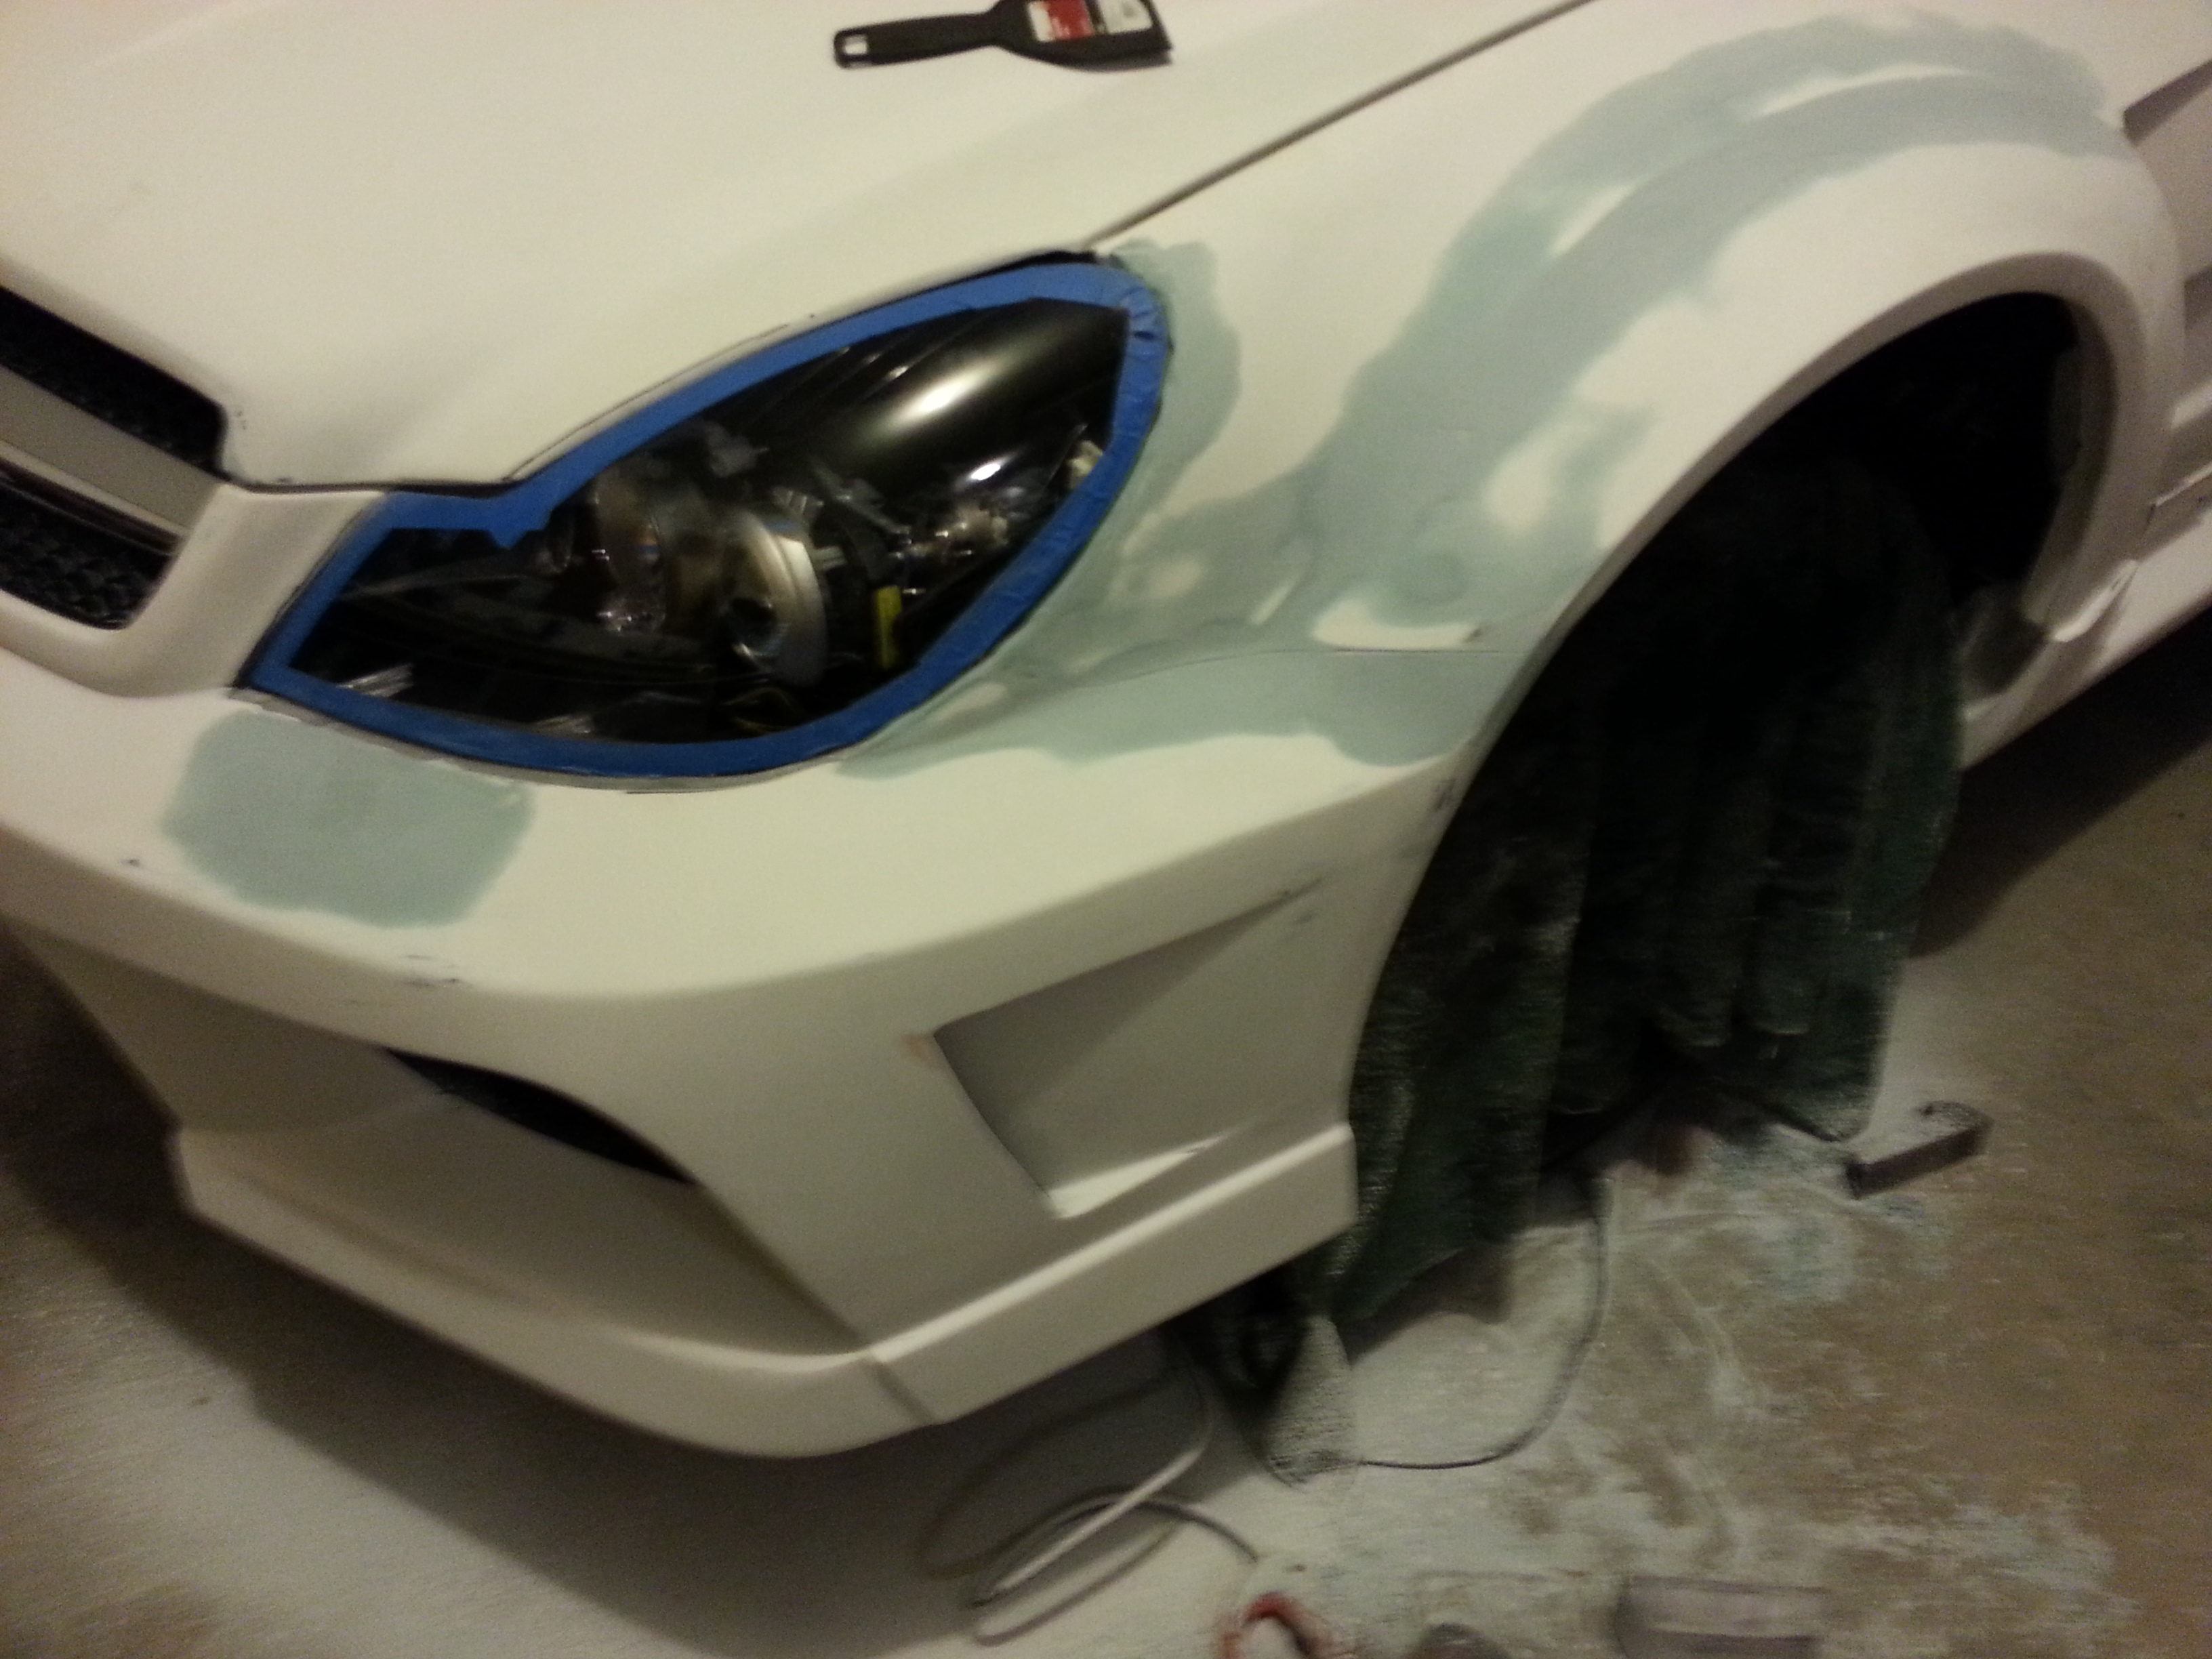
look at reveal around all of light. this is after over an hour of grinder work!! light is recessed at bottom, yet high at top. no easy fix.
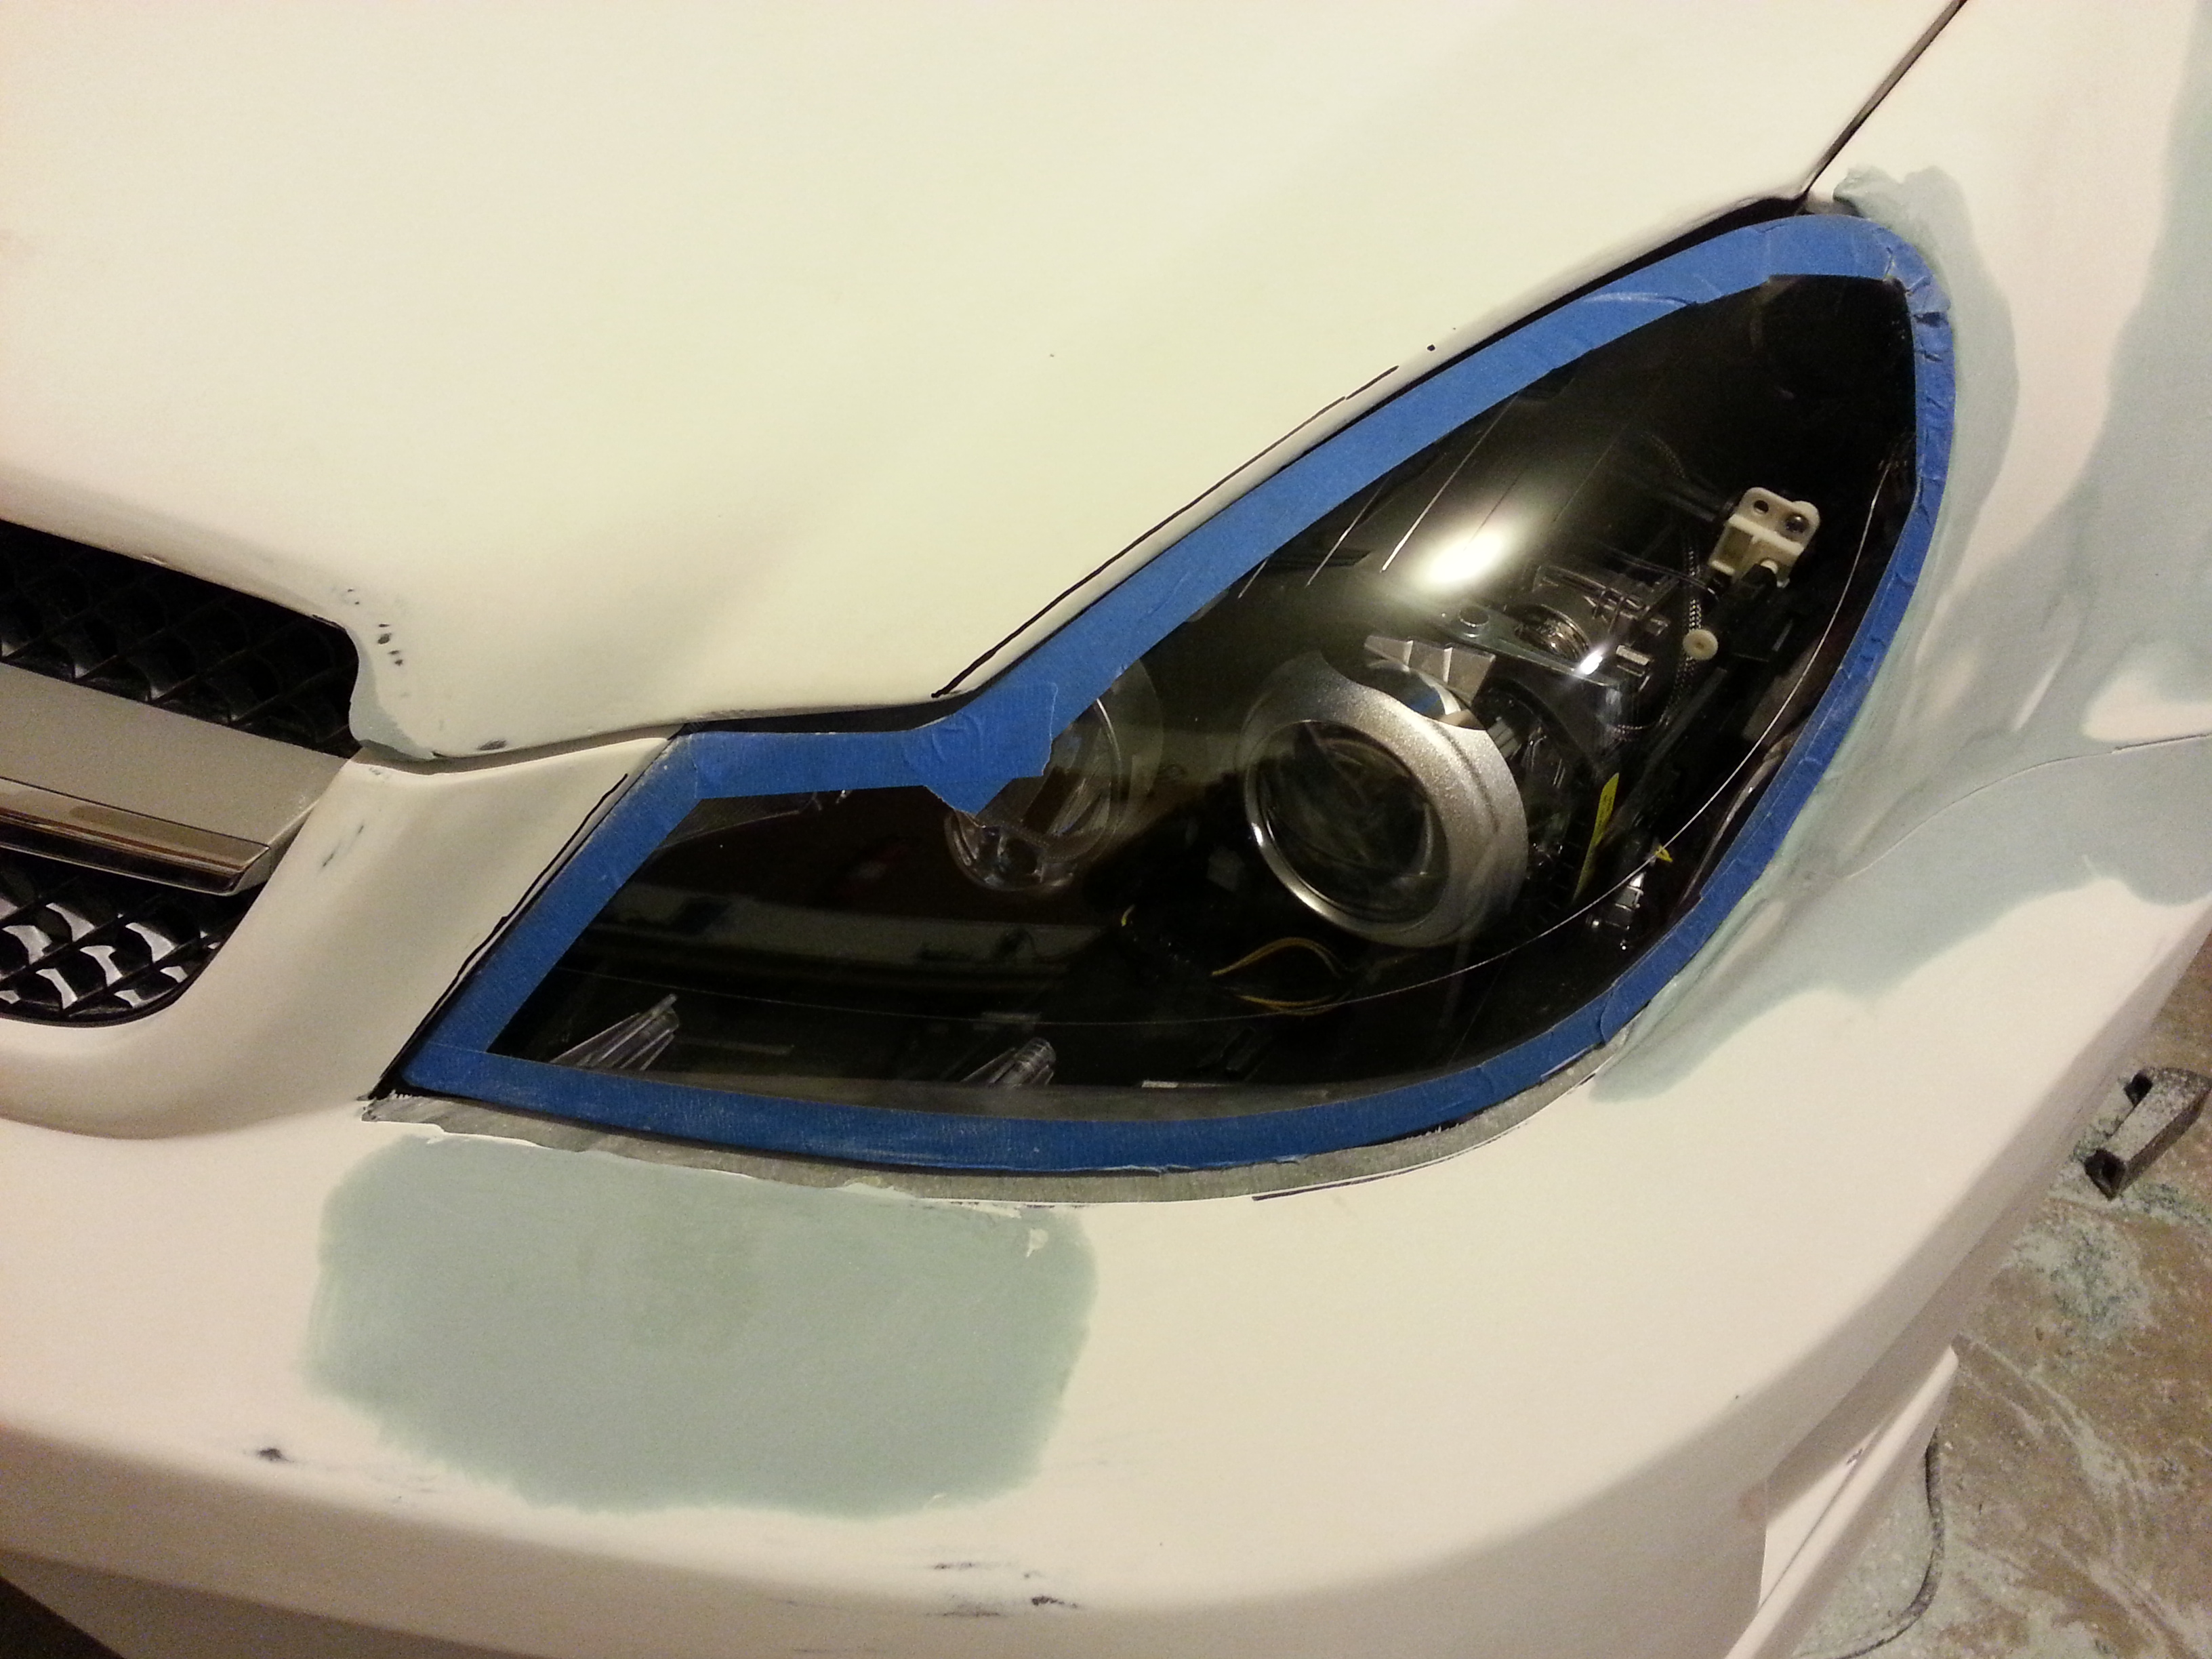
note how bumper and fender come together. this is better than how the drivers side started out. again, this is after alot of time grinding. atleast the headlight is fitting mostly correct and a quick fix.
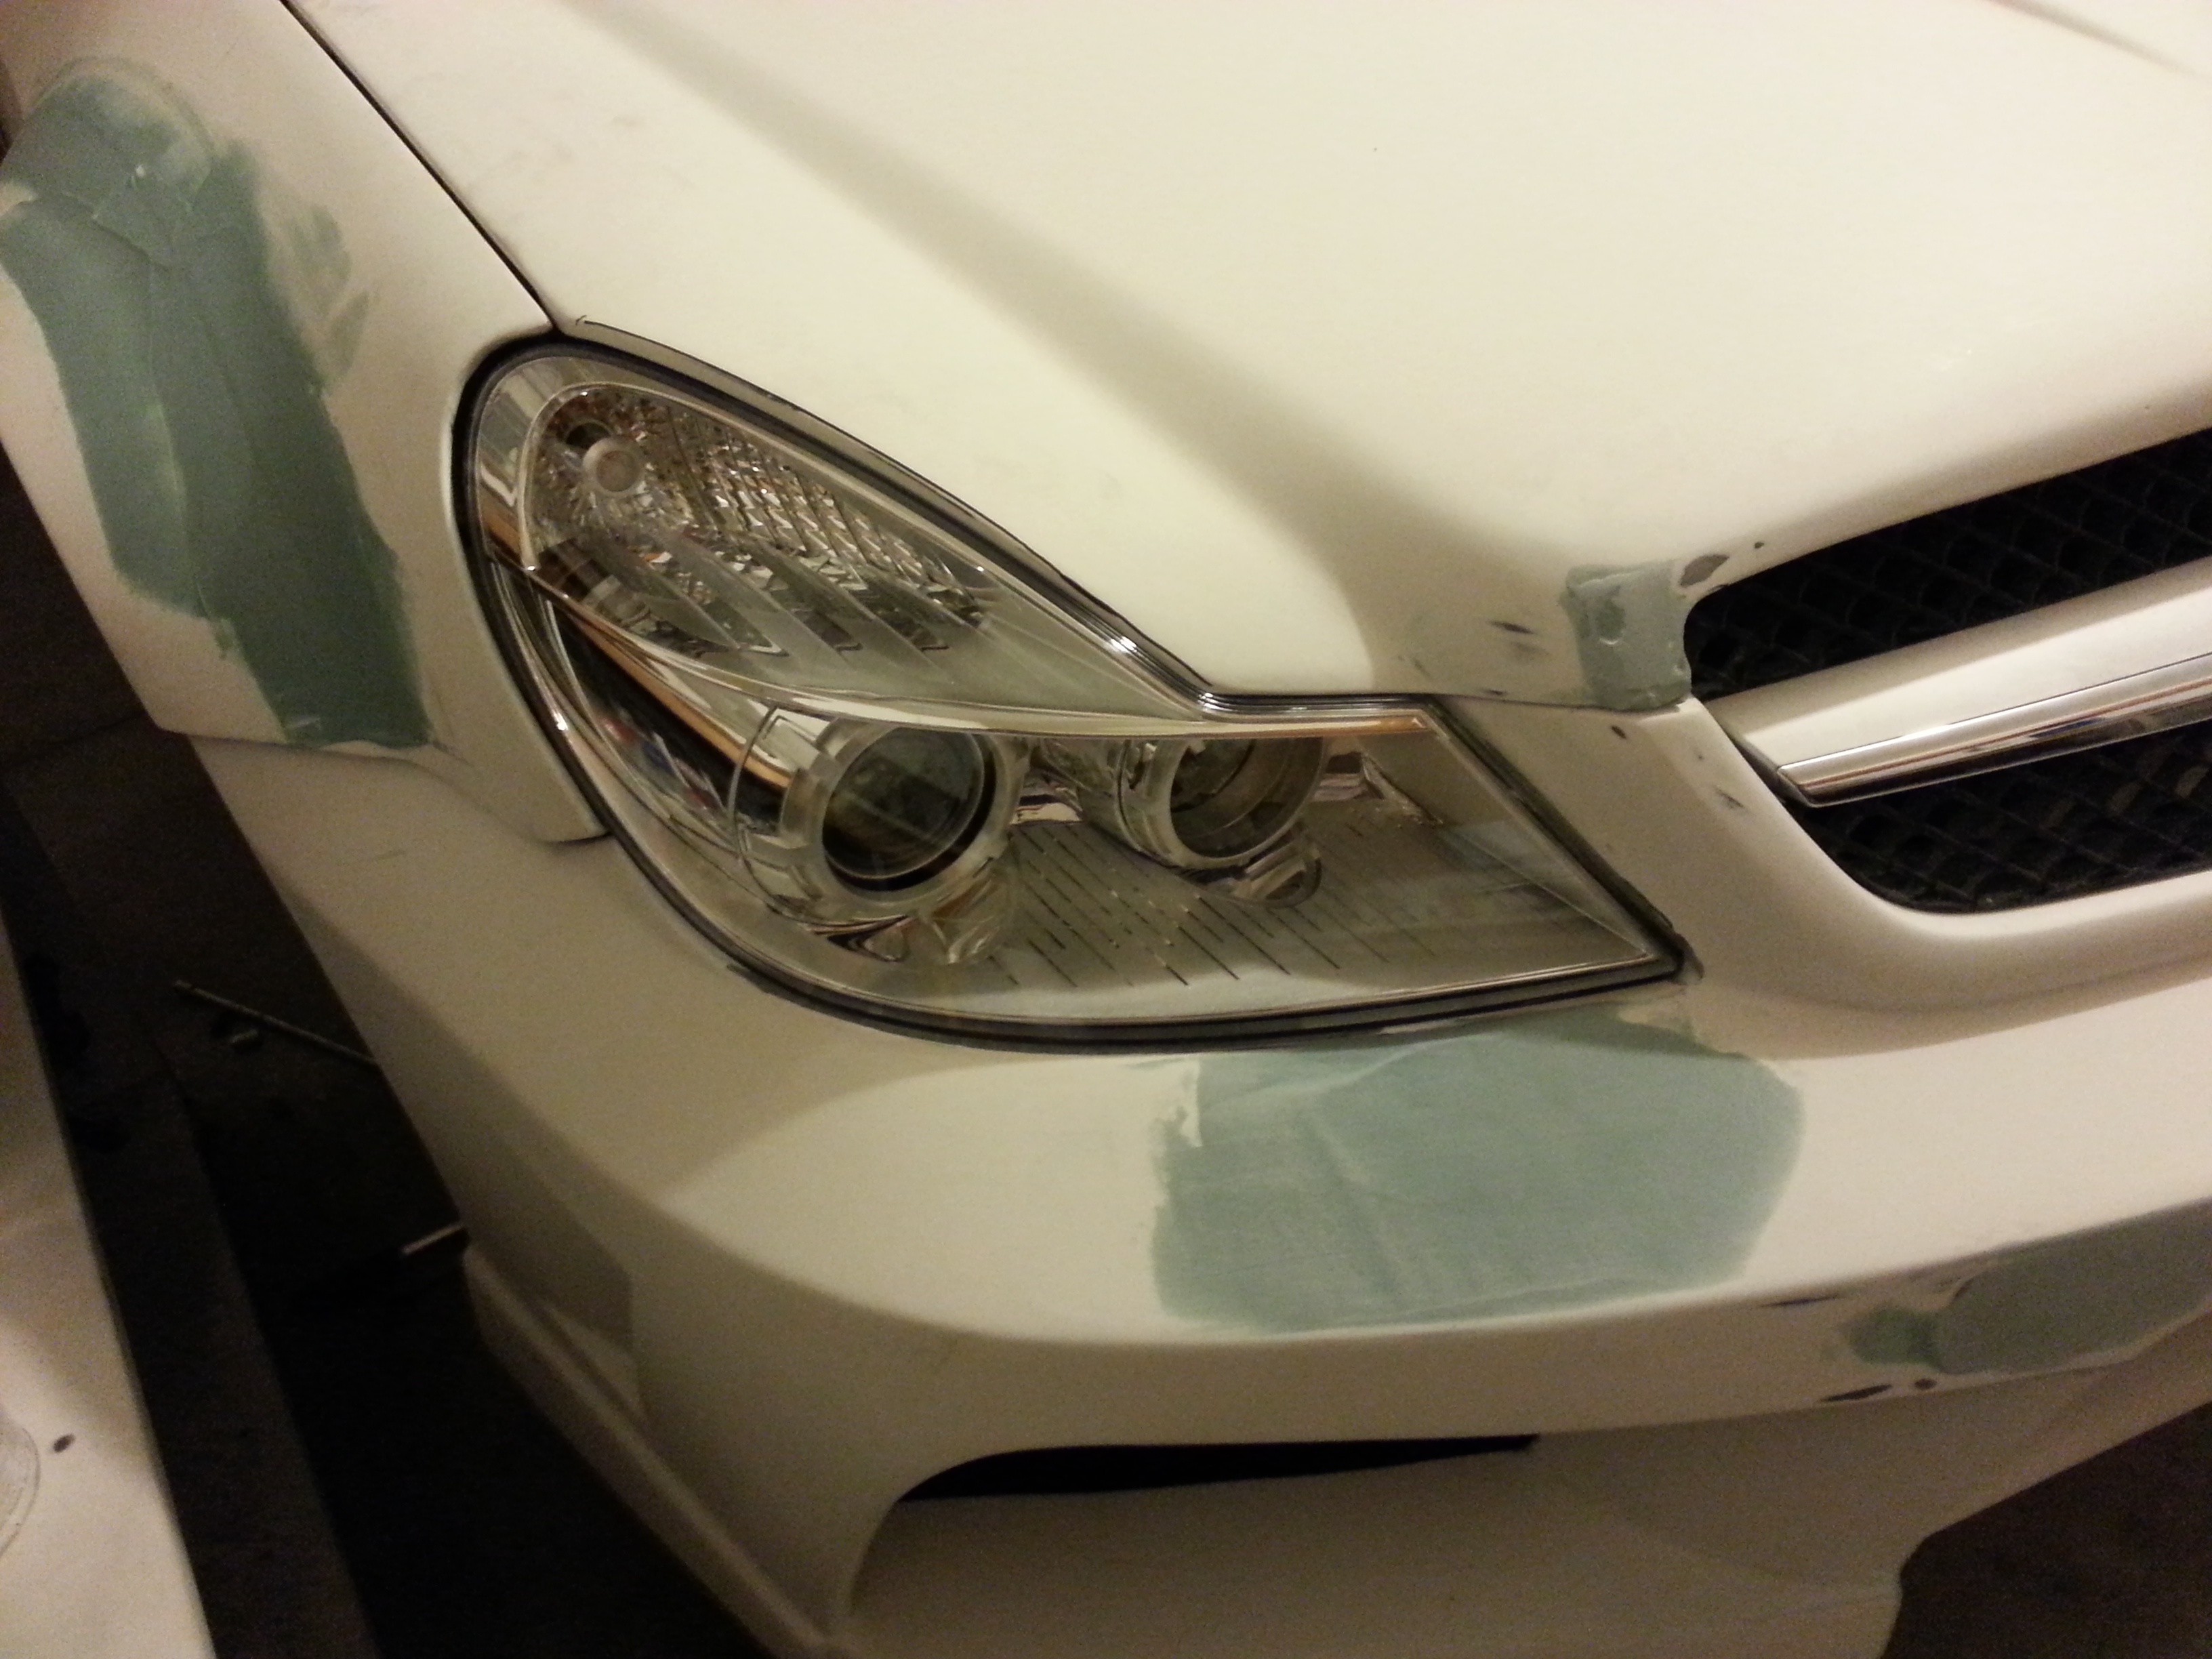
here is drivers side after lots of work. i am filling in the fender detail, i think smooth will look better. i am needing to fill in the area all around light with bondo. may even need to mount light in a non-stock fashion to have correct reveal to bumper on bottom.
i bolted it together, ground out high spots, then bondoed the whole intersection. with each layer of bondo, you take a razor blade and cut in the panel joint once bondo has gelled. lots of work, but i am now energized again that with the effort i can make it look perfect.
MBWorld Fanatic!
Joined: Mar 2007
Posts: 2,155
Likes: 14
From: Sydney, Australia
Vath ML63 Brabus C63 SL63 CLK63BS C63BS
That is an outrageous amount of extra work required. For someone like me who has no skills that would be costing a fortune to do, assuming I could get body shop to even atempt rectification. Misha design should be ashamed and embarrassed to supply a kit like that and market it as fit for purpose, simply woeful. I would be disgusted and throwing things round the room like a 2 year old!! My hat is off to you for your persistence with this shambles
Thread Starter
MBWorld Fanatic!
Joined: Sep 2012
Posts: 1,009
Likes: 2
sl55 amg
well, considering i did a transaction outside of ebay for one of the headlights, and it showed up with the hid portion popped out of it's bracket and one of the tabs superglued on, i will say the build so far has not gone smoothly.
i am staying positive though. you are right, if i was paying someone to do it, i would be mad as hell. i am about 18 hours into it so far and not even close to seeing light at the end of the tunnel. luckily body filler is cheap, my labor is free, and this hobby is sort of a relaxation time for me from my job where **** really can go to hell quick! haha. i look at it as a sort of continuing education in body work.
i will call misha tomorrow though and atleast make sure he is aware of the troubles. i have closely inspected others pics, and seen areas that didn't fit exact. mine just seems to be a very exaggerated case.
Thread Starter
MBWorld Fanatic!
Joined: Sep 2012
Posts: 1,009
Likes: 2
sl55 amg
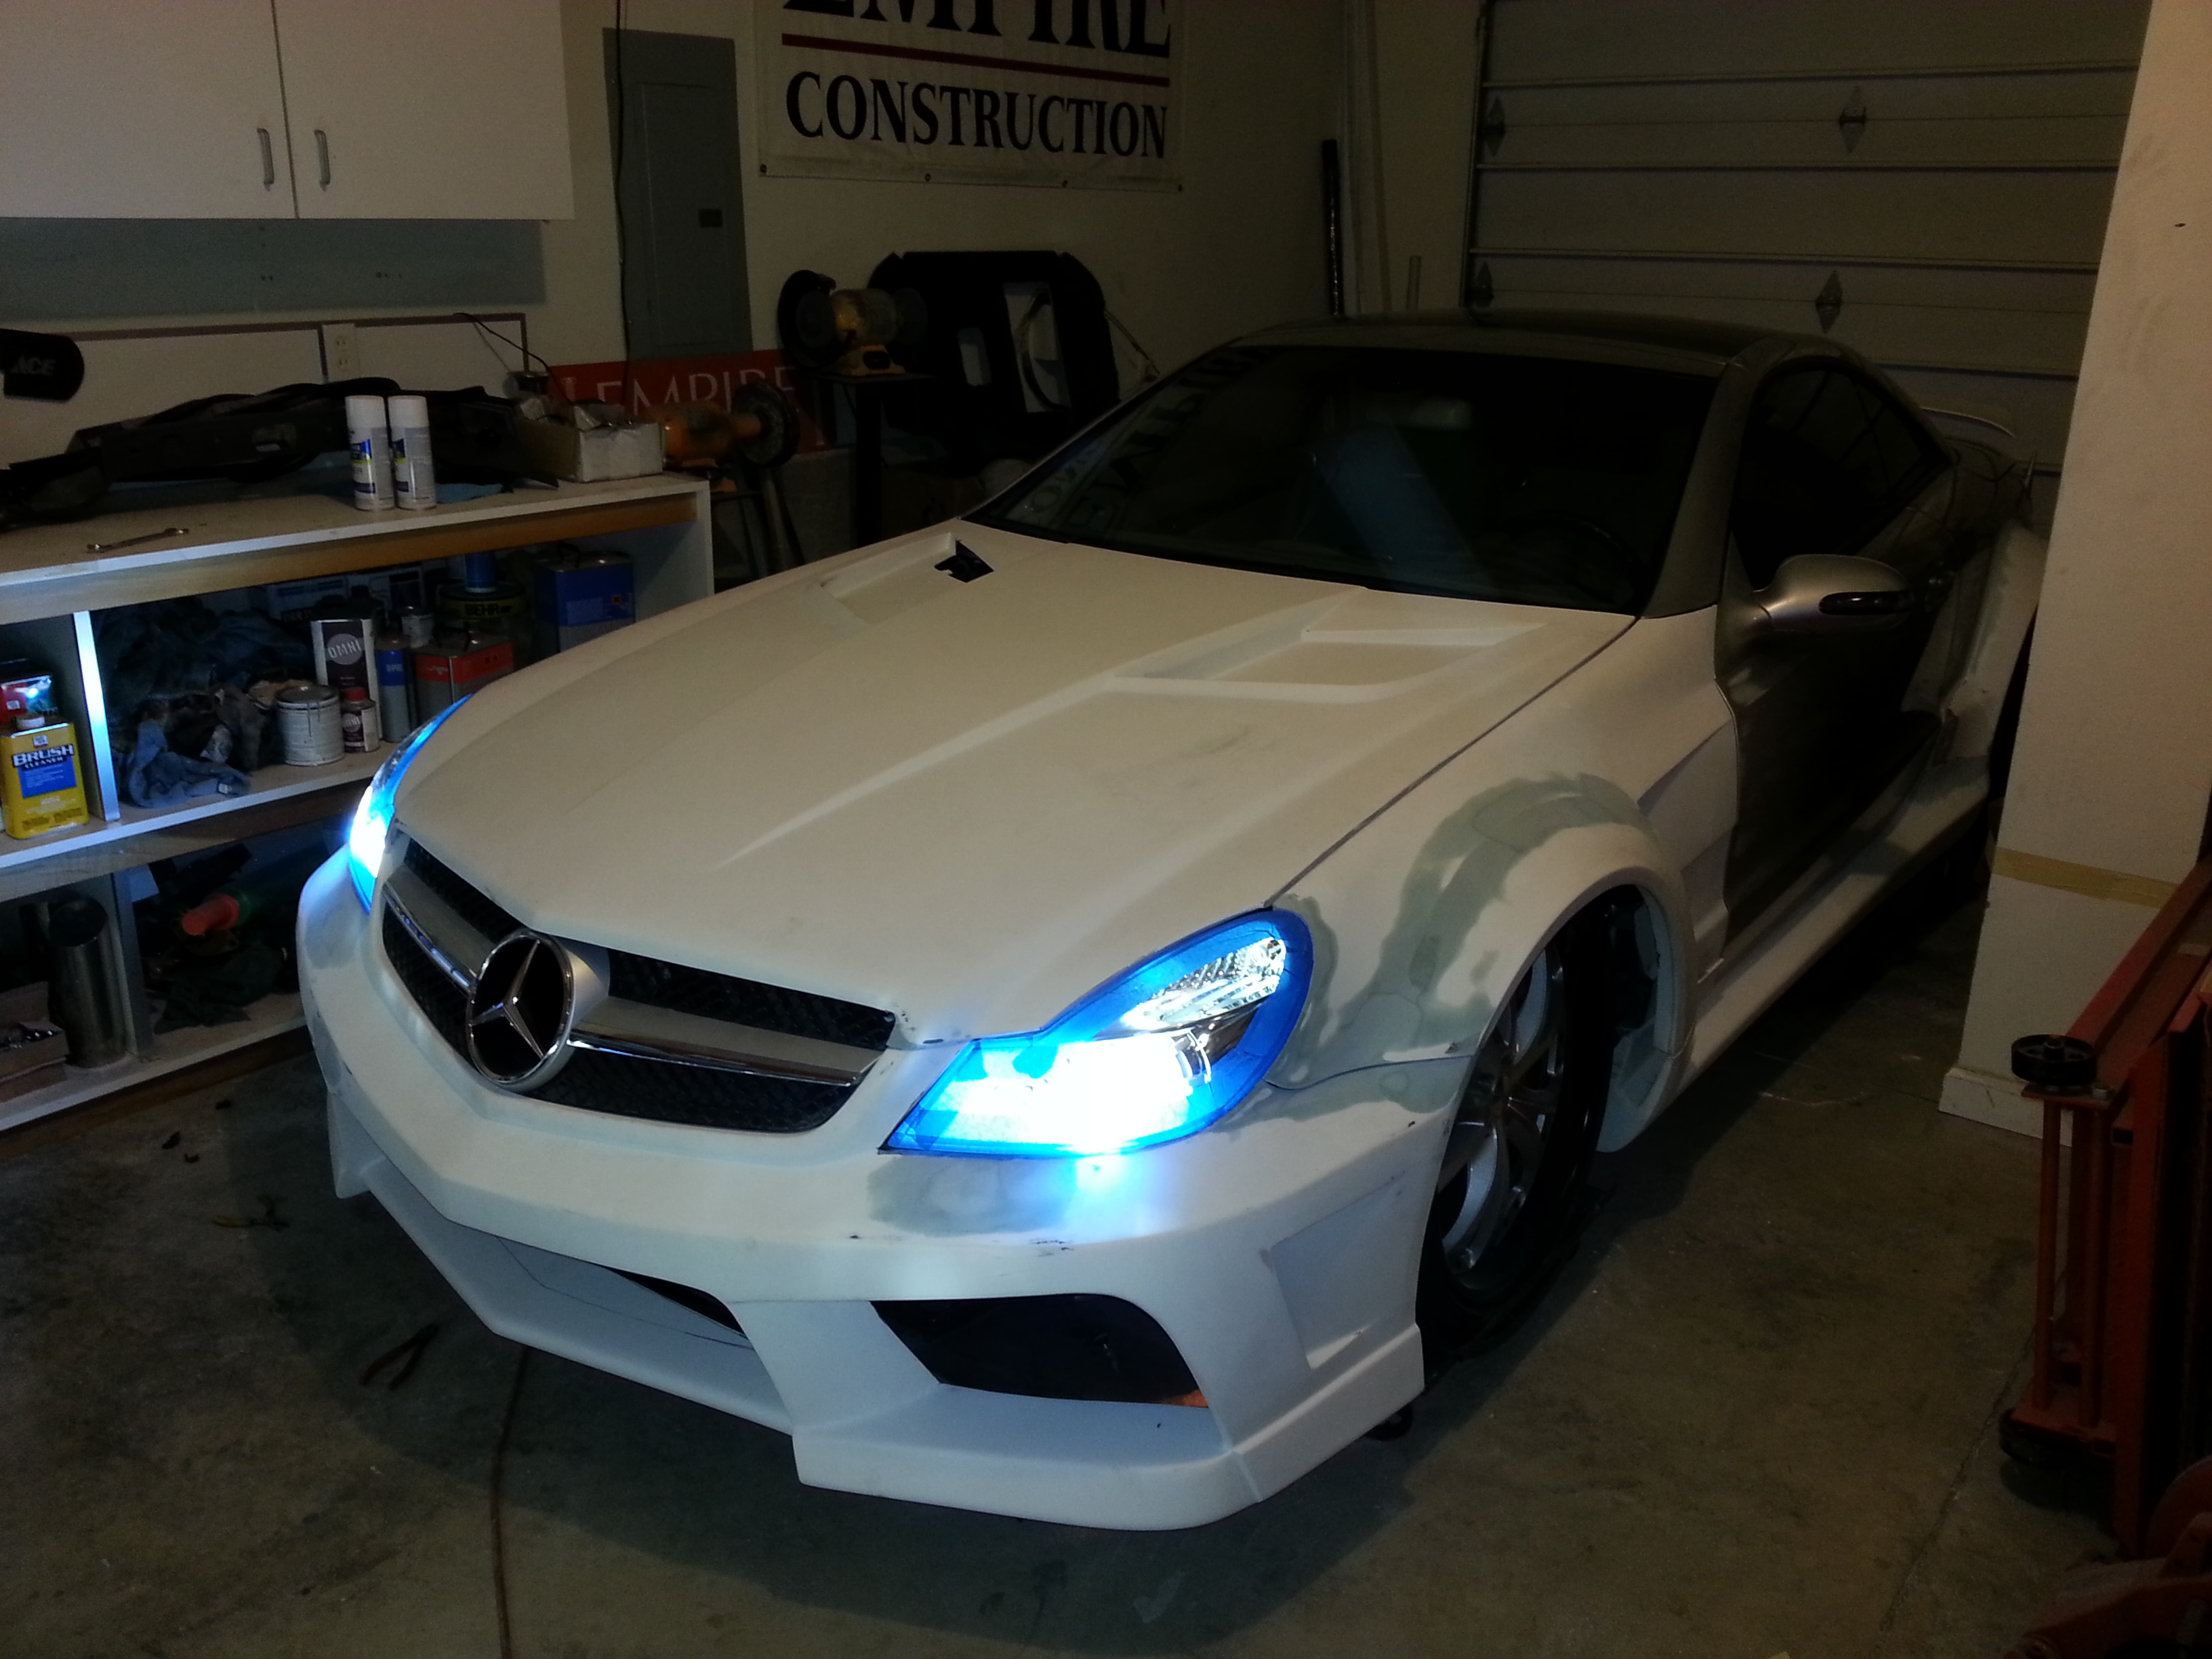
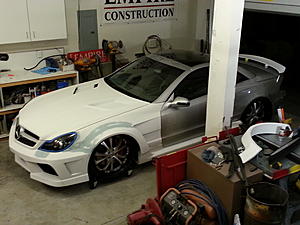
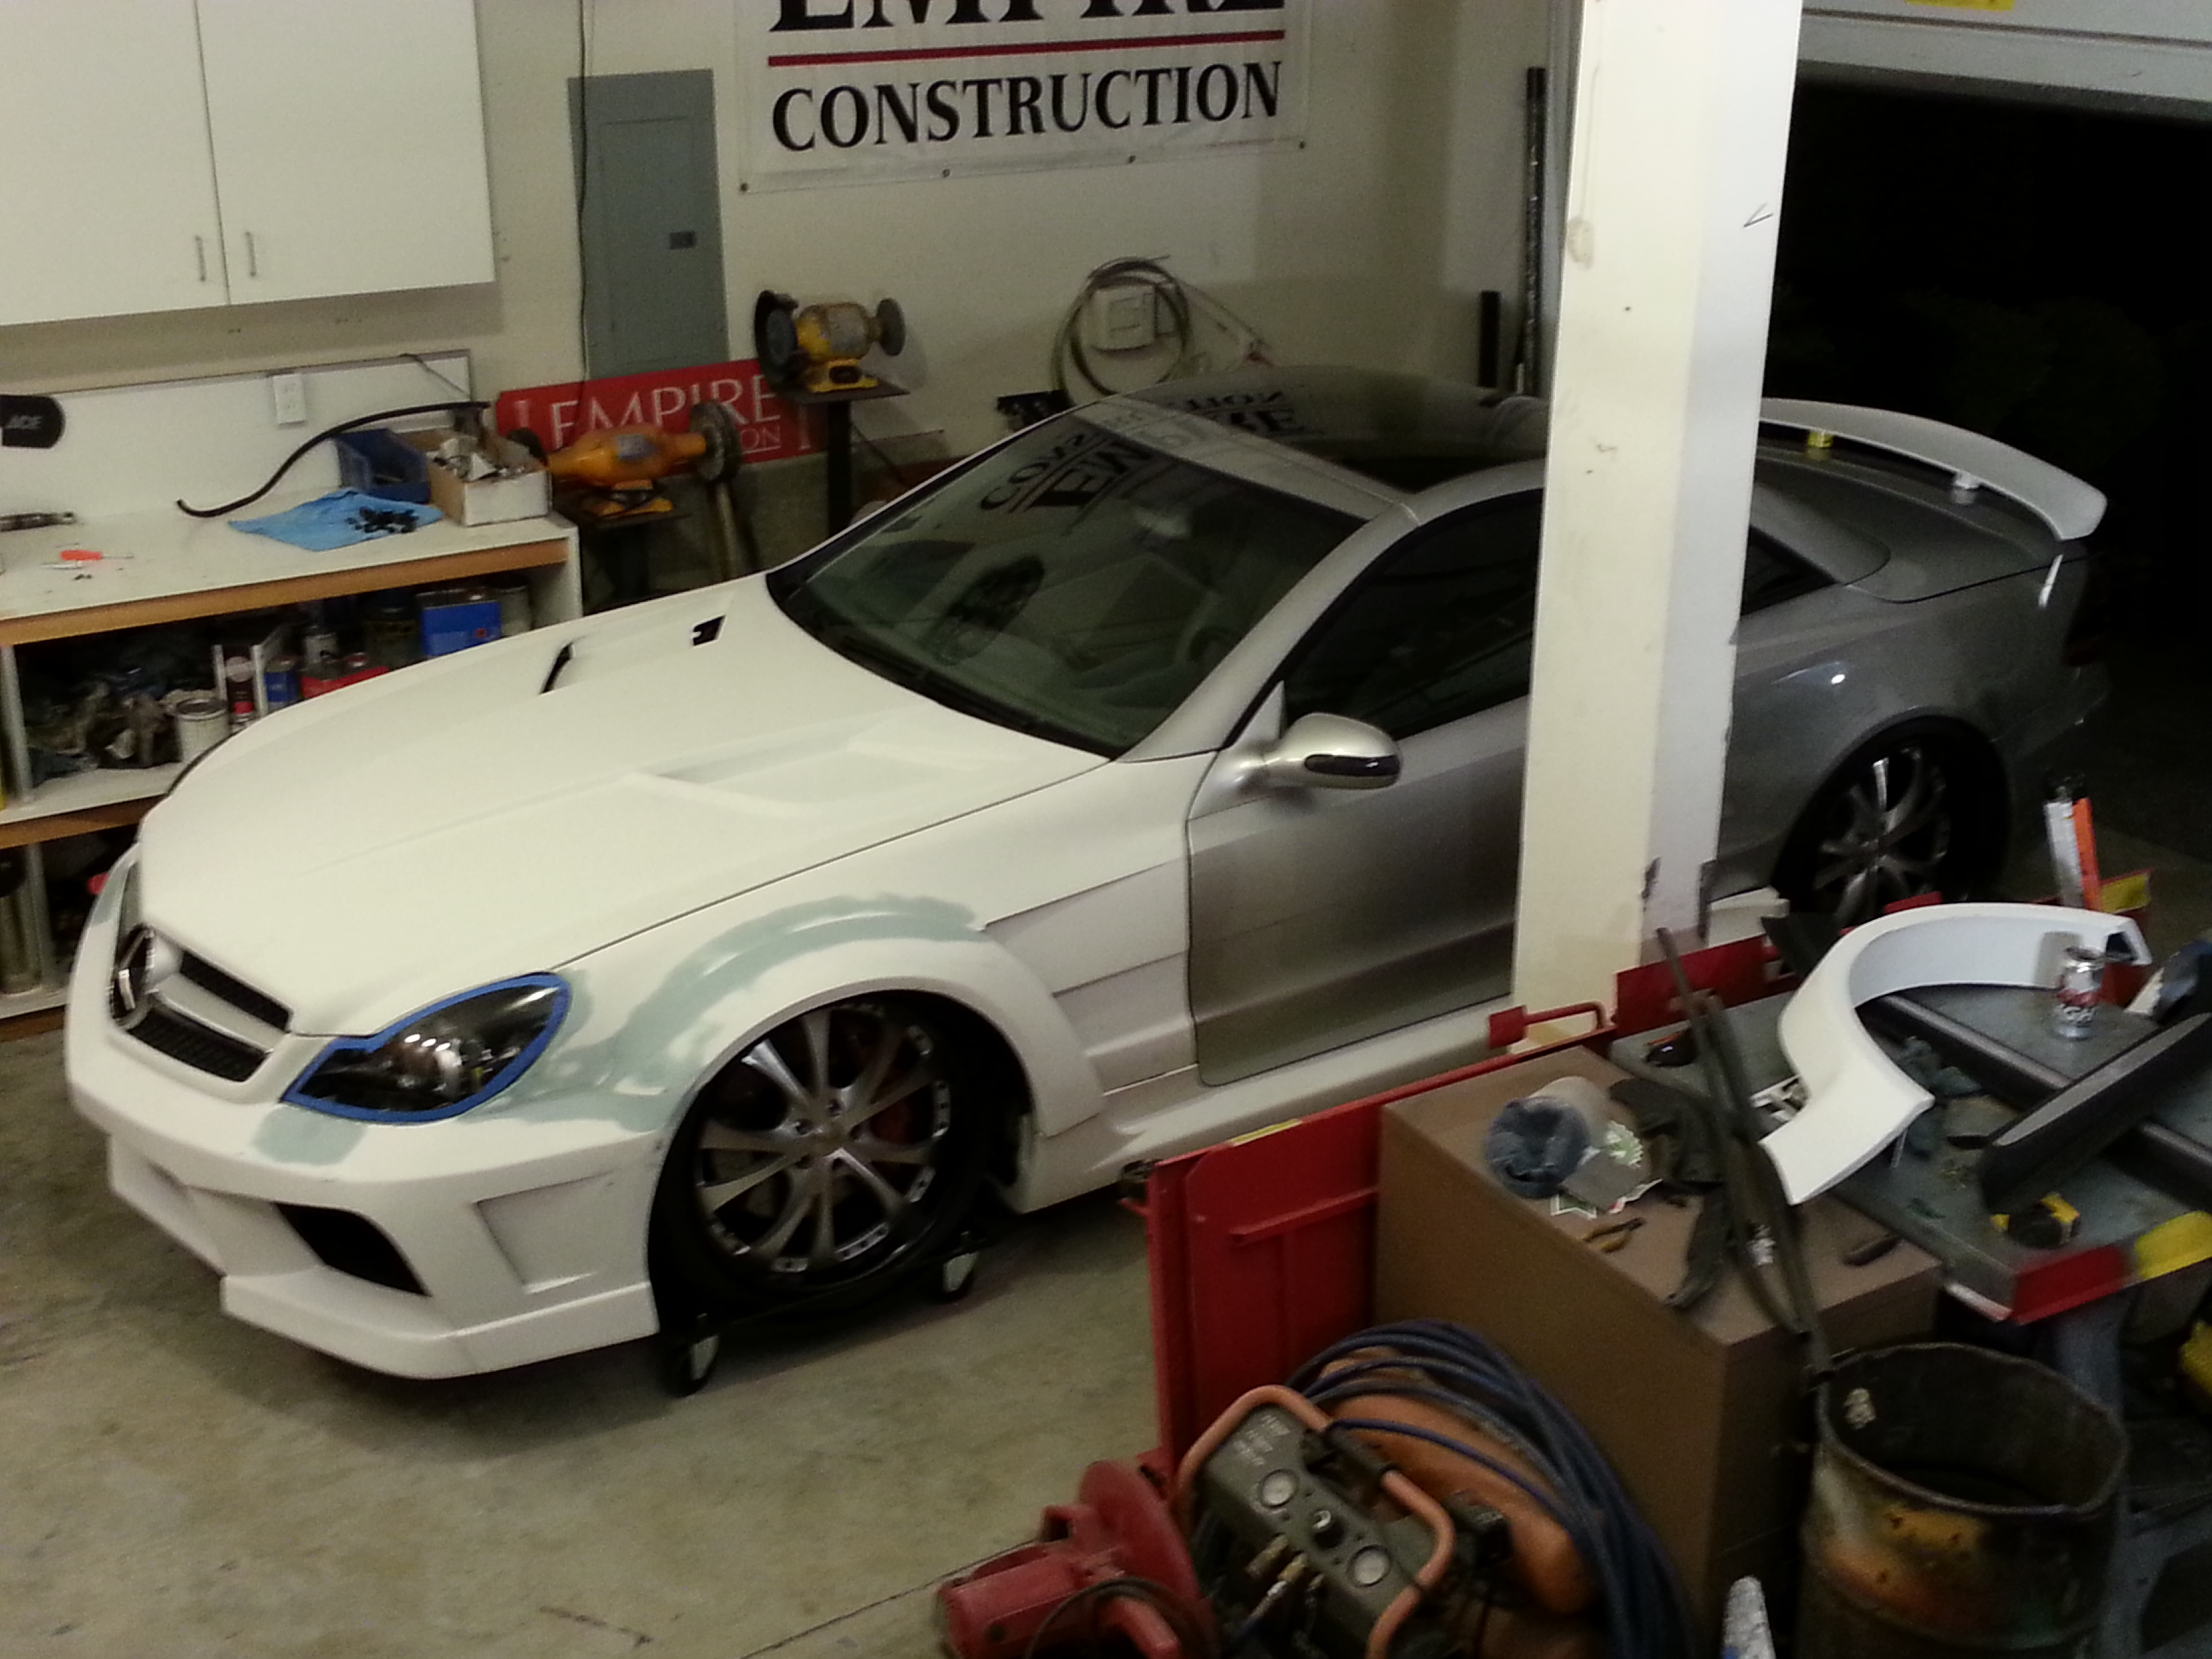
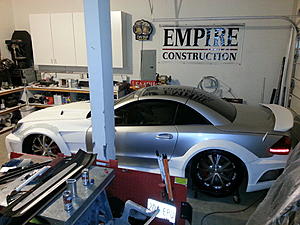
i forgot i had a set of wheel dollies. was killing me to want to see car on the ground, so now best of both worlds. raised enough for what i have to do, and can move car around abit and see how the clearance at ride height.
everyone has seen the pics of a misha kit going on, but, i tell ya it is alot more impressive to see it in person on your car!
i am redoing the wing to sit about 3" up off the deck lid. this pic kind of shows the idea. didn't do much today, just set it on the wheel dollies, but had to post pic anyways!!

MBWorld Fanatic!
iTrader: (1)
Joined: Jan 2012
Posts: 2,092
Likes: 29
From: Orlando
1967 Pro Touring turbo LSX Camaro
Wouldn't you have been more surprised if it did fit instead? Unfortunately this seems to be the rule rather than the exception with aftermarket fiberglass components.
Great work so far, you're a motivated SOB!
Great work so far, you're a motivated SOB!
MB World Stories
The Best of Mercedes & AMG

Manual Mercedes? 6 Times Sindelfingen Let Drivers Have All The Fun
Verdad Gallardo
Mercedes SLR McLaren 722 S Is Extremely Rare Example Modified by McLaren
Verdad Gallardo
8 Classic Boxy Mercedes Designs That Have Aged Like Fine Wine
Verdad Gallardo
Flawlessly Restored Mercedes 190E Evo II Heads to Auction
Verdad Gallardo
Electric Mercedes C-Class Unveiled: 11 Things You Need to Know
Verdad Gallardo
Mercedes EQS Gets A Major Update: Everything You Need to Know
Verdad Gallardo
5 Underrated Mercedes-Benz Models That Don't Get the Love They Deserve
Verdad Gallardo
Mercedes 300D Has Pushed Well Past 1 Million Miles and It Ain't Stopping
Verdad Gallardo
10 Most Reliable Mercedes-Benz Models You Can Buy Used
Verdad Gallardo
Thread Starter
MBWorld Fanatic!
Joined: Sep 2012
Posts: 1,009
Likes: 2
sl55 amg
thanks chris. i would expect not great fitment if the kit was $2-3k, but was expecting a little better for the price. raw materials to make each kit can't be over $400-500, so it leaves quite a bit of margin to spend the time to make the kit correct.
i have been in contact with misha and they are trying to get me in contact with the actual guys who are building from the molds. mostly just letting them know what is going on with what they are putting out the door. sounds as though it is an isolated incident, but i am probably the first to install the kit with the holiday special build run i assume. i know they were backed up with some orders, so maybe something as simple as pulled to quick from the molds, packaged up, and they set weird in the box during shipment.
i have been in contact with misha and they are trying to get me in contact with the actual guys who are building from the molds. mostly just letting them know what is going on with what they are putting out the door. sounds as though it is an isolated incident, but i am probably the first to install the kit with the holiday special build run i assume. i know they were backed up with some orders, so maybe something as simple as pulled to quick from the molds, packaged up, and they set weird in the box during shipment.
Thread Starter
MBWorld Fanatic!
Joined: Sep 2012
Posts: 1,009
Likes: 2
sl55 amg
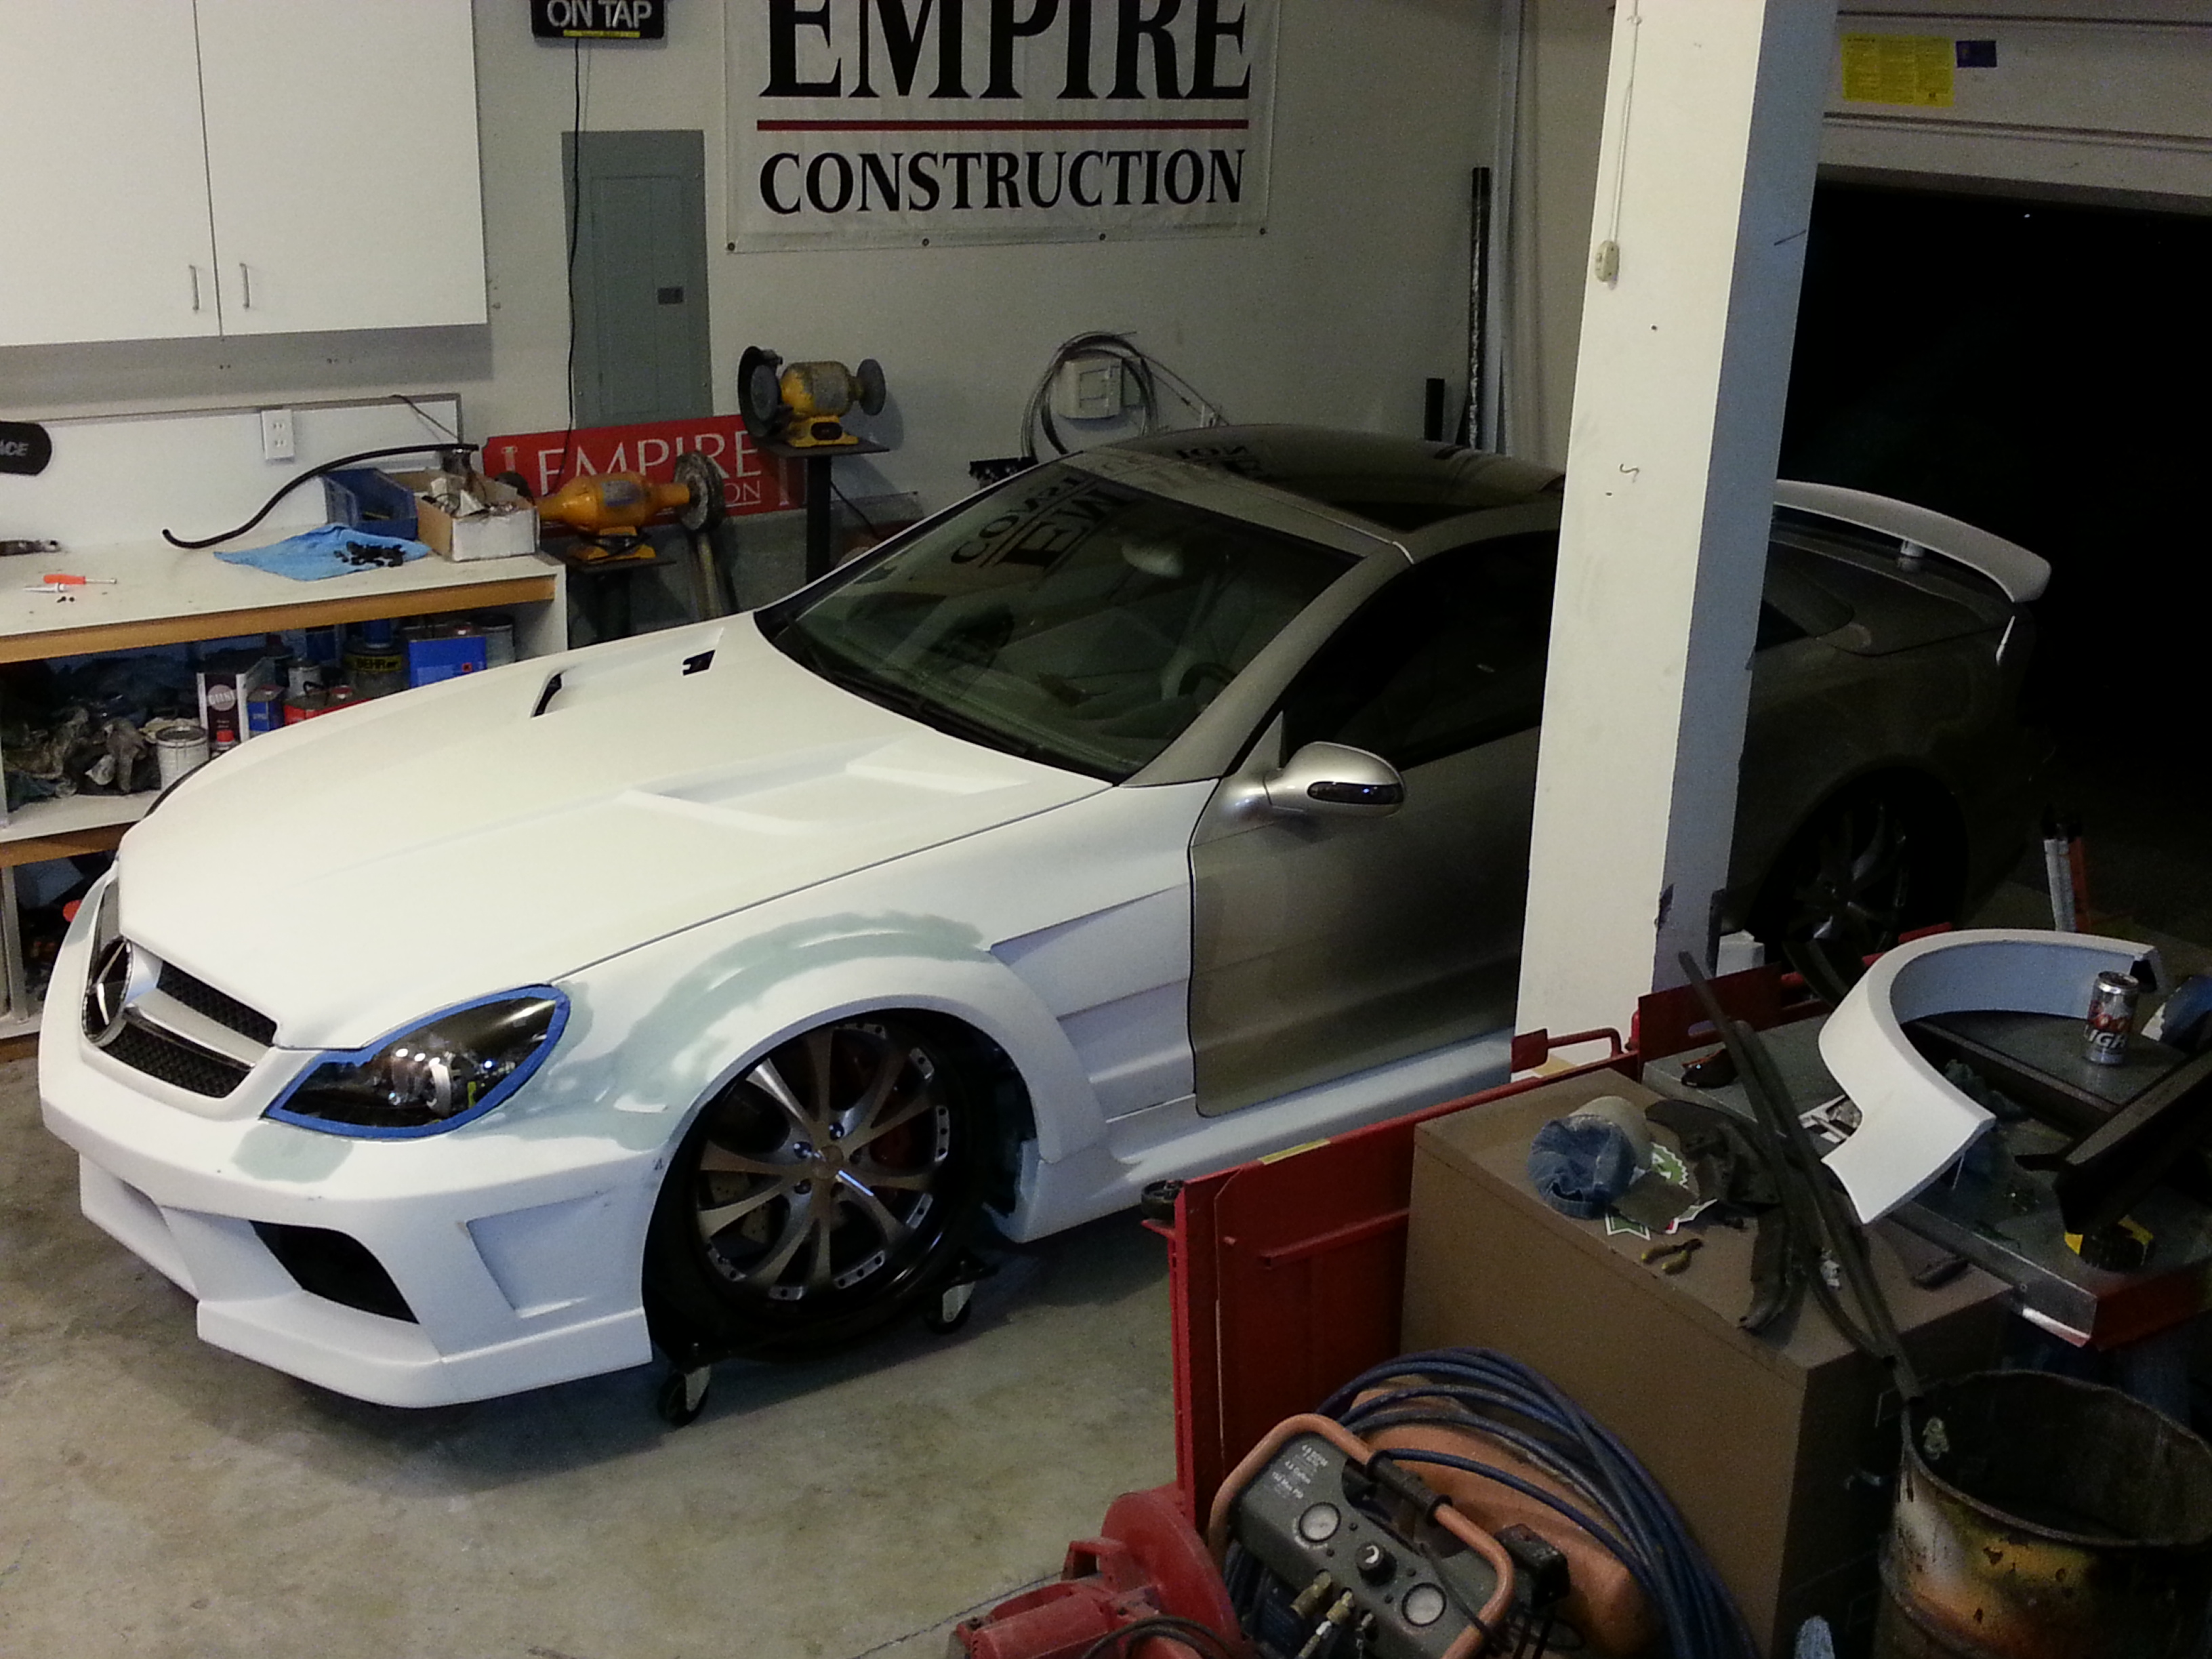
been trying to keep the garage clean so far, but finally decided i needed to let all hell break loose and will just clean up all the dust when done. no way to keep the dust off of everything when grinding fiberglass and bondo.
pretty brutal work week so far but managed to get rear bumper on and cut drivers fender for the flare today. here i thought i would have all the panels swapped out in a day! ha! only half day tomorrow and saturday and sunday open for car stuff. hopefully good progress will be made. i have an estimate of 150 hours from this point to get to my liking before paint. not that the kit is that bad at all, but to try and make it appear as oem body panels with same thickness and reveals is very time consumming. it is one of those things, like if you have a small rock chip in front bumper that nobody else notices or cares, but bugs the hell out of you. if i don't get it perfect before paint, those little details will always stand out.
pretty brutal work week so far but managed to get rear bumper on and cut drivers fender for the flare today. here i thought i would have all the panels swapped out in a day! ha! only half day tomorrow and saturday and sunday open for car stuff. hopefully good progress will be made. i have an estimate of 150 hours from this point to get to my liking before paint. not that the kit is that bad at all, but to try and make it appear as oem body panels with same thickness and reveals is very time consumming. it is one of those things, like if you have a small rock chip in front bumper that nobody else notices or cares, but bugs the hell out of you. if i don't get it perfect before paint, those little details will always stand out.


Senior Member
Joined: Oct 2012
Posts: 319
Likes: 0
From: San Francisco
2015 SL63 AMG
very nice, impressive, i'm sure it'll come out nice, I've had so many experience with aftermarket fiberglass body parts, and all of them are VERY GOOD, ummm, maybe just my luck....

Super Member
Joined: Jan 2012
Posts: 883
Likes: 24
From: Finland
SL600 / SL450 (107) / E350 / BMW M5 E60 / BMW 745i (E23) / BMW X6M / Toyota Hilux 4 WD/ Honda CBX 10
been trying to keep the garage clean so far, but finally decided i needed to let all hell break loose and will just clean up all the dust when done. no way to keep the dust off of everything when grinding fiberglass and bondo.
pretty brutal work week so far but managed to get rear bumper on and cut drivers fender for the flare today. here i thought i would have all the panels swapped out in a day! ha! only half day tomorrow and saturday and sunday open for car stuff. hopefully good progress will be made. i have an estimate of 150 hours from this point to get to my liking before paint. not that the kit is that bad at all, but to try and make it appear as oem body panels with same thickness and reveals is very time consumming. it is one of those things, like if you have a small rock chip in front bumper that nobody else notices or cares, but bugs the hell out of you. if i don't get it perfect before paint, those little details will always stand out.


pretty brutal work week so far but managed to get rear bumper on and cut drivers fender for the flare today. here i thought i would have all the panels swapped out in a day! ha! only half day tomorrow and saturday and sunday open for car stuff. hopefully good progress will be made. i have an estimate of 150 hours from this point to get to my liking before paint. not that the kit is that bad at all, but to try and make it appear as oem body panels with same thickness and reveals is very time consumming. it is one of those things, like if you have a small rock chip in front bumper that nobody else notices or cares, but bugs the hell out of you. if i don't get it perfect before paint, those little details will always stand out.
 . Can't work at al if it dirty.
I have al parts at the car except the rear fender parts. I'm gone let the paint shop do it..... (I have no welding machine). I have cut the "air let holes" at the front fenders also.....
Your project looks great.....
BTW.... have you measure how much wider your car is going to be at the rear..? I have measure it and my car is going to be 67mm = 2,63" each side wider.
Juha
Last edited by Ekselent; Jan 11, 2013 at 05:16 AM.
MBWorld Fanatic!


Joined: Sep 2008
Posts: 3,076
Likes: 28
From: Seattle, WA
99 ML430, 01 CLK55, 07 R63, 15 E63 Wagon
Holy cow this thread really is a transformation! I thought you were done with your mods before, but it looks like you've just gotten started.
Maybe I missed this earlier, but what color will you be painting it (since you'll have to repaint the majority of the car anyways). Have you thought about having a little fun and doing something different? Metallic orange seems to be killer:
http://luxuryvice.com/blog/2009/07/2...shot-overload/
Maybe I missed this earlier, but what color will you be painting it (since you'll have to repaint the majority of the car anyways). Have you thought about having a little fun and doing something different? Metallic orange seems to be killer:
http://luxuryvice.com/blog/2009/07/2...shot-overload/
Thread Starter
MBWorld Fanatic!
Joined: Sep 2012
Posts: 1,009
Likes: 2
sl55 amg
Holy cow this thread really is a transformation! I thought you were done with your mods before, but it looks like you've just gotten started.
Maybe I missed this earlier, but what color will you be painting it (since you'll have to repaint the majority of the car anyways). Have you thought about having a little fun and doing something different? Metallic orange seems to be killer:
http://luxuryvice.com/blog/2009/07/2...shot-overload/
Maybe I missed this earlier, but what color will you be painting it (since you'll have to repaint the majority of the car anyways). Have you thought about having a little fun and doing something different? Metallic orange seems to be killer:
http://luxuryvice.com/blog/2009/07/2...shot-overload/
that looks pretty awesome. i am seriously leaning towards the new ford grabber blue. pretty sure i am doing the roof black (or atleast the center to blend in the pano roof) and black wheels with blacked out lights and other stuff. i like the idea of no metallics or pearls and just straight pigment on this car incase i need to touch it up in the future.
Thread Starter
MBWorld Fanatic!
Joined: Sep 2012
Posts: 1,009
Likes: 2
sl55 amg
Same here... I have also clean up the garage. Can't work at al if it dirty.
I have al parts at the car except the rear fender parts. I'm gone let the paint shop do it..... (I have no welding machine). I have cut the "air let holes" at the front fenders also.....
Your project looks great.....
BTW.... have you measure how much wider your car is going to be at the rear..? I have measure it and my car is going to be 67mm = 2,63" each side wider.
Juha
. Can't work at al if it dirty.I have al parts at the car except the rear fender parts. I'm gone let the paint shop do it..... (I have no welding machine). I have cut the "air let holes" at the front fenders also.....
Your project looks great.....
BTW.... have you measure how much wider your car is going to be at the rear..? I have measure it and my car is going to be 67mm = 2,63" each side wider.
Juha
MBWorld Fanatic!
Joined: Sep 2008
Posts: 3,076
Likes: 28
From: Seattle, WA
99 ML430, 01 CLK55, 07 R63, 15 E63 Wagon
that looks pretty awesome. i am seriously leaning towards the new ford grabber blue. pretty sure i am doing the roof black (or atleast the center to blend in the pano roof) and black wheels with blacked out lights and other stuff. i like the idea of no metallics or pearls and just straight pigment on this car incase i need to touch it up in the future.
https://mbworld.org/forums/c63-amg-w...ue-c63-bs.html
If you do the roof black, you may want to consider doing the windshield frame/ A pillar area as well. Sort of mimics the idea that the latest Ferraris and Lamborghinis have if you do the bi colore options.
http://www.gtspirit.com/wp-content/u...458_italia.jpg
http://www.thetorquereport.com/Lambo...4_Bicolore.jpg
Can't wait to see the finished product!
You certainly can't go wrong with a solid pigmented color as that can be really sharp as well. Another cool choice may be turquoise made famous by the LP670-SV and CCX in London.
http://www.shmeemobiles.co.uk/files/...ds/012/012.jpg
http://3.bp.blogspot.com/_VIvDEx3B93..._6024782_n.jpg
Thread Starter
MBWorld Fanatic!
Joined: Sep 2012
Posts: 1,009
Likes: 2
sl55 amg
yes, i think that jaguar blue is very close to the same color. great to see the color on the c63. that has alot of the same lines as the misha kit. i wanted it to tone down the body lines just a touch, but still be a loud color. looks like that blue is the ticket!
Super Member
Joined: Feb 2011
Posts: 571
Likes: 5
From: Sweden
SL55AMG + SL600 + E320 + A180
Hi OZ
Way to go .... gonna be very brutal you new car! and again the effort you put into it ..... you burn for this ....... just remember to enjoy your build - I know I do )
)
Way to go .... gonna be very brutal you new car! and again the effort you put into it ..... you burn for this ....... just remember to enjoy your build - I know I do
)
Super Member
Joined: Jan 2012
Posts: 883
Likes: 24
From: Finland
SL600 / SL450 (107) / E350 / BMW M5 E60 / BMW 745i (E23) / BMW X6M / Toyota Hilux 4 WD/ Honda CBX 10

Thread Starter
MBWorld Fanatic!
Joined: Sep 2012
Posts: 1,009
Likes: 2
sl55 amg
thanks amok. i admittedly have a problem or addiction with cars. lol. it goes hand in hand with the ebay addiction too. not a good combo to have. haha.
Thread Starter
MBWorld Fanatic!
Joined: Sep 2012
Posts: 1,009
Likes: 2
sl55 amg
MBWorld Fanatic!
Joined: Feb 2004
Posts: 9,155
Likes: 20
From: Southern, CA.
V12-Biturbo
Throwing you guys a bone here..
Don't get caught up in the huge wheels IE 20x10 20x13 (my personal setup w/265/30 345/25 tires) The extra width not only kills gas mileage but these huge wheels ARE ALL TERRIBLY HEAVY & kill HP/TQ quite noticably ") 40-45 rwhp & rwtq LESS (yes dyno proof, & why I'm switching to much smaller/lighter CCW'S)
40-45 rwhp & rwtq LESS (yes dyno proof, & why I'm switching to much smaller/lighter CCW'S)
Adding 375's outback is just adding insult to injury.. The effects are even MORE noticeable on SL55's as they have 100 LESS rwtq & about 30-40 less rwhp stock vs stock, forget factory ratings I've seen umpteen 600/55 stock & modded Dyno's & I've driven both SL55 & SL600 before & after huge wheels w/widebody kits.
These huge 3-piece 20x13's weigh anywhere between 40-45 lbs ea add 35-40 lb 345-375 tire then add the 20x10 front wheels/tires & it just gets worse you'll soon see what I'm talking about if you go this route.. (Rotational mass murders perf, I never thought it'd be this much though) Now as far as looks go by ALL means they look stellar but @ what point are you willing to suffer so much performance LOSS for beauty?
If I'd known this before adding these Tonka wheels I'd of done it much differently (though the look is perfection, & I'll keep them for car meets/shows or occassional summer cruising) Was tempted to sell them to spring for the over priced lightweight HRE's but CCW's are slightly lighter & HALF the price + I can have both looks & switch whenever I want..
Just trying to impart my & (3) other Widebody kit owners experience who added these giant wheels etc (2) of the (3) other owners dumped the 20x13's etc & went to 19x11 or 20x11 rears & 19x8.5 or 20x8.5 fronts..
Edit: just looked it up 345/25/20 tires weigh 35-36 lbs ea 375's 39-40 lbs each.
40-45 rwhp & rwtq LESS (yes dyno proof, & why I'm switching to much smaller/lighter CCW'S)Adding 375's outback is just adding insult to injury.. The effects are even MORE noticeable on SL55's as they have 100 LESS rwtq & about 30-40 less rwhp stock vs stock, forget factory ratings I've seen umpteen 600/55 stock & modded Dyno's & I've driven both SL55 & SL600 before & after huge wheels w/widebody kits.
These huge 3-piece 20x13's weigh anywhere between 40-45 lbs ea add 35-40 lb 345-375 tire then add the 20x10 front wheels/tires & it just gets worse you'll soon see what I'm talking about if you go this route.. (Rotational mass murders perf, I never thought it'd be this much though) Now as far as looks go by ALL means they look stellar
but @ what point are you willing to suffer so much performance LOSS for beauty?If I'd known this before adding these Tonka wheels I'd of done it much differently (though the look is perfection, & I'll keep them for car meets/shows or occassional summer cruising) Was tempted to sell them to spring for the over priced lightweight HRE's but CCW's are slightly lighter & HALF the price + I can have both looks & switch whenever I want..
Just trying to impart my & (3) other Widebody kit owners experience who added these giant wheels etc (2) of the (3) other owners dumped the 20x13's etc & went to 19x11 or 20x11 rears & 19x8.5 or 20x8.5 fronts..
Edit: just looked it up 345/25/20 tires weigh 35-36 lbs ea 375's 39-40 lbs each.
Last edited by Thericker; Jan 13, 2013 at 06:42 PM.
Thread Starter
MBWorld Fanatic!
Joined: Sep 2012
Posts: 1,009
Likes: 2
sl55 amg
+1. i am still not 100% decided on my wheel tire set up. it looks like if i keep the same wheels, i would need 2.5" spacers all around. after seeing them on the car (albeit a little inboard!) i do still like the looks of them and i run 255/305 tires.
i do have a set of 20x10 and 20x13 on piece forged adv wheels though. they are about as light as they get. heck, they are probably lighter than my current set up. going to wait till car is mostly together and pull it outside and set them up next to it.
either way i go, the wheel spacers are $400 for a set of 4 in the bp and size i need.
either way if you use spacers or have wheels custom built, your scrub radius will be retarded and the car will feel different. only way to get rid of that is longer control arms, which then will probably need the mounting points moved to bring geometry back into correct.
Thread Starter
MBWorld Fanatic!
Joined: Sep 2012
Posts: 1,009
Likes: 2
sl55 amg
here is what i used to glue the rear flares on. it is a fusor product. not super cheap, $45 a tube and the guns can range from $50-100, but it is great stuff and this is exactly what it is design for.
it can be used directly on a painted surface roughed up with 60-80 grit. this particular one is kind of a slow set, but a heat gun speeds it right up.
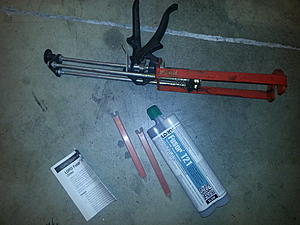
run a bead liberally on all the mounting flanges and contact areas, then whatever squeezes out, you run your finger along it. i try to make sure the adhesive fills the seam and that i feather edge it to the body and the part. this way the seam spans onto both parts further lessening any chance of a separation or stress crack. do a final smoothing over seam with a lightweight filler.

Thread Starter
MBWorld Fanatic!
Joined: Sep 2012
Posts: 1,009
Likes: 2
sl55 amg
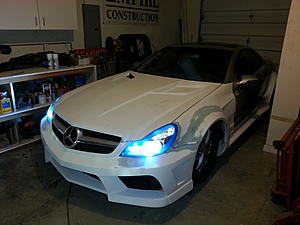
another long day. my other new headlight came today to replace the crap used one i got, and also the headlight harnesses. got other fender glued on also. i am actually getting close to having the panels lined up to eachother and ready to pull back off to sand and finish the interior portions of the panels.
got headlights working, but, the high beams do not seem to work. i didn't try with ignition on though. maybe it needs to be on.
got headlights working, but, the high beams do not seem to work. i didn't try with ignition on though. maybe it needs to be on.