


richvegas
Member
close


Jun 18, 2025
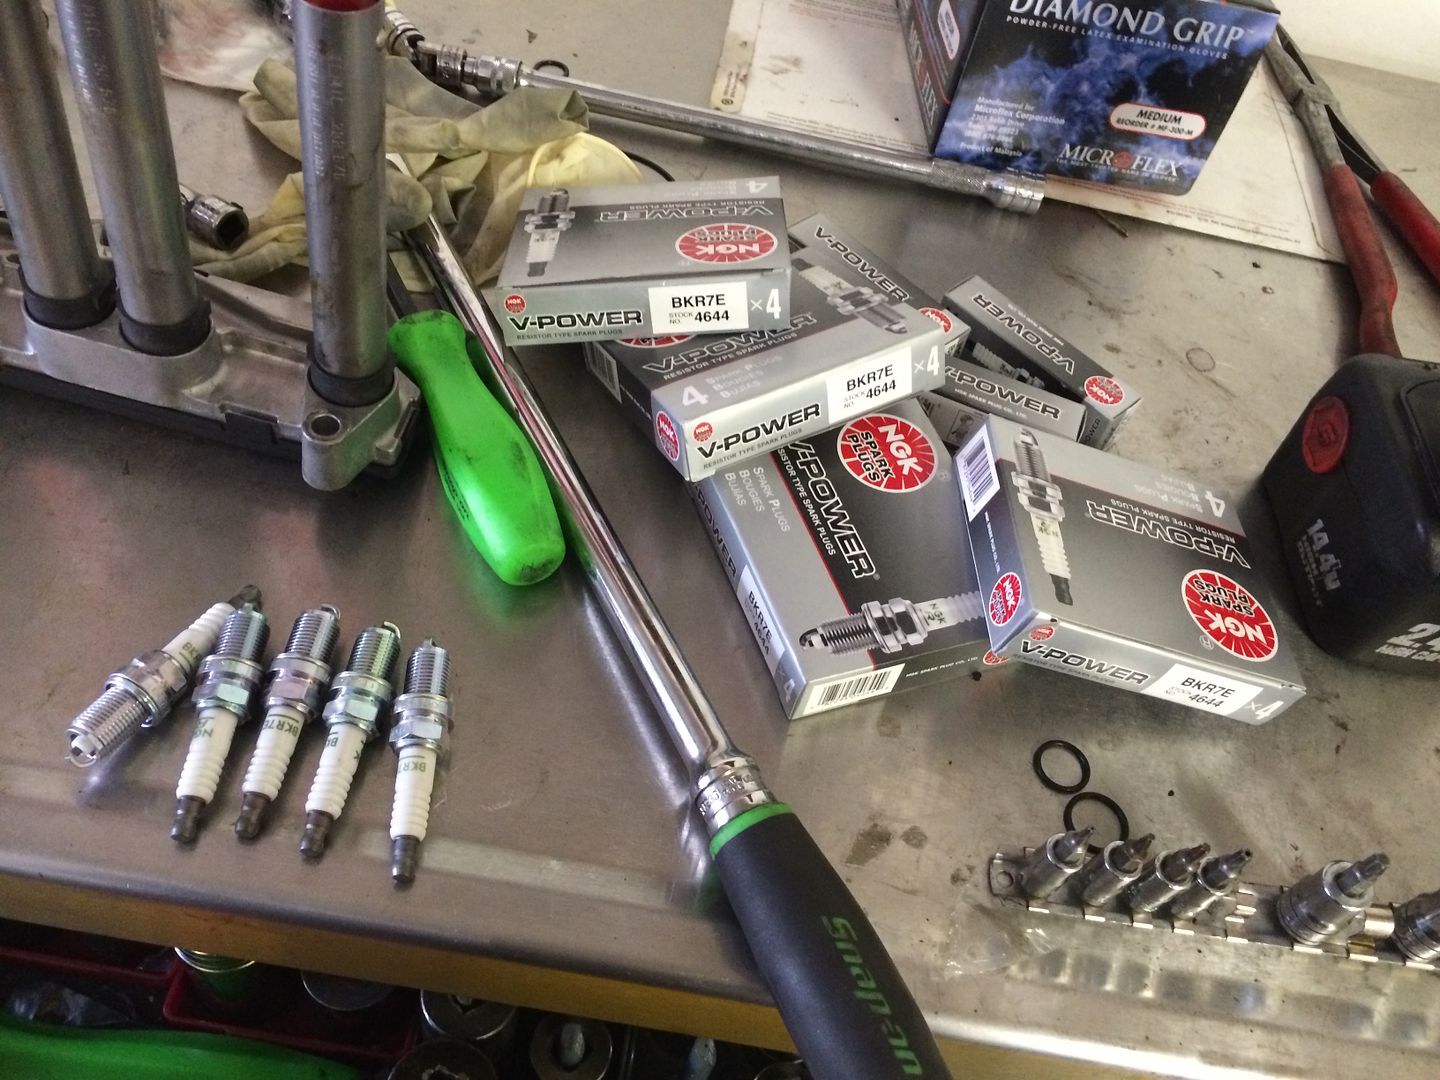
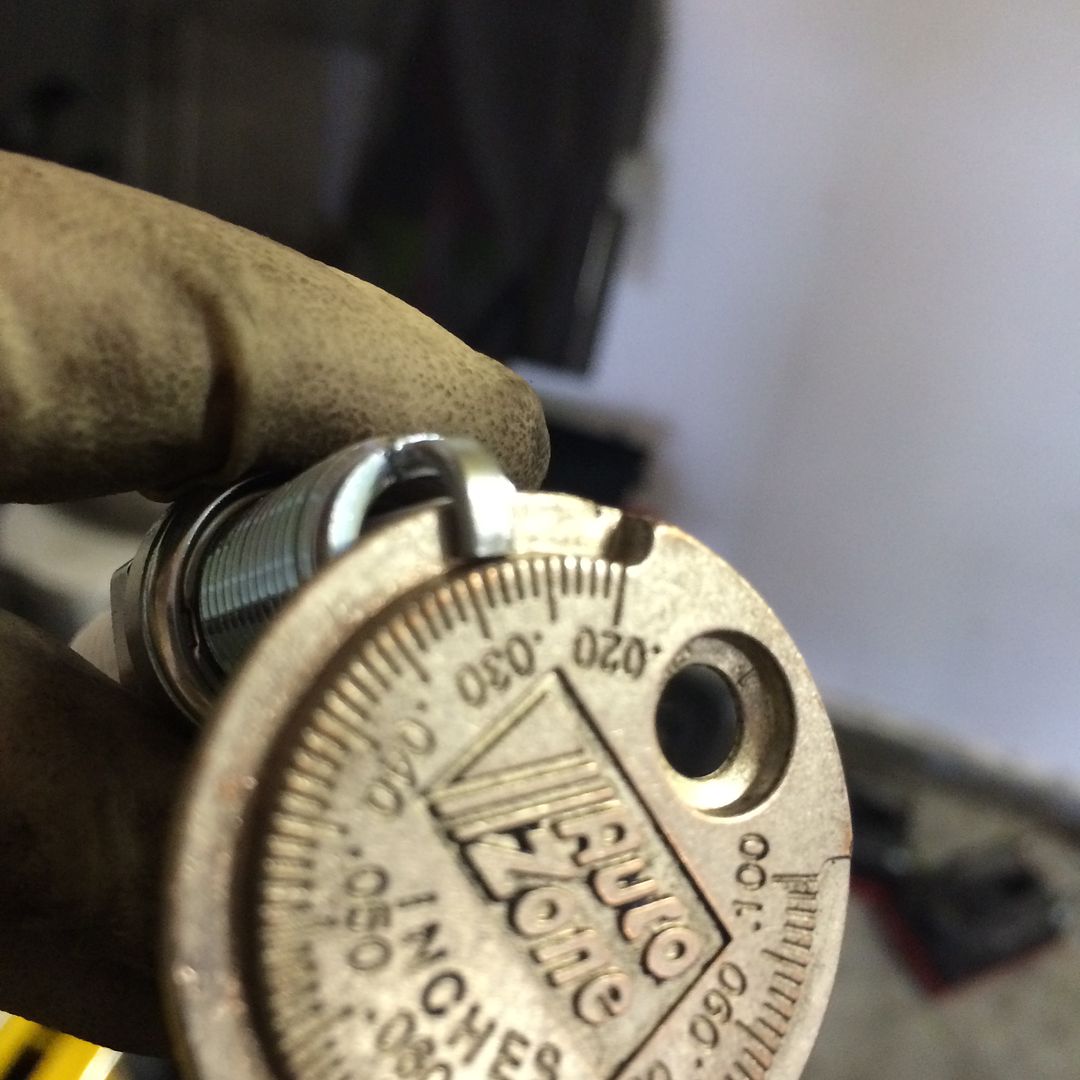
So I've decided to do the spark plug mod on my 2006 S65. With some help from Ed@proedgetunin, we found the colder range spark plugs for after a tune. I went with NGK BKR7E 4644 and i gapped them at .027"
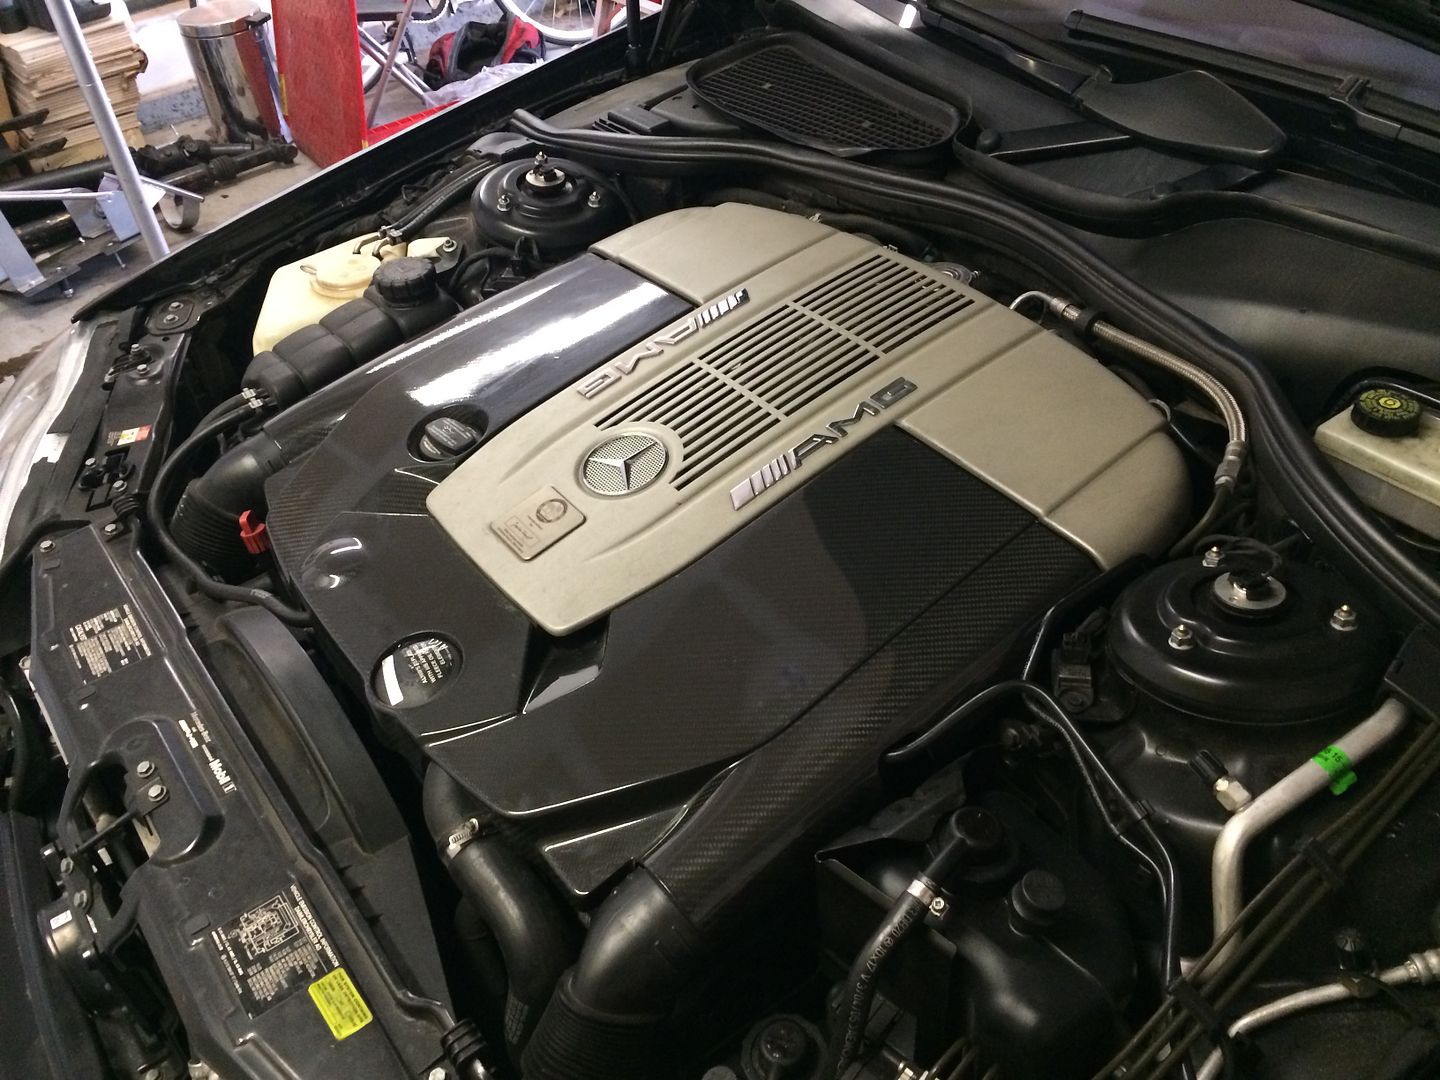
TAKE OFF ENGINE COVERS

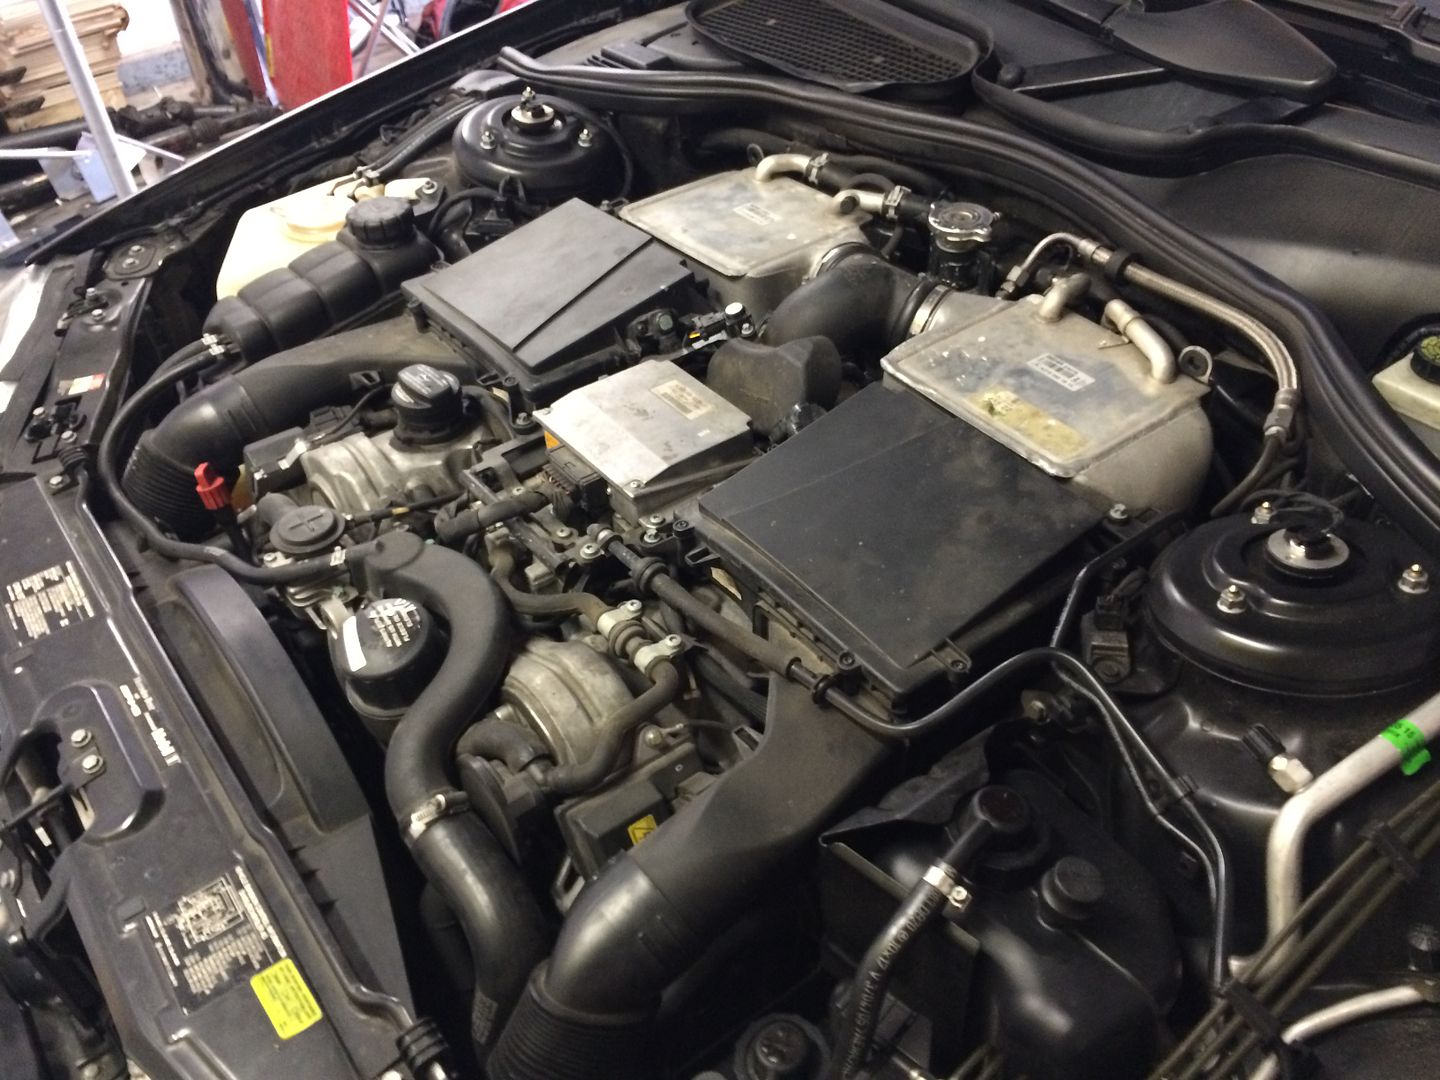
REMOVE AIR INLET DUCTS
REMOVE AIR FILTER COVERS AND FILTERS. USE A TORX T25 FOR THE LID COVERS AND UNHOOK THE SENSORS BY SQUEEZING THE CONNECTOR.
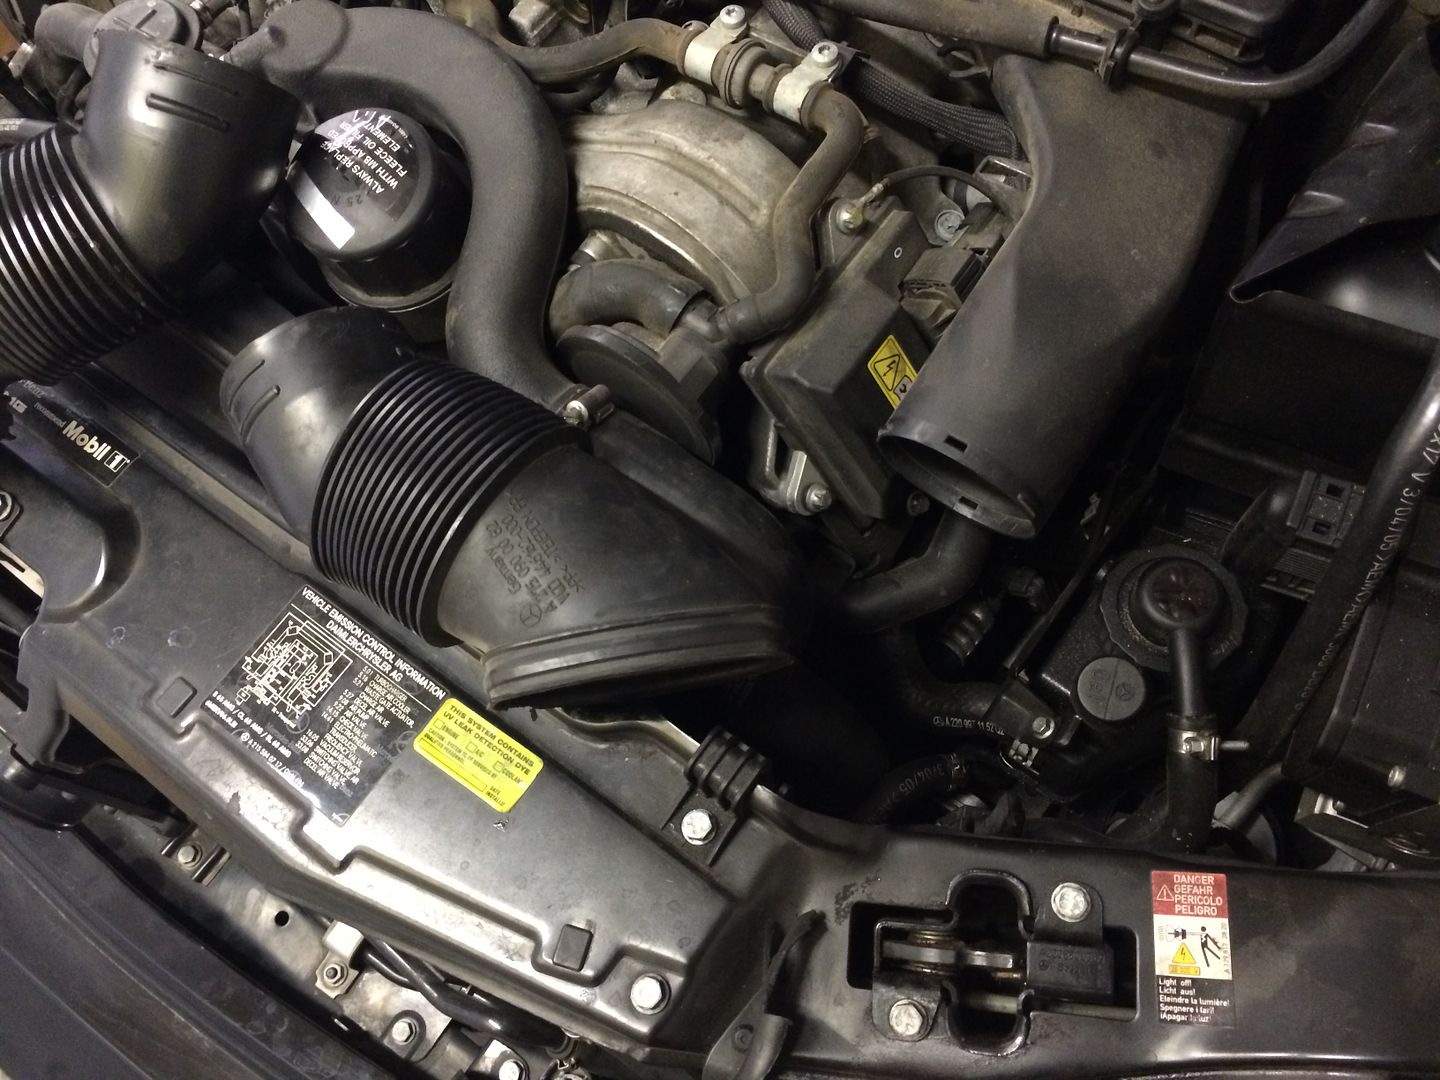
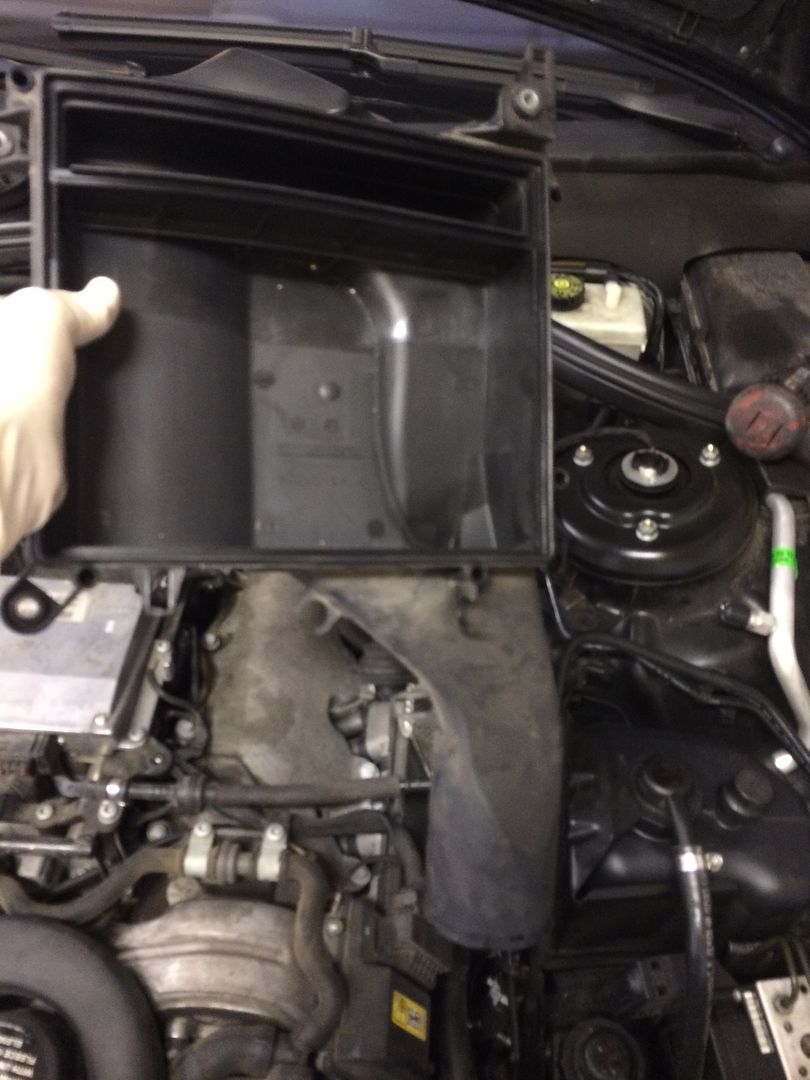
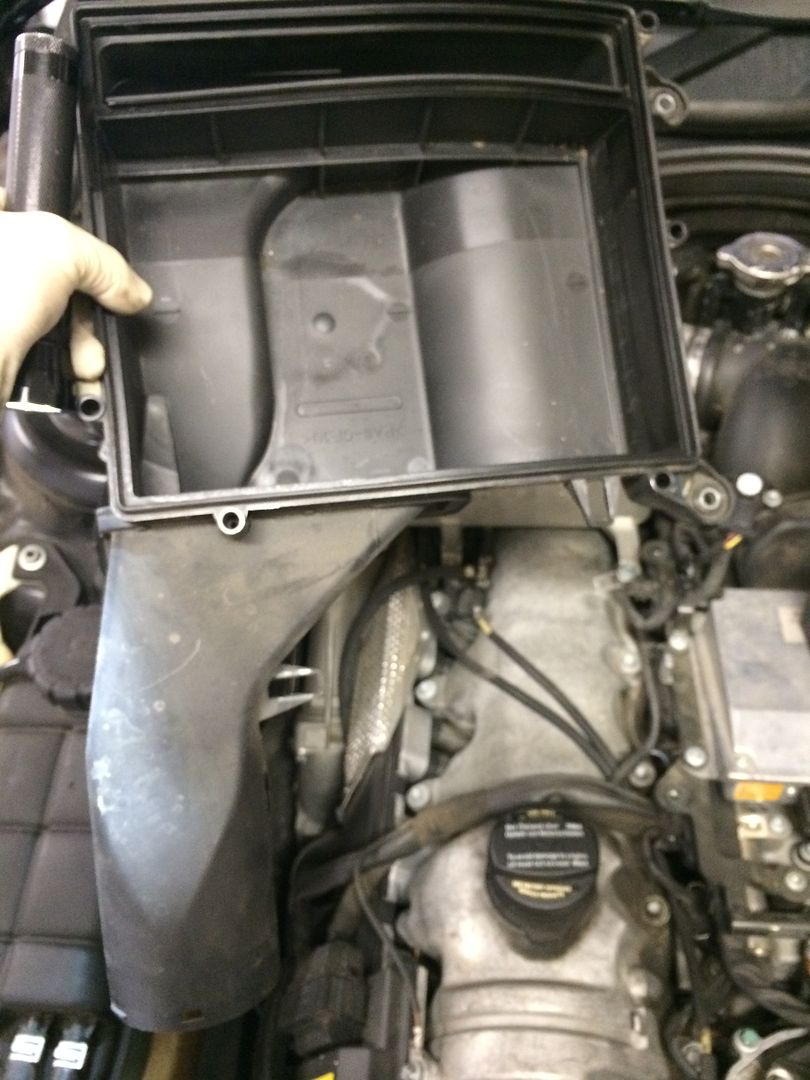
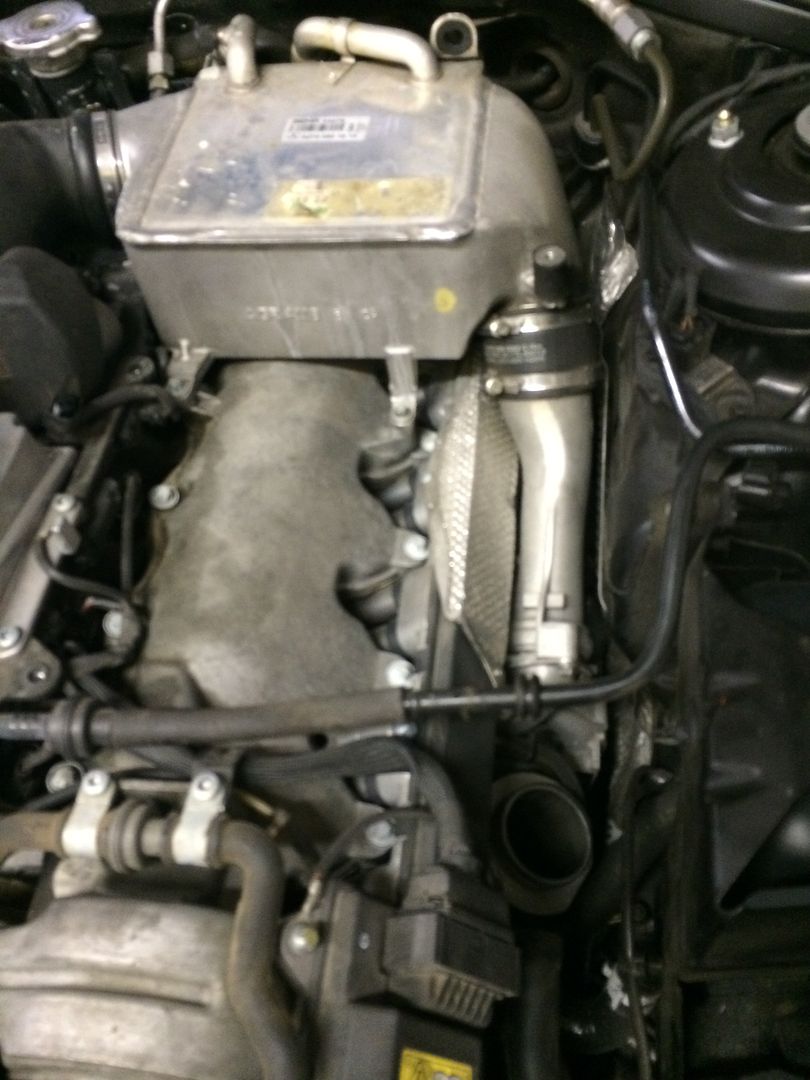
NEXT REMOVE THE LOWER AIRBOX'S
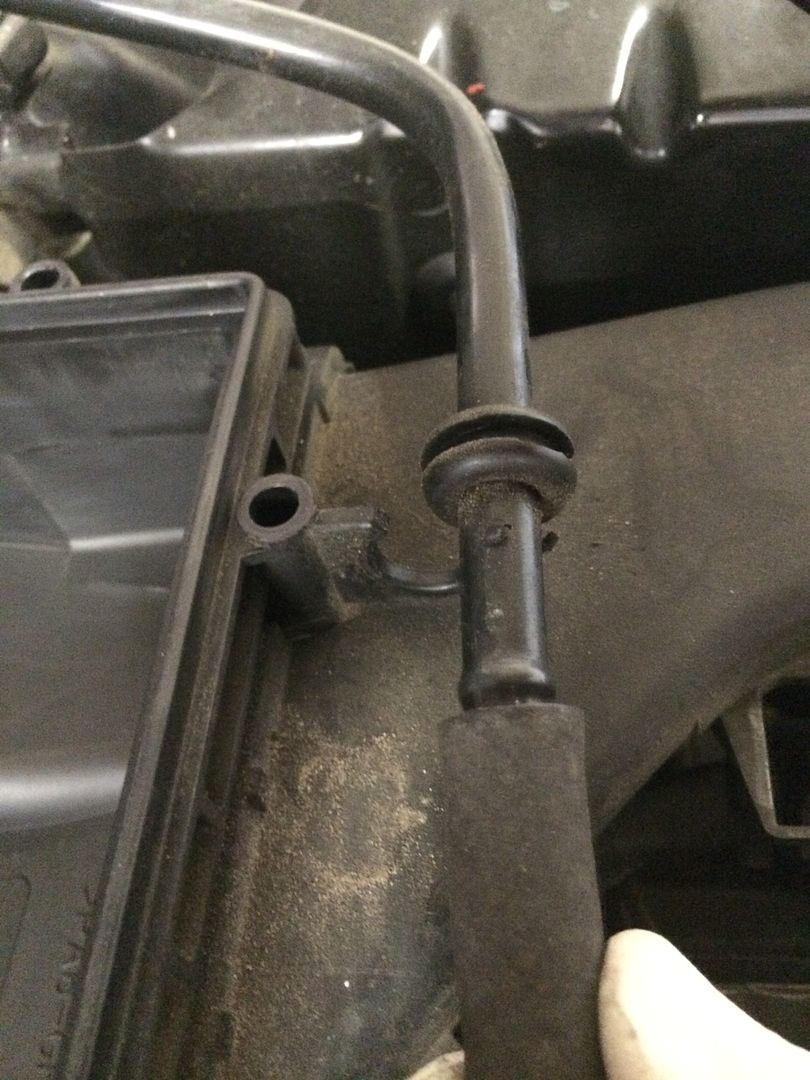
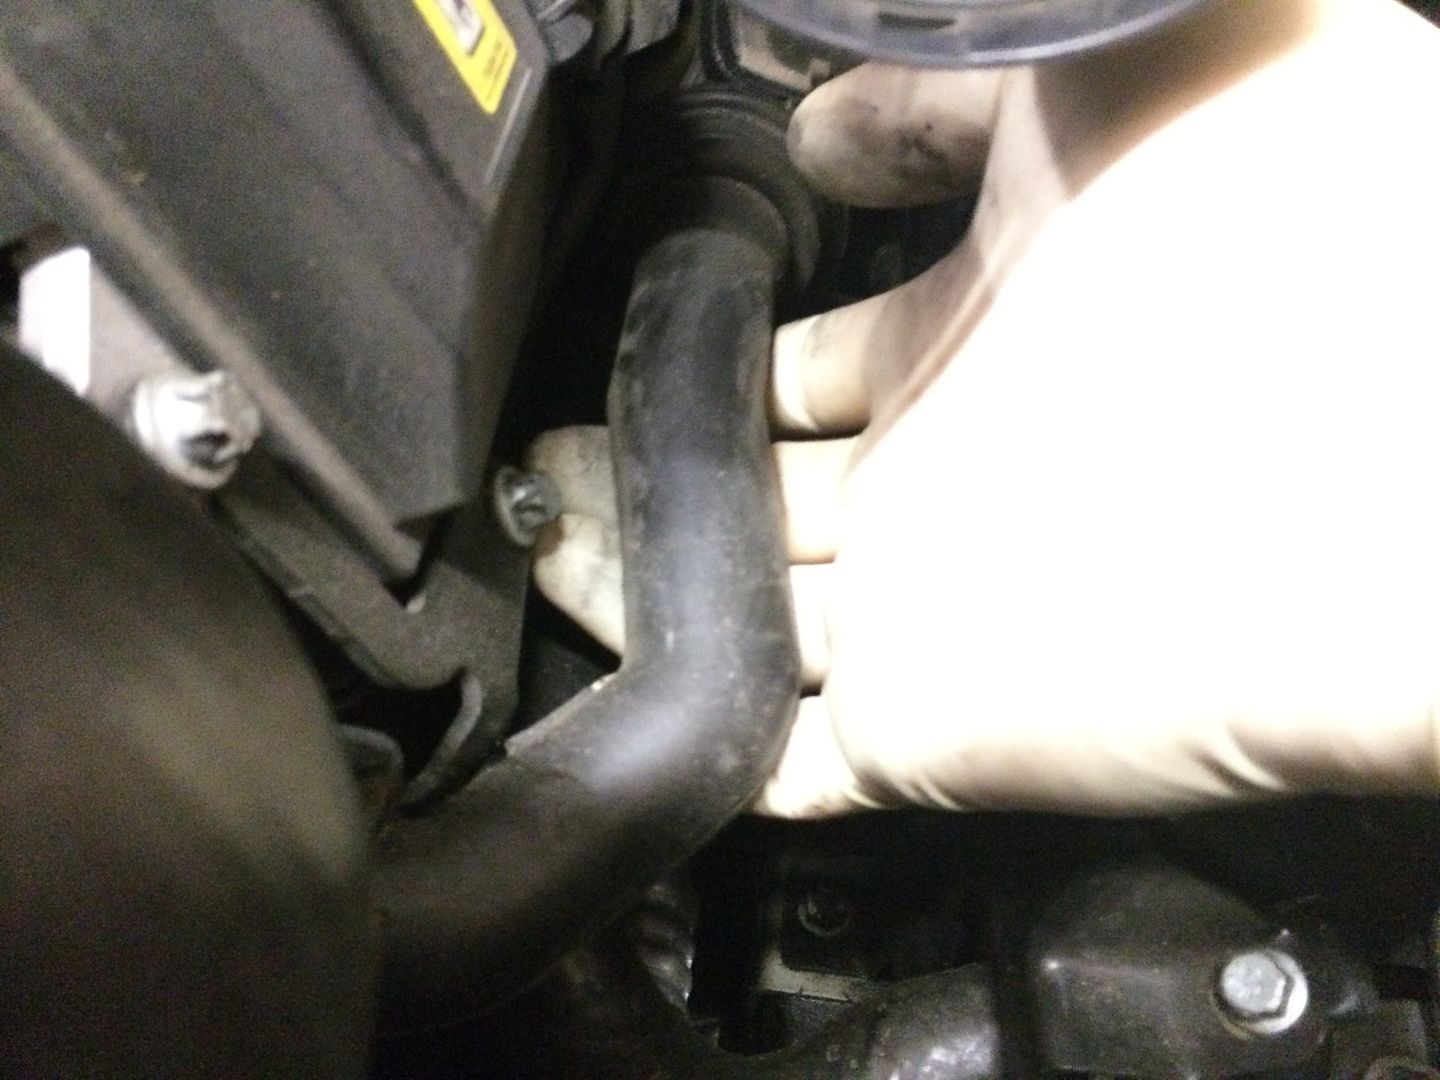
-THERE ARE 3 E10 INVERTED TORX BOLTS THAT HOLD EACH ONE. ON THE DRIVER'S SIDE THERE IS A HOSE UNDERNEATH THAT JUST PULLS OFF AND ON THE TOP THE HOSE JUST PULLS OUT OF THE HOLDER.
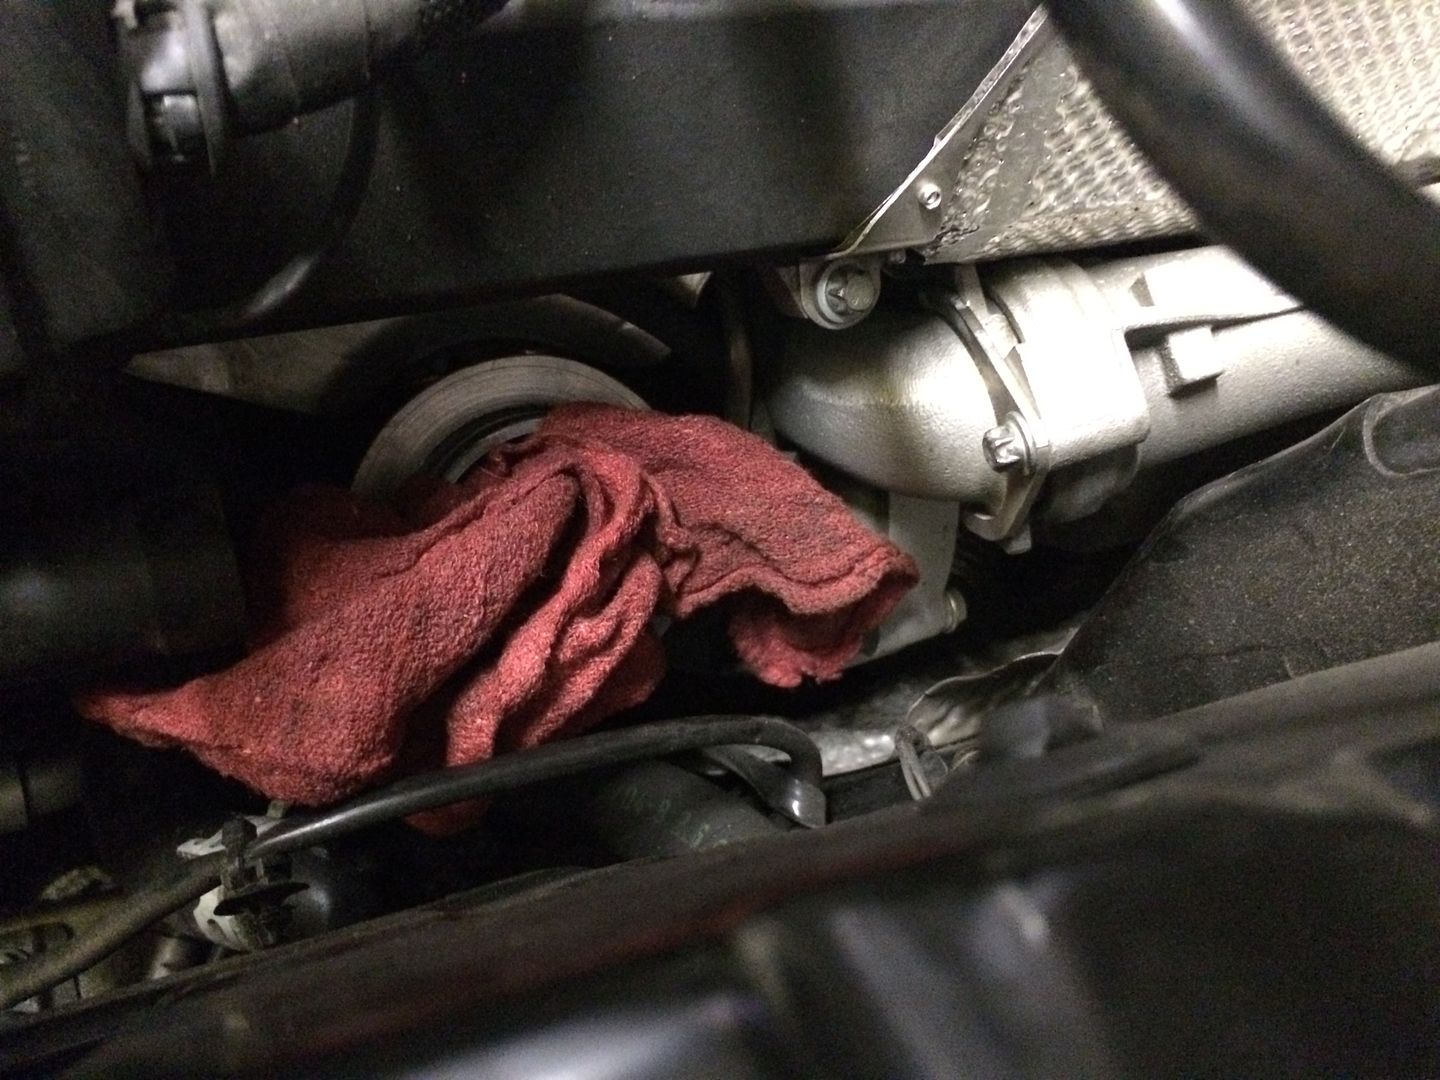
AT THIS POINT, ITS A GOOD IDEA TO STUFF A RAG OR TOWEL INTO THE TURBO INLET SO YOU DON'T DROP ANYTHING IN THERE AND HAVE REALLY BIG PROBLEMS.
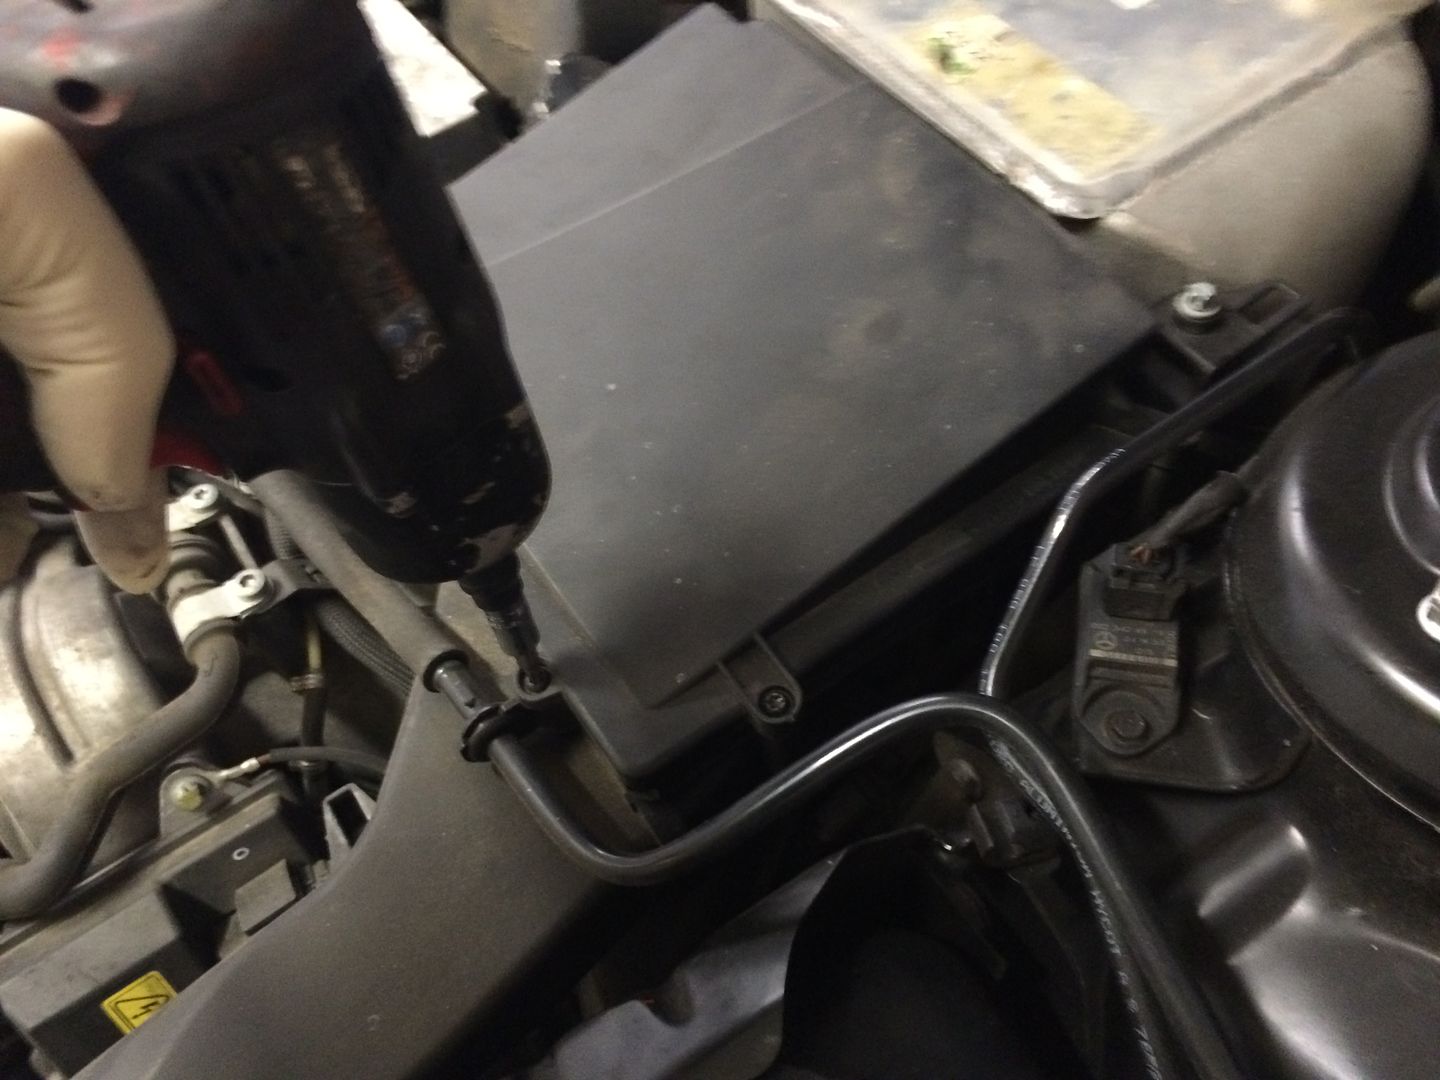
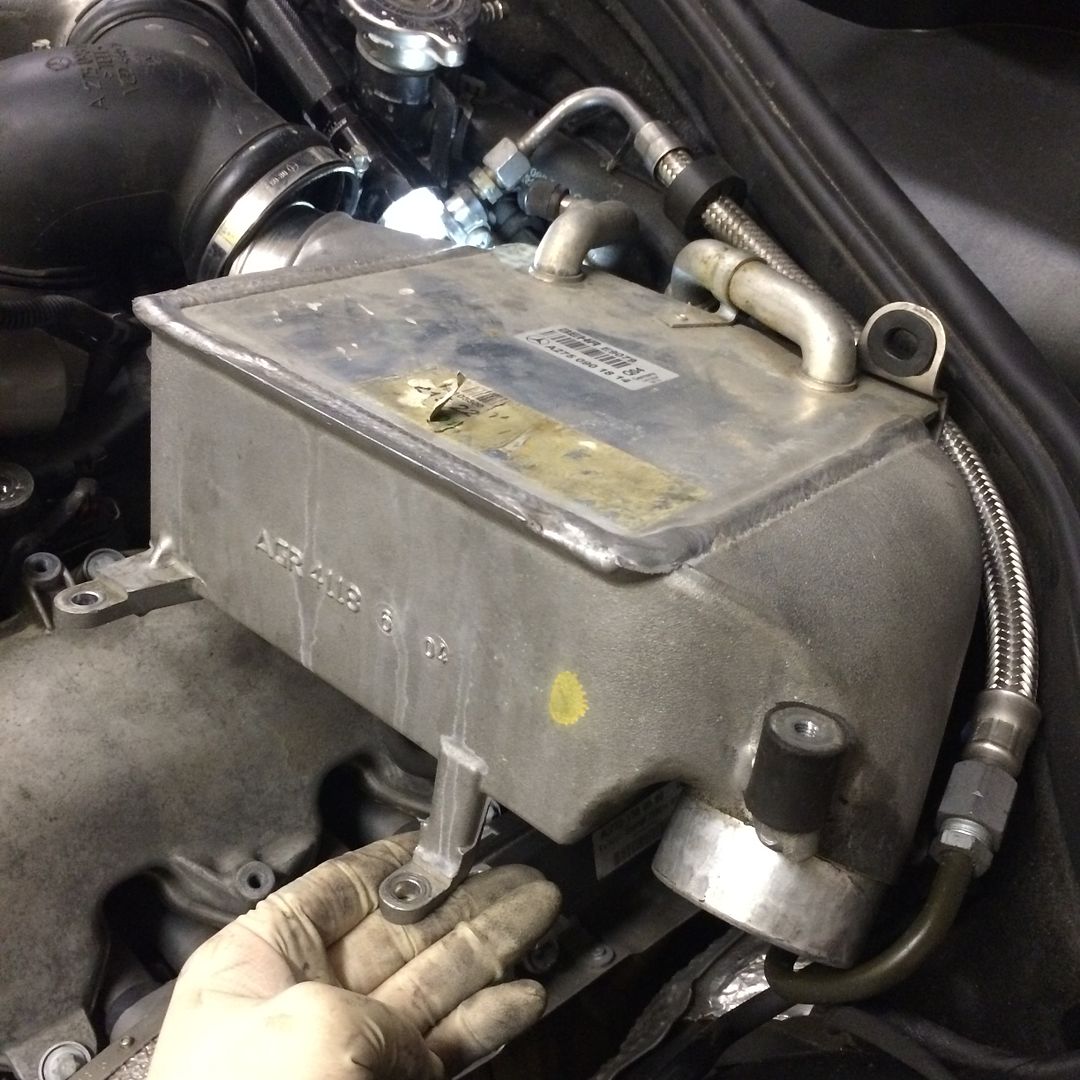
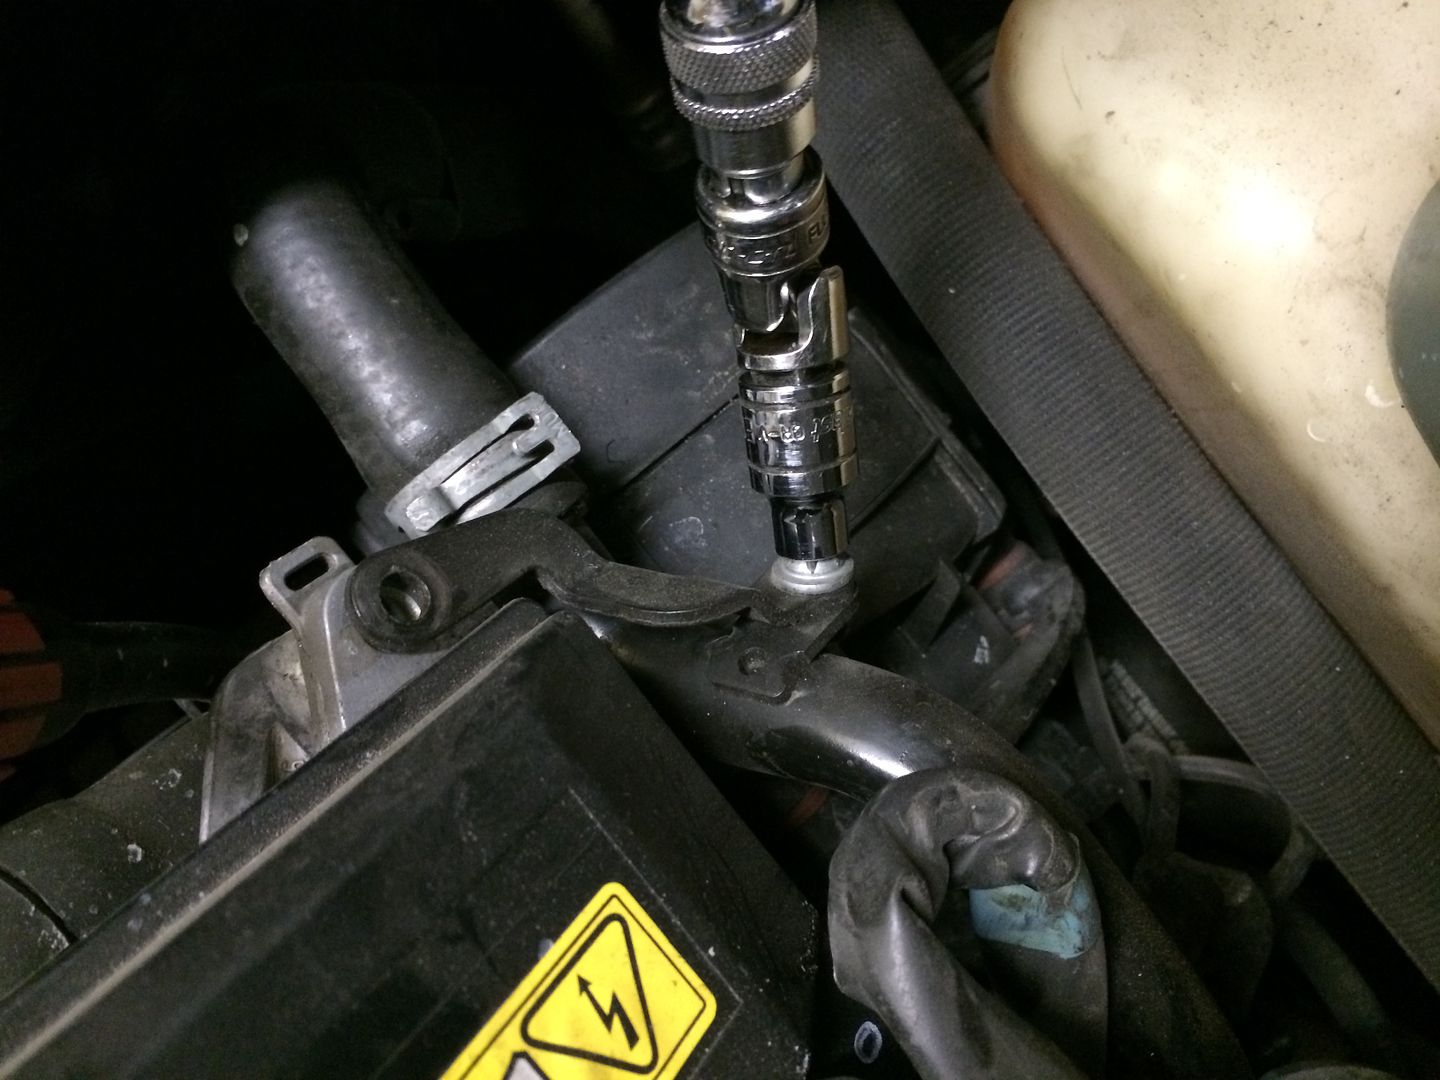
NEXT YOU NEED TO UNBOLT THE INTERCOOLERS. THERE ARE 3 E10 INVERTED TORX BOLTS ON EACH(THE ONE IN THE BACK IS A TIGHT FIT SO BE CAREFULL NOT TO DROP IT.
ALSO NEED TO LOSEN ALL OF THE HOSE CLAMPS ON THE INTERCOOLERS AND INTAKE "Y"
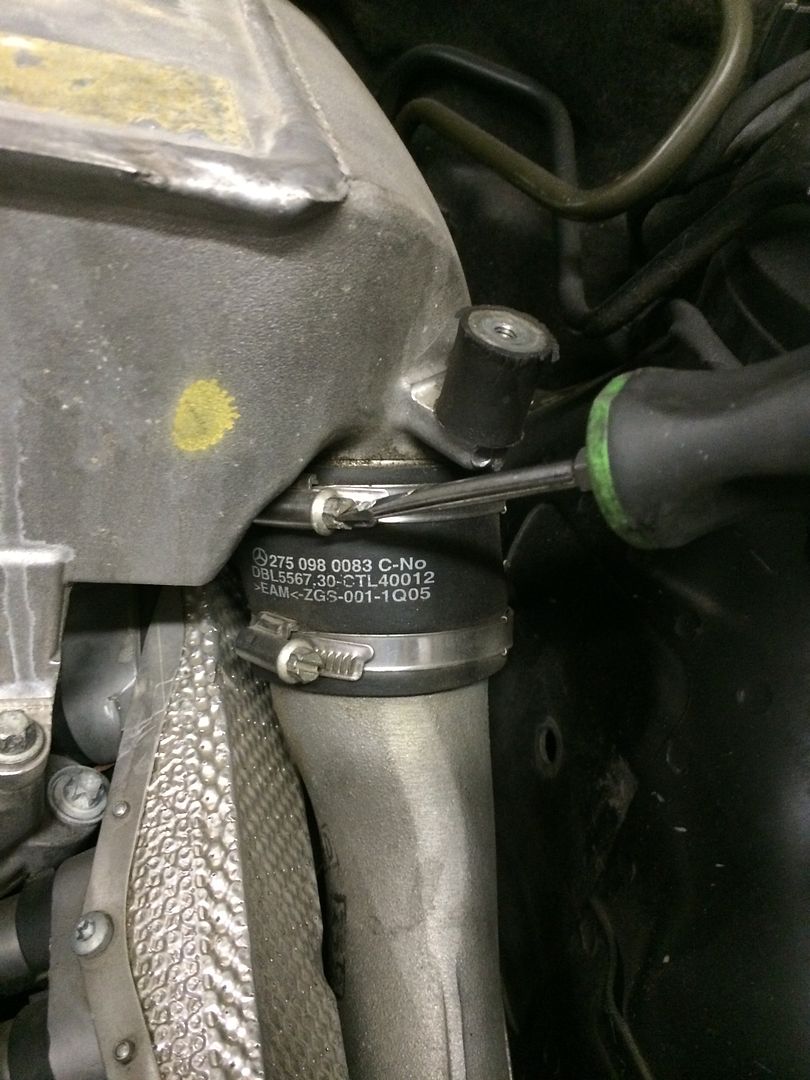

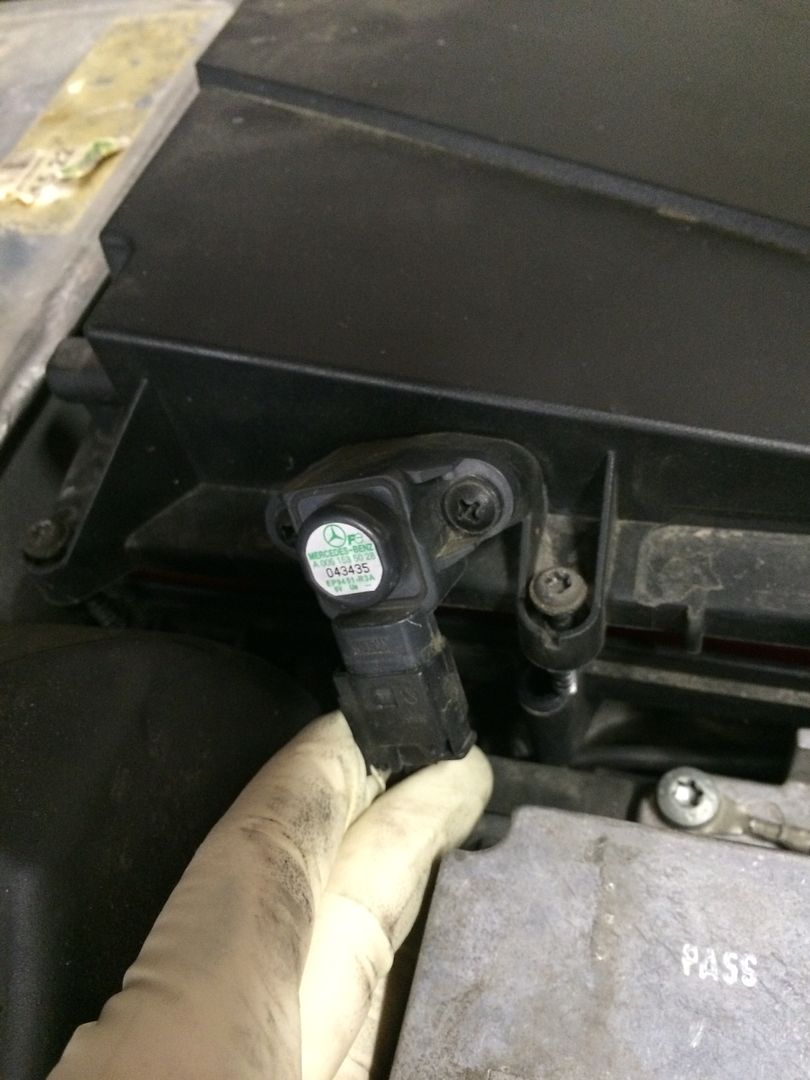
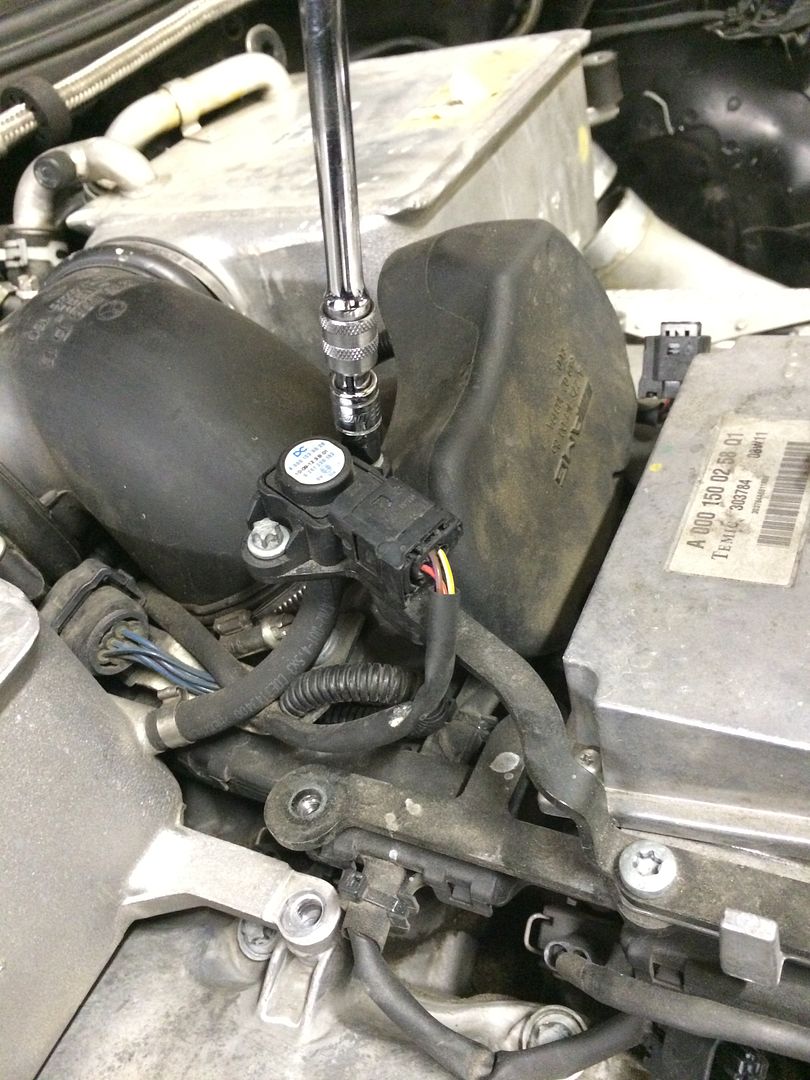
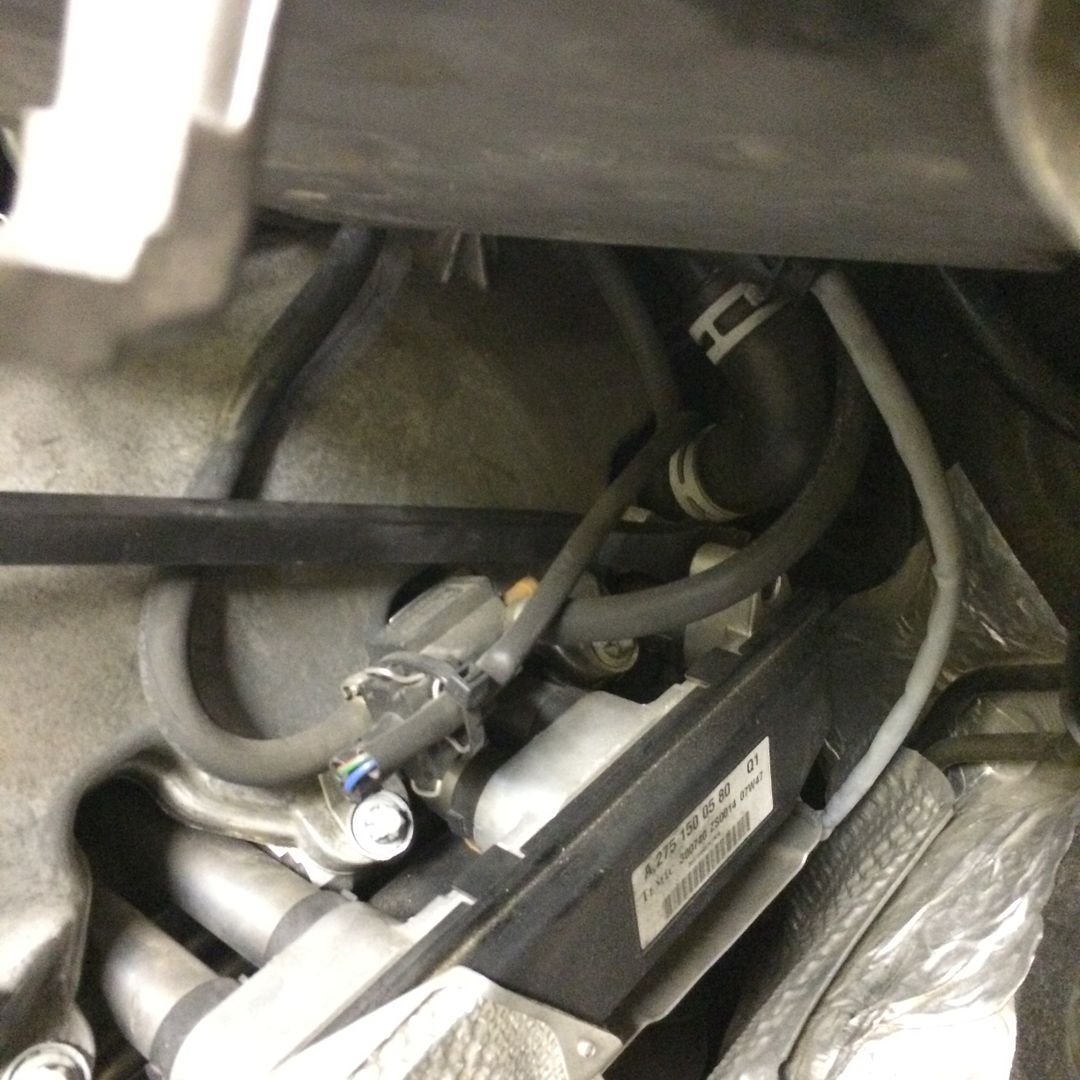
YOU DON'T NEED TO COMPLETELY REMOVE THE INTERCOOLERS, YOU CAN USE A WIRE OR BUNGEE TO HOLD THEM UP AND OUT OF YOUR WAY. TO REMOVE THE PASSENGER SIDE INTERCOOLER, YOU MUST TAKE OFF WHAT APPEARS TO BE THE MAP SENSOR WITH 2 E8 INVERTED TORX BOLTS
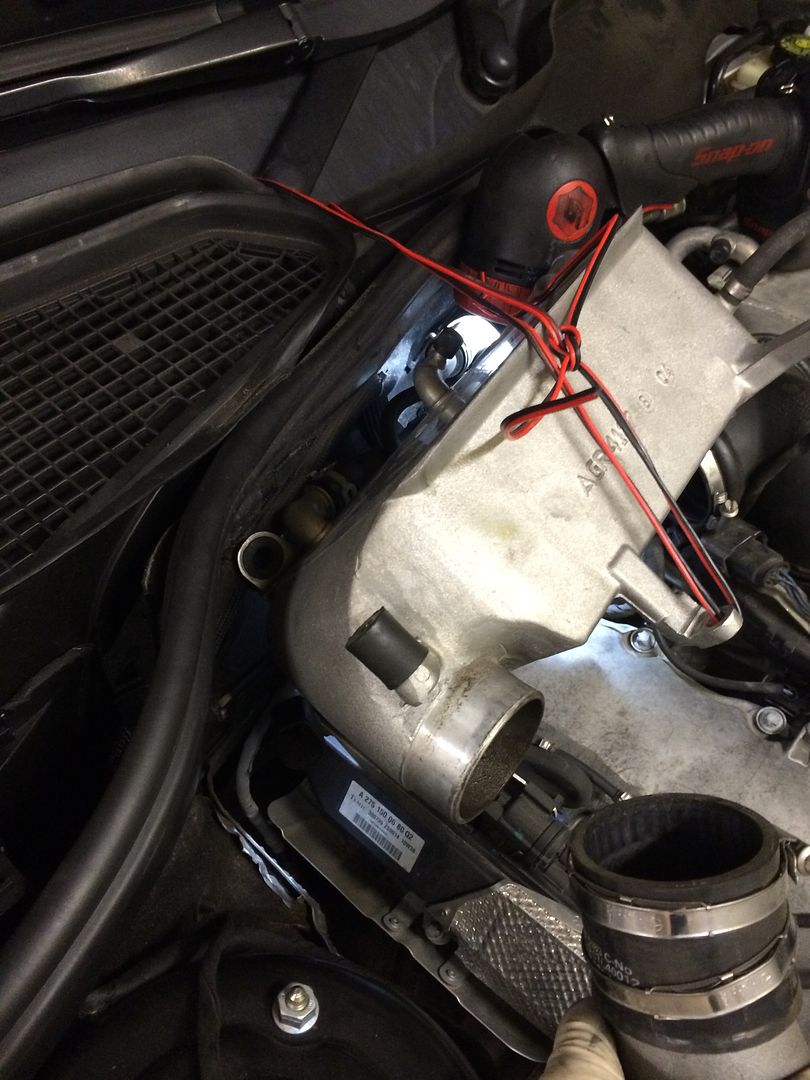
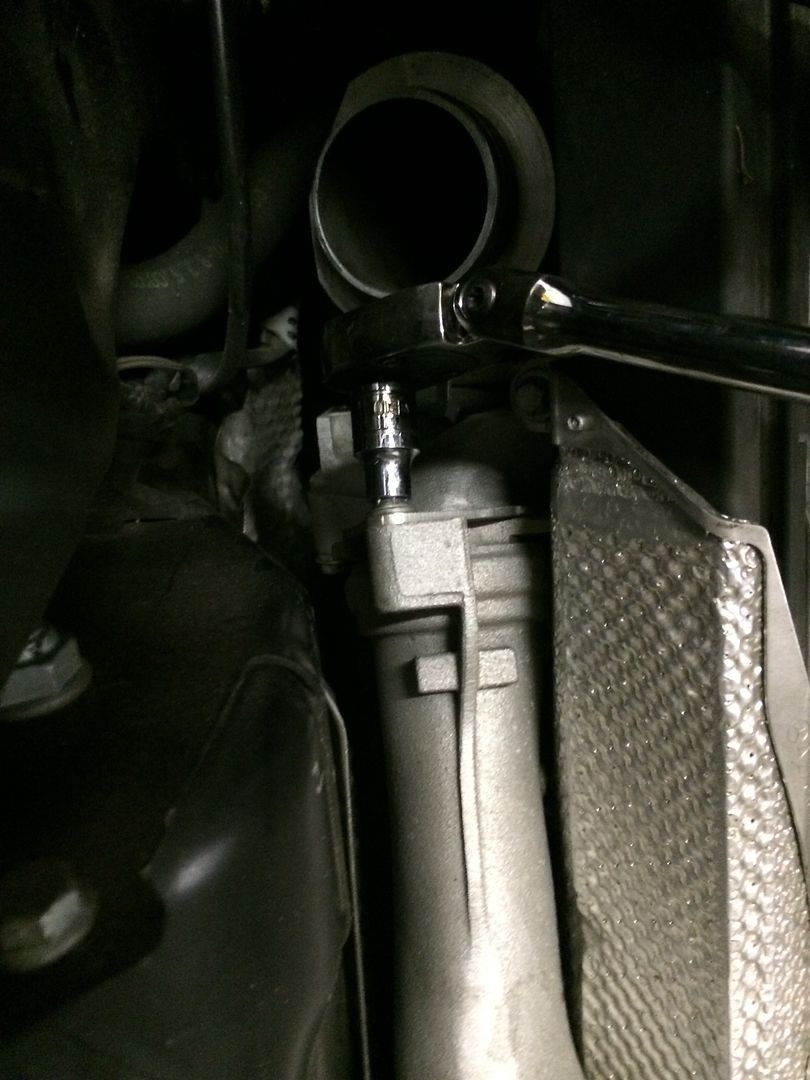
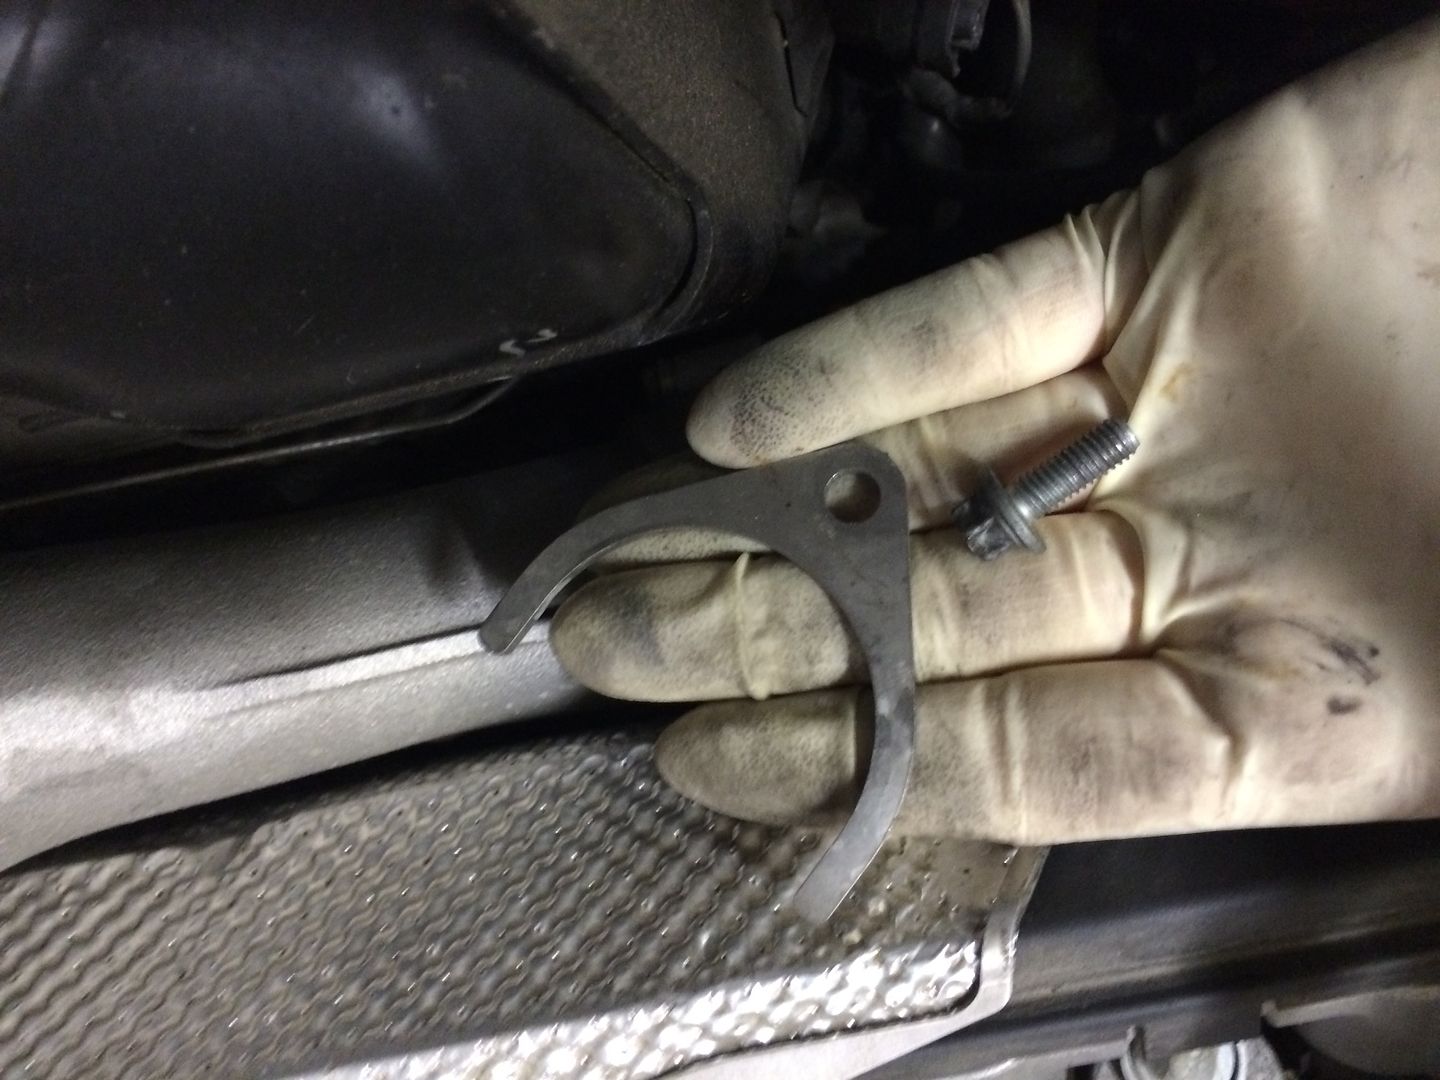
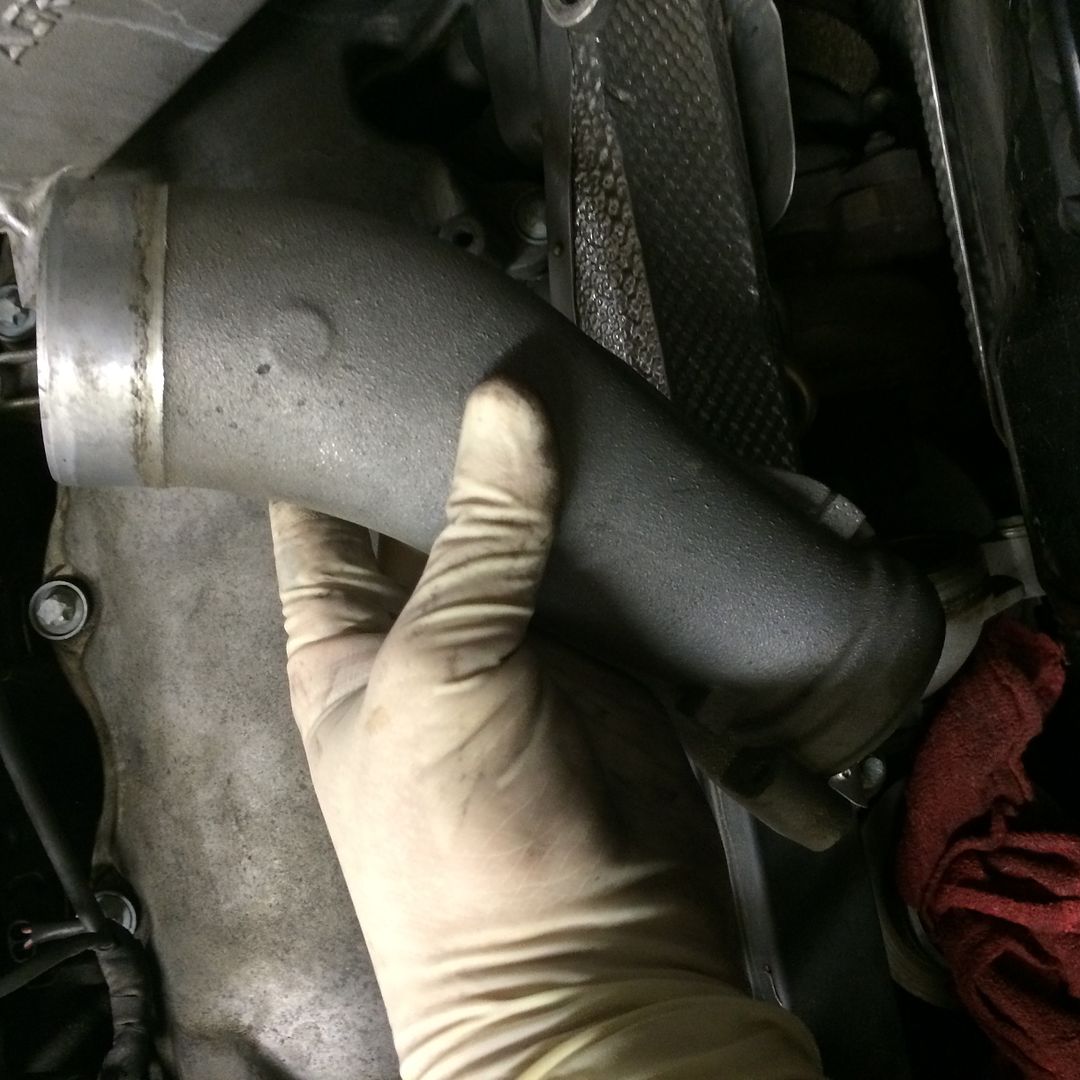
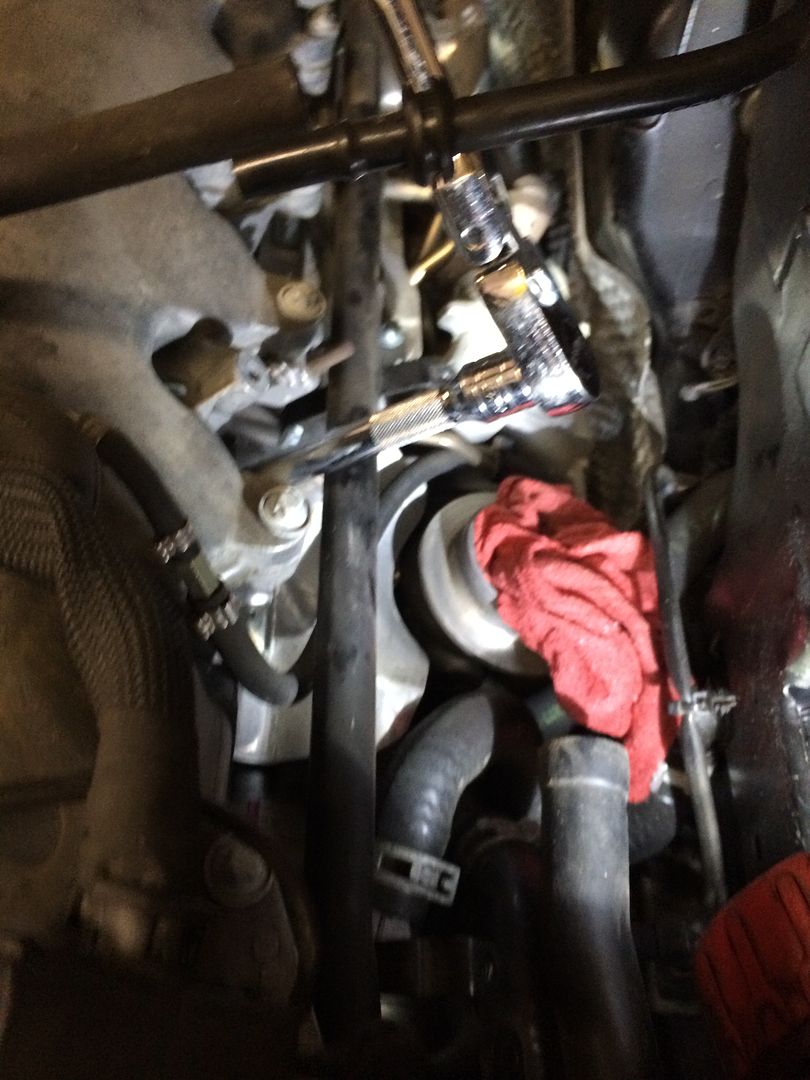
YOU CAN NOW REMOVE THE OUTLET PIPE OFF OF THE TURBO HOUSING. THERE IS 1 E10 INVERTED TORX AND A "U" CLAMP. REMOVE BOTH AND THE PIPE JUST WORKS IT WAY LOOSE.
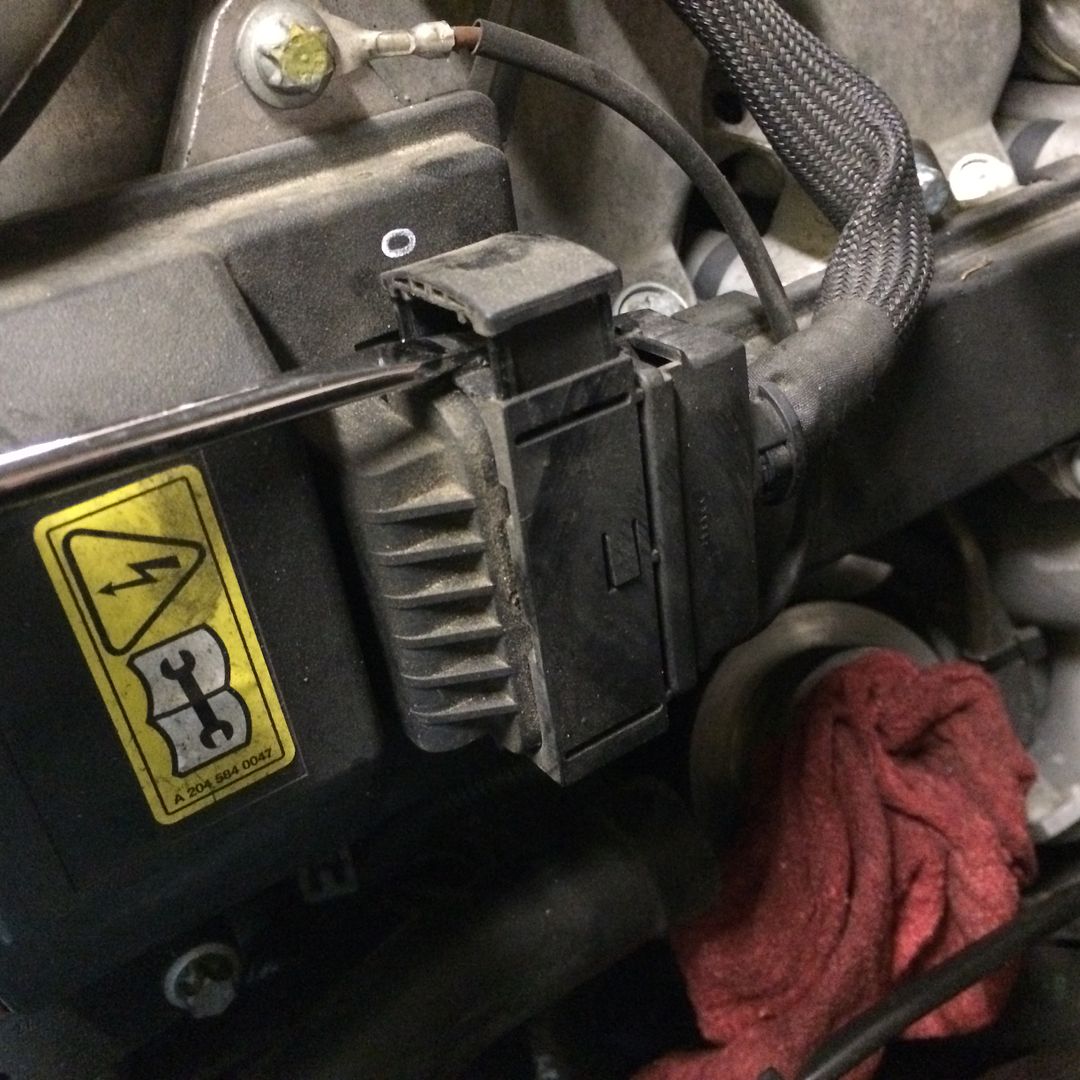
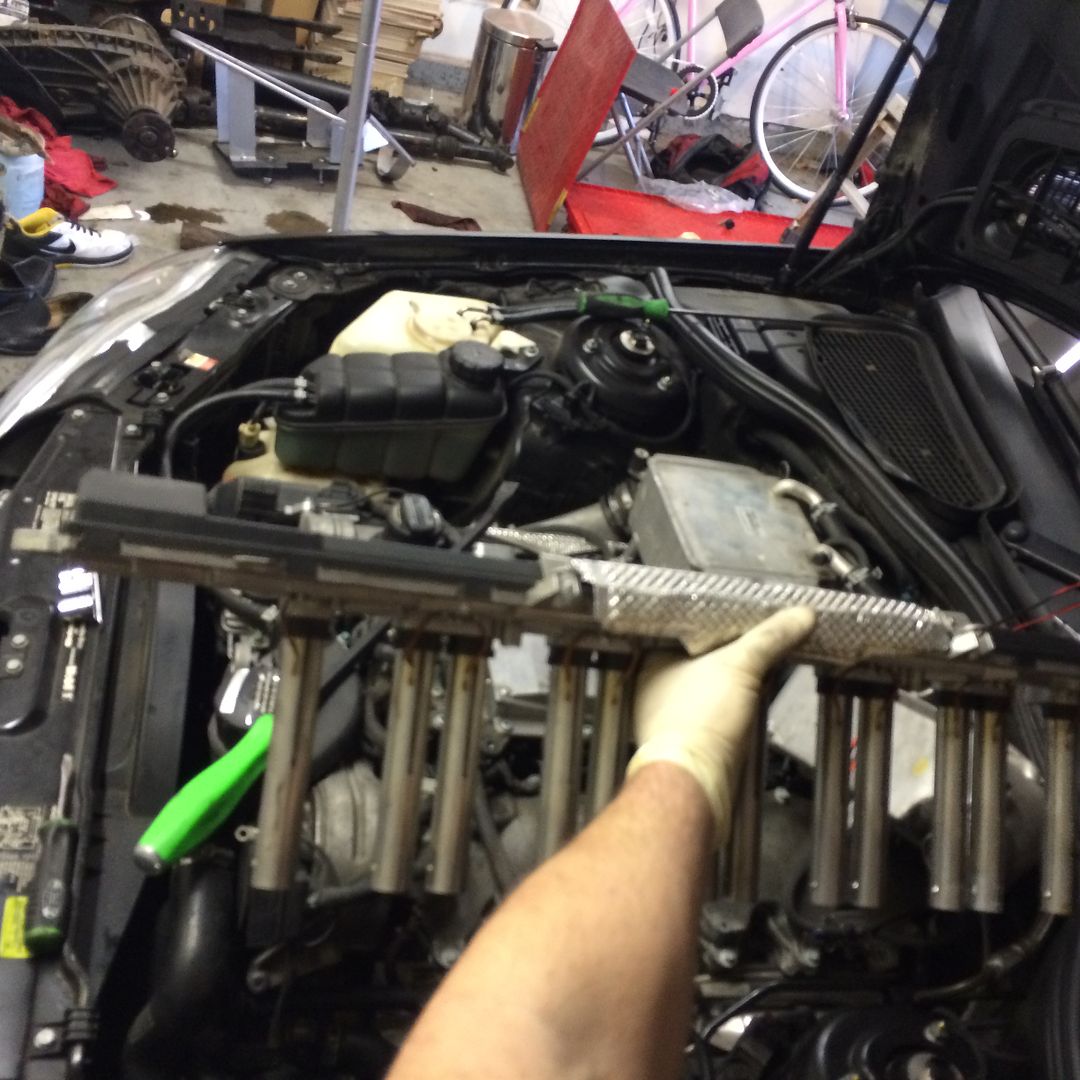
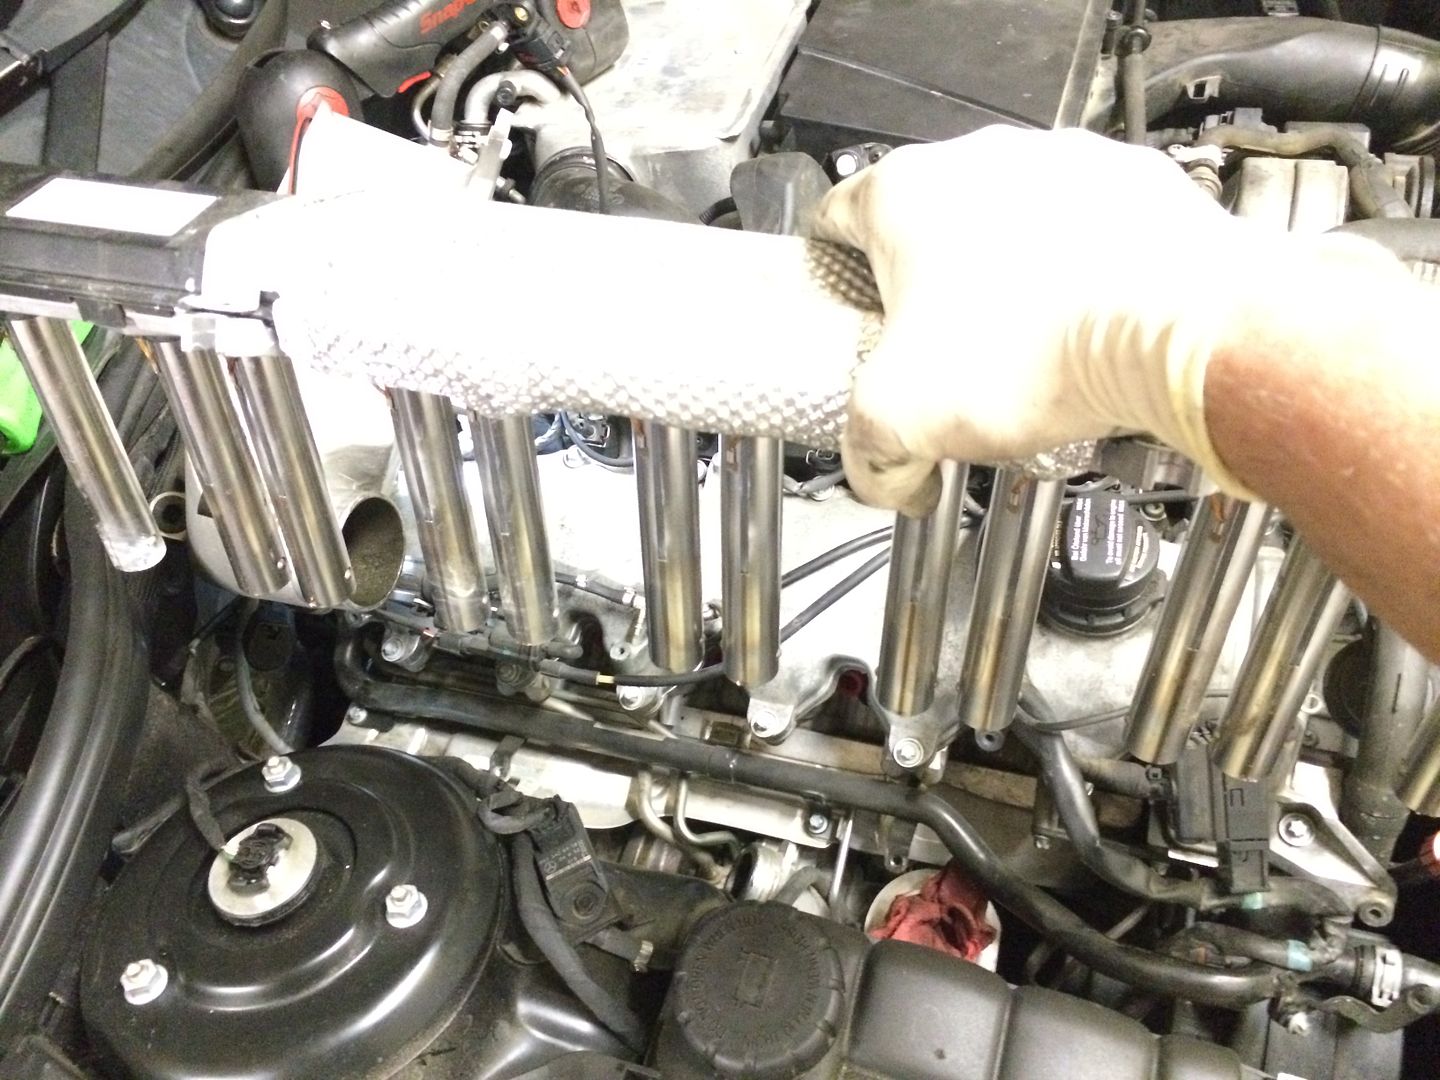
YOU CAN NOW UNBOLT THE COILPACKS. THERE ARE 7 BOLTS TOTAL. ALL ARE E10 TORX. UNBOLT THEM ALL AND UNCLIP THE HARNESS AND PULL IT AROUND THE FRONT
YOU MAY NOW REMOVE THE COIL PACK. YOU MAY HAVE TO USE A PRYBAR TO PULL UP ON THE MOUNTING POINTS AS ITS IN THERE TIGHT. BE CAREFULL!!! THEY WILL COME OUT JUST USE LIGHT FORCE.
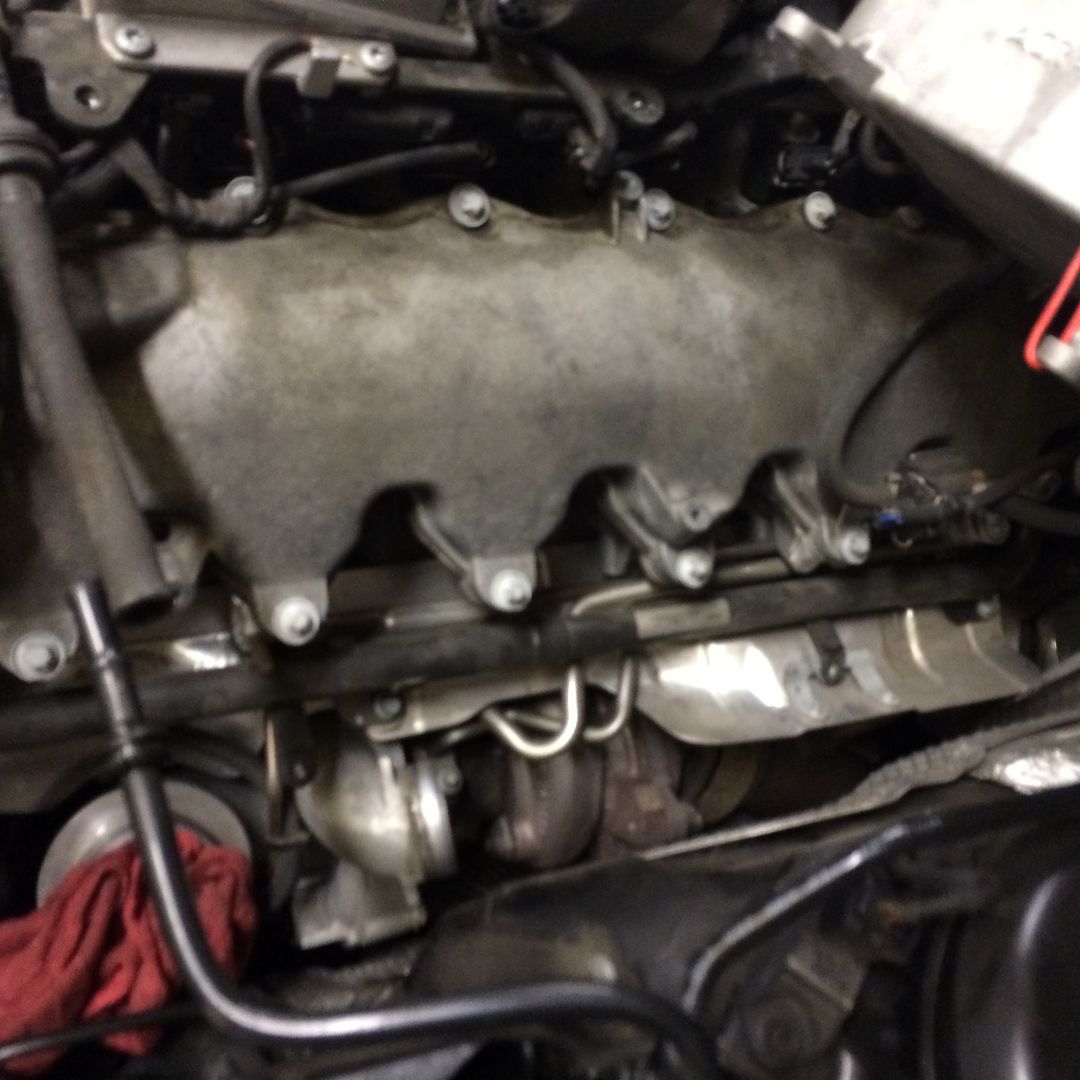
BE CAREFUL AS SOME OF THE RED BOOTS MAY STAY INSIDE THE SPARK PLUG HOLES. JUST USE A PAIR OF NEEDLE NOSE AND PULL THESE OUT AND REINSTALL THEM INTO THE COILPACK BEFORE REINSTALLING THE COIL PACK.

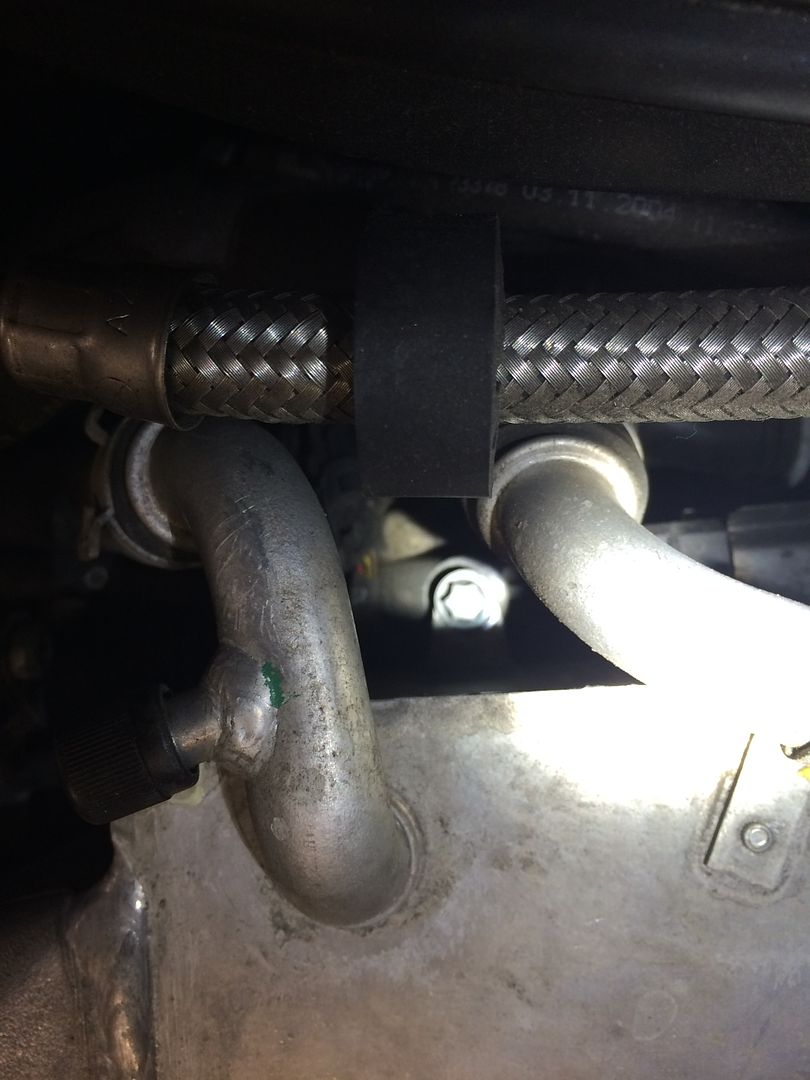
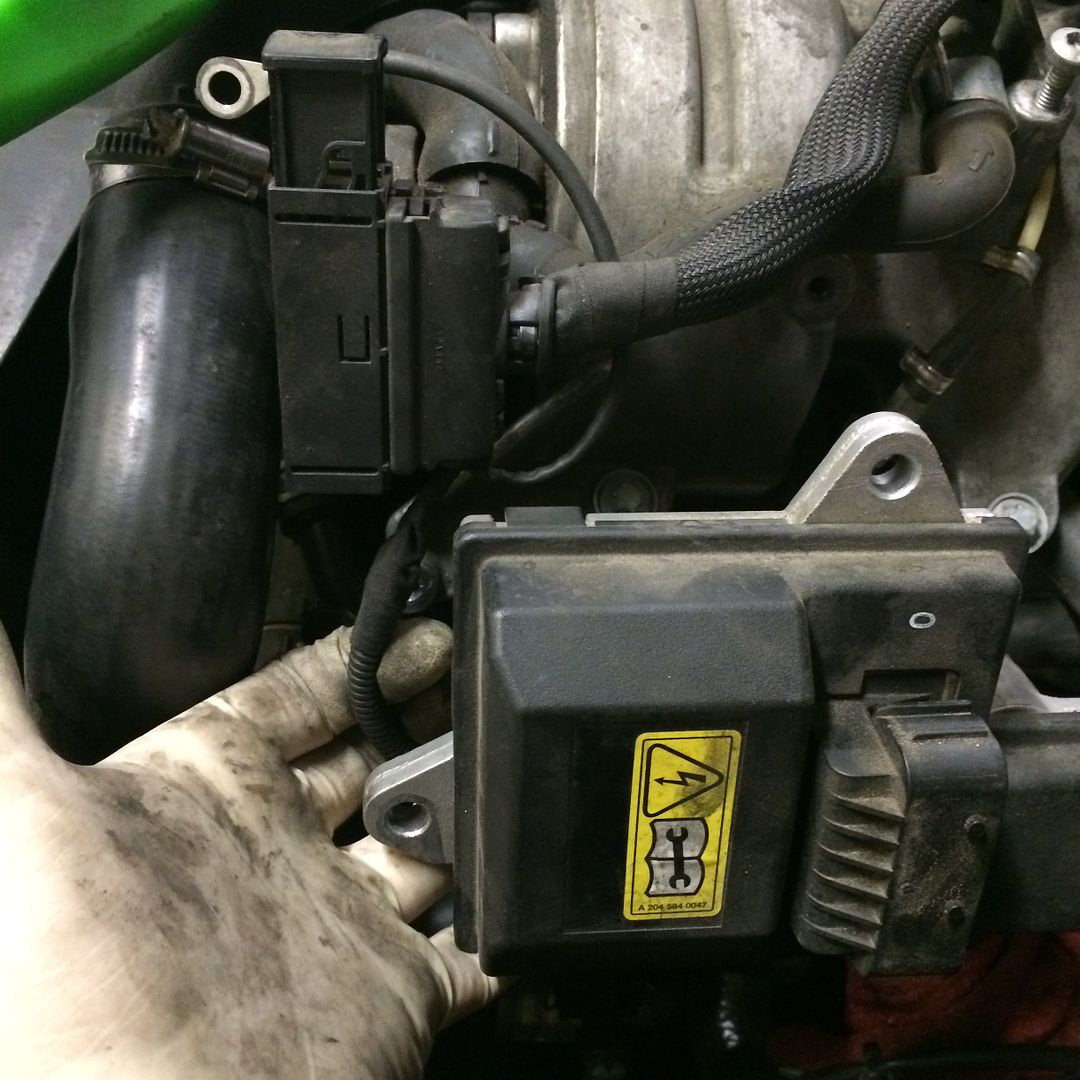
WHEN REMOVING THE PASSENGER SIDE, YOU MUST UNPLUG THE VACUUM LINE AND MOVE IT OUT OF THE WAY.
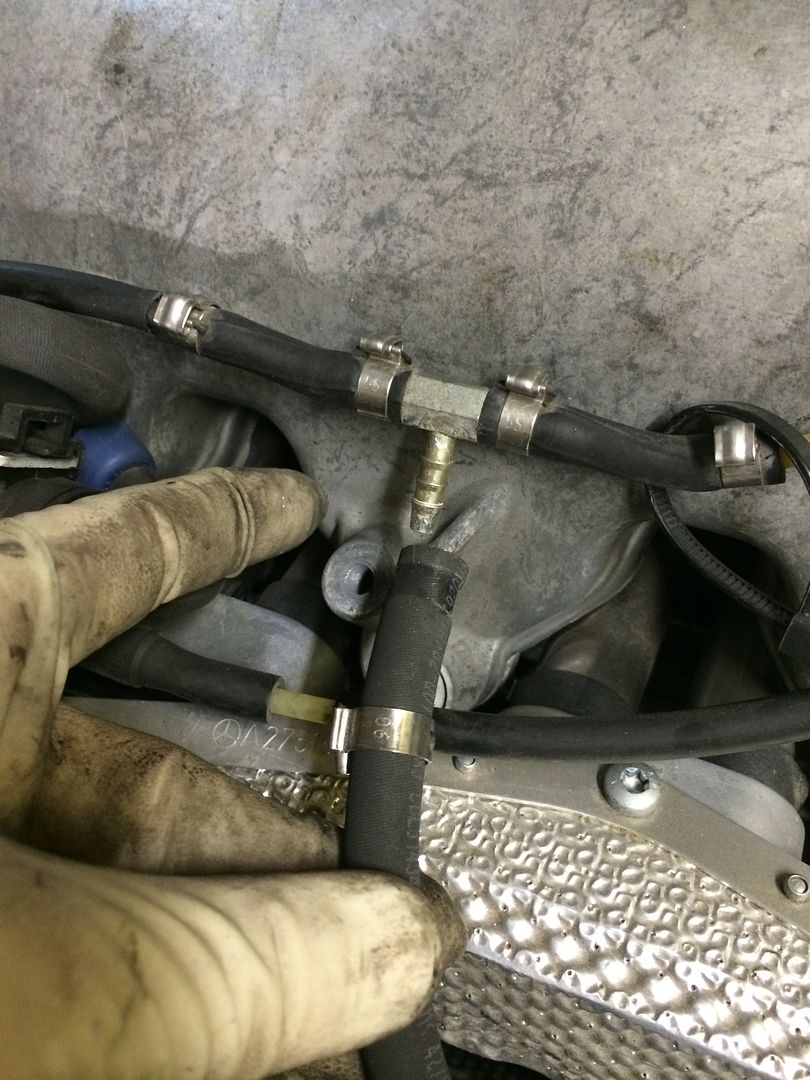
ALSO REMOVE THE COOLER LINE BRACKET ON THE FRONT
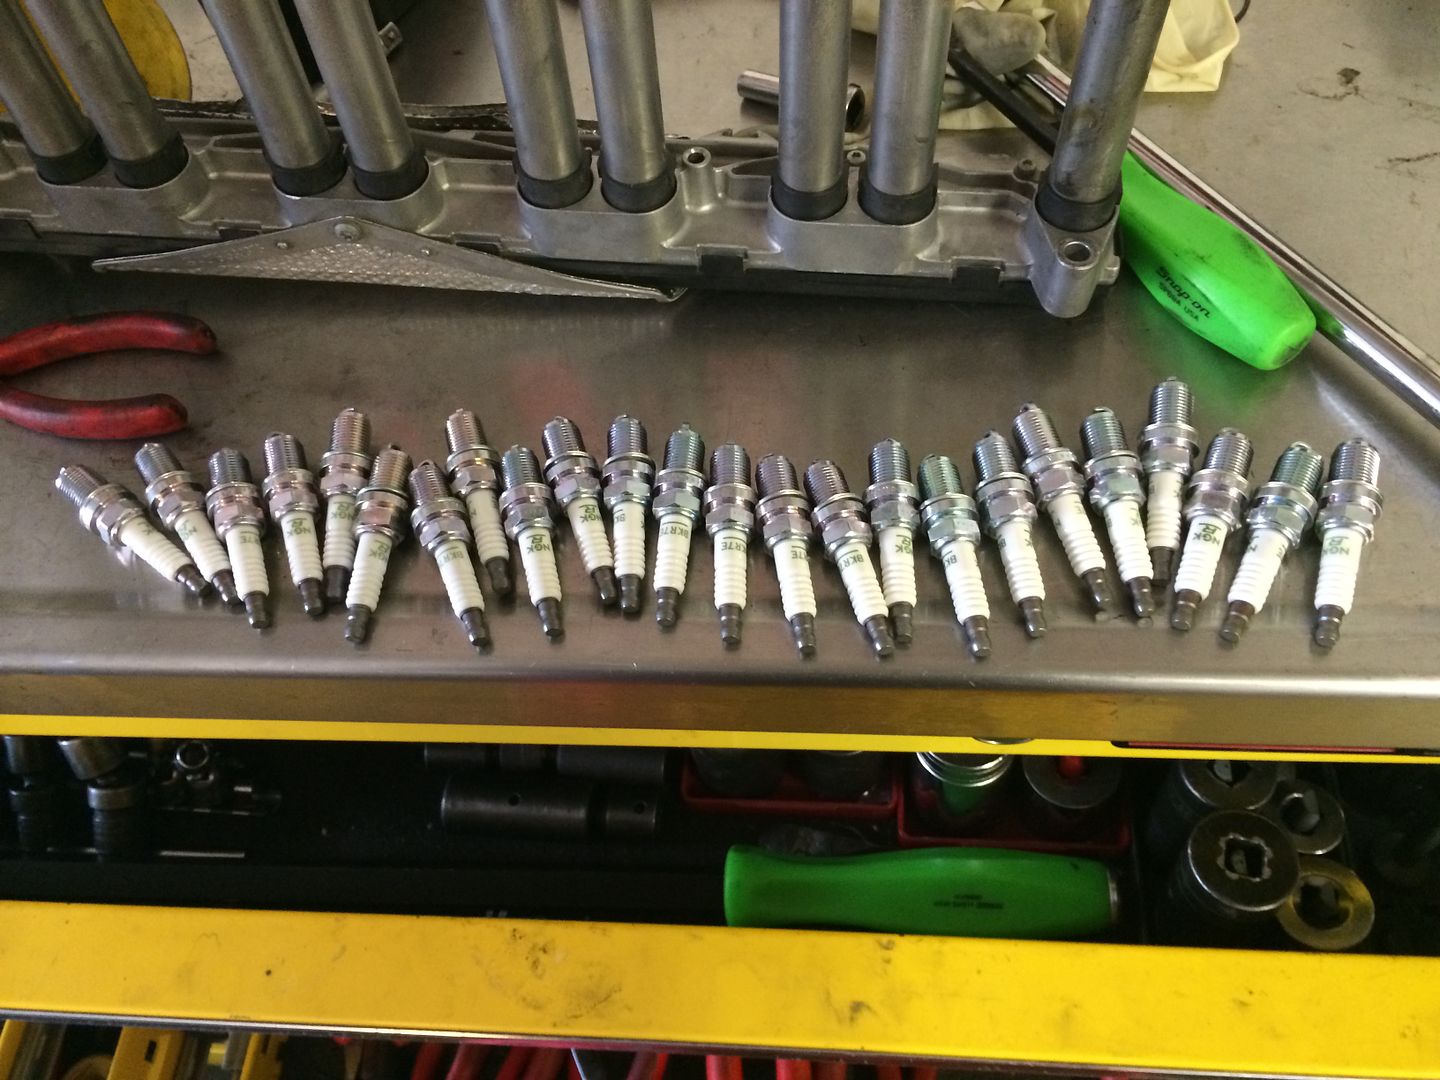
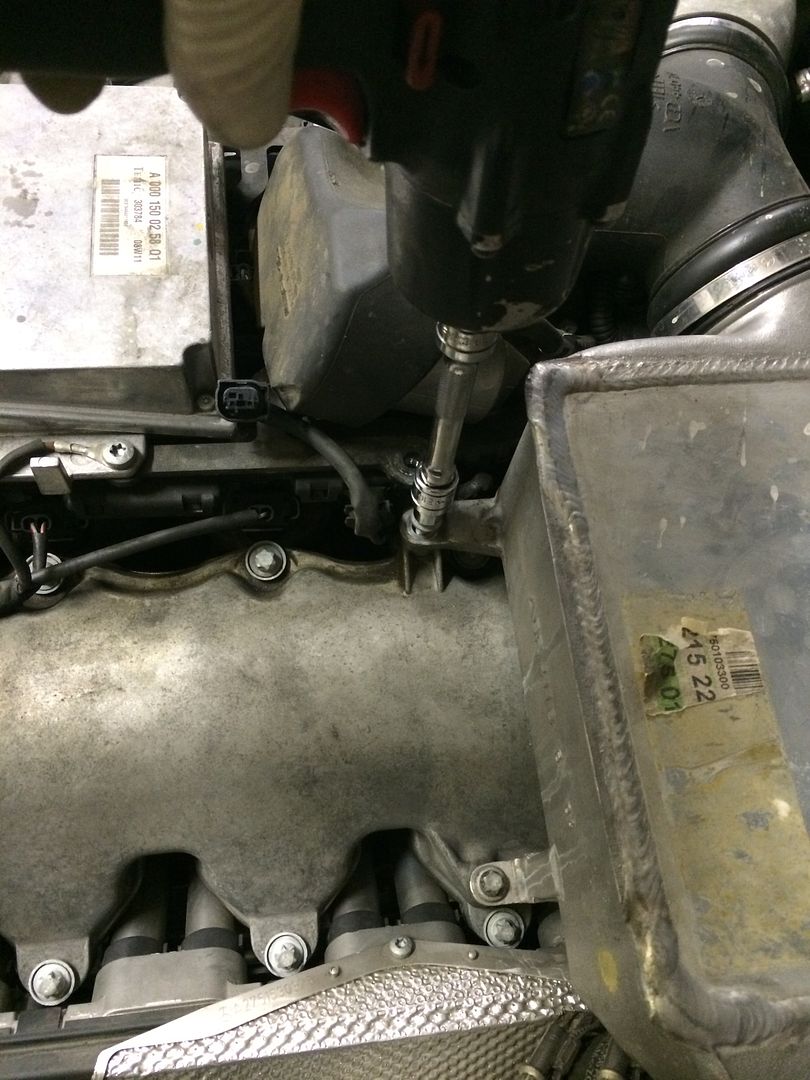
ONCE YOU GET ALL OF THE BOOTS OUT, YOU CAN REMOVE ALL OF THE PLUGS OR ONE AT A TIME DEPENDING ON YOUR PREFERENCE. NONE OF THEM ARE TOO DIFFICULT TO GET TO, I ONLY USED 2 DIFFERENT EXTENSIONS.
ONCE YOU GET ALL OF THE PLUGS REPLACED, CAREFULLY REINSTALL THE COIL PACKS. AGAIN, JUST CONSTANT LIGHT PRESSURE AND THEY WILL GO BACK IN.
THEN REVERSE ALL THE PROCESSES
-REINSTALL CHARGE PIPES
-REINSTALL INTERCOOLERS
-REINSTALL FILTER BOXES
-REINSTALL FILTERS/LIDS
-REINSTALL SCOOPS AND ENGINE COVERS
TAKE OFF ENGINE COVERS
REMOVE AIR INLET DUCTS
REMOVE AIR FILTER COVERS AND FILTERS. USE A TORX T25 FOR THE LID COVERS AND UNHOOK THE SENSORS BY SQUEEZING THE CONNECTOR.
NEXT REMOVE THE LOWER AIRBOX'S
-THERE ARE 3 E10 INVERTED TORX BOLTS THAT HOLD EACH ONE. ON THE DRIVER'S SIDE THERE IS A HOSE UNDERNEATH THAT JUST PULLS OFF AND ON THE TOP THE HOSE JUST PULLS OUT OF THE HOLDER.
AT THIS POINT, ITS A GOOD IDEA TO STUFF A RAG OR TOWEL INTO THE TURBO INLET SO YOU DON'T DROP ANYTHING IN THERE AND HAVE REALLY BIG PROBLEMS.
NEXT YOU NEED TO UNBOLT THE INTERCOOLERS. THERE ARE 3 E10 INVERTED TORX BOLTS ON EACH(THE ONE IN THE BACK IS A TIGHT FIT SO BE CAREFULL NOT TO DROP IT.
ALSO NEED TO LOSEN ALL OF THE HOSE CLAMPS ON THE INTERCOOLERS AND INTAKE "Y"
YOU DON'T NEED TO COMPLETELY REMOVE THE INTERCOOLERS, YOU CAN USE A WIRE OR BUNGEE TO HOLD THEM UP AND OUT OF YOUR WAY. TO REMOVE THE PASSENGER SIDE INTERCOOLER, YOU MUST TAKE OFF WHAT APPEARS TO BE THE MAP SENSOR WITH 2 E8 INVERTED TORX BOLTS
YOU CAN NOW REMOVE THE OUTLET PIPE OFF OF THE TURBO HOUSING. THERE IS 1 E10 INVERTED TORX AND A "U" CLAMP. REMOVE BOTH AND THE PIPE JUST WORKS IT WAY LOOSE.
YOU CAN NOW UNBOLT THE COILPACKS. THERE ARE 7 BOLTS TOTAL. ALL ARE E10 TORX. UNBOLT THEM ALL AND UNCLIP THE HARNESS AND PULL IT AROUND THE FRONT
YOU MAY NOW REMOVE THE COIL PACK. YOU MAY HAVE TO USE A PRYBAR TO PULL UP ON THE MOUNTING POINTS AS ITS IN THERE TIGHT. BE CAREFULL!!! THEY WILL COME OUT JUST USE LIGHT FORCE.
BE CAREFUL AS SOME OF THE RED BOOTS MAY STAY INSIDE THE SPARK PLUG HOLES. JUST USE A PAIR OF NEEDLE NOSE AND PULL THESE OUT AND REINSTALL THEM INTO THE COILPACK BEFORE REINSTALLING THE COIL PACK.
WHEN REMOVING THE PASSENGER SIDE, YOU MUST UNPLUG THE VACUUM LINE AND MOVE IT OUT OF THE WAY.
ALSO REMOVE THE COOLER LINE BRACKET ON THE FRONT
ONCE YOU GET ALL OF THE BOOTS OUT, YOU CAN REMOVE ALL OF THE PLUGS OR ONE AT A TIME DEPENDING ON YOUR PREFERENCE. NONE OF THEM ARE TOO DIFFICULT TO GET TO, I ONLY USED 2 DIFFERENT EXTENSIONS.
ONCE YOU GET ALL OF THE PLUGS REPLACED, CAREFULLY REINSTALL THE COIL PACKS. AGAIN, JUST CONSTANT LIGHT PRESSURE AND THEY WILL GO BACK IN.
THEN REVERSE ALL THE PROCESSES
-REINSTALL CHARGE PIPES
-REINSTALL INTERCOOLERS
-REINSTALL FILTER BOXES
-REINSTALL FILTERS/LIDS
-REINSTALL SCOOPS AND ENGINE COVERS

Excellent job richvegas. Great DIY writeup !!

Super Member
Nice! Now I understand why it costs so much to have a mechanic change the plugs! What was your total time for the job?

Former Vendor of MBWorld
shardul
Former Vendor of MBWorld
close
Jul 18, 2024
- Join DateMay 2008
- LocationHouston
- Posts:12,139
-
iTrader Positive Feedback100
-
iTrader Feedback Score(1)
- Vehicle(s) I drive2003 W211 E55, 2003 W220 S600
-
Likes:389
-
Liked:295 Times in 244 Posts
Nice DIY
You can remove the air boxes as a whole unit you don't need to remove the top cover.
You can remove the air boxes as a whole unit you don't need to remove the top cover.
richvegas
Member
close
Jun 18, 2025
about 4 hours total taking my time and being careful. 2 hours on the next one

Good job posting the procedure and pictures.
Just like to emphasise how careful you have to be when removing the coil packs. They're really fragile and expensive, and have to come out a millimetre at a time. Needs patience.
Also watch out for all the sensors.
Nice job - did the plugs make any difference?
Nick
Just like to emphasise how careful you have to be when removing the coil packs. They're really fragile and expensive, and have to come out a millimetre at a time. Needs patience.
Also watch out for all the sensors.
Nice job - did the plugs make any difference?
Nick
Excellent DIY!
It is also recommended to replace the red insulators when replacing spark plugs.
It is also recommended to replace the red insulators when replacing spark plugs.
richvegas
Member
close
Jun 18, 2025
Thanks guys!
Plugs didn't make a noticable difference, but there wasn't a problem before.
Benz- i was planning to replace them if they were damaged, but they were all in good shape.
Motor mounts are next... pretty nervous about this one, its a pretty big job and i'm determined not to pull the motor.
Plugs didn't make a noticable difference, but there wasn't a problem before.
Benz- i was planning to replace them if they were damaged, but they were all in good shape.
Motor mounts are next... pretty nervous about this one, its a pretty big job and i'm determined not to pull the motor.
MB World Stories
The Best of Mercedes & AMG
Explore

Manual Mercedes? 6 Times Sindelfingen Let Drivers Have All The Fun
Verdad Gallardo
Mercedes SLR McLaren 722 S Is Extremely Rare Example Modified by McLaren
Verdad Gallardo
8 Classic Boxy Mercedes Designs That Have Aged Like Fine Wine
Verdad Gallardo
Flawlessly Restored Mercedes 190E Evo II Heads to Auction
Verdad Gallardo
Electric Mercedes C-Class Unveiled: 11 Things You Need to Know
Verdad Gallardo
Mercedes EQS Gets A Major Update: Everything You Need to Know
Verdad Gallardo
5 Underrated Mercedes-Benz Models That Don't Get the Love They Deserve
Verdad Gallardo
Mercedes 300D Has Pushed Well Past 1 Million Miles and It Ain't Stopping
Verdad Gallardo
10 Most Reliable Mercedes-Benz Models You Can Buy Used
Verdad Gallardo
MBWorld Fanatic!
Great write up.
Just curious, are you planning to raise the boost level or do a turbo upgrade? If not why the colder plugs?
Just curious, are you planning to raise the boost level or do a turbo upgrade? If not why the colder plugs?
richvegas
Member
close
Jun 18, 2025
Quote:
Just curious, are you planning to raise the boost level or do a turbo upgrade? If not why the colder plugs?
I got the ecu/tcu tune from eurocharged which turns up the boostOriginally Posted by Dr Matt
Great write up. Just curious, are you planning to raise the boost level or do a turbo upgrade? If not why the colder plugs?
Quote:
Brave man, that's a tough job! I'm convinced you can do it without removing the engine. Have you seen these threads? Originally Posted by richvegas
Motor mounts are next... pretty nervous about this one, its a pretty big job and i'm determined not to pull the motor.
https://mbworld.org/forums/s-class-w...t-install.html
https://mbworld.org/forums/cl55-amg-...ml#post5759593
https://mbworld.org/forums/sl55-amg-...sl-models.html
Nick
richvegas
Member
close
Jun 18, 2025
I have seen them. I want to talk to someone that's done in with the motor in the car. I'm pretty sure that I can support the motor from the strut towers and lower the cradle and slip them out.


Quote:
Not sure how its done but it can be done "relatively" easily as the dealer only charged me 6.5hrs to do engine and tranny mounts on my '08 S65.Originally Posted by richvegas
I have seen them. I want to talk to someone that's done in with the motor in the car. I'm pretty sure that I can support the motor from the strut towers and lower the cradle and slip them out.
Super Member
I don't post much anymore, but thought I'd comment. On the 220 and 215 V12 cars, motor mounts can be done from under the car. On the 230 SLs, the engine needs to be dropped on the subframe. I saw a guy do them on an SL and tried to leave the engine in the car, and it took him all of 35 hours. On a 220, I have done them in a couple hours going slow.
Nick
Nick
richvegas
Member
close
Jun 18, 2025
Quote:
Nick
Nick, Originally Posted by nick 55
I don't post much anymore, but thought I'd comment. On the 220 and 215 V12 cars, motor mounts can be done from under the car. On the 230 SLs, the engine needs to be dropped on the subframe. I saw a guy do them on an SL and tried to leave the engine in the car, and it took him all of 35 hours. On a 220, I have done them in a couple hours going slow. Nick
I'm looking for a little more DIY pointers. like:
-do you need to lift the motor and/or lower subframe?
-do i need to remove the downpipes?
-do i need to remove or move any ABC lines?
Any pointers would be greatly appreciated.
Rich
For those that don't know, Nick 55 is the ex-MB tech who wrote thedefinitive illustrated V12TT removal thread here:
https://mbworld.org/forums/sl55-amg-sl63-amg-sl65-amg-r230/328038-diy-motor-mounts-v12-sl-models.html
Just for clarity, are you talking about the mounts on the N/A V12 or the TT V12?
Is this how you do it?:
https://mbworld.org/forums/cl55-amg-cl65-amg-cl63-amg-w215-w216/510432-replaced-engine-trans-mounts-2005-cl65.html#post5759593
Cheers, Nick
https://mbworld.org/forums/sl55-amg-sl63-amg-sl65-amg-r230/328038-diy-motor-mounts-v12-sl-models.html
Quote:
MBW is worse for your absence, but I'm more than somewhat relieved to hear that I might be able to do the job myself. Is it the sort of thing a capable DIY guy could do in a domestic garage: i.e. jack stands etc, but no hydraulic ramp ?Originally Posted by nick 55
I don't post much anymore, but thought I'd comment. On the 220 and 215 V12cars, motor mounts can be done from under the car....On a 220, I have done them in a couple hours going slow.
Just for clarity, are you talking about the mounts on the N/A V12 or the TT V12?
Is this how you do it?:
https://mbworld.org/forums/cl55-amg-cl65-amg-cl63-amg-w215-w216/510432-replaced-engine-trans-mounts-2005-cl65.html#post5759593
Cheers, Nick
Super Member
I avoided the NA V12 engines mainly because at that time I was sorting out other problems and didn't see too many. The secret on the turbo 220 and 215 models is it remove the steering rack. Leave the flex coupler on it and disconnect the input shaft from the steering column at the firewall. There are nuts on top of the subframe for the long bolts that hold the rack and they are very thin so it takes short wrenches and skinny hands. Unbolt one mount from the subframe at a time and lift the engine one inch. Roll the mount forward on its side after using a short dogbone socket wrench to undo the top bolt. Slide the mount out where the rack was at. Repeat on the other side after reinstalling the new mount. If you remove the rack like this, you are not changing your toe settings on your alignment either.
Merry Christmas
Nick
Merry Christmas
Nick
Quote:
Cool; that's a nugget. Do you mean remove the rack from the car completely, or just dismount it and move it out of the way?Originally Posted by nick 55
The secret on the turbo 220 and 215 models is it remove the steering rack.
Cheers, Nick
Super Member
Quote:
Cheers, Nick
Well, getting the rack dropped is the trickiest part. Really, you would be working around it so much you might as well remove the tie rod ends from the steering knuckles too. I have the special tools somewhere in my tool box that popped them off very quickly. It was basically a threaded cap to screw down on the tie rod end threads, a small vise type of tool that I inserted a small hydraulic "portapower" type of tool into. It is all handheld, so its not super cumbersome, but I don't remember how much it was either for those three tools. They were indespensible for me though. If I can, ill dig out the part numbers when I get back from my holiday so you can check. Originally Posted by Welwynnick
Cool; that's a nugget. Do you mean remove the rack from the car completely, or just dismount it and move it out of the way?Cheers, Nick
As another note, with regard to the red coil insulators, ALWAYS REPLACE THEM ANY TIME THE COILS ARE REMOVED. They are the only thing that prevents voltage leaks and if they have any scratches or cracks, they are compromised. If the voltage leaks(70k volts), then it typically finds its ground through those stainless towers, essentially shorting the coil packs. That is a very expensive ground cable.........
Nick
richvegas
Member
close
Jun 18, 2025
Great tips Nick! Thank you!

Junior Member
I know this is an old thread, but I don't see a lot of info in the web about colder plugs in a tuned M275.
The plugs mentioned by the OP are copper. I don't like copper because they wear out too fast. I don't want to handle these coil packs any more than I absolutely have to.
I contacted NGK about iridium plugs in the same heat range as the copper NGK 4644. This is what they sent:
NGK 2667 Iridium IX
NGK 92400 Ruthenium HX
These plugs incidentally are the same ones specified for these cars:
ASTON MARTIN DB7 1997-1998
AUDI R8 2011-2017
AUDI RS5 2013-2015
AUDI RS6 2003-2004
AUDI S4 1992-1994
AUDI S6 1995-1997
AUDI TT 2008-2015
BMW ALPINA B7 2007-2008
PORSCHE 911 2003-2008
PORSCHE BOXSTER 2005-2008
PORSCHE CAYENNE 2003-2006
PORSCHE CAYMAN 2006-2008
I have a set of the Iridium plugs on order. Looking forward to putting them in!
Just to reiterate the point, 1 step colder plugs are recommended when running a tune with high boost. Do not install these plugs if you are running factory software. Even a mild tune should probably stick with OE plugs. Best answer is to contact your tuner to get a specific recommendation.


