


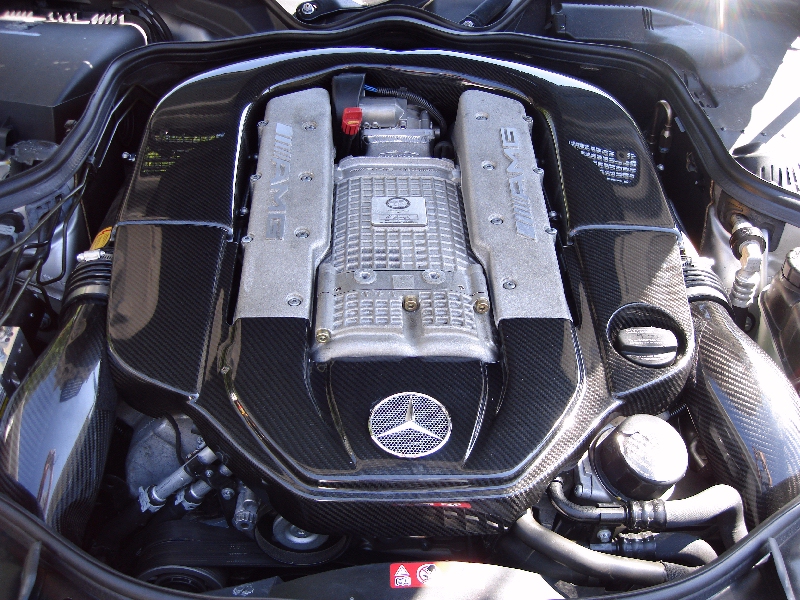
*** $1,500 CF Airbox with HP benefits ***

Thread Starter
Banned
Joined: May 2004
Posts: 3,797
Likes: 2
From: Richmond Hill, Ontario
2003 E55 AMG
I'm not sure to be honest... Hopefully someone can answer the question for you.
Sang... sorry to hear that .. Did it snap right in half? Maybe a little crazy glue will repair it? I dont have a spare one otherwise I would send it to you.
I've seen the plastic star on display at the dealership.. but I am not sure what size they were. I asked my parts guy.. he is looking into it.. I'll get you a part # once i hear back if it can be ordered.
Originally Posted by e55 killer
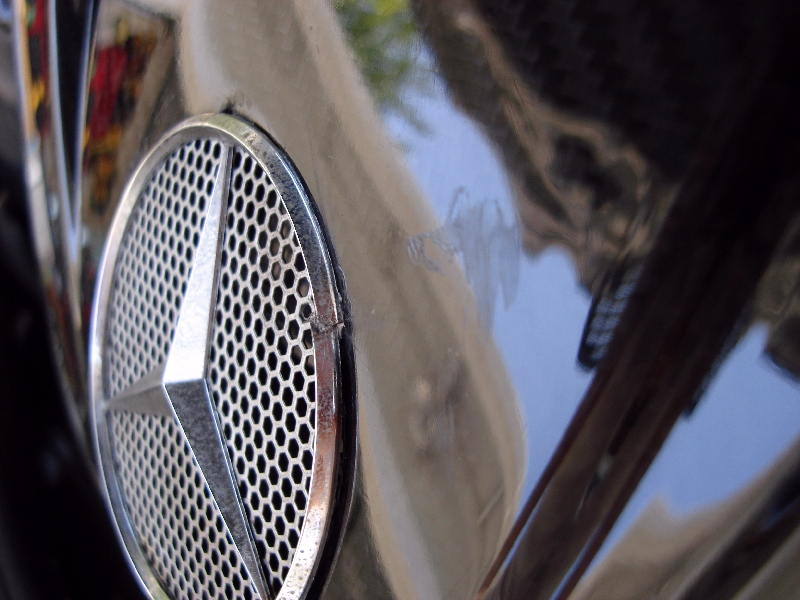
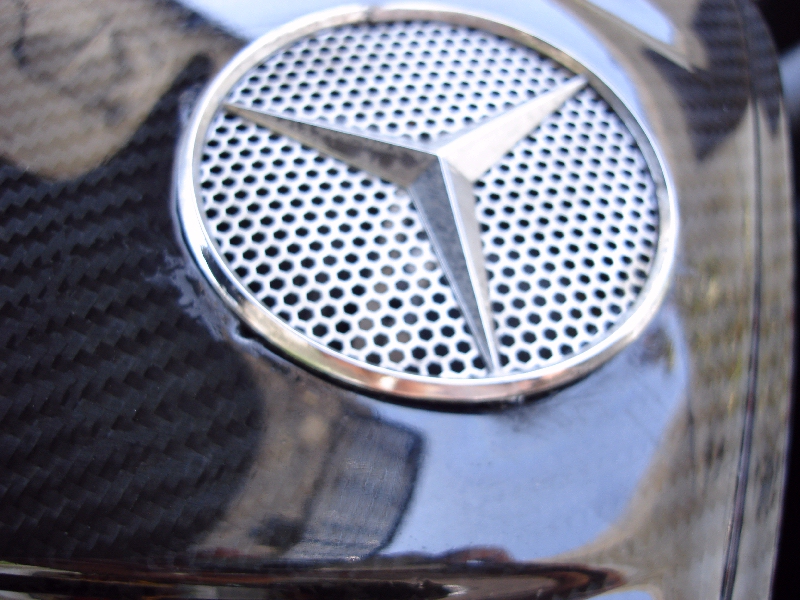
Last night after I installed the Airtube I broke the MB Star while I try to take it off from the OEM cover to put it on the CF cover . Call MB Dealer today they said they have it but they wont sell the Star alone , so Vic or anyone know where can I get the MB Star for CF engine cover . thanks a lot

Senior Member
Joined: Mar 2006
Posts: 372
Likes: 0
From: San Diego.Ca
K3 05 E55 sold, 09 GL550
I'm not sure to be honest... Hopefully someone can answer the question for you.
Sang... sorry to hear that .. Did it snap right in half? Maybe a little crazy glue will repair it? I dont have a spare one otherwise I would send it to you.
I've seen the plastic star on display at the dealership.. but I am not sure what size they were. I asked my parts guy.. he is looking into it.. I'll get you a part # once i hear back if it can be ordered.
Sang... sorry to hear that .. Did it snap right in half? Maybe a little crazy glue will repair it? I dont have a spare one otherwise I would send it to you.
I've seen the plastic star on display at the dealership.. but I am not sure what size they were. I asked my parts guy.. he is looking into it.. I'll get you a part # once i hear back if it can be ordered.
MBWorld Fanatic!
Joined: May 2006
Posts: 3,042
Likes: 0
From: So.Ca.
E55
Last night after I installed the Airtube I broke the MB Star while I try to take it off from the OEM cover to put it on the CF cover . Call MB Dealer today they said they have it but they wont sell the Star alone , so Vic or anyone know where can I get the MB Star for CF engine cover . thanks a lot
I tryied to find the star alone but it doesnt show a part number for it.
Go to the dealer and ask to see this part number. A211 758 00 58,that is the part number for the star that is on the rear of the trunk lid on your E55.It might be close in size and appearnace.Onlt thing I can think of right now for you.
Super Member


Joined: Aug 2005
Posts: 725
Likes: 1
From: SoCal
05 E55
Yeah, Victor... very nice kit. But let me be the first to warn you people are going to have a problem on that last step with the silly emblem. Not only is it a pain to get off the original cover without breaking, but each cover varies in difficulty. I know this because of my spare engine... I used its emblem after breaking mine as E55 killer did.
Second, once they get the frickin emblem off, expect more that a few people to not be able to line up the holes well, let alone just get the super glue in the exact correct spot... AND have it actually stay. It pops out, slides, its mickey mouse. Even then it spreads to the side and bingo, you're frantically wiping super glue off the cover.... and it doesn't come off. Now you've got some nice super glue stains on your cover. I tried the emblem 4 times, broke one, and neither line up with the holes 100%, so one side is sticking out.
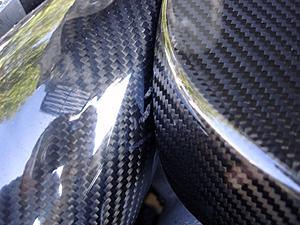
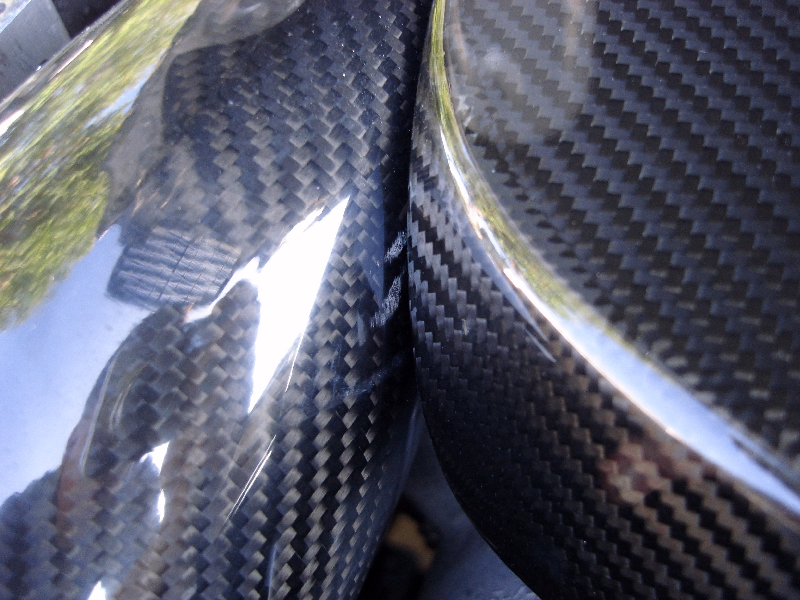
I now have two messed up emblems, 4 super glue marks on the CF engine cover, 1 scratch from a post sliding out... not good. I have a feeling I'm not going to be the first to experience this.
The kit would have been excellent if you had removed this last step: Either bought a lot of little plastic emblems and pre installed them, or just made the cover without the hole necessitating the emblem transplant.
By the way, the airbox install and everything else, even the clips, was easy. This super glued emblem part is going to make people insane, and produce a lot of ruined covers... as mine is now.
Just my two cents...

Loren
Second, once they get the frickin emblem off, expect more that a few people to not be able to line up the holes well, let alone just get the super glue in the exact correct spot... AND have it actually stay. It pops out, slides, its mickey mouse. Even then it spreads to the side and bingo, you're frantically wiping super glue off the cover.... and it doesn't come off. Now you've got some nice super glue stains on your cover. I tried the emblem 4 times, broke one, and neither line up with the holes 100%, so one side is sticking out.
I now have two messed up emblems, 4 super glue marks on the CF engine cover, 1 scratch from a post sliding out... not good. I have a feeling I'm not going to be the first to experience this.
The kit would have been excellent if you had removed this last step: Either bought a lot of little plastic emblems and pre installed them, or just made the cover without the hole necessitating the emblem transplant.
By the way, the airbox install and everything else, even the clips, was easy. This super glued emblem part is going to make people insane, and produce a lot of ruined covers... as mine is now.
Just my two cents...
Loren
Last edited by FlyByNight; Jul 13, 2007 at 08:30 PM.
Senior Member
Joined: Mar 2006
Posts: 372
Likes: 0
From: San Diego.Ca
K3 05 E55 sold, 09 GL550
Yeah, Victor... very nice kit. But let me be the first to warn you people are going to have a problem on that last step with the silly emblem. Not only is it a pain to get off the original cover without breaking, but each cover varies in difficulty. I know this because of my spare engine... I used its emblem after breaking mine as E55 killer did.
Second, once they get the frickin emblem off, expect more that a few people to not be able to line up the holes well, let alone just get the super glue in the exact correct spot... AND have it actually stay. It pops out, slides, its mickey mouse. Even then it spreads to the side and bingo, you're frantically wiping super glue off the cover.... and it doesn't come off. Now you've got some nice super glue stains on your cover. I tried the emblem 4 times, broke one, and neither line up with the holes 100%, so one side is sticking out.
I now have two messed up emblems, 4 super glue marks on the CF engine cover, 1 scratch from a post sliding out... not good. I have a feeling I'm not going to be the first to experience this.
The kit would have been excellent if you had removed this last step: Either bought a lot of little plastic emblems and pre installed them, or just made the cover without the hole necessitating the emblem transplant.
By the way, the airbox install and everything else, even the clips, was easy. This super glued emblem part is going to make people insane, and produce a lot of ruined covers... as mine is now.
Just my two cents...
Loren
MBWorld Fanatic!
Joined: May 2006
Posts: 3,042
Likes: 0
From: So.Ca.
E55
Loren you're right , Why didn't Vic make the cover without the hole. because once the Emblem sit on the OEM cover if you try to take it off the chrome thing will break . I'll try the emblem on the trunk of the C class to see if it fit the hole . The emblem of the E is too big . I will let you guys know .
Super Member
Joined: Aug 2005
Posts: 725
Likes: 1
From: SoCal
05 E55
yeah, but it goes past that... the super glue in the kit is really runny... like water, so it moves off the posts quickly and easily. No matter what emblem you're putting on it, expect that particular glue in the kit to move outside the area... and that's if you get it aligned perfectly on the first try.
I got it perfectly aligned on the second try, with very little glue at all... and just barely pushing down on one side the was popping up just a tick pushed the super glue out to the edge from the post... ran like a drop of water to the side. Wipe it quickly, won't matter... its left is mark.
For those of you who have not done this yet, get super glue GEL or other more viscous solution that won't move much... assuming you get the original emblem off the old cover in one piece.
Anyone knows what takes off super glue without damaging the CF, let me know... I got as far as adhesive remover, HD cleanse, 409... nothing works. Scared about paint thinner, but who knows.

Loren
I got it perfectly aligned on the second try, with very little glue at all... and just barely pushing down on one side the was popping up just a tick pushed the super glue out to the edge from the post... ran like a drop of water to the side. Wipe it quickly, won't matter... its left is mark.
For those of you who have not done this yet, get super glue GEL or other more viscous solution that won't move much... assuming you get the original emblem off the old cover in one piece.
Anyone knows what takes off super glue without damaging the CF, let me know... I got as far as adhesive remover, HD cleanse, 409... nothing works. Scared about paint thinner, but who knows.
Loren
Last edited by FlyByNight; Jul 14, 2007 at 02:58 AM.
MB World Stories
The Best of Mercedes & AMG

Manual Mercedes? 6 Times Sindelfingen Let Drivers Have All The Fun
Verdad Gallardo
Mercedes SLR McLaren 722 S Is Extremely Rare Example Modified by McLaren
Verdad Gallardo
8 Classic Boxy Mercedes Designs That Have Aged Like Fine Wine
Verdad Gallardo
Flawlessly Restored Mercedes 190E Evo II Heads to Auction
Verdad Gallardo
Electric Mercedes C-Class Unveiled: 11 Things You Need to Know
Verdad Gallardo
Mercedes EQS Gets A Major Update: Everything You Need to Know
Verdad Gallardo
5 Underrated Mercedes-Benz Models That Don't Get the Love They Deserve
Verdad Gallardo
Mercedes 300D Has Pushed Well Past 1 Million Miles and It Ain't Stopping
Verdad Gallardo
10 Most Reliable Mercedes-Benz Models You Can Buy Used
Verdad GallardoSenior Member
Joined: Feb 2007
Posts: 363
Likes: 0
From: East Coast Baby!
SL55
Guys...
Been reading this... How bout clear Silicone?
It should hold, and resist vibration. And it certainly won't stain, you should be able to roll it off with your fingers. And it won't run either.
It will take 24 hrs to dry properly though.
RoydRage
Been reading this... How bout clear Silicone?
It should hold, and resist vibration. And it certainly won't stain, you should be able to roll it off with your fingers. And it won't run either.
It will take 24 hrs to dry properly though.
RoydRage
Thread Starter
Banned
Joined: May 2004
Posts: 3,797
Likes: 2
From: Richmond Hill, Ontario
2003 E55 AMG
Damn Loren.. I'm sorry it was a struggle... I checked and those emblems are not available by themselves.. They are part of a $156 engine cover.. There was no way for me to pre-assemble this otherwise I would have.
One thing I did was take clear scotch tape and taped all the way around the area that the star was going into. This was just in case I made a mess and had overrun of the glue.
When you drop the star into the opening, did it not sit flush? You dont really have to press down hard on it for the glue to adhere to it.
I will look into the glue and see if there is a better replacement for it.
As for the star, do you guys really think the cover would be better without the hole altogether and just not put the factory star in it?
Can you take a pic of the stain on the cover and email it to me.. Let me see what it looks like now. I'll forward to the composites shop and I'll see what we can do.
Yeah, Victor... very nice kit. But let me be the first to warn you people are going to have a problem on that last step with the silly emblem. Not only is it a pain to get off the original cover without breaking, but each cover varies in difficulty. I know this because of my spare engine... I used its emblem after breaking mine as E55 killer did.
Second, once they get the frickin emblem off, expect more that a few people to not be able to line up the holes well, let alone just get the super glue in the exact correct spot... AND have it actually stay. It pops out, slides, its mickey mouse. Even then it spreads to the side and bingo, you're frantically wiping super glue off the cover.... and it doesn't come off. Now you've got some nice super glue stains on your cover. I tried the emblem 4 times, broke one, and neither line up with the holes 100%, so one side is sticking out.
I now have two messed up emblems, 4 super glue marks on the CF engine cover, 1 scratch from a post sliding out... not good. I have a feeling I'm not going to be the first to experience this.
The kit would have been excellent if you had removed this last step: Either bought a lot of little plastic emblems and pre installed them, or just made the cover without the hole necessitating the emblem transplant.
By the way, the airbox install and everything else, even the clips, was easy. This super glued emblem part is going to make people insane, and produce a lot of ruined covers... as mine is now.
Just my two cents...
Loren
Second, once they get the frickin emblem off, expect more that a few people to not be able to line up the holes well, let alone just get the super glue in the exact correct spot... AND have it actually stay. It pops out, slides, its mickey mouse. Even then it spreads to the side and bingo, you're frantically wiping super glue off the cover.... and it doesn't come off. Now you've got some nice super glue stains on your cover. I tried the emblem 4 times, broke one, and neither line up with the holes 100%, so one side is sticking out.
I now have two messed up emblems, 4 super glue marks on the CF engine cover, 1 scratch from a post sliding out... not good. I have a feeling I'm not going to be the first to experience this.
The kit would have been excellent if you had removed this last step: Either bought a lot of little plastic emblems and pre installed them, or just made the cover without the hole necessitating the emblem transplant.
By the way, the airbox install and everything else, even the clips, was easy. This super glued emblem part is going to make people insane, and produce a lot of ruined covers... as mine is now.
Just my two cents...
Loren

MBWorld Fanatic!
Joined: Nov 2005
Posts: 1,463
Likes: 0
E55
Just installed my carbon fiber tubes.. Wow!! Do they look nice. Thanks Victor.
Does anyone know what the rubber hose is for that comes out of the airbox in the back? Is it suppose to connect to something. I looked around and couldn't find anything to connect it to..
Does anyone know what the rubber hose is for that comes out of the airbox in the back? Is it suppose to connect to something. I looked around and couldn't find anything to connect it to..
Member
Joined: Oct 2006
Posts: 93
Likes: 0
From: Maryland
'03 E55

MBWorld Fanatic!
Joined: Jul 2005
Posts: 1,224
Likes: 6
From: S.E. FLA.
05 ML-500 , 03 CLK5.5 AMG has left the Garage
Instant Adhesive tips
Hi Folks: there is some different type of Super glue to chose from . I personally Like Loctite Products , out of Newington CT. I Use their Loctite , Quicktite Instant Adhesive GEL. P/N 37391. 2 oz tube. It has a non running formula. Will stay put for vertical applications. You can get it at WW Grainger
I usually put my in the Refridgerator . Next to the Beer. The coolness helps thicken the gell. And keep it from running out of the tip , on to your part without squeezing the bottle . Cheers ___PTE___
I usually put my in the Refridgerator . Next to the Beer. The coolness helps thicken the gell. And keep it from running out of the tip , on to your part without squeezing the bottle . Cheers ___PTE___
Last edited by PTE; Jul 15, 2007 at 02:05 PM.
Super Member
Joined: Aug 2005
Posts: 725
Likes: 1
From: SoCal
05 E55
Hi Folks: there is some different type of Super glue to chose from . I personally Like Loctite Products , out of Newington CT. I Use their Loctite , Quicktite Instant Adhesive GEL. P/N 37391. 2 oz tube. It has a non running formula. Will stay put for vertical applications. You can get it at WW Grainger
I usually put my in the Refridgerator . Next to the Beer. The coolness helps thicken the gell. And keep it from running out of the tip , on to your part without squeezing the bottle . Cheers ___PTE___
I usually put my in the Refridgerator . Next to the Beer. The coolness helps thicken the gell. And keep it from running out of the tip , on to your part without squeezing the bottle . Cheers ___PTE___
@$%!%$!#$%#@$#@$% !!!!!!!!!!!
Otherwise, stunning kit. My advice to everyone: Assuming you get your star off your old cover intact (congrats), use some thick glue only... and do so very very carefully. Maybe tape up around the opening to protect the CF, etc, as Victor said. I'm good with stuff like this... not an ******** by any means... so if it can happen to me, I'm sure others will run into it too.
Loren
Last edited by FlyByNight; Jul 15, 2007 at 11:46 PM.
MBWorld Fanatic!
Joined: Jul 2005
Posts: 1,224
Likes: 6
From: S.E. FLA.
05 ML-500 , 03 CLK5.5 AMG has left the Garage
Glue removal
You can try a little acetone or MEK (Methyl Ethyl Ketone) on a area not seen from the front or top . Say maybe the rear mating sealing edge behind / below the Throttle body flange area. Use a small amount on a clean cotton cloth . Apply to the finish , See if it doesn't melt it or soften the epoxy. I sometimes am a little messy and get that glue on my fingers. MEK gets it right off. You still may have to buff out the area with some very light compond. I feel really bad about your misshap. It's happen to me more often than I care to admit. I drink WAYYY to much Coffee  ___PTE___
___PTE___
Senior Member
Joined: Mar 2006
Posts: 306
Likes: 0
From: Miami, FL
CLS 55 AMG, 2002 Chevy Avalanche (w/ NOS) :D
Well I just got back to Miami, Finally get to open the BOX!! Amazing work Vic!! I was a lil worried when I was reading all these stories about the star emblem breaking.. I just finished removing my star, and nothing broke. THANK GOD! Im usually the first one to break it. Well a helpful hint to taking it off which is what I did. I first placed the cover on my knee sitting down with star directly on my knee to support. Then I took a sharp knife (Miracle Blade) and one by one placed the tip of the knife over each small pin hole and just twisted the blade with gentle pressure until it popped out, carefully do this to each pin hole and you should be ok. I hope this helps out..
Amazing work Vic!! I was a lil worried when I was reading all these stories about the star emblem breaking.. I just finished removing my star, and nothing broke. THANK GOD! Im usually the first one to break it. Well a helpful hint to taking it off which is what I did. I first placed the cover on my knee sitting down with star directly on my knee to support. Then I took a sharp knife (Miracle Blade) and one by one placed the tip of the knife over each small pin hole and just twisted the blade with gentle pressure until it popped out, carefully do this to each pin hole and you should be ok. I hope this helps out..
Member
Joined: Oct 2006
Posts: 93
Likes: 0
From: Maryland
'03 E55
Super Member
Joined: Aug 2005
Posts: 725
Likes: 1
From: SoCal
05 E55
*** Update ***
Good news / bad news:
Acetone does remove the super glue... at least the smaller marks. Lots of rubbing and soaking, and only minimally faded the area in question, if at all. I'll have to keep working on the larger marks, but already its cleaned up a lot.
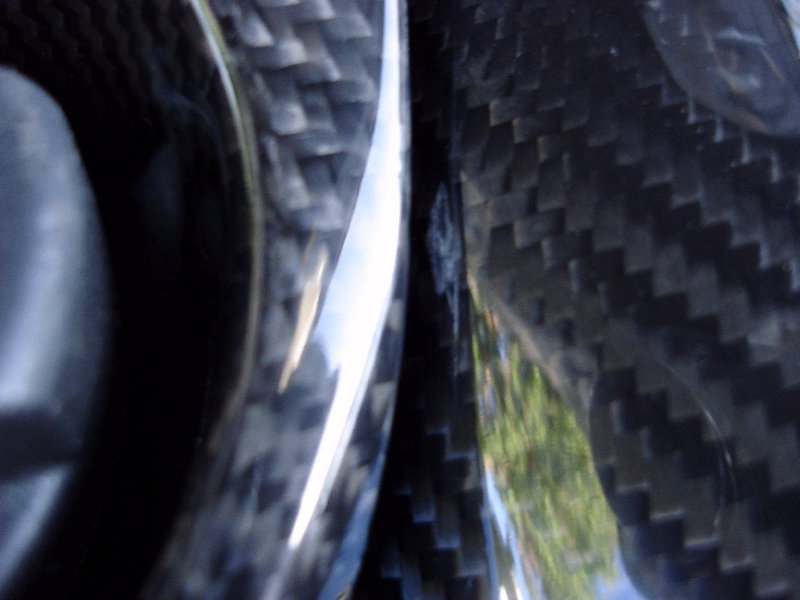
Bad news: Be very careful how you rotate / mount the engine tubes, as even though they may clear the engine cover by a 1/4" or so, they end up rubbing while you're driving / when the engine flexes... which immediately leave marks in the tubes themselves. I'm going to take them off and try pressing them down while tightening the hose clamps / or otherwise rotating them a bit to create more distance. Mine are snapped in and straight, with both coming about 1/4" from the engine cover with these resulting marks on both sides after just one day of driving:
Loren

Good news / bad news:
Acetone does remove the super glue... at least the smaller marks. Lots of rubbing and soaking, and only minimally faded the area in question, if at all. I'll have to keep working on the larger marks, but already its cleaned up a lot.
Bad news: Be very careful how you rotate / mount the engine tubes, as even though they may clear the engine cover by a 1/4" or so, they end up rubbing while you're driving / when the engine flexes... which immediately leave marks in the tubes themselves. I'm going to take them off and try pressing them down while tightening the hose clamps / or otherwise rotating them a bit to create more distance. Mine are snapped in and straight, with both coming about 1/4" from the engine cover with these resulting marks on both sides after just one day of driving:
Loren
Thread Starter
Banned
Joined: May 2004
Posts: 3,797
Likes: 2
From: Richmond Hill, Ontario
2003 E55 AMG
Thanks everyone for the input & feedback! I appreciate it and this is exactly what I need to improve on the products.
Those airtubes were made as big as possible to take advantage of extra volume.. Every car is a bit different with respect to the routing of the hoses and other ancillary components that reside in that general area.. Because of that, everyone's car might have different things in the way with different tolerances..
On my own car, there was no sign of rubbing on the sides of the tubes but I am going to install them on another car and check for clearances.
Loren: Sorry for the rocky road you went through to install these.
Maybe a small strip of window weatherstripping or something similar can be stuck on the bottom of the CF engine cover in case the tubes make contact??
Can you take a pic of the 2 items as they are installed on your car so I can see better?? I will also pass them along to the composites shop and see if we should increase the gaps between the 2 of them.
Super Member
Joined: Aug 2005
Posts: 725
Likes: 1
From: SoCal
05 E55
Thanks everyone for the input & feedback! I appreciate it and this is exactly what I need to improve on the products.
Those airtubes were made as big as possible to take advantage of extra volume.. Every car is a bit different with respect to the routing of the hoses and other ancillary components that reside in that general area.. Because of that, everyone's car might have different things in the way with different tolerances..
On my own car, there was no sign of rubbing on the sides of the tubes but I am going to install them on another car and check for clearances.
Loren: Sorry for the rocky road you went through to install these.
Maybe a small strip of window weatherstripping or something similar can be stuck on the bottom of the CF engine cover in case the tubes make contact??
Can you take a pic of the 2 items as they are installed on your car so I can see better?? I will also pass them along to the composites shop and see if we should increase the gaps between the 2 of them.
Those airtubes were made as big as possible to take advantage of extra volume.. Every car is a bit different with respect to the routing of the hoses and other ancillary components that reside in that general area.. Because of that, everyone's car might have different things in the way with different tolerances..
On my own car, there was no sign of rubbing on the sides of the tubes but I am going to install them on another car and check for clearances.
Loren: Sorry for the rocky road you went through to install these.
Maybe a small strip of window weatherstripping or something similar can be stuck on the bottom of the CF engine cover in case the tubes make contact??
Can you take a pic of the 2 items as they are installed on your car so I can see better?? I will also pass them along to the composites shop and see if we should increase the gaps between the 2 of them.
Loren
Out Of Control!
Joined: Nov 2001
Posts: 21,014
Likes: 2
From: CA, NV, CO
Here you go... I tried loosening the clamps and pushing away and down, but then it pops out of the radiator mount area... so its kinda fixed in this position on both sides. I'm putting in some adhesive felt (pictured) between the three pieces...
Loren
Attachment 109615
Loren
Attachment 109615
Super Member
Joined: Aug 2005
Posts: 725
Likes: 1
From: SoCal
05 E55
Loren
Thread Starter
Banned
Joined: May 2004
Posts: 3,797
Likes: 2
From: Richmond Hill, Ontario
2003 E55 AMG
Loren,
I forwarded all of these posts to the composites shop.. I will go personally install it on another car here and see what the fit is like in relation to my own car.
I forwarded all of these posts to the composites shop.. I will go personally install it on another car here and see what the fit is like in relation to my own car.
Here you go... I tried loosening the clamps and pushing away and down, but then it pops out of the radiator mount area... so its kinda fixed in this position on both sides. I'm putting in some adhesive felt (pictured) between the three pieces...
Loren
Attachment 109615
Loren
Attachment 109615


